How to Configure Auto-Clear Cloudflare Cache in Super Speed Module
When optimizing a PrestaShop store, combining the Super Speed module's page caching with Cloudflare’s CDN provides maximum performance. However, when you update products, prices, or layout configurations, you need the caches on both your server and Cloudflare to clear simultaneously.
By enabling the Auto-clear Cloudflare cache feature in the Super Speed module, every time you click "Clear All Caches" in your PrestaShop Back Office, the module automatically triggers an API call to purge your Cloudflare CDN cache in real-time.
To set up this integration, you need two pieces of credentials from your Cloudflare dashboard: a Zone ID and a secure API Token. Follow this step-by-step guide to retrieve and configure them correctly.
Part 1: How to find your Cloudflare Zone ID
The Zone ID is a unique identifier assigned by Cloudflare to your specific domain name. It tells the Super Speed module which website's cache needs to be cleared.
1) Open a new browser tab, go to the Cloudflare Dashboard, and log into your account.
2) On the Home page, look at the list of your websites and click on the domain name associated with your PrestaShop store.
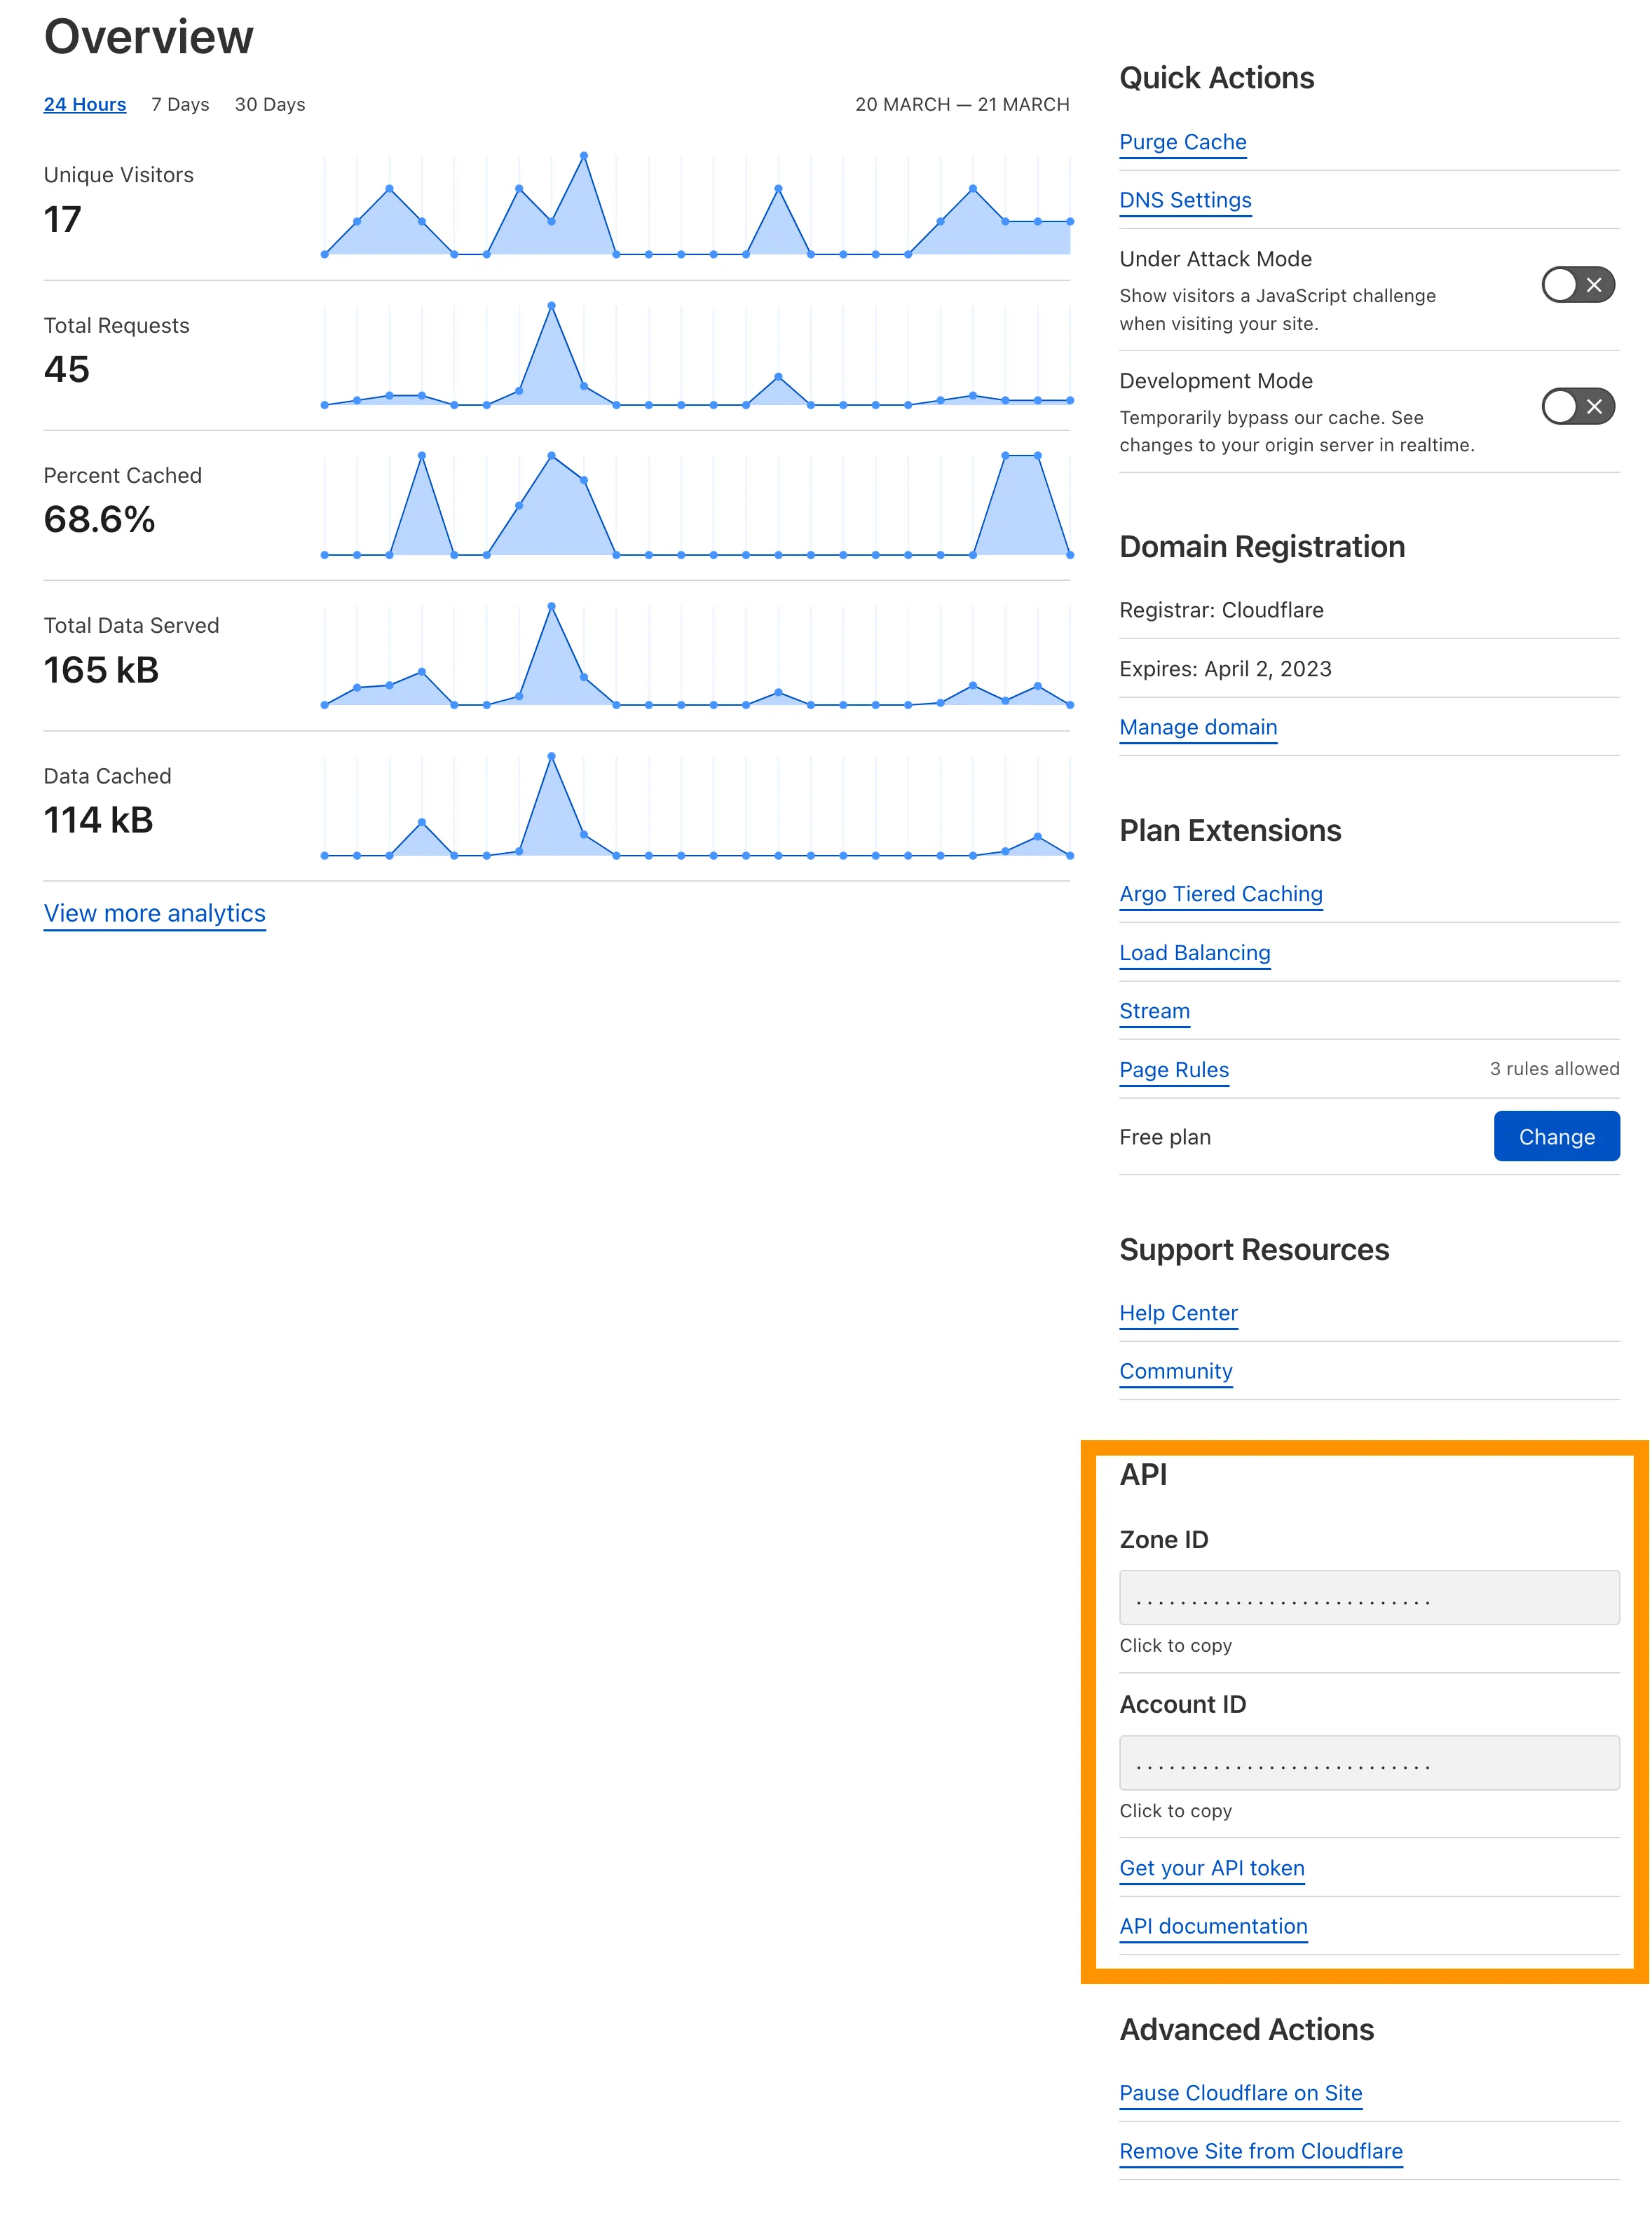
3) Ensure you are on the Overview tab, which is located at the top of the left-hand navigation sidebar.
4) Look at the right side of the screen (or scroll down to the bottom depending on your screen resolution) and locate the API section.
5) Find the Zone ID field. You will see a long alphanumeric string (a mix of letters and numbers).
6) Click the Click to copy text or manually copy this entire string and save it temporarily in a text editor (like Notepad).
Part 2: How to create a secure Cloudflare API Token
Cloudflare provides two ways to authenticate external applications: a Global API Key and an API Token. For maximum production security, always use an API Token. A token allows you to grant the Super Speed module "scoped permission", restricting it to only purge the cache for one specific domain, rather than giving it full administrative control over your entire Cloudflare account.
1) In the upper-right corner of the Cloudflare dashboard, click on your User Profile icon and select My Profile from the dropdown menu.
2) In the left-hand navigation menu, click on API Tokens.
3) Click the blue Create Token button.
4) Scroll down to the bottom of the page to the section labeled Create Custom Token and click the Get started button.
5) Configure your Custom Token with the following exact settings:
Token name: Enter a descriptive name so you know what it is for (e.g., PrestaShop Super Speed Token).
Permissions: You need to add exactly two permission rules.
- Rule 1: In the first dropdown select Zone, in the second dropdown select Cache Purge, and in the third dropdown select Edit.
- Rule 2: Click the + Add info button right below to add a second line. Select Zone, then Zone, and set it to Read.
Zone Resources: This restricts the token's scope.
In the first dropdown, select Include, in the second dropdown select Specific zone, and in the third dropdown select the exact domain name of your PrestaShop store.
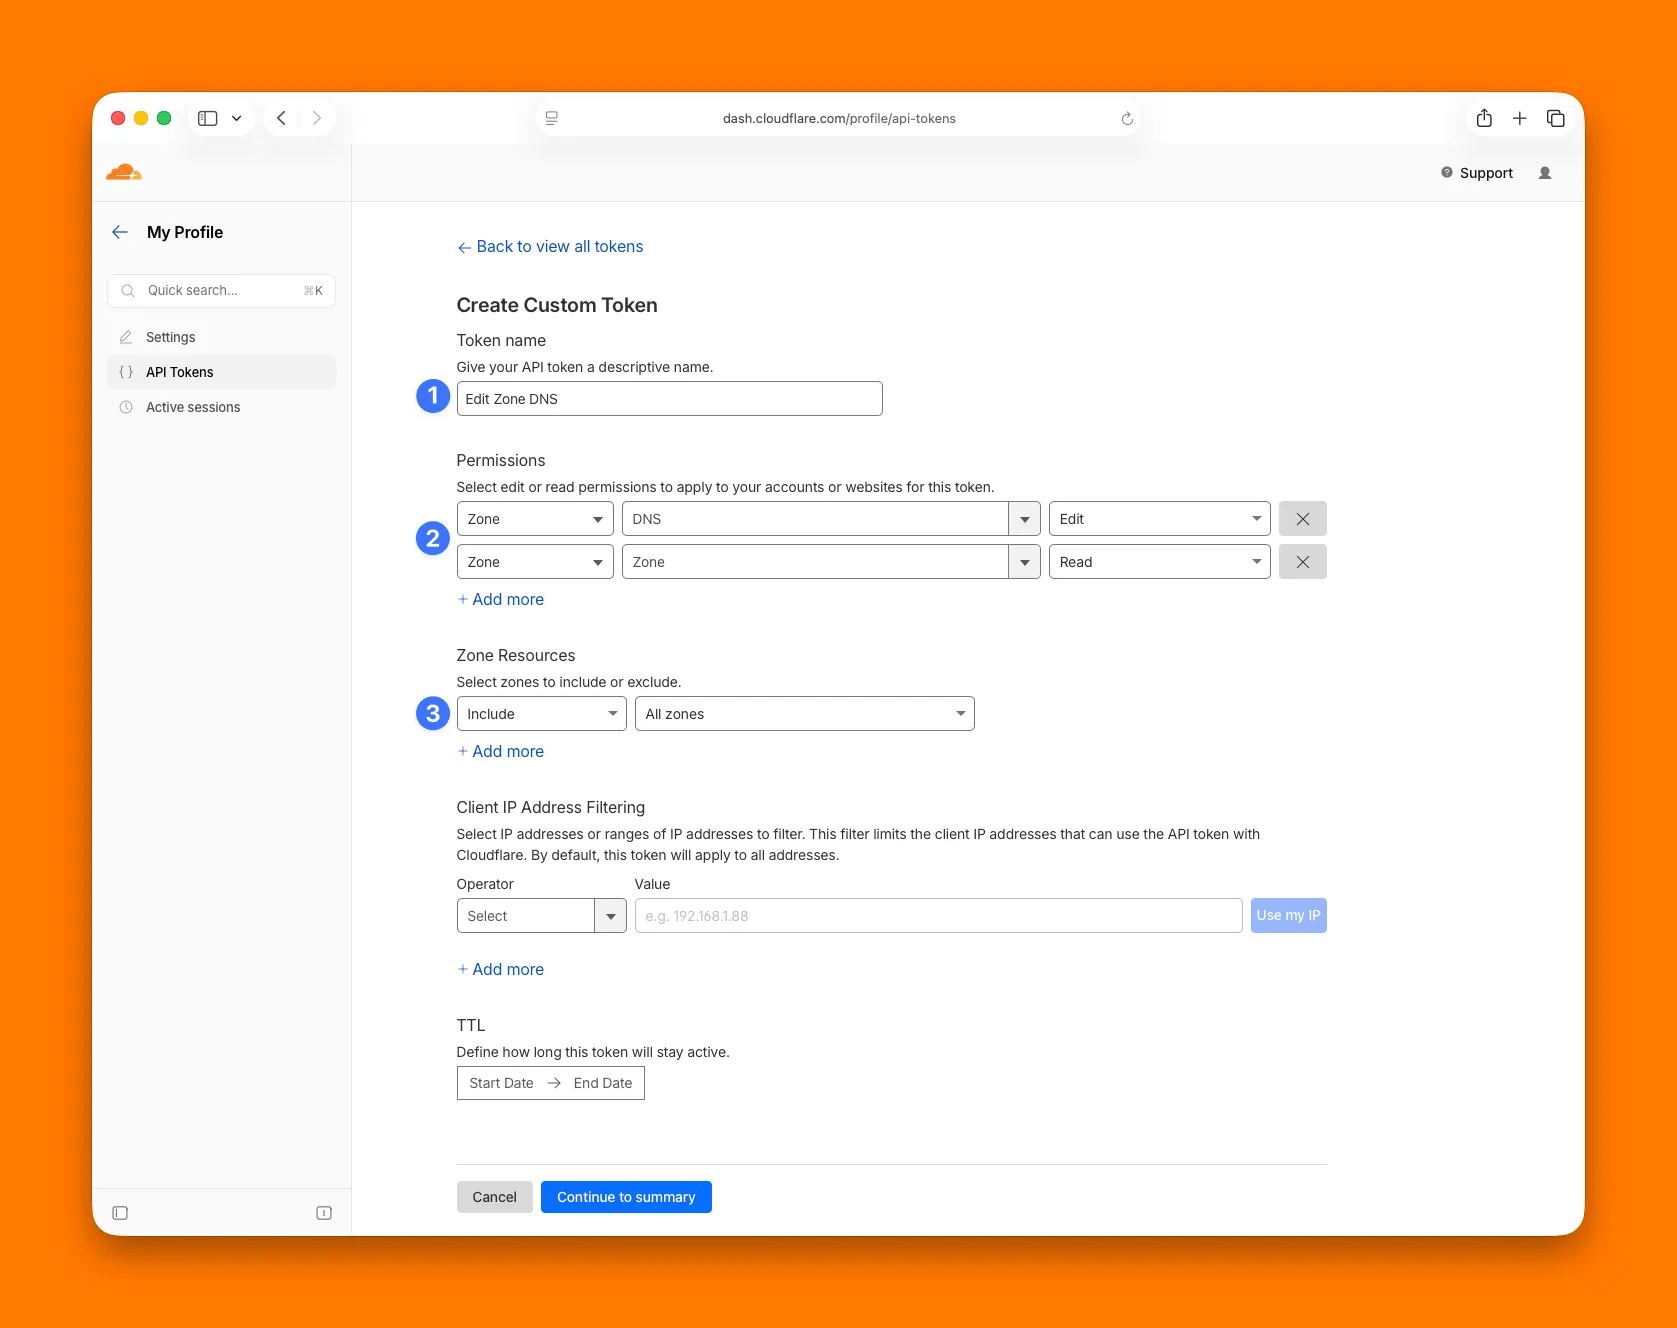
6) Scroll to the bottom of the page and click Continue to summary.
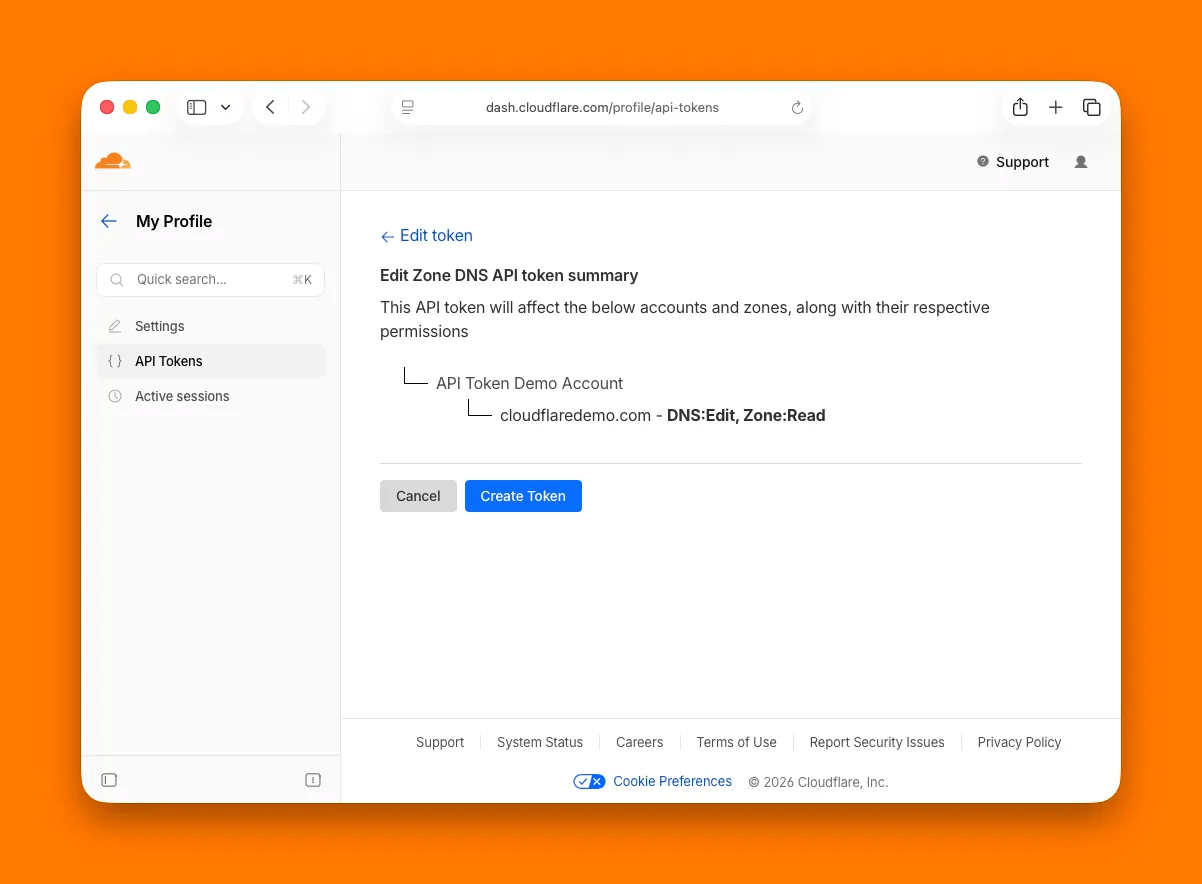
7) Review the summary to ensure it states that the token can read zone configurations and edit cache purges for your specific site. Click Create Token.
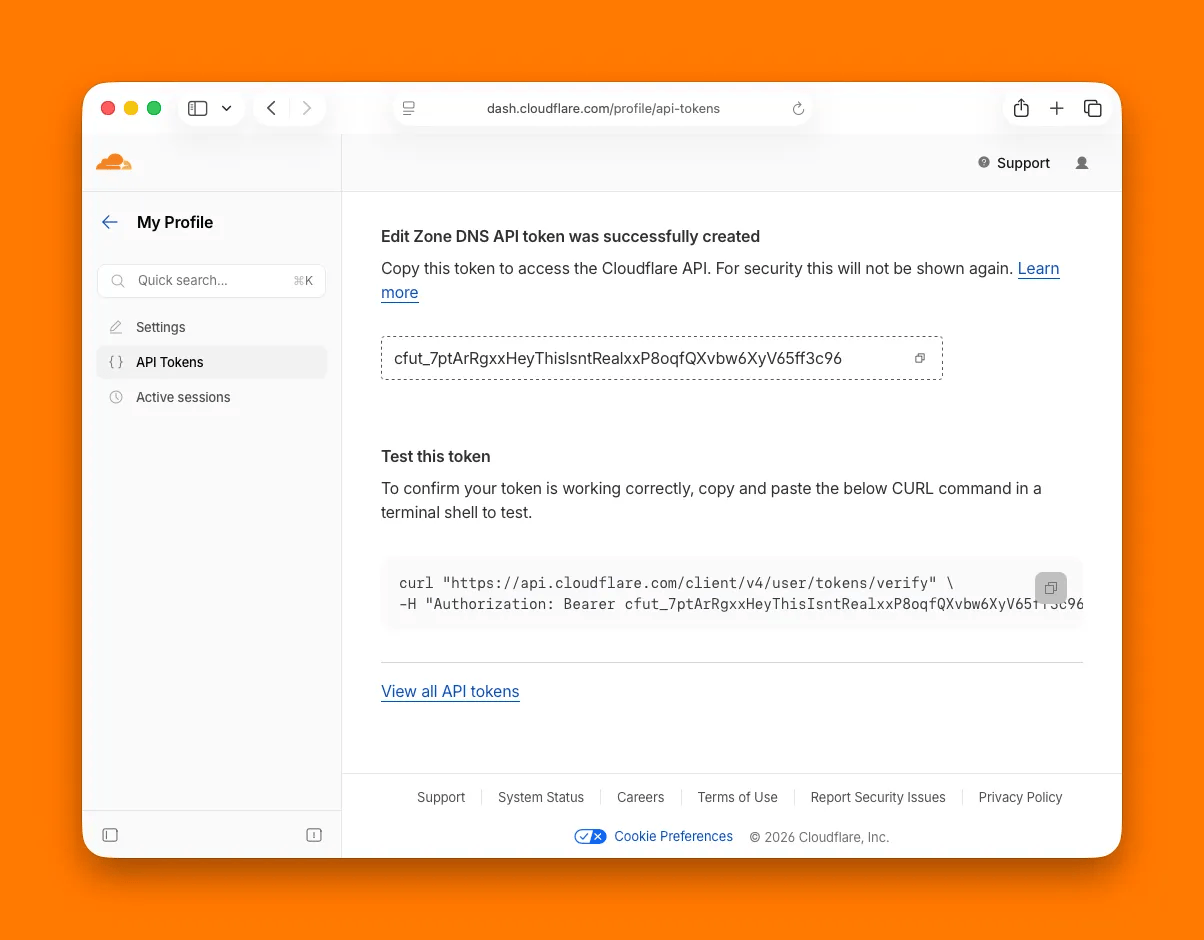
Important: Your unique API Token string will now be displayed on the screen. Copy this token immediately and save it safely. Cloudflare will only display this token once. If you refresh or close the page, you cannot view it again and will have to generate a new one.
Part 3: Configure Cloudflare credentials in the Super Speed module
Now that you have gathered both your Zone ID and API Token, it is time to input them into your PrestaShop store.
1) Log in to your PrestaShop Admin Back Office.
2) Navigate to Modules > Module Manager and locate the Super Speed module. Click Configure.
3) On the module's upper menu bar, click on Cache and minification and select the Page cache tab from the dropdown list.
4) Scroll down the page until you see the configuration section dedicated to Cloudflare integrations. Locate the Auto-clear Cloudflare cache setting and toggle the switch to On.
5) Paste your copied alphanumeric string into the Cloudflare Zone ID input field.
6) Paste your secret API Token string into the Cloudflare API Token input field.
7) Scroll to the bottom of the section and click the Save button.
Testing the configuration
To verify that the module is communicating properly with the Cloudflare API network:
1) Go to the Dashboard tab of the Super Speed module.
2) Click the Clear All Caches button.
If the configuration is correct, the module will execute smoothly without any errors. If your API Token or Zone ID contains a typo or is missing permissions, the module will throw an error notice during the clearing process, indicating that you need to re-verify the token setup in your Cloudflare account.