How to Configure Gmail SMTP for Easy SMTP Module
Gmail SMTP is a popular and reliable choice for sending emails from your PrestaShop store. By configuring Gmail SMTP, you can ensure that your emails are delivered effectively and securely to your customers. In this guide, we'll walk you through the steps to configure Gmail SMTP using the Easy SMTP module.
What is Gmail SMTP
Gmail's SMTP (Simple Mail Transfer Protocol) service allows you to send emails through Google's servers. This is ideal for businesses that use Gmail for their communications, as it ensures high deliverability and security.
How to configure Gmail SMTP
Before configuring Gmail SMTP in your PrestaShop store, you'll need to set up the necessary settings in Gmail:
Step 1: Enable POP in Gmail
- Open Gmail on your computer.
- Go to the Settings (gear icon) and click on See all settings.
- Select the Forwarding and POP/IMAP tab.
- In the "POP download" section, choose Enable POP for all mail or Enable POP for mail that arrives from now on.
- Click Save changes at the bottom of the page.
Step 2: Check POP and SMTP settings
- Incoming Mail (POP) Server: pop.gmail.com
- Port: 995
- Requires SSL: Yes
- Outgoing Mail (SMTP) Server: smtp.gmail.com
- Port for TLS/STARTTLS: 587
- Requires SSL: Yes
- Requires Authentication: Yes
Configuring Gmail SMTP with Easy SMTP Module
Once your Gmail settings are configured, you can proceed to configure the Easy SMTP module in PrestaShop. Follow these steps:
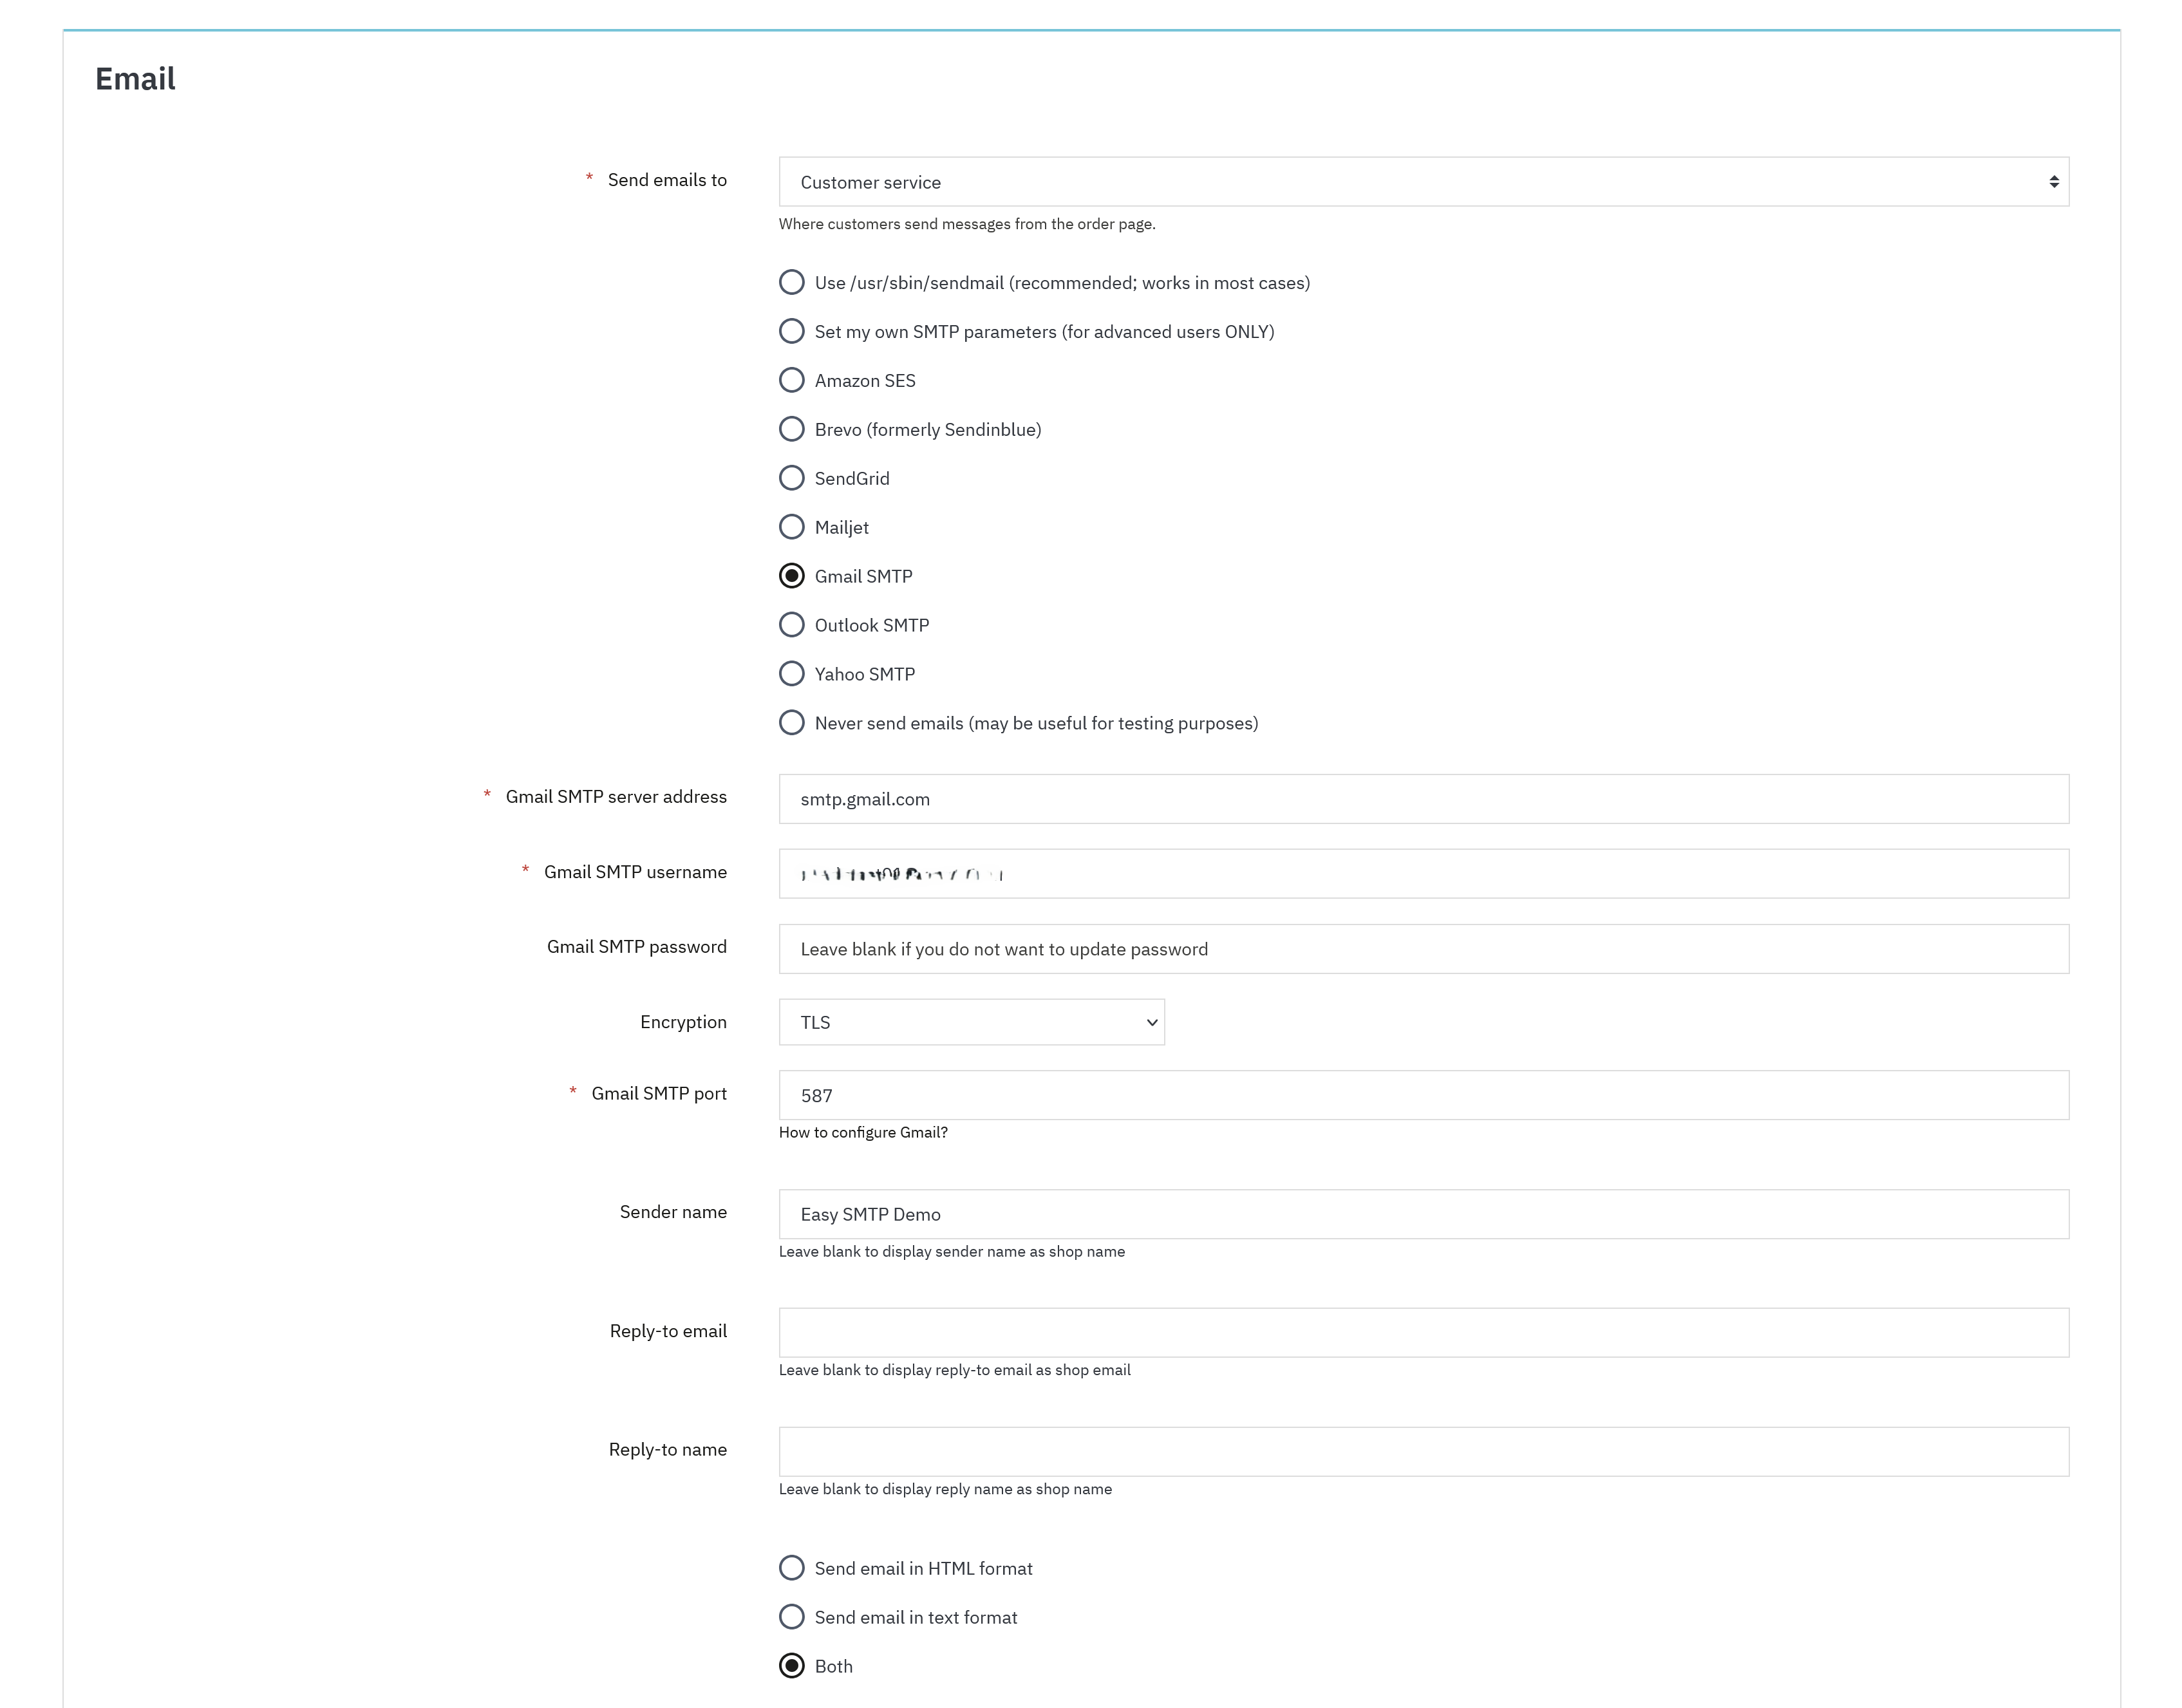
Step 1: From your PrestaShop back office, navigate to Advanced Parameters > Email.
Step 2: Enter the configuration details:
- Gmail SMTP server address: smtp.gmail.com
- Gmail SMTP username: Your full Gmail email address (e.g., [email protected])
- Gmail SMTP password: Your Gmail password or app-specific password (recommended for security).
- Encryption: TLS (recommended) or SSL
- Gmail SMTP port: 587 for TLS, 465 for SSL
- Sender email: Your Gmail address will appear as the sender.
- Sender name: The name you want to display as the sender.
- Reply-to email: The email address where replies should be directed.
- Reply-to name: The name that will be shown in the reply-to field.
Step 3: After entering all the required fields, click Save to apply the settings.
Step 4: Test your configuration
Send a test email to confirm that everything is set up correctly. Ensure that the email is sent and received without any issues.
Your PrestaShop store is now configured to send emails through Gmail's SMTP servers, ensuring reliable and secure email delivery.