How to Add and Configure URL Redirect
URL redirects play a crucial role in maintaining website integrity, preserving SEO value, and enhancing user experience. In this guide, we'll walk you through the process of configuring URL redirects using the SEO Audit module for PrestaShop.
Understanding URL redirects
URL redirects are instructions that tell web browsers and search engines to send users from one URL to another. They are commonly used to redirect outdated or broken links to relevant, updated content.
Imagine you've moved to a new house, but your old address is still in the mailbox. URL redirects work similarly, forwarding visitors from outdated or incorrect URLs to the current, relevant ones. This prevents visitors from encountering frustrating error messages or irrelevant content.
Types of URL redirects supported by SEO Audit
The SEO Audit module supports several types of URL redirects, including:
301 Redirects
Permanent redirects that inform search engines that the original URL has permanently moved to a new location. This is the most common type of redirect and is recommended for SEO purposes.
Example:
- Redirect after changing a product name: Suppose you rename a product from "Summer T-shirt" to "Basic T-shirt". Use a 301 redirect to redirect the old URL (https://www.example.com/summer-t-shirt) to the new URL (https://www.example.com/basic-t-shirt). This ensures SEO for the product and doesn't affect search rankings.
- Redirect after deleting a page: You want to delete the "About Us" page but still want to retain SEO for that page. Use a 301 redirect to redirect the old URL (https://www.example.com/about-us) to a new page with similar content (https://www.example.com/about-our-company).
302 Redirects
Temporary redirects that indicate the original URL has temporarily moved to a different location. These are useful for situations like site maintenance or testing.
Example:
- Redirect a product page that is temporarily out of stock: When the "X Smartphone" product is temporarily out of stock, use a 302 redirect to redirect the product URL (https://www.example.com/X-smartphone) to the product out-of-stock notification page (https://www.example.com/product-out-of-stock). Once the product is back in stock, you can remove the redirect.
- Redirect users to a login page: When users access a page that requires login (https://www.example.com/login-required-page), use a 302 redirect to redirect them to the login page (https://www.example.com/login). After successful login, users will be automatically redirected to the page they initially wanted to access.
303 Redirects
This redirect instructs search engines to consider the new URL as the relevant one while keeping the old URL in its index.
Example:
- Redirect images: When displaying product images on a website, use a 303 redirect to redirect the image URL (https://www.example.com/images/product-image.jpg) to the image hosting URL (https://cdn.example.com/product-image.jpg). This optimizes page loading speed and saves storage space.
- Redirect a link to another website: When you want to link to another website but still want to retain SEO for that link, use a 303 redirect to redirect the URL (https://www.example.com/external-link) to the URL of the other website (https://www.another-website.com).
NOTE:
- Using too many 302 redirects can affect website SEO.
- Use 303 redirects for cases involving linking to another website or displaying content from an external source.
404 error page handling
SEO Audit also helps you identify 404 error pages, which occur when a user tries to access a page that doesn't exist. You can set up redirects for these pages to guide users to relevant content and prevent them from encountering dead ends.
Certain types of links can be ignored when they are reported as 404 errors. These typically include:
- Backend links: These are links that are not intended to be accessed by users, but rather by internal systems or processes. For example, a link to an administrative dashboard or an internal API endpoint would be considered a backend link.
- Normal links that are no longer relevant: Over time, websites and their content evolve, and some links may become outdated or irrelevant. For example, a link to a product page that has been discontinued or a link to an event that has already taken place can be safely ignored.
- Links to external websites: If a 404 error is reported for a link to an external website, it is not necessarily an issue with your website. It is possible that the external website is experiencing downtime or that the link itself is incorrect. In these cases, you can try accessing the external website directly to verify whether it is down.
Configuring URL redirects with SEO Audit
Follow these steps to configure URL redirects using the SEO Audit module:
- Access the SEO Audit module from the PrestaShop admin panel.
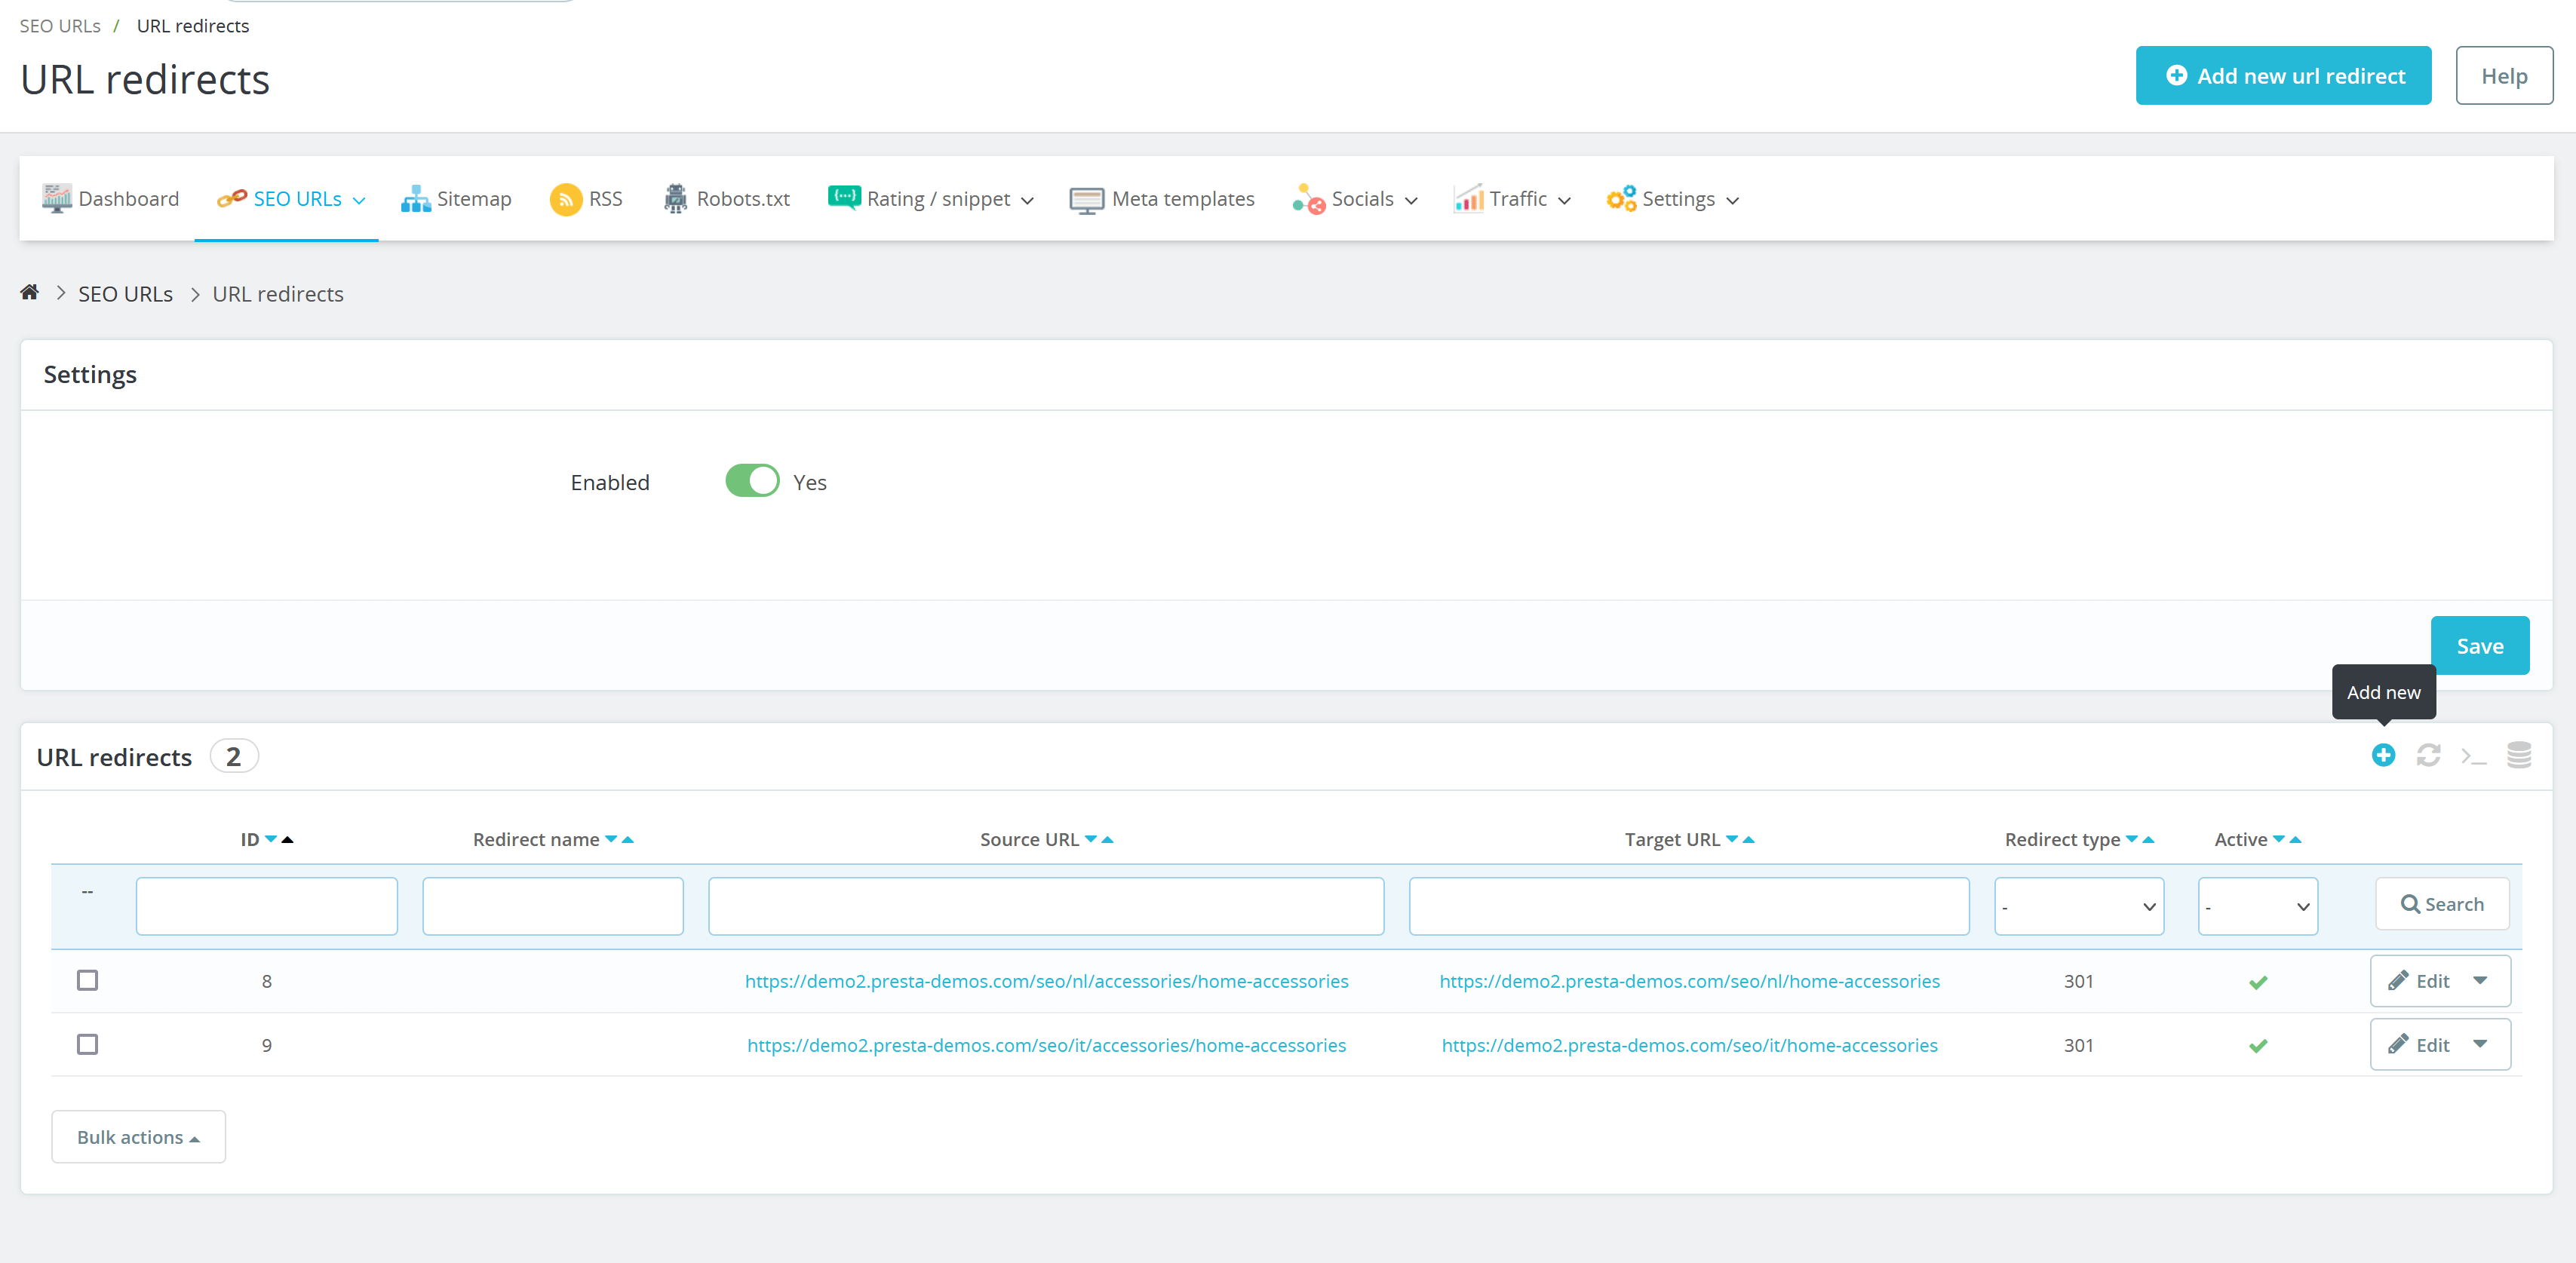
- Navigate to the "SEO URLs > URL Redirects" page.
- Turn on the “Enabled” switch. Save your changes.
- Click on the “Add new” icon on the “URL redirects” list.

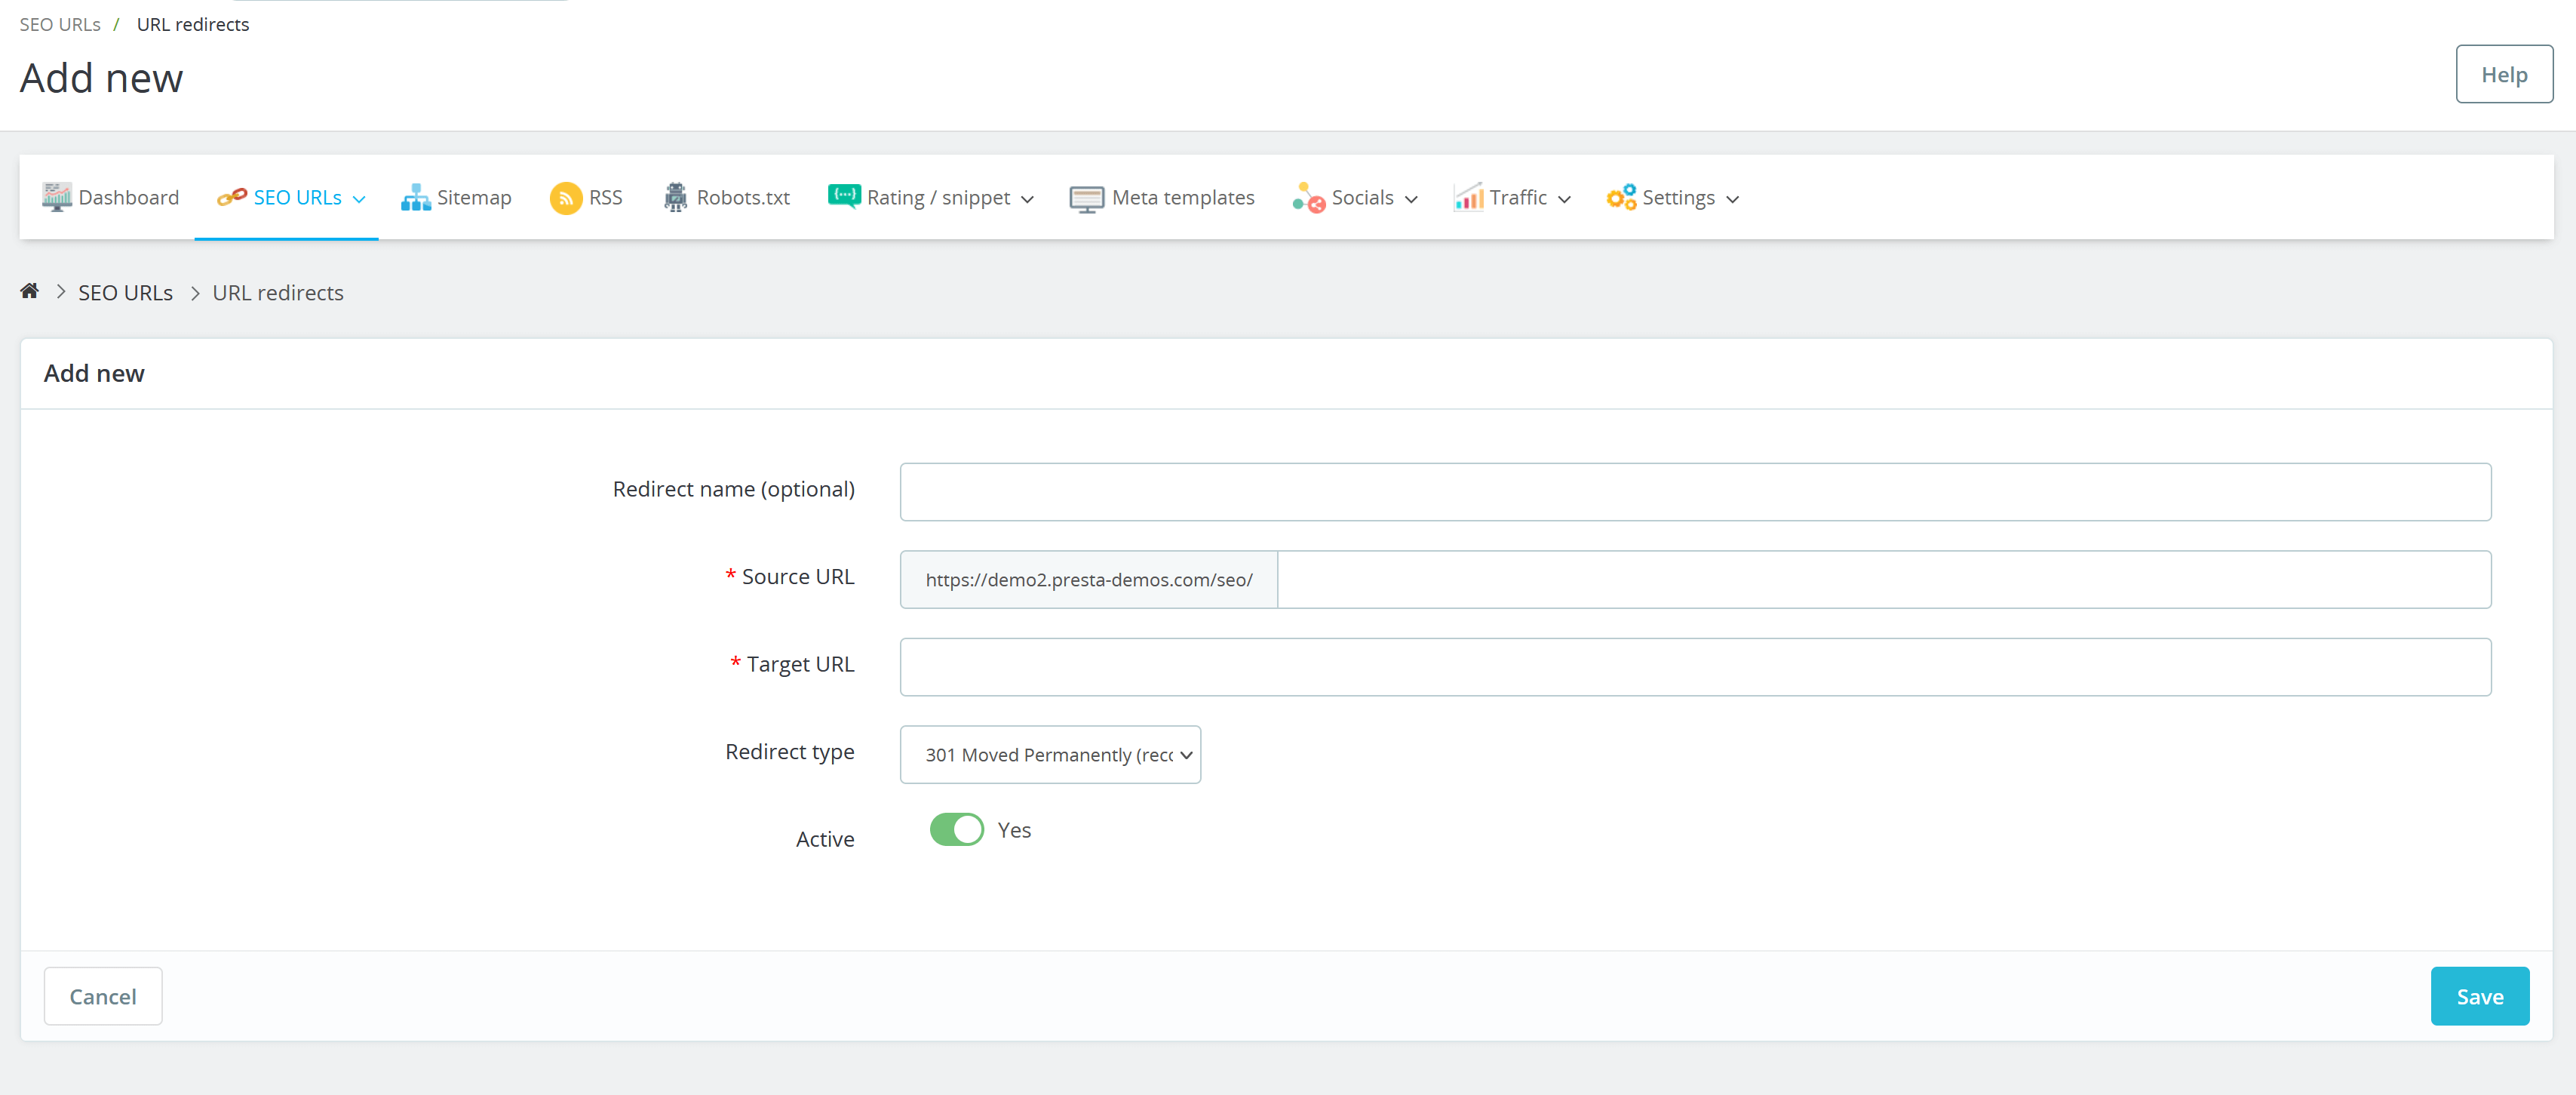
- Choose the type of redirect you want to set up (301, 302, 303).
- Enter the original URL and the destination URL.
- Save your changes.

Adding redirects for 404 pages
To add redirects for 404 error pages identified by the SEO Audit module, follow these steps:
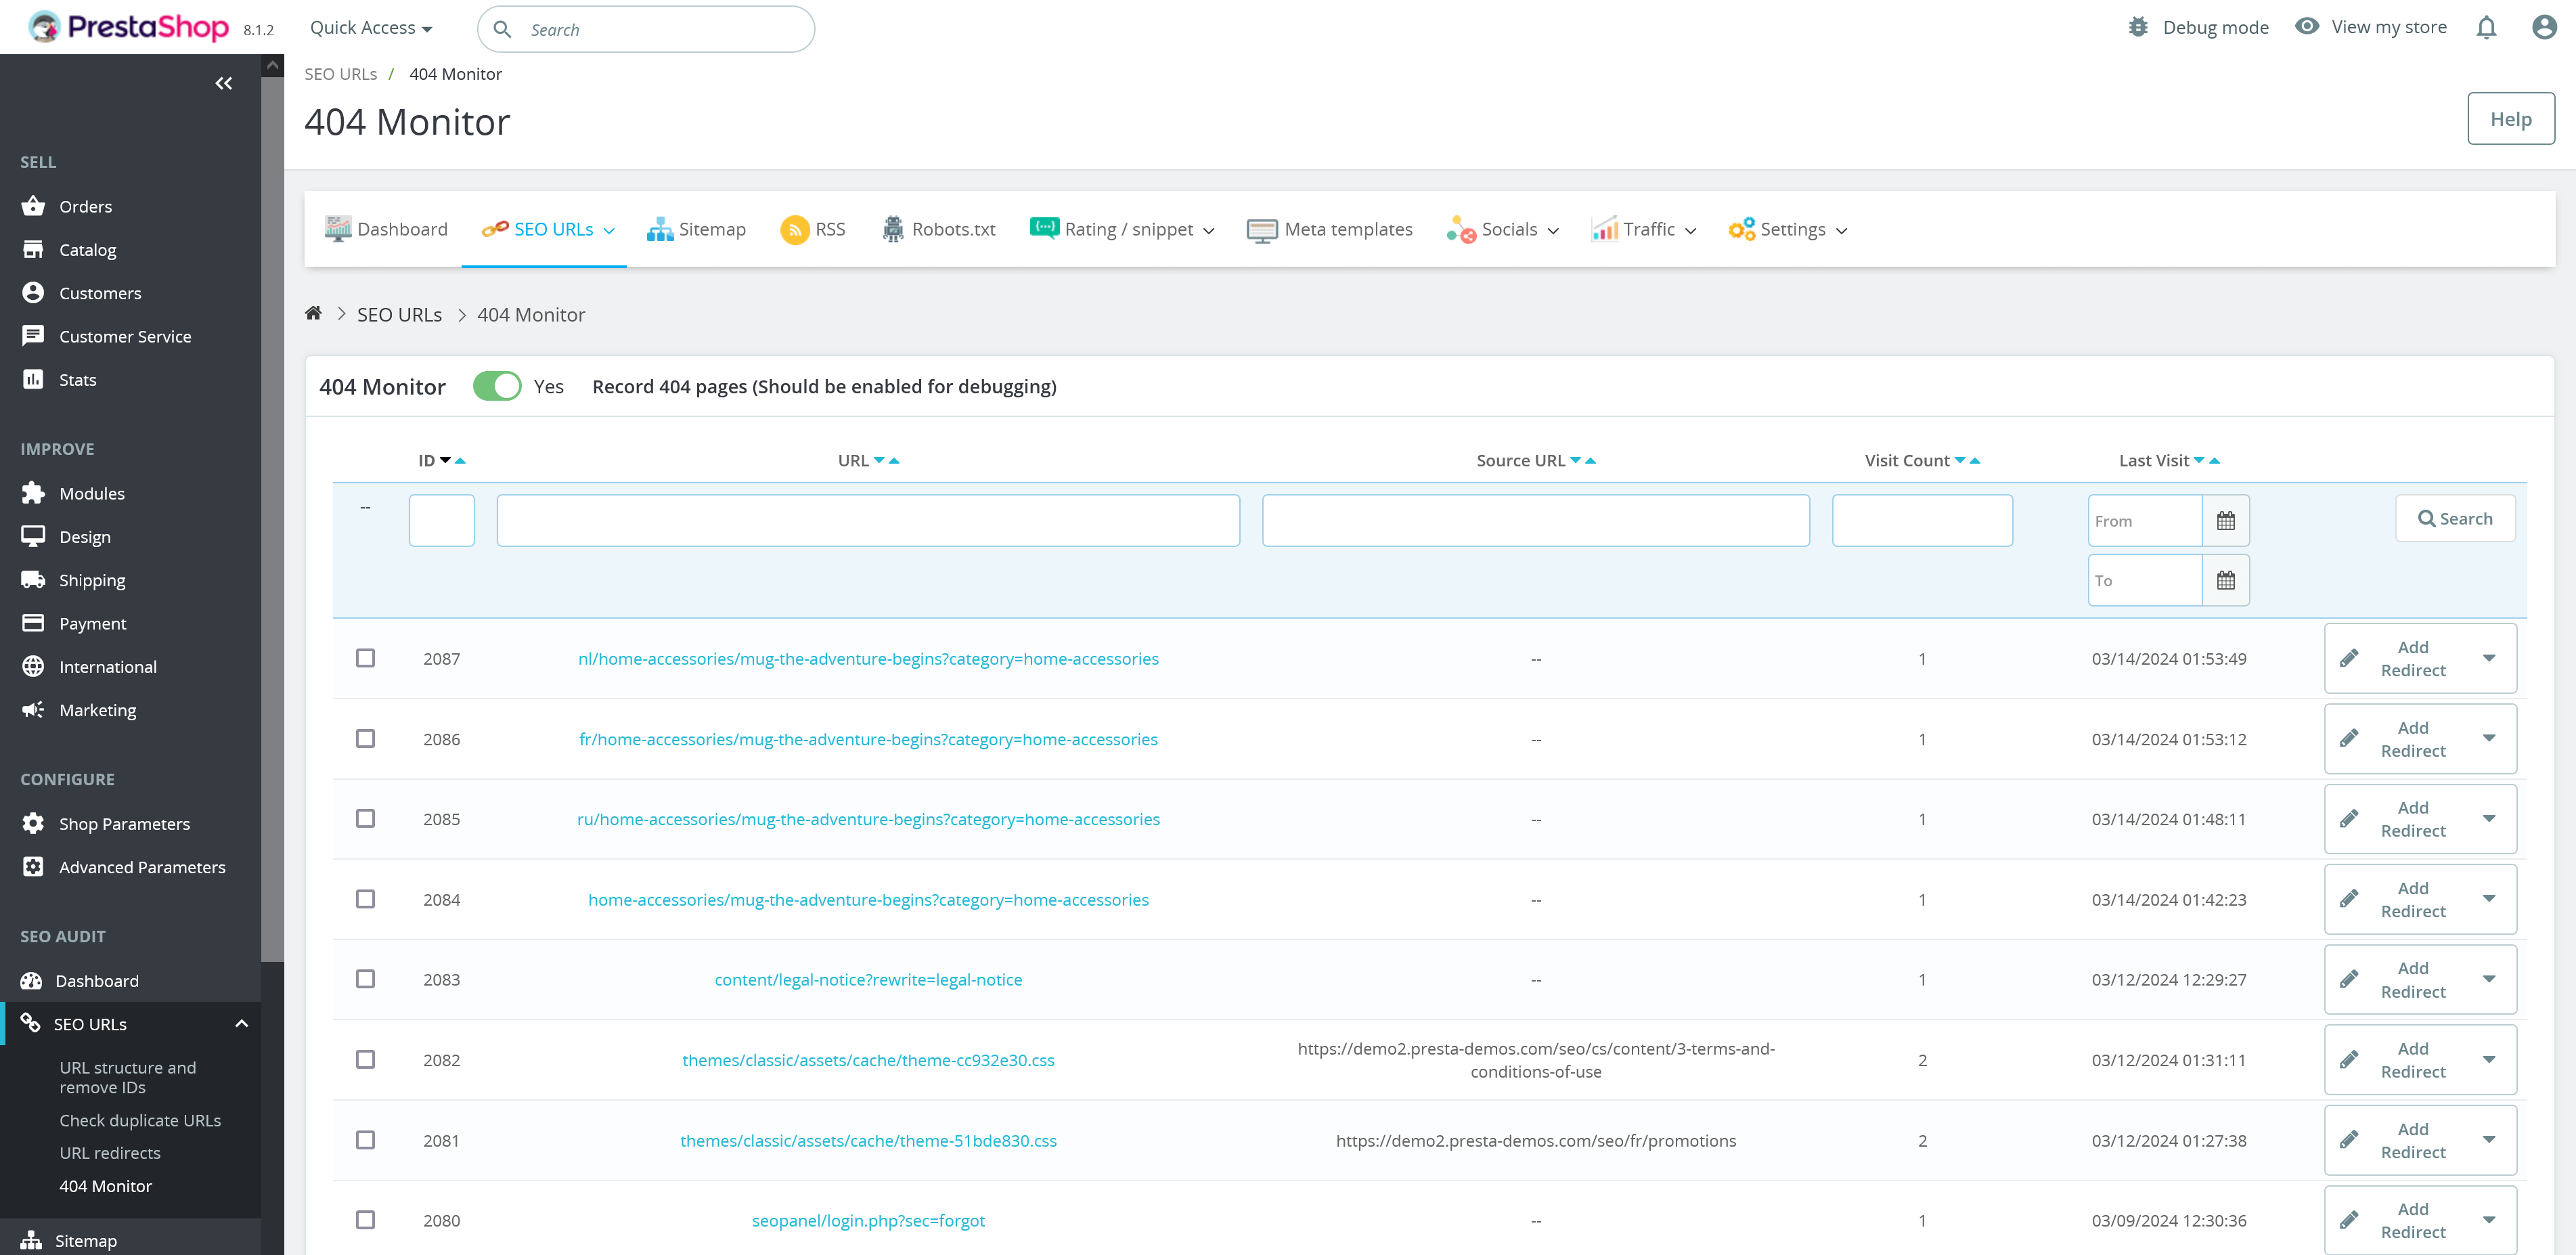
- Access the SEO Audit module and navigate to the "SEO URLs > 404 Monitor” page.
- Turn on the “Record 404 pages (Should be enabled for debugging)” option.
- Review the list of identified 404 error pages.
- For each 404 page, click on the “Add redirect” button.
- Enter the destination URL where you want to redirect users who encounter the 404 error.
- Select the type of redirect you want to set up.
- Save your changes.

By configuring URL redirects and handling 404 error pages effectively, you can improve user navigation, maintain SEO value, and ensure a seamless browsing experience for your website visitors.

