Automated emails play a crucial role in driving sales and ensuring customer satisfaction for e-commerce websites. Gmail SMTP has become an integral part of this process, allowing users to efficiently send large volumes of emails. In this updated guide, we'll delve into the basics of Gmail SMTP and provide step-by-step instructions on setting it up for your PrestaShop store.
SMTP, or Simple Mail Transfer Protocol, is a dedicated mail server facilitating the sending of emails. It operates at the application layer of the TCP/IP protocol and collaborates with the Mail Transfer Agent (MTA) to deliver emails efficiently. SMTP essentially guides your email's journey from your computer to its destination through a "save and forward" procedure.
SMTP is a set of codes that makes sending and receiving email messages between servers easier. It's a type of shorthand that lets a server divide a message into categories that the other server can comprehend.
When you send a message, it's converted into a series of text strings separated by code words (or numbers) that define the section's function.
These codes are provided by SMTP, and email server software is intended to interpret them. Each message passes via several computers as well as its MTAs on its way to its destination.
It is temporarily saved before moving on to the next computer in the path. Consider it as a letter that passes through several hands-on routes to the correct mailbox.
Gmail SMTP operates by delivering messages to the specified SMTP server, initiating communication with a DNS server based on the recipient's email domain. The SMTP server then exchanges information with the destination SMTP server through TCP/IP port 25, ensuring successful email delivery.
Using SMTP Gmail will help businesses quickly reach and attract many potential customers. In addition, SMTP offers the following great benefits:
Please follow the steps below:
Step 1: Go to your Google Account and log in.
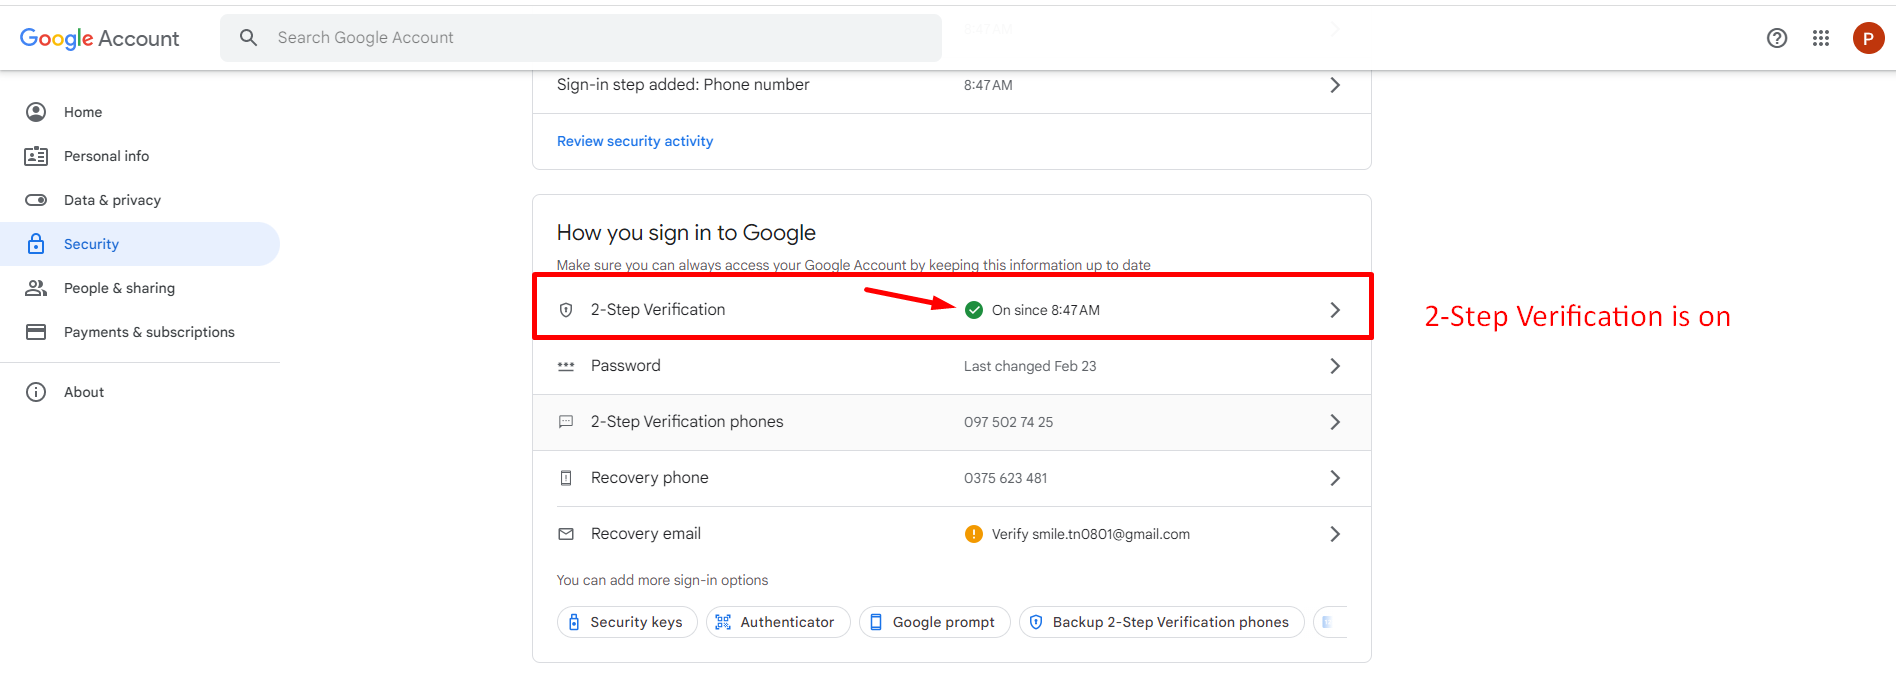
Step 2: Navigate to “Security” > “How you sign in to Google”. Click on “2-Step Verification” and proceed with the verification steps to turn on "2-Step Verification".
Now, "2-Step Verification" is on:
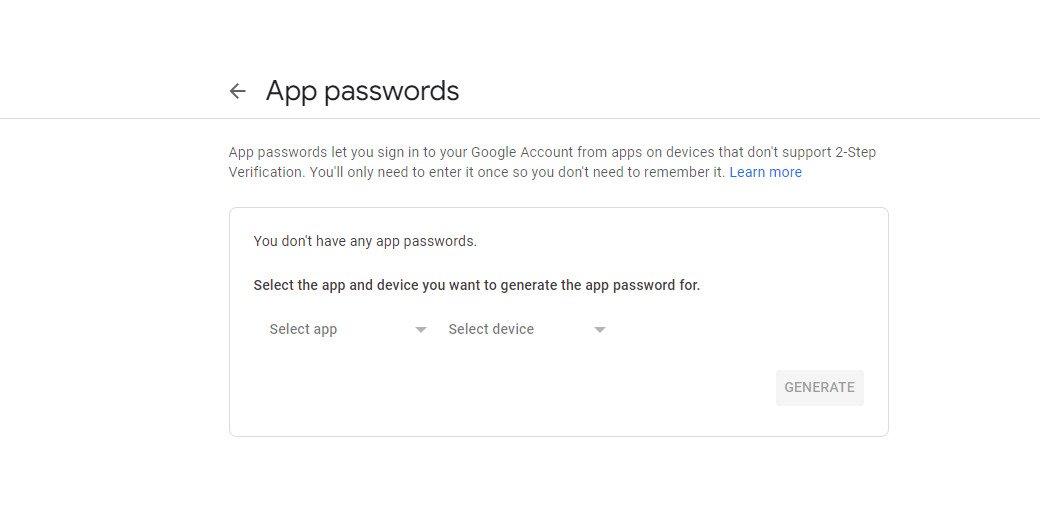
Step 3: Click on this link to access “App passwords”.
Then, you log in to your Google account as normal:
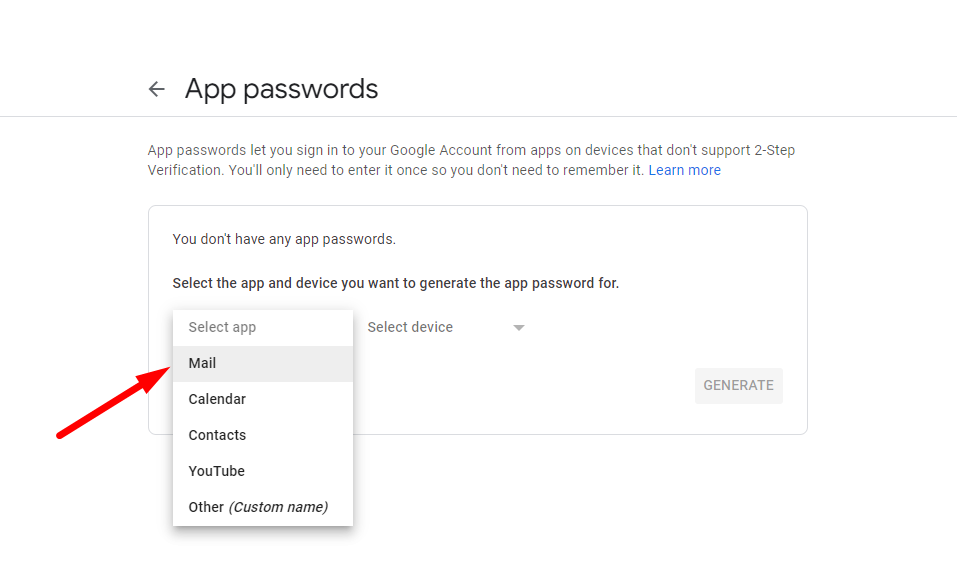
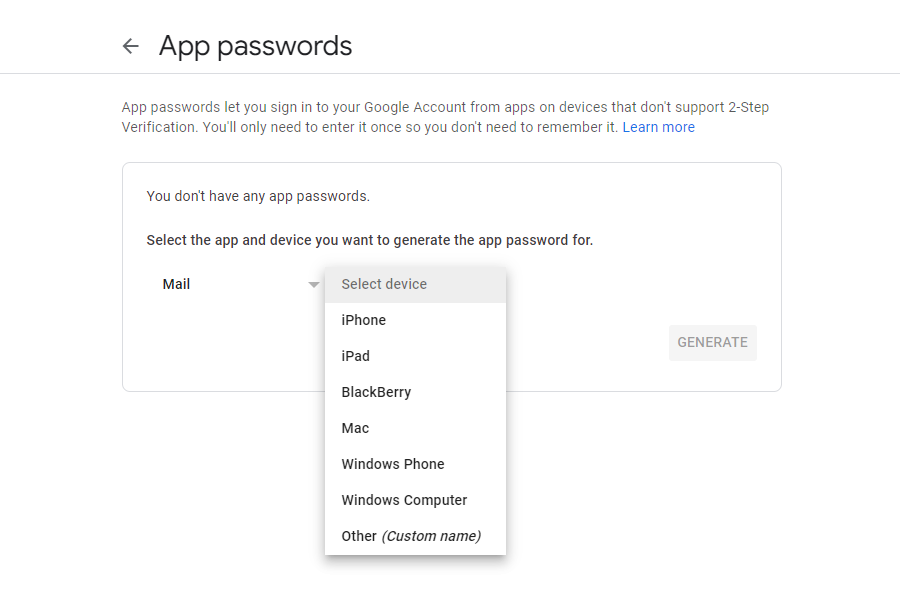
Step 4: On the “Select app” field, select “Mail”.
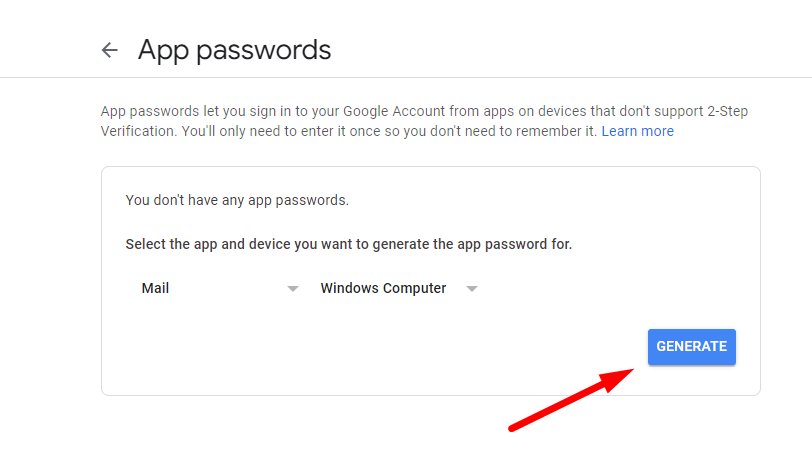
Step 5: Select a device, for example, “Windows Computer”.
Step 6: Click on “Generate” button.
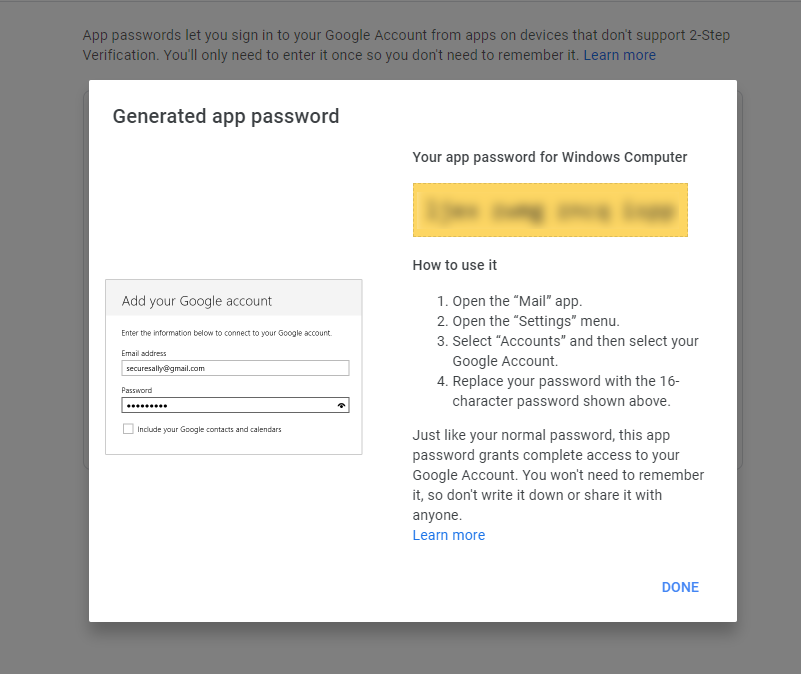
Step 7: Copy the password that has just been generated and go back to your PrestaShop admin panel.
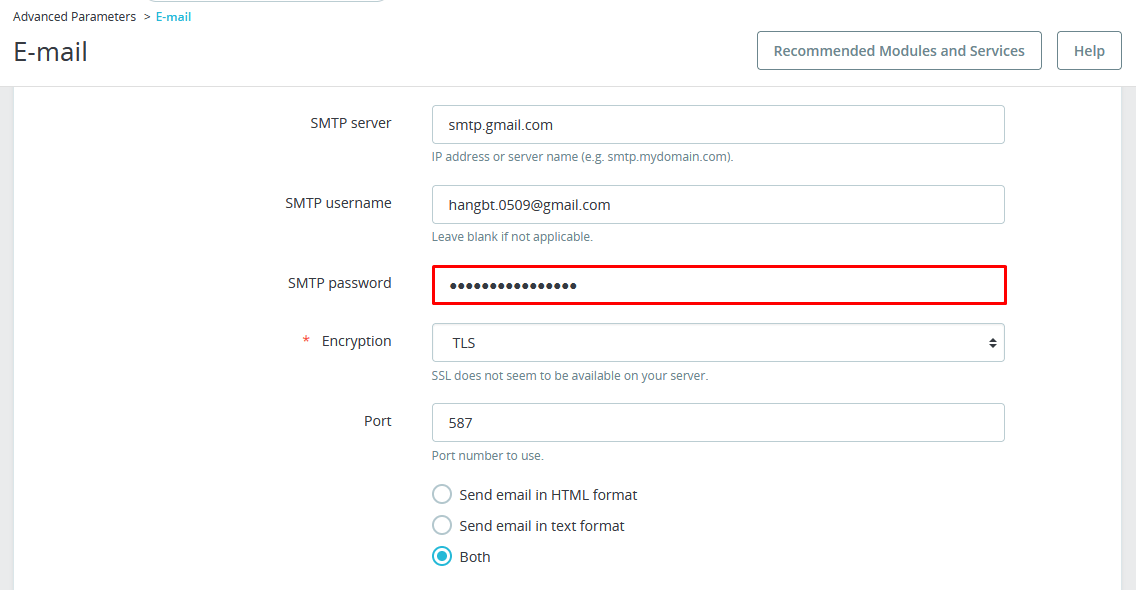
Enter the password that you have generated on the “SMTP password” field:
To ensure that the Gmail SMTP setting is successful, you can enter an email address in the "Send a test email to" field then click "Send a test email" to check.
Setting up SMTP for your PrestaShop website can be a breeze with the "Easy SMTP" module developed by PrestaHero. This user-friendly tool streamlines the process, allowing you to integrate your store seamlessly with the most popular mailing services, including Amazon SES, SendGrid, Brevo (Sendinblue), Mailjet, and more.
Easy SMTP offers a straightforward solution for PrestaShop store owners looking to enhance their email configuration. By integrating with top mailing services, you can ensure reliable email delivery and optimize communication with your customers.
The benefits of using a Gmail SMTP server for marketing are undeniable. What are you waiting for if you haven't set up Gmail SMTP for your PrestaShop store yet? Let's get started right now!