How to Configure Pickup Slots in Your PrestaShop Store
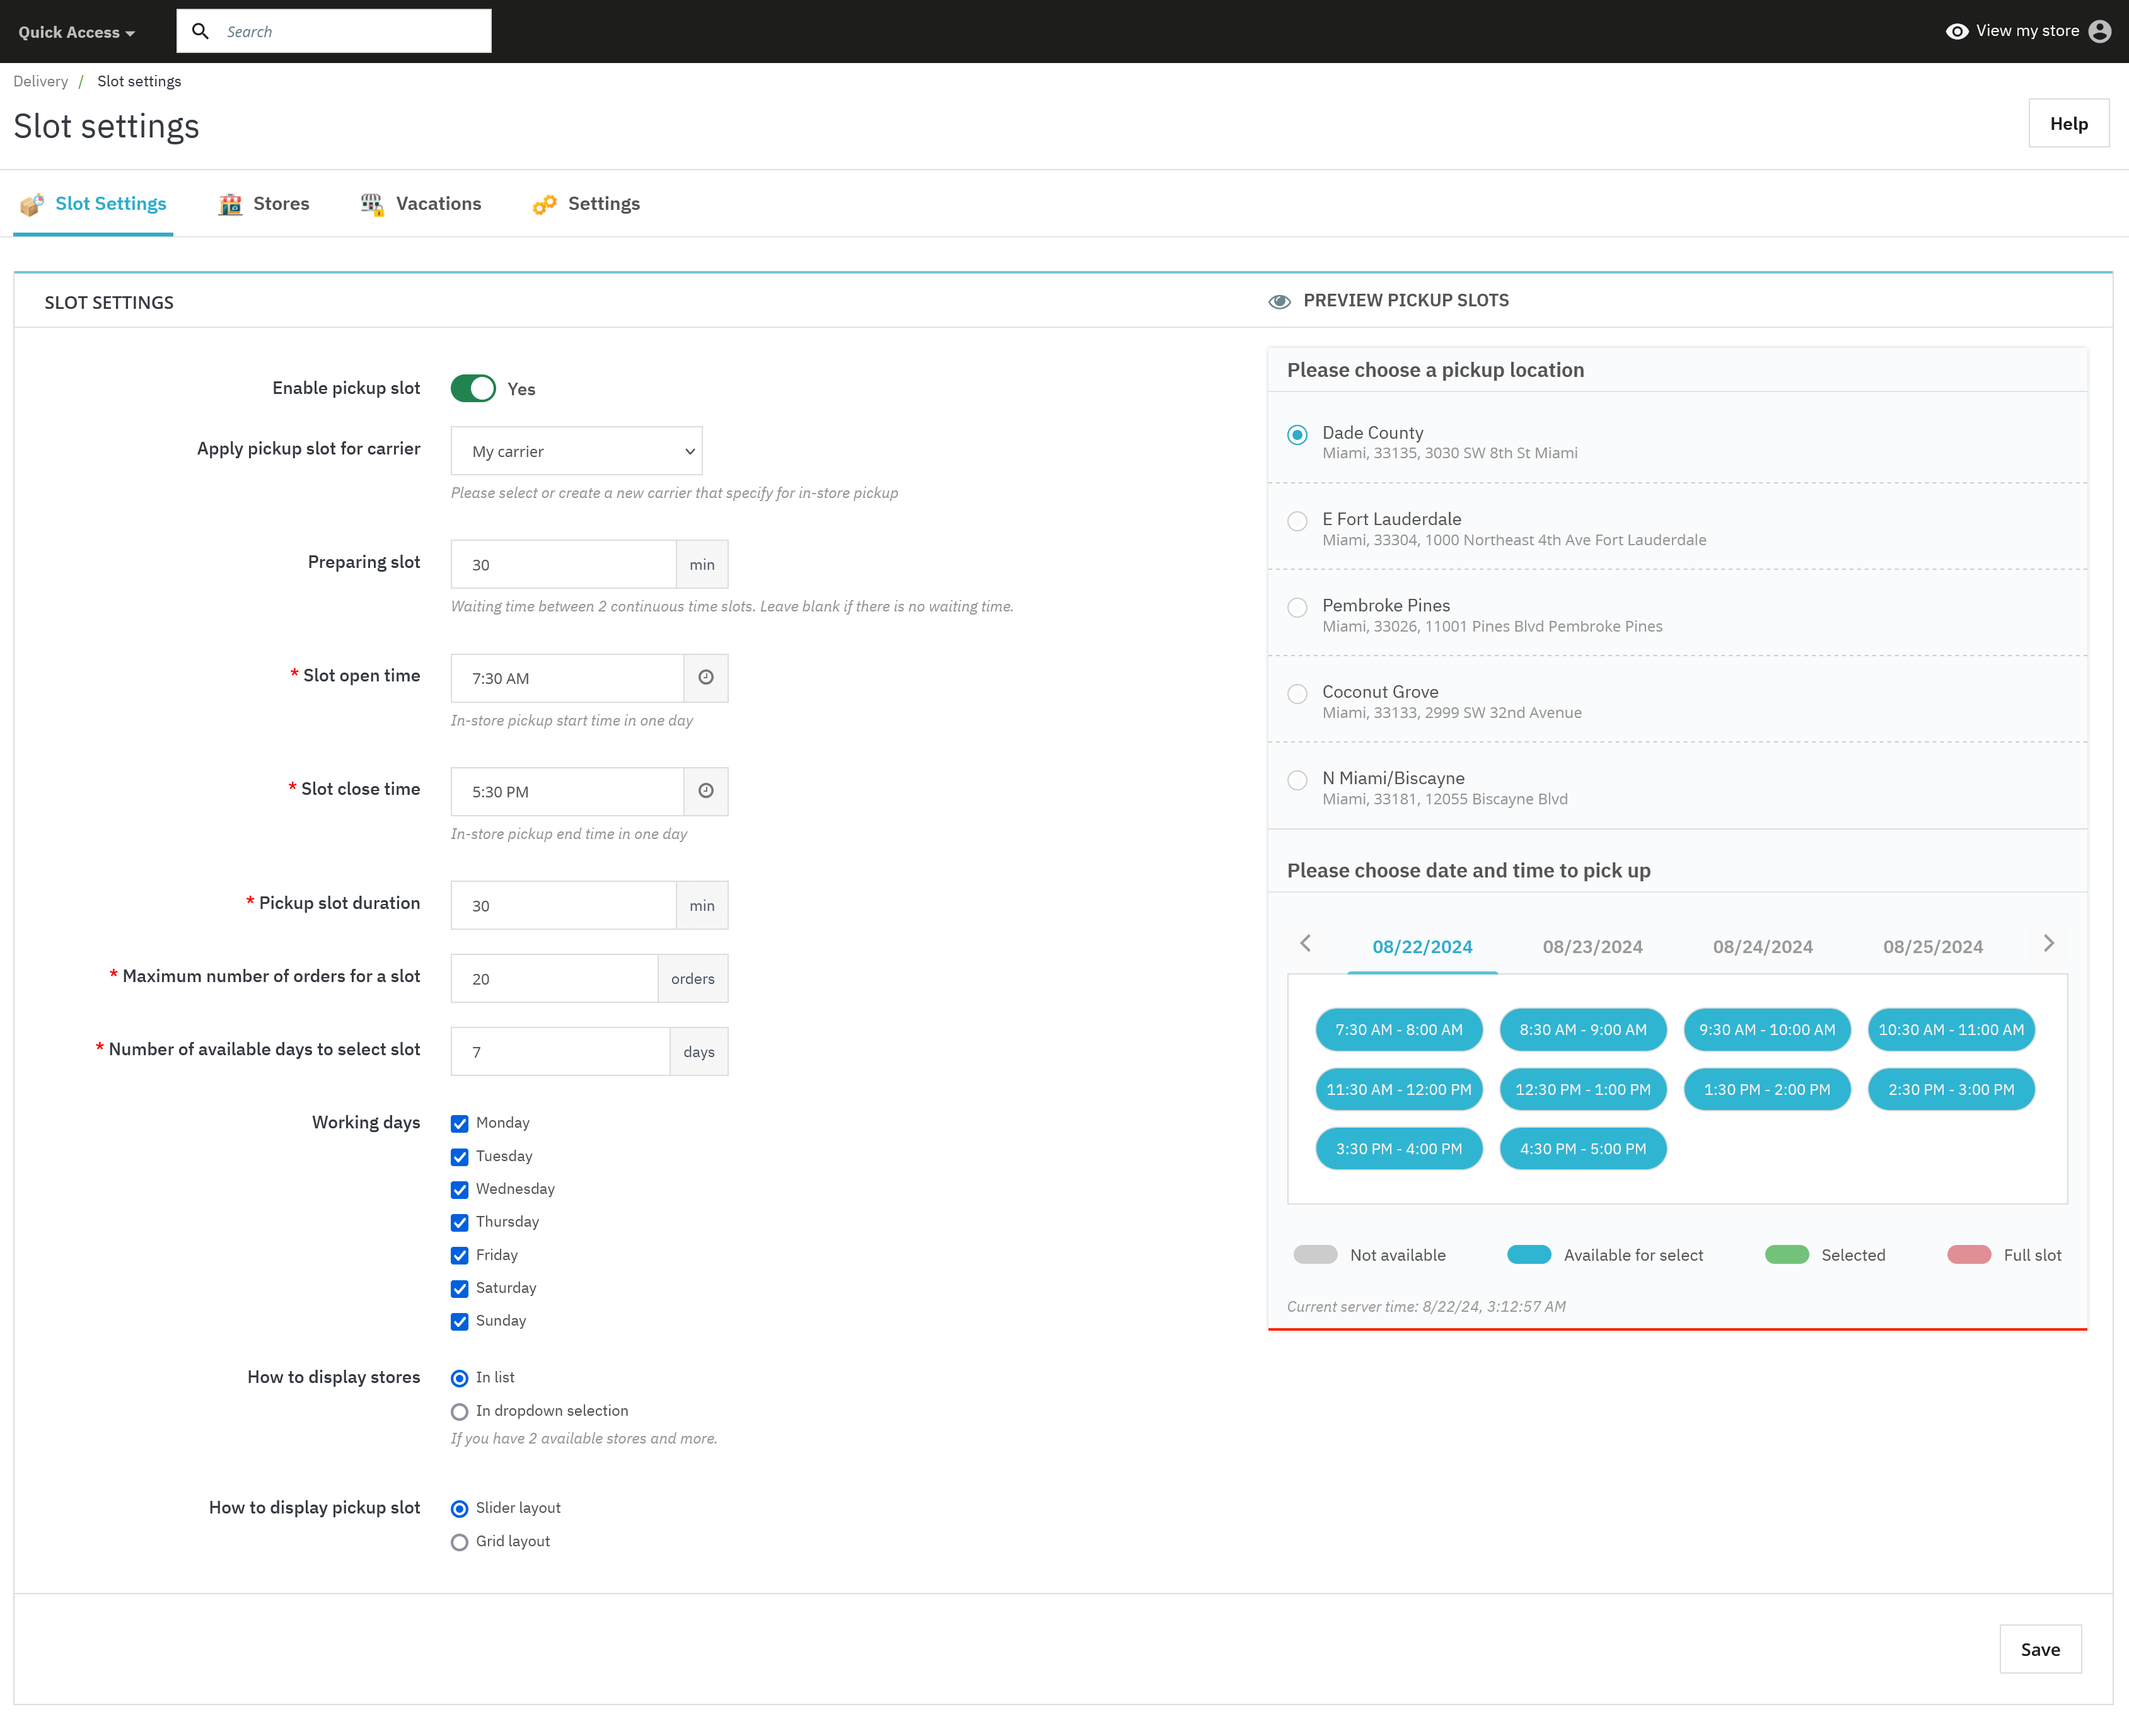
When setting up the "Store Pickup and Local Delivery" module in PrestaShop, the first page you'll encounter is the “Slot Settings” page. This page is crucial as it allows you to configure all aspects of the delivery slot, ensuring that customers can choose the most convenient time and location for picking up their orders. Additionally, you can preview how these configurations will appear on your store's front end.
Step-by-step slot configuration
Step 1: Enable pickup slot
First, turn on the “Enable pickup slot” option. It will display the select pickup store and pickup slot section on the checkout page of your PrestaShop site.
Step 2: Choose or create a carrier
Next, select or create a new carrier for customers who want to pick up items in-store. This is crucial for connecting the delivery slot with the logistics of your store, ensuring that everything runs smoothly.
Step 3: Set the preparation slot
The preparing slot is the time interval between two continuous pickup slots. For example, Marie, a customer of Camellia Studio—a women's fashion store—might want to pick up a dress she ordered online at a time that suits her. If Marie selects a 10:00 AM slot, and you’ve set a 30-minute preparing slot, the next available slot for other customers will be 10:30 AM. This gives your store enough time to prepare the order for the next customer.
Step 4: Define delivery open and close time
Set the start and end times for when pickups can occur during the day. For Camellia Studio, if pickups are allowed between 9:00 AM and 5:00 PM, you’ll set this time range here.
Step 5: Set pickup slot duration
Define how long each pickup slot will last. For example, you might set a 15-minute slot duration, giving Marie a quarter-hour window to pick up her dress.
Step 6: Limit the number of orders per slot
You can control the number of orders that can be picked up during a single slot. For instance, if you want to ensure that only five customers can pick up their orders during the 10:00 AM slot, you can set this limit.
Step 7: Set available days for slot selection
Choose the number of days in advance that customers like Marie can select a pickup slot. This helps manage expectations and workload in your store.
Step 8: Customize display on the checkout page
You have the option to display the store and pick-up slots either in a list or a dropdown selection on the checkout page. For example, Marie might see a list of available slots for Camellia Studio or choose from a dropdown menu. Additionally, you can choose to show pickup slots in either a slider or grid layout.
Previewing configurations
On the “Slot Settings” page, the right half of the screen shows a live preview of how the store and pick-up slot selection will appear on the front end. This preview updates in real-time based on your configurations, allowing you to visually confirm the changes and ensure everything looks as intended.
This hands-on preview is especially useful for verifying how the "Camellia Studio" store and the available pickup slots will be presented to customers like Marie, giving them a seamless and visually appealing shopping experience.
By following these steps, you can effectively set up and customize pickup slots to meet the needs of your customers, enhancing their shopping experience while also optimizing your store’s operations.