How to Configure Amazon SES for Your PrestaShop Store
What is Amazon SES
Amazon Simple Email Service (SES) is a powerful, scalable email service designed to help businesses of all sizes send transactional, marketing, and notification emails. By integrating Amazon SES with your PrestaShop store, you can ensure high deliverability rates, reliable email sending, and access to advanced email features.
How to get AWS access key ID and secret access key
Before you can configure Amazon SES in PrestaShop, you need to obtain your AWS access key ID and secret access key. Follow these steps to create and manage your access keys:
Step 1: Sign In to the AWS Management Console
Go to the AWS Management Console and log in with your AWS account credentials. Use your account ID or alias, IAM user name, and password.
Step 2: Access security credentials
In the navigation bar on the upper right, click on your user name, and select Security credentials.
Step 3: Create an access key
- In the Access keys section, click Create access key. If you already have two access keys, delete one before creating a new one.
- On the Access key best practices & alternatives page, select your use case or choose Other, then click Next.
- (Optional) Add a description tag value to help you identify the access key later.
- Click Create access key. On the Retrieve access keys page, click Show to reveal your secret access key, or download the CSV file. This is the only opportunity to save your secret access key, so make sure to store it securely.
Step 4: Manage existing access keys
To deactivate, activate, or delete an access key, go to the Access keys section and choose the appropriate action from the Actions dropdown menu.
Configuring Amazon SES in the Easy SMTP module
Once you have your AWS credentials, follow these steps to configure Amazon SES in your PrestaShop store:
Step 1: Navigate to SMTP settings
In your PrestaShop back office, go to Advanced Parameters > Email.
Step 2: Select Amazon SES as the email sending option
Under the Send email option, choose Amazon SES from the list.
Step 3: Enter the Amazon SES configuration details
- Regions: Select the AWS region where your SES service is located.
- Access key ID: Enter the access key ID you generated in the previous steps.
- Secret access key: Enter the corresponding secret access key.
- Sender email: Provide the email address you wish to use as the sender. This email address must be verified in your Amazon SES account.
- Sender name: Enter the name you want to appear as the sender.
- Reply-to email: (Optional) Specify an email address for recipients to reply to.
- Reply-to name: (Optional) Enter a name for the reply-to address.
Step 4: Save your configuration
After entering all the necessary information, click Save to apply the settings.
Step 5: Test your configuration
Send a test email to confirm that everything is set up correctly. Ensure that the email is sent and received without any issues.
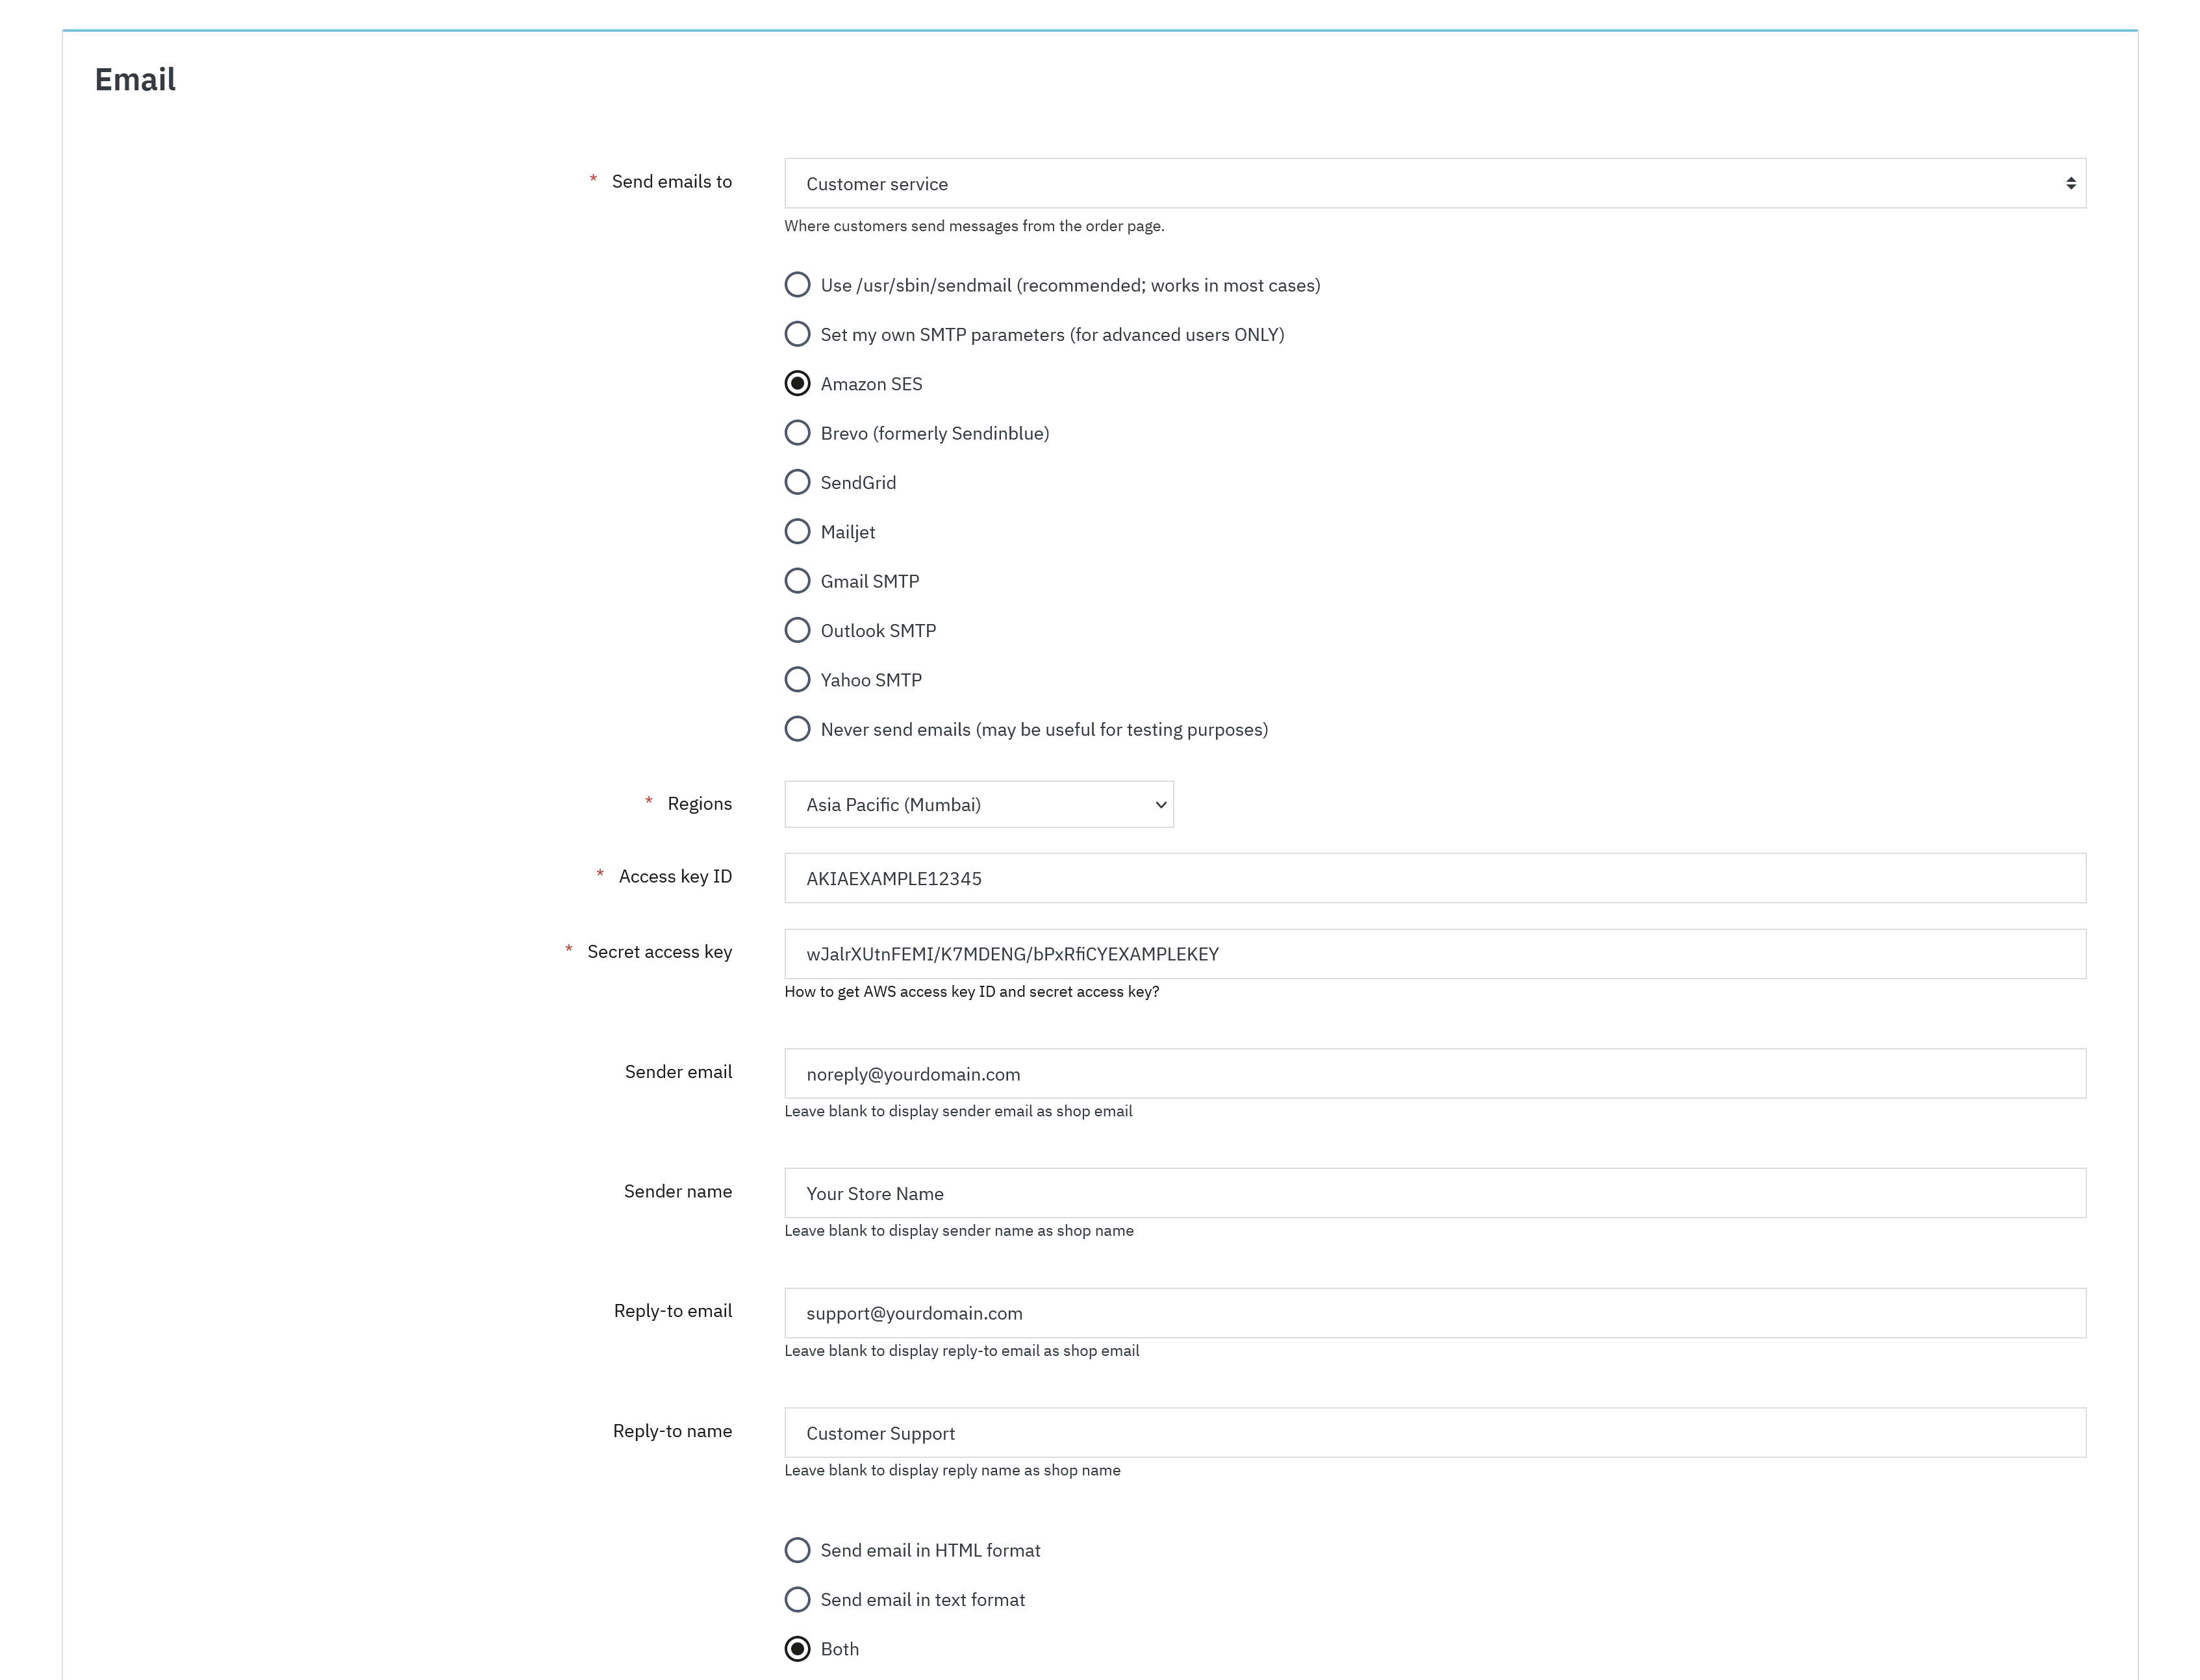
Example Amazon SES configuration
Here’s an example of how to fill out the fields:
- Regions: Asia Pacific
- Access key ID: AKIAEXAMPLE12345
- Secret access key: wJalrXUtnFEMI/K7MDENG/bPxRfiCYEXAMPLEKEY
- Sender email: [email protected]
- Sender name: Your Store Name
- Reply-to email: [email protected]
- Reply-to name: Customer Support
By following these steps, you can configure Amazon SES as your SMTP server, ensuring reliable and efficient email communication from your PrestaShop store.