How To Select Data for Seamless Migration
To proceed with the data migration process, follow these steps to select the data types you want to migrate with the “MigrationPro Ultimate” module:
Migrate instantly with default settings
- After connecting the source and target stores, you will be navigated to the list of data entities that will be migrated into the target store. By default, all data entities are selected.
- Locate the "Migrate" button and click on it to initiate the migration process instantly.
- By clicking on the "Migrate" button, the module will start migrating data with default migration settings and pre-selected data entities.
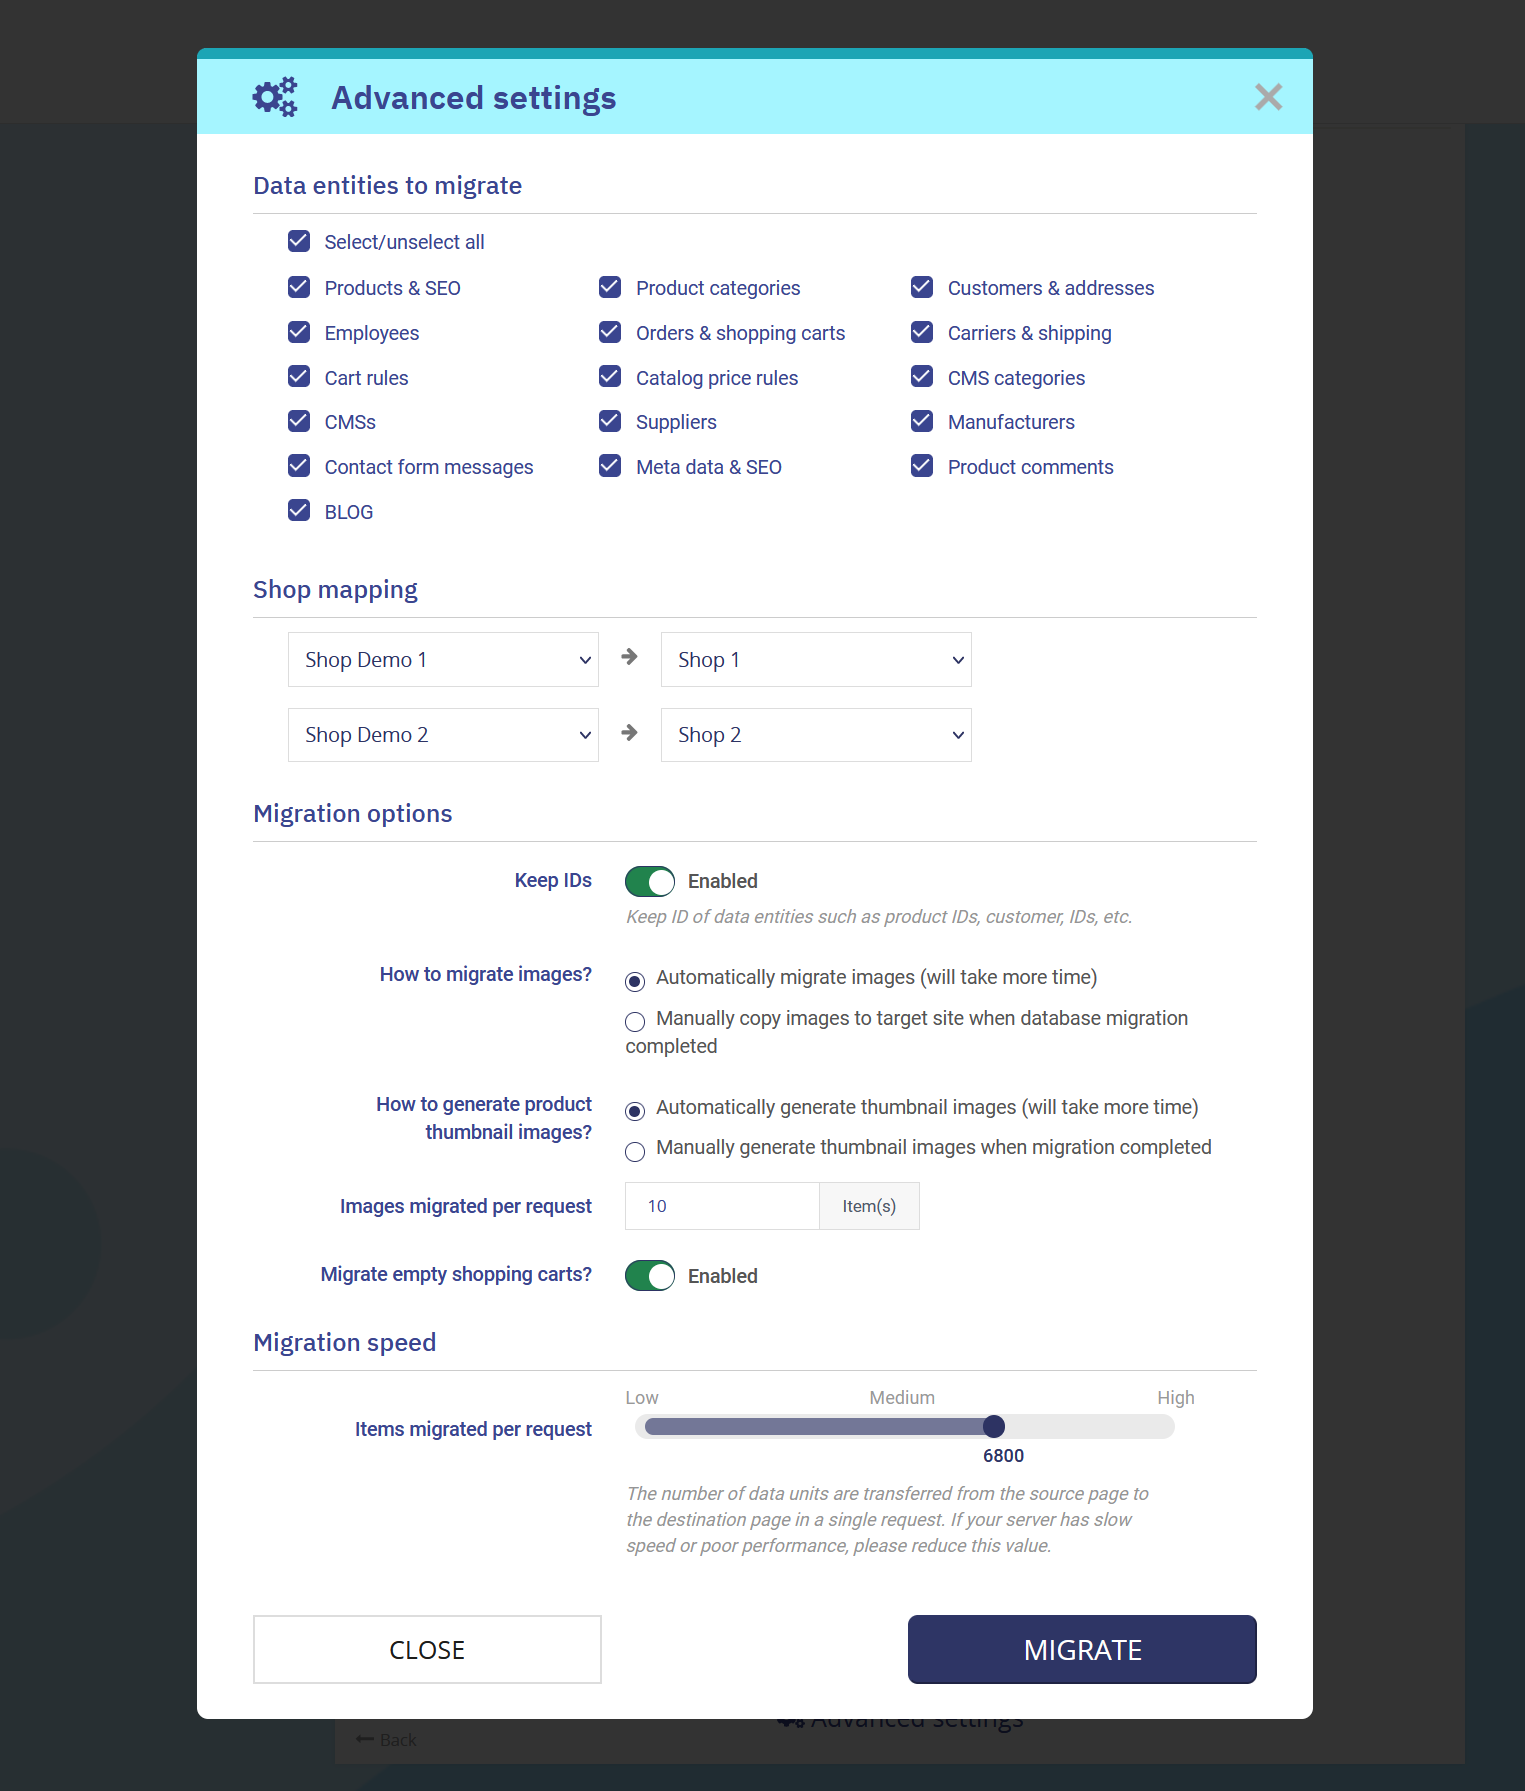
Select data types to migrate
To choose specific data types for migration instead of migrating all data, follow these steps:
- Click on the "Advanced settings" option. This allows you to customize the migration process according to your preferences and specific requirements.
- Within the advanced settings, you can select the data entities you want to migrate into the target store.
- In addition to selecting data types for migration, you can also adjust other migration settings related to the data transfer process.
Review the list of available data types supported by the “MigrationPro Ultimate” module and select the entities you wish to migrate.
Important note
There are some data entities that need to be migrated together. You cannot migrate these data entities alone since it can break the logic of the database.
For example:
- If you intend to migrate “Orders & shopping carts” data, you must also migrate "Customers & addresses" and "Carriers & shipping".
- Similarly, if you wish to migrate "Products & SEO" data, you must also migrate "Product categories".
Save changes and start migration
- Once you have selected the desired data entities, save your changes.
- After saving, you can proceed to start the migration process by clicking on the "Migrate" button.