How to Clone Your PrestaShop Site – 2024 Edition
Imagine this: you've poured your heart and soul into crafting the perfect PrestaShop store. It's sleek, feature-rich, and attracting tons of customers. But now, update time looms... with a chilling twist. What if the update introduces bugs that crash your site, leaving your precious store in shambles for everyone?
Don't panic, fellow PrestaShop enthusiast! A simple yet powerful solution is at your fingertips: cloning your site.
Why Clone Your PrestaShop Site?
Think of a clone as your store's secret twin, a haven for experimentation and testing. Here's why cloning is your best friend:
- Fearless experimentation: Unleash your inner mad scientist! Test new features, plugins, and updates in the clone without jeopardizing your live site.
- Smooth troubleshooting: Encountered an issue? Debug and fix it in the comfort of your clone, ensuring a seamless experience for your customers.
- Stress-free development: Build new features, optimize pages, and refine your store's look and feel all in a stress-free testing environment.
The Simplest Solution? You Bet!
Cloning your PrestaShop site is not just essential, it's surprisingly easy. In this comprehensive guide, we'll walk you through the entire process step-by-step, from initial setup to seamless testing and deployment.
Ready to unleash the power of cloning and safeguard your live store? Dive into this guide and experience the magic of worry-free PrestaShop updates!
Step-by-Step Guide to Duplicate a PrestaShop Site
Step 1: clone your website’s code
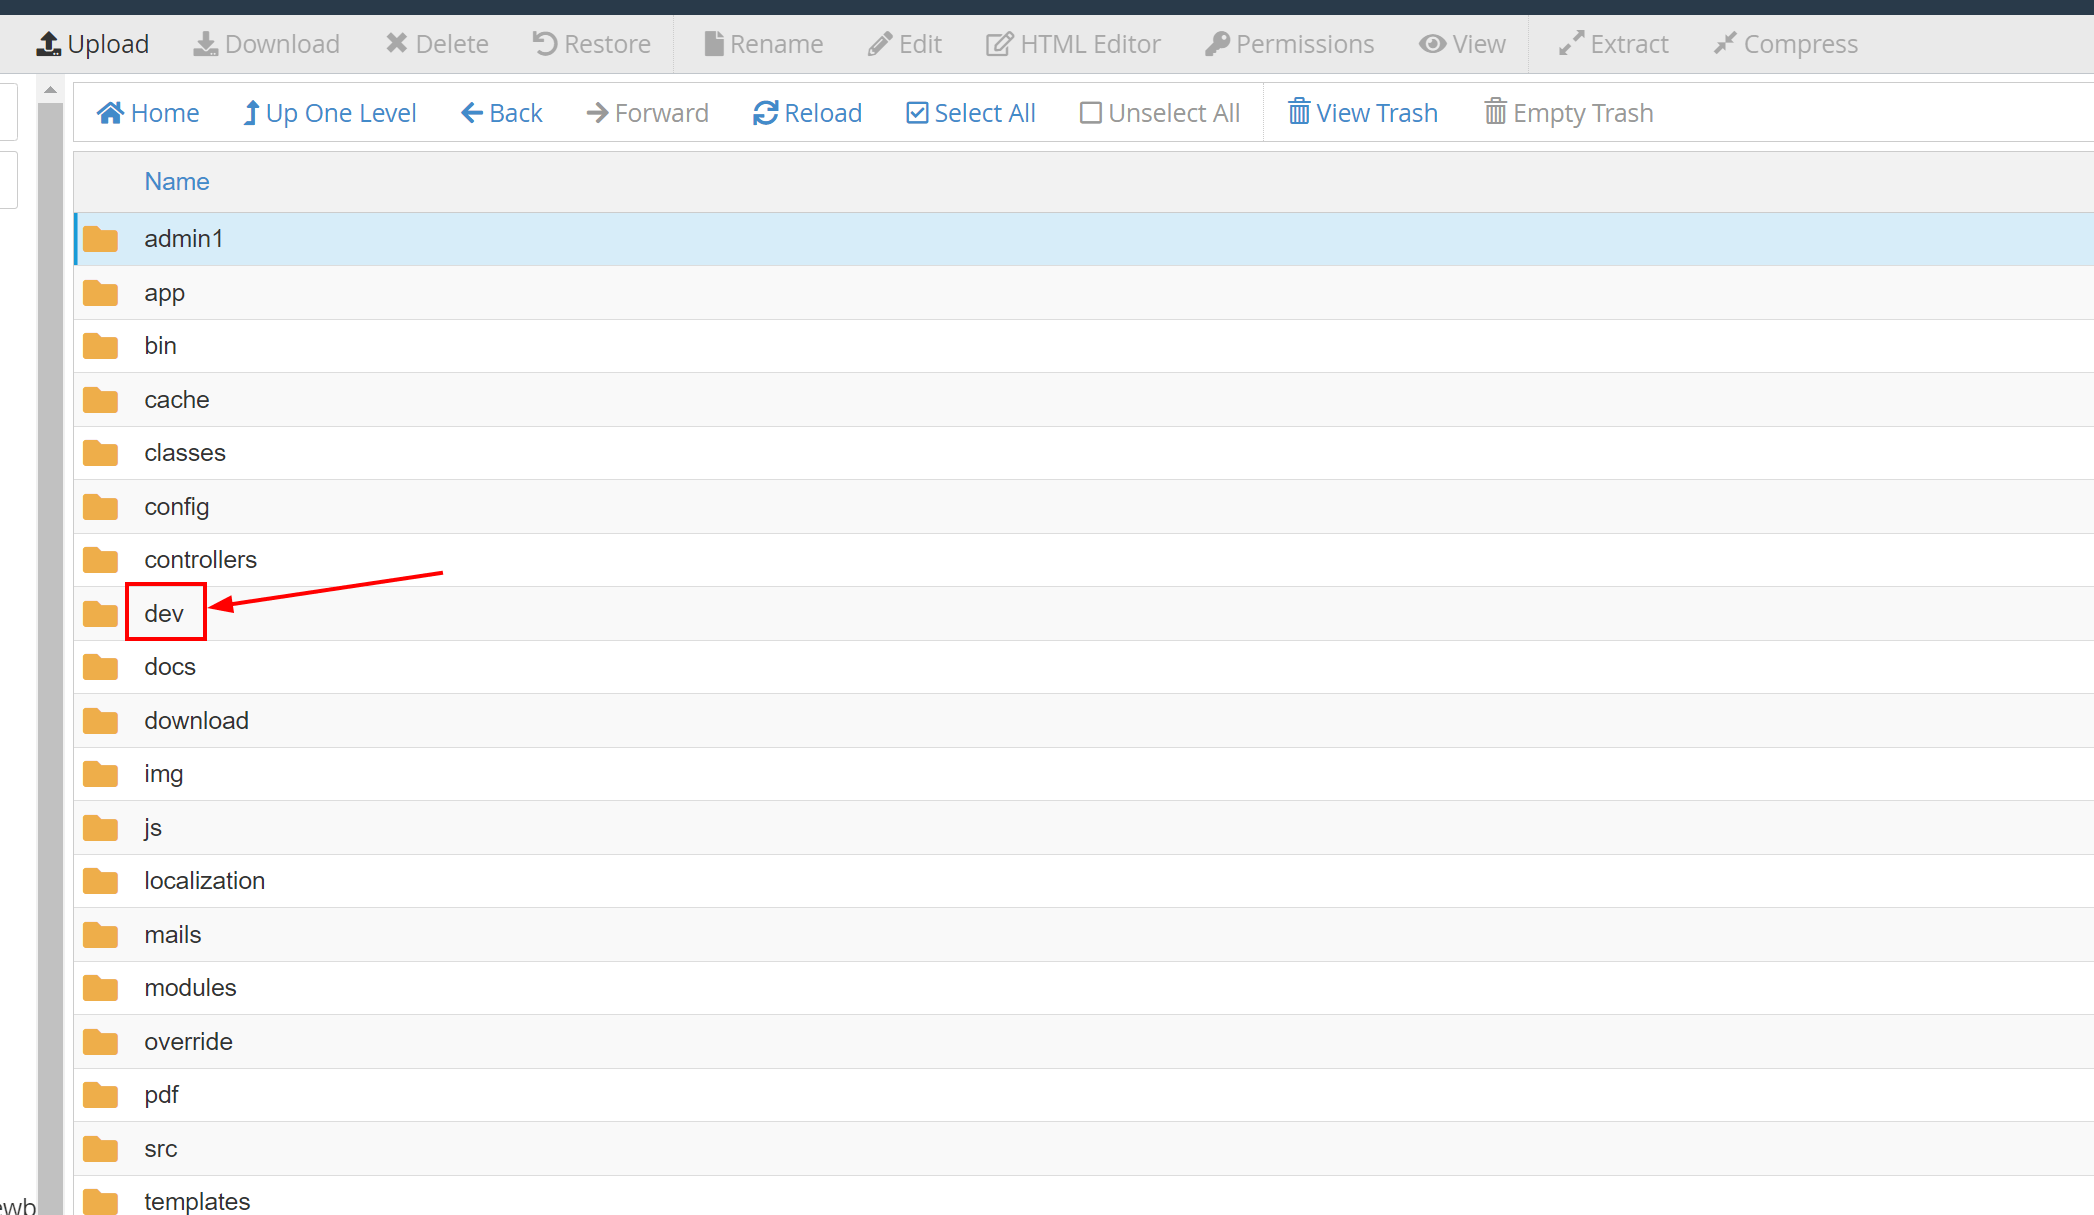
Create a "dev" folder within your website's root directory.
Zip relevant files from the live site, excluding unnecessary folders (test folders, backup folders, etc.) for a faster process.
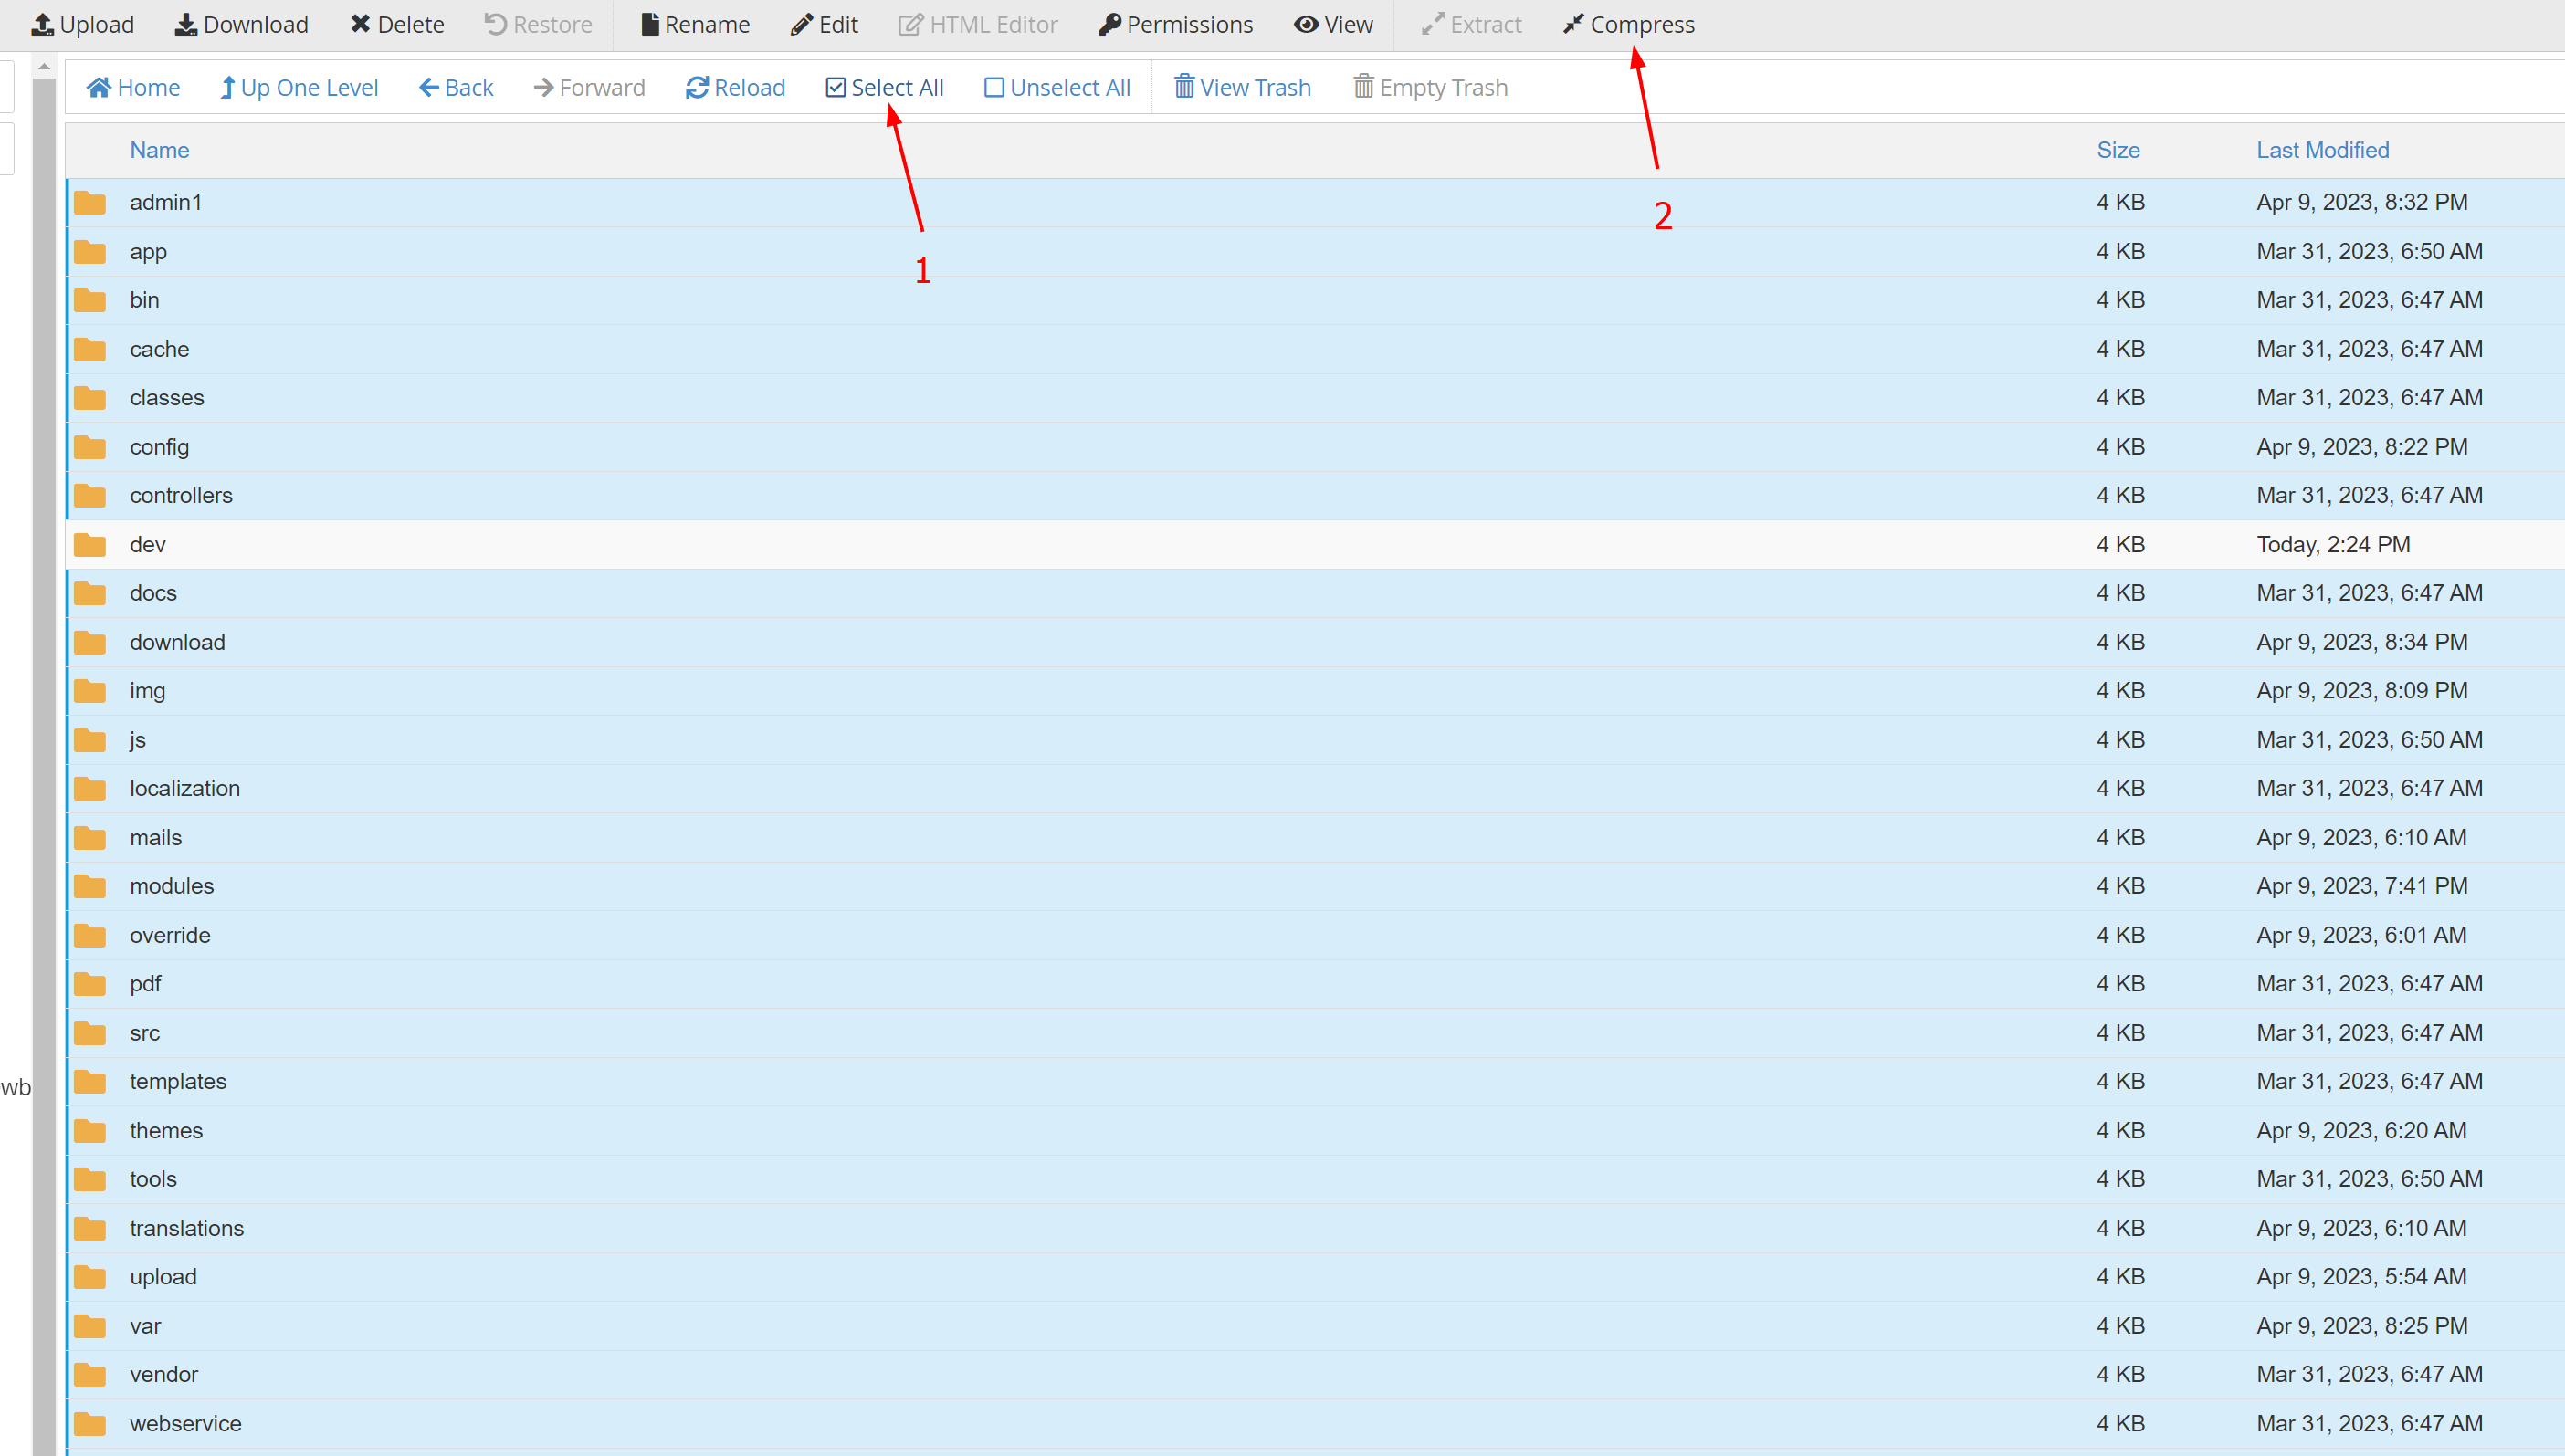
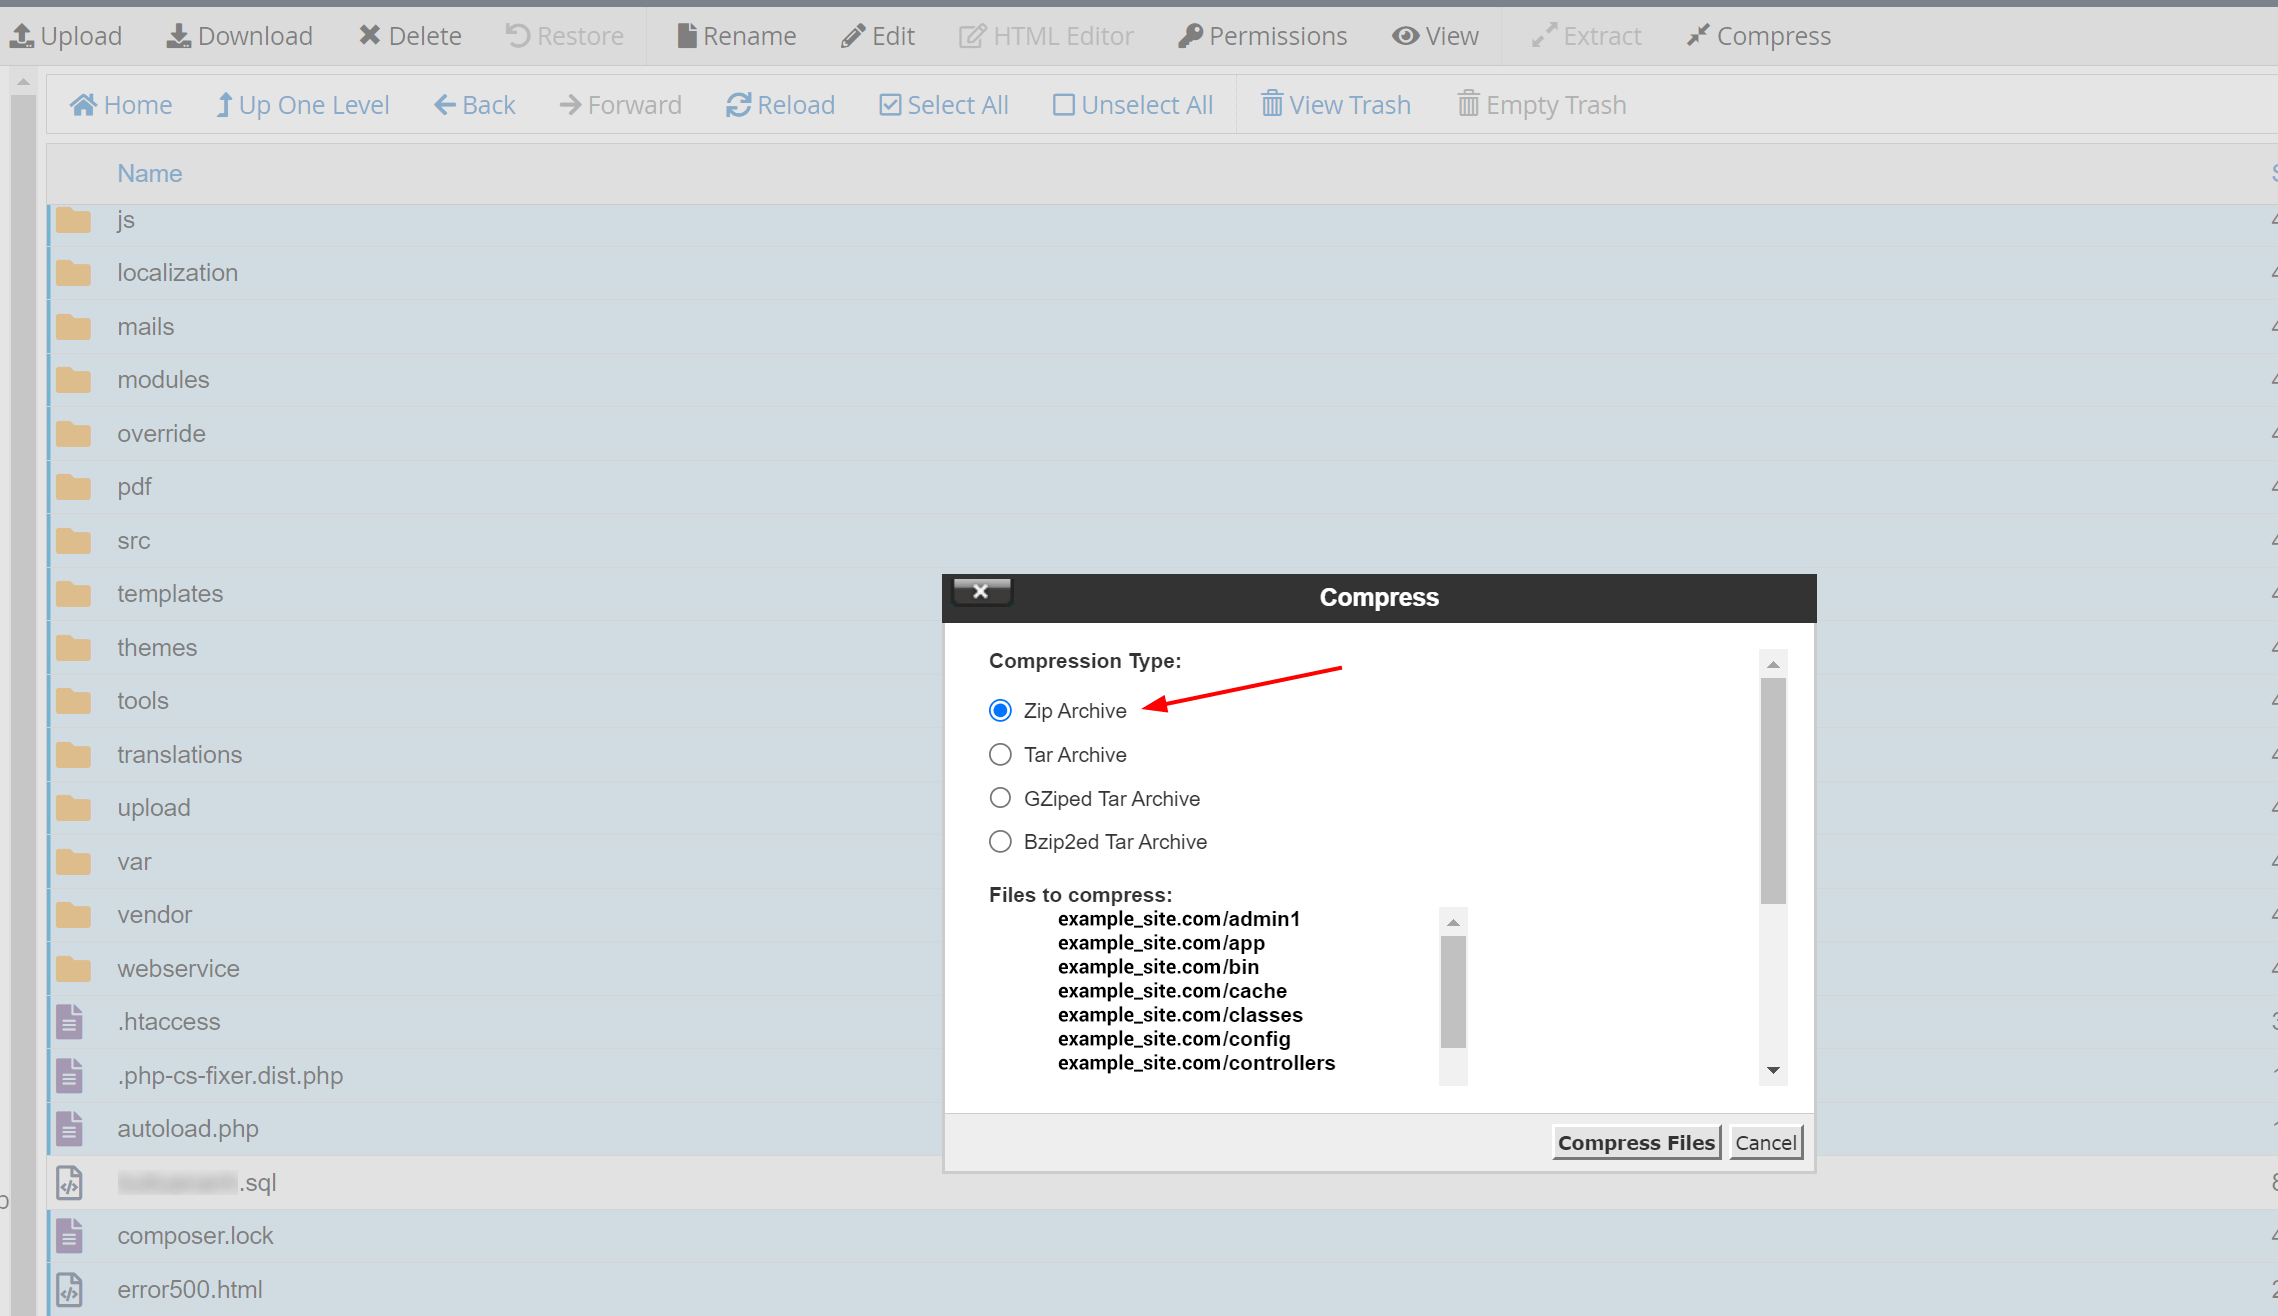
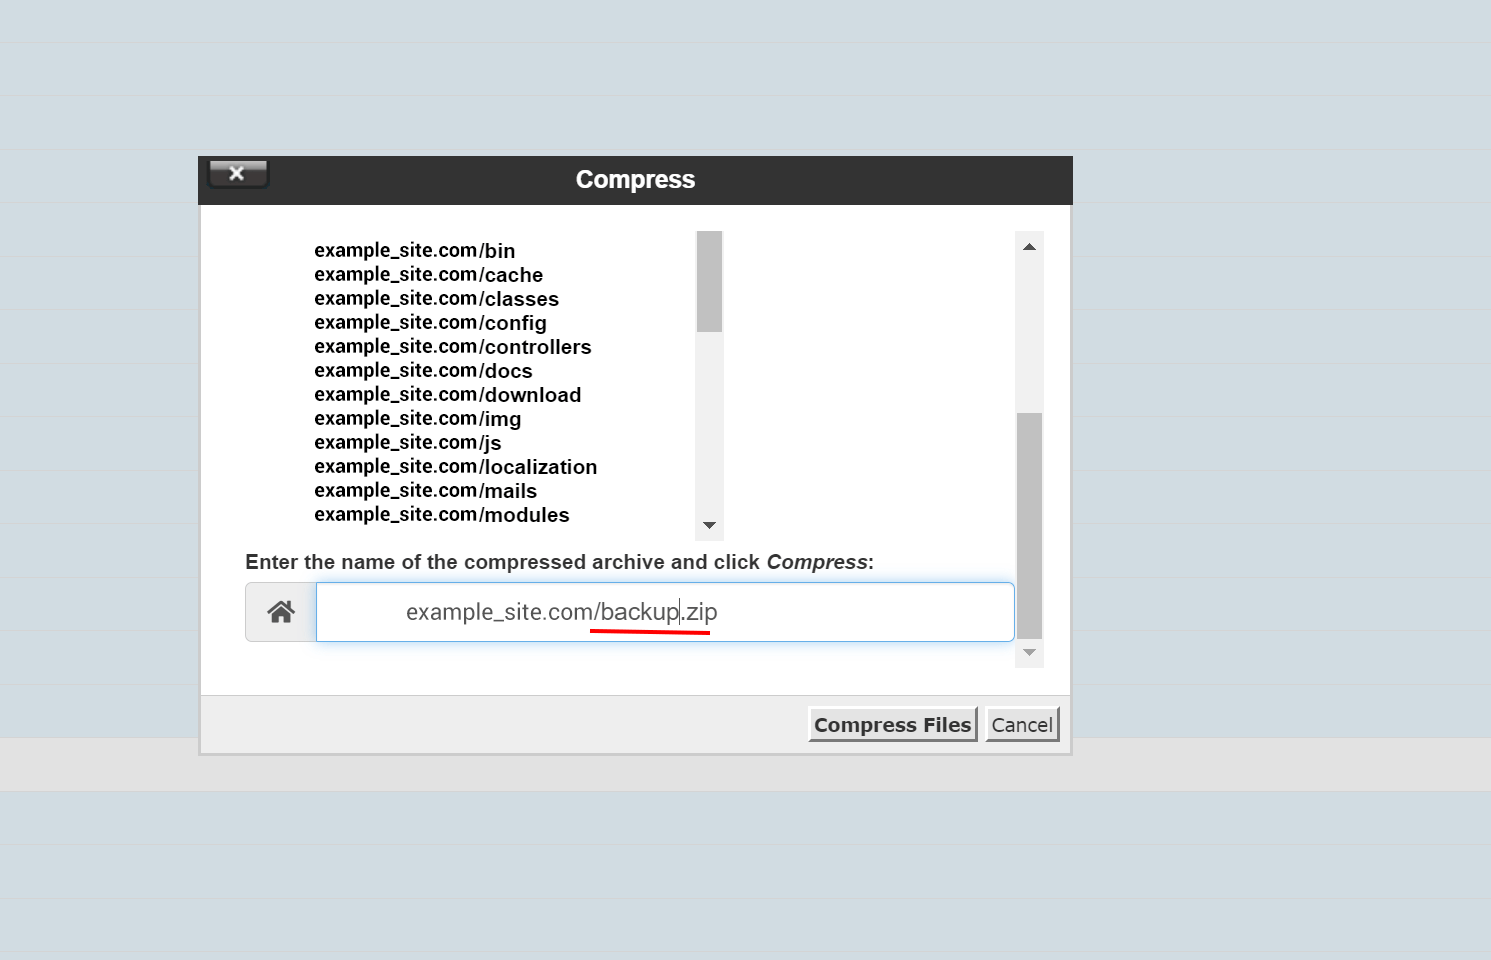
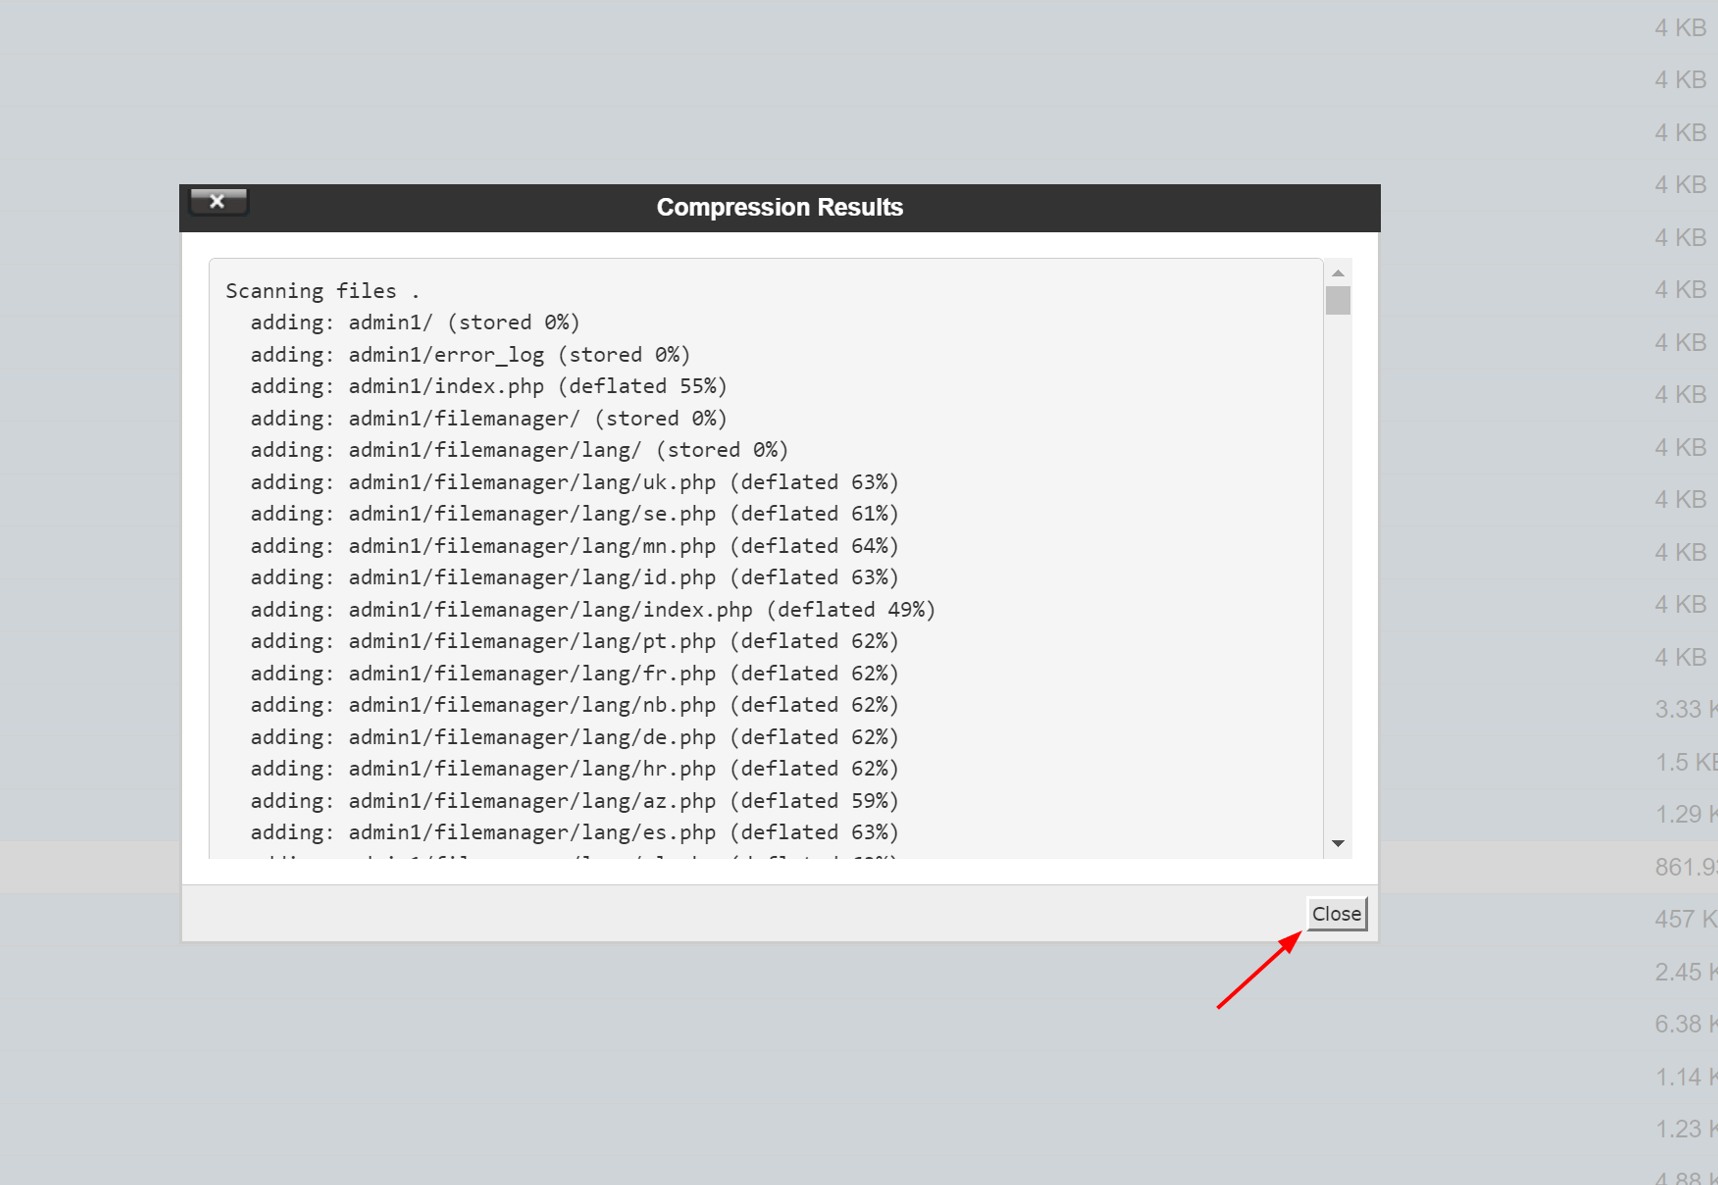
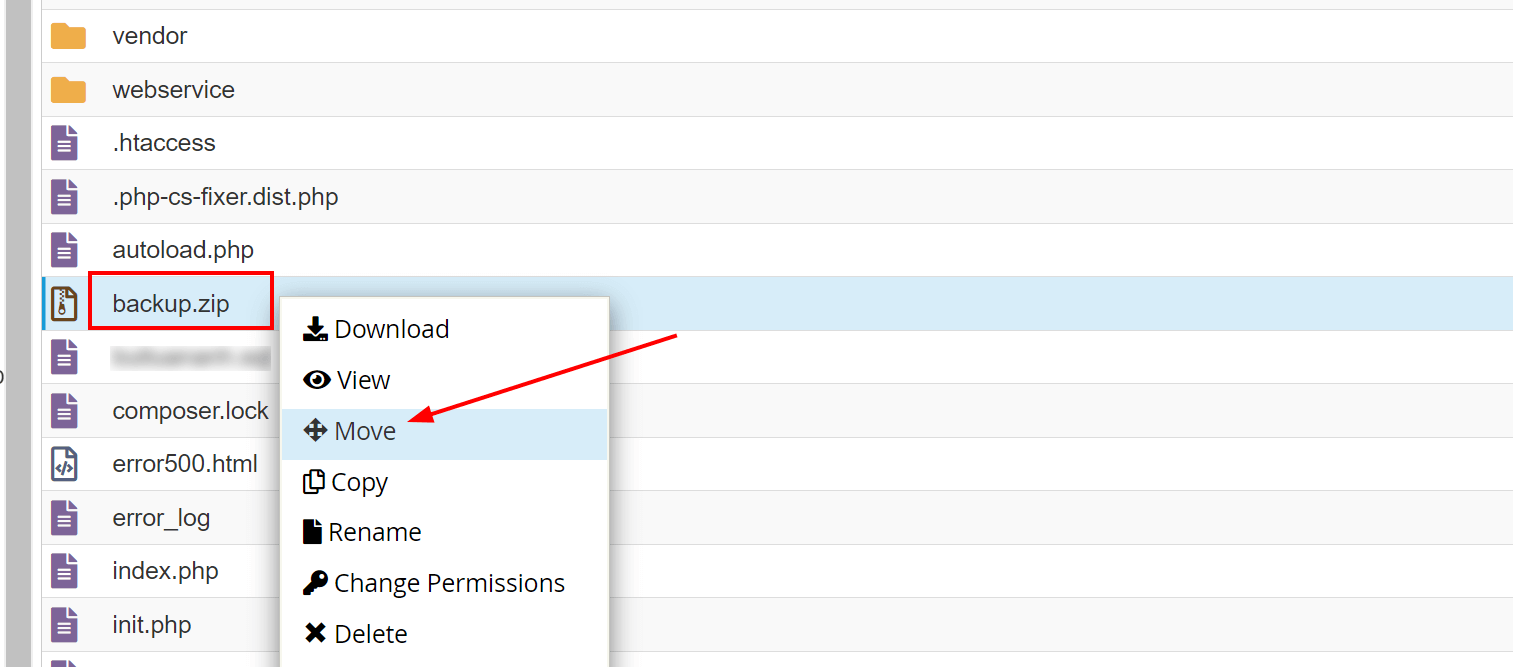
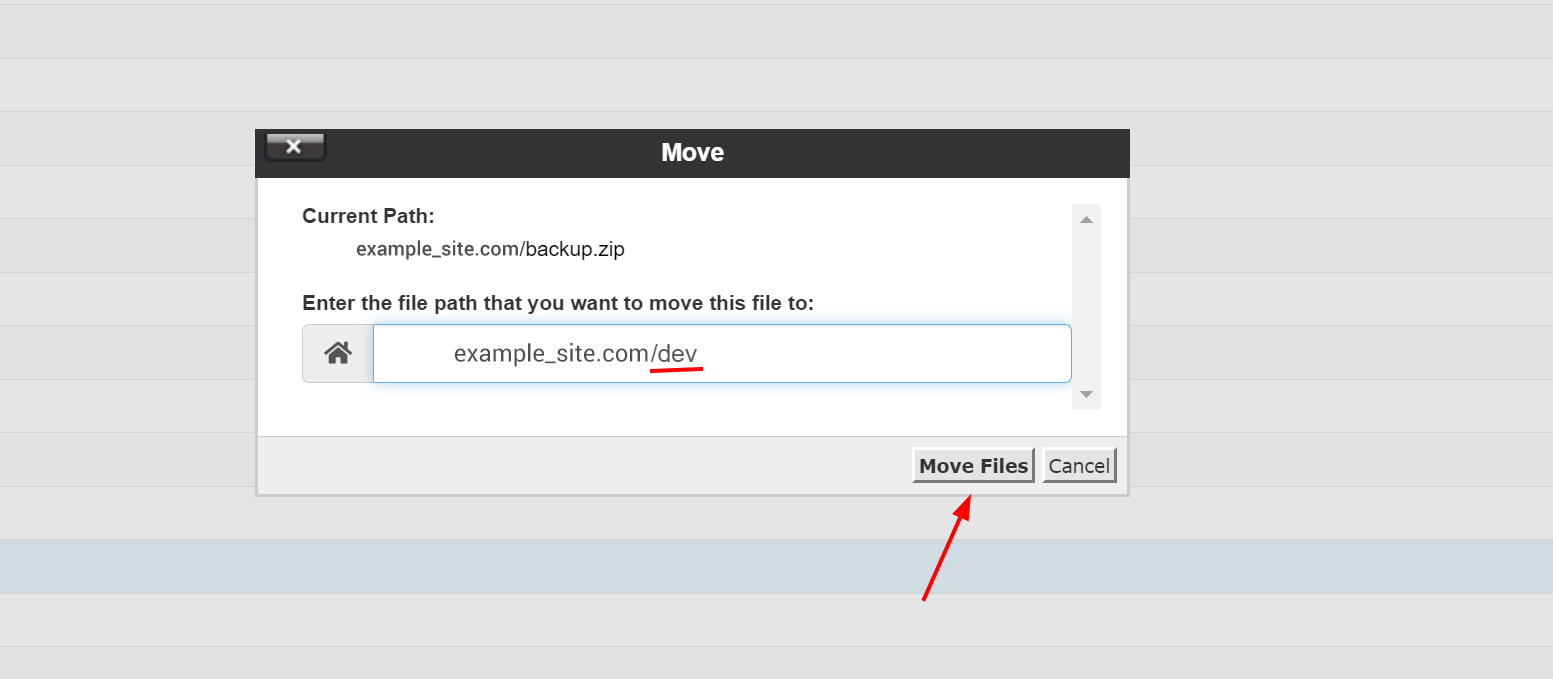
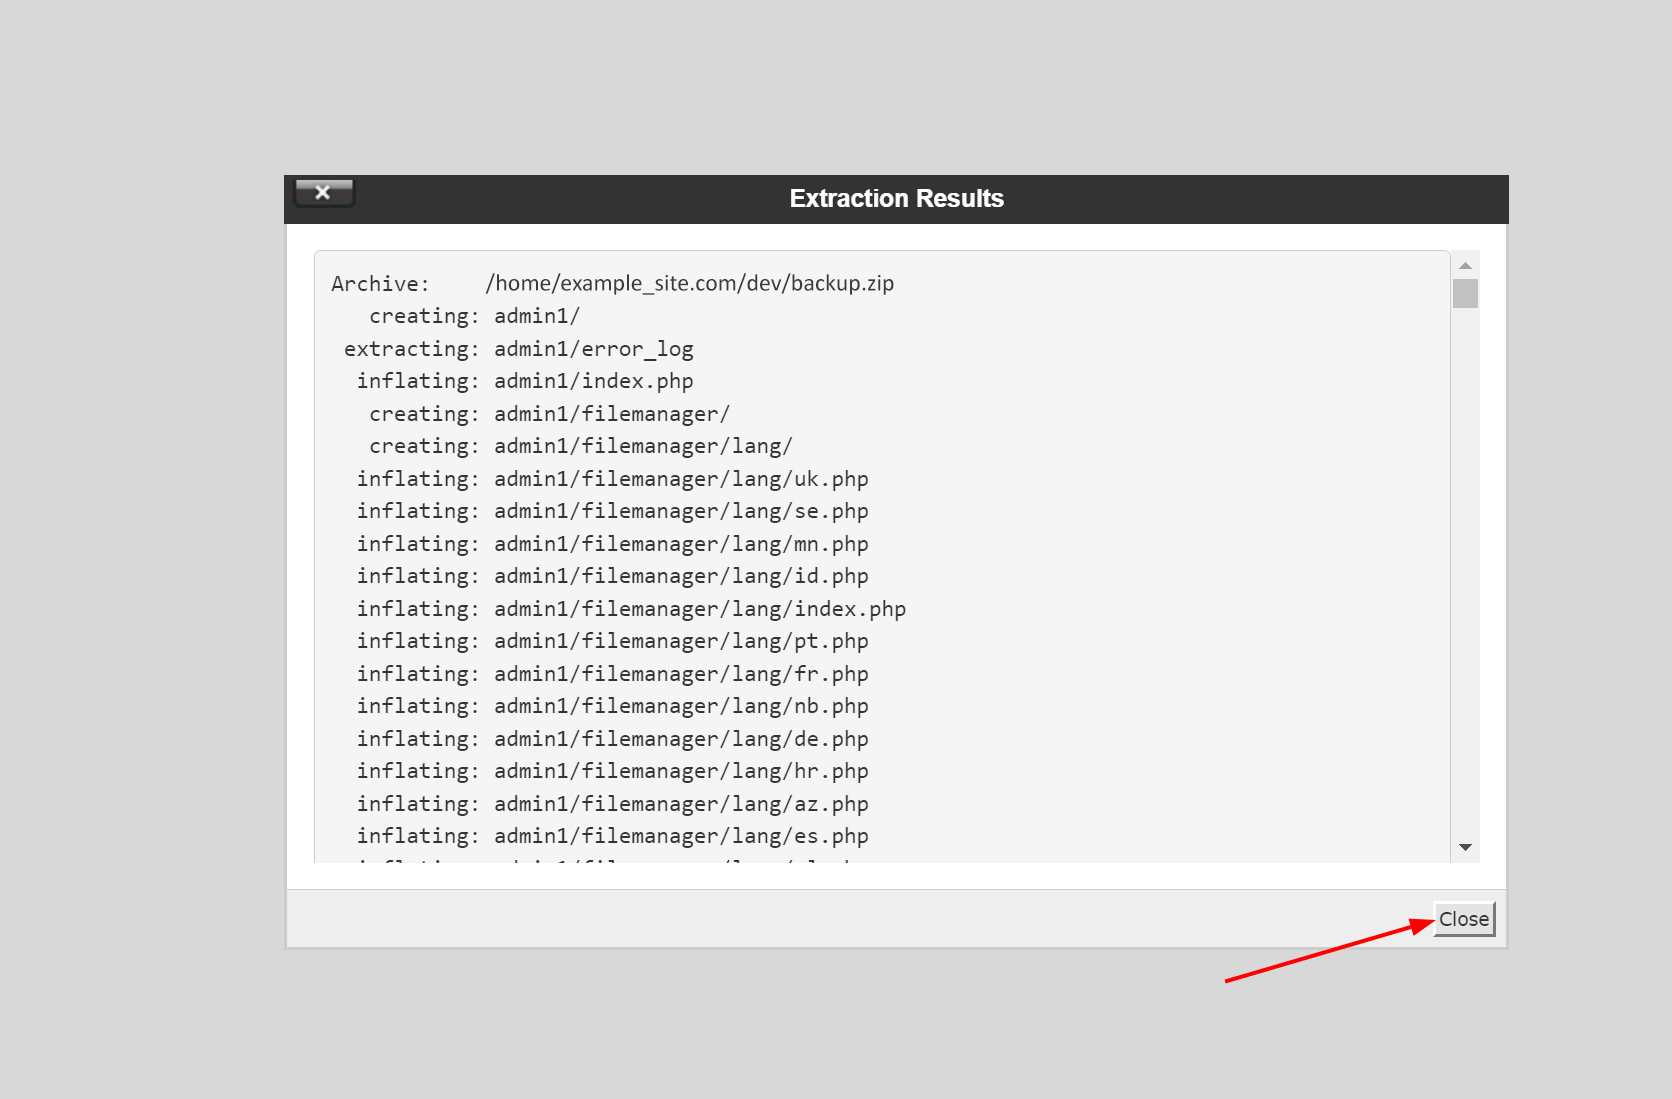
Reload site. Move the compressed file to the "dev" folder and extract its contents.

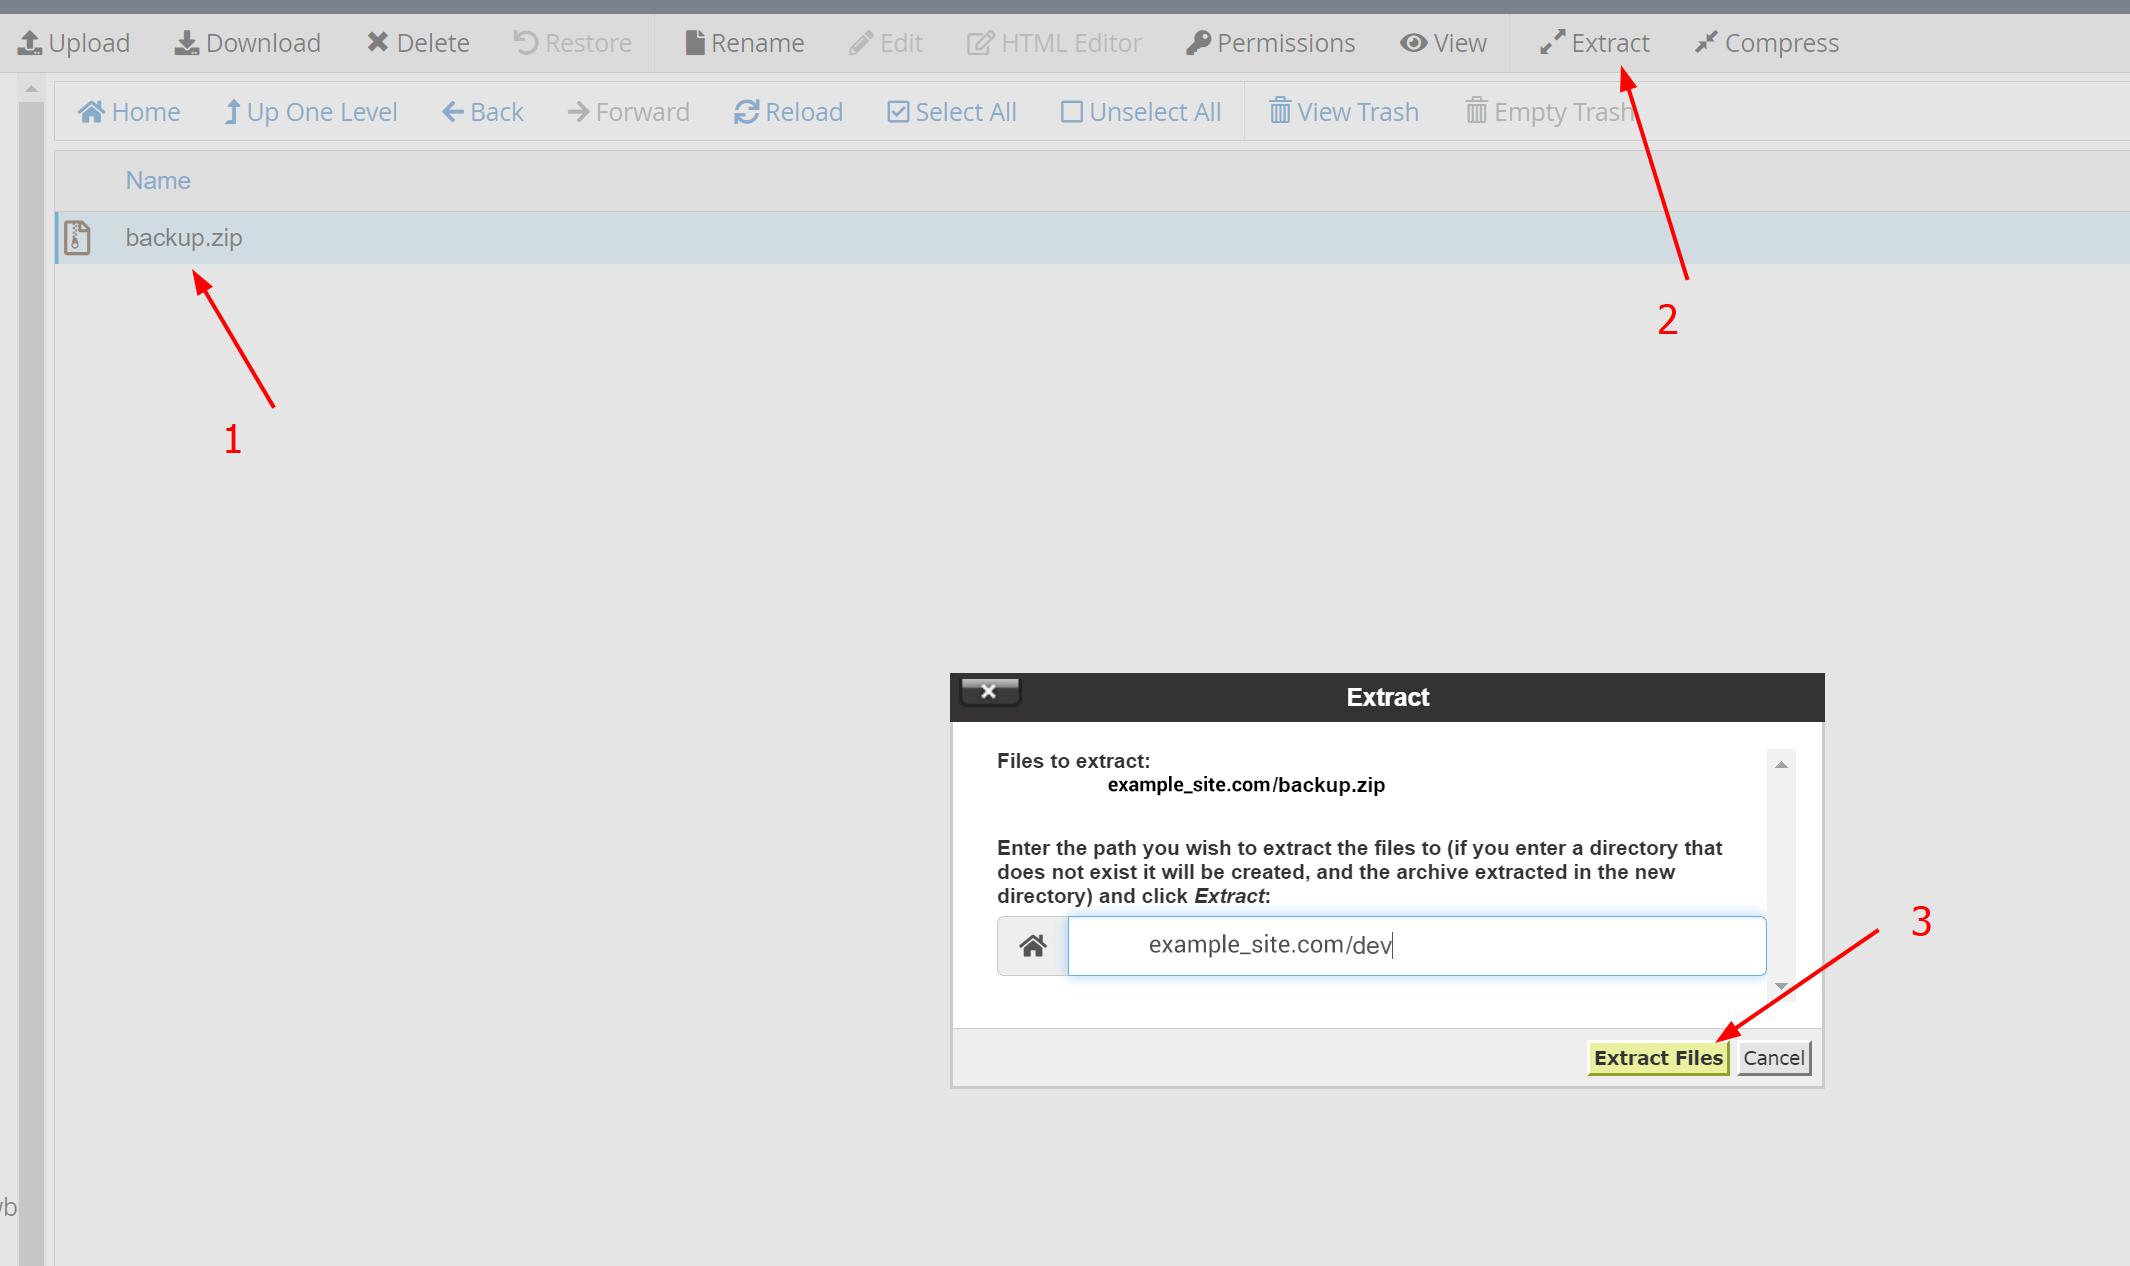
Go to the “dev” folder then extract the compressed file.
Step 2: clone your website’s database
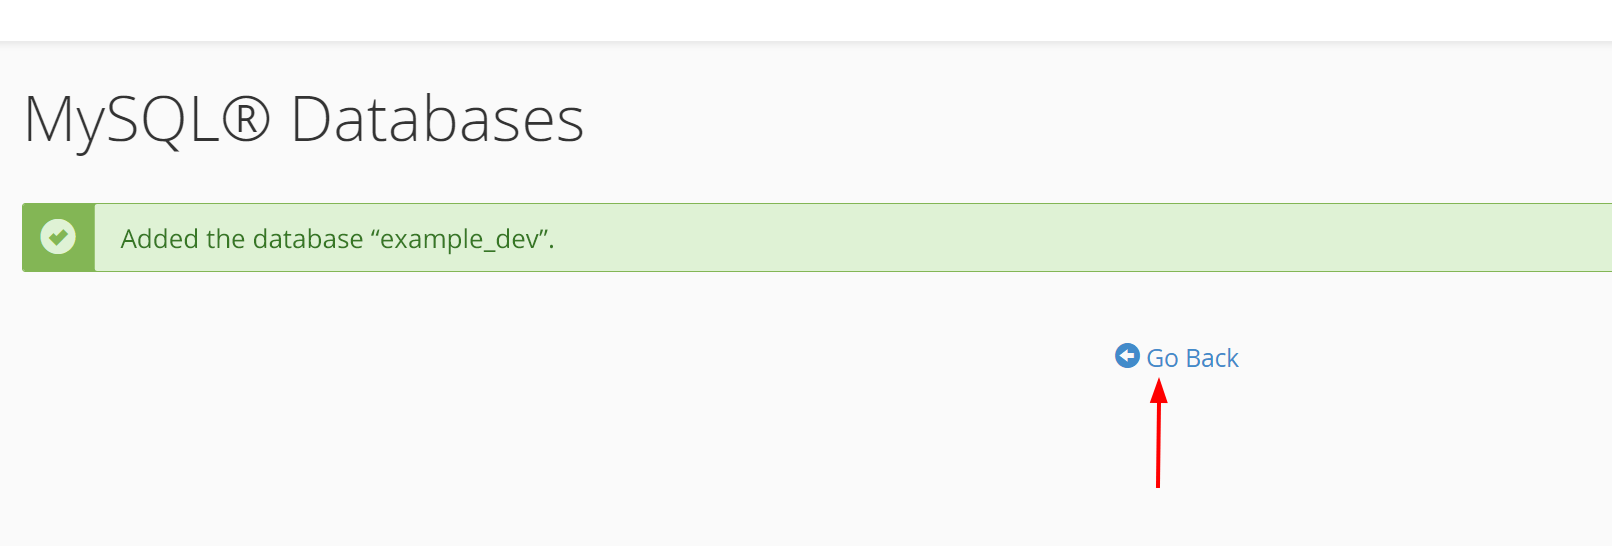
Create a new database for the "dev" site, ensuring compatibility and easy identification.
- Select database type: "utf8_general_ci" for best compatibility (if the server gives options, and it is available).
- Use the same database name as the dev folder name for easy searching.


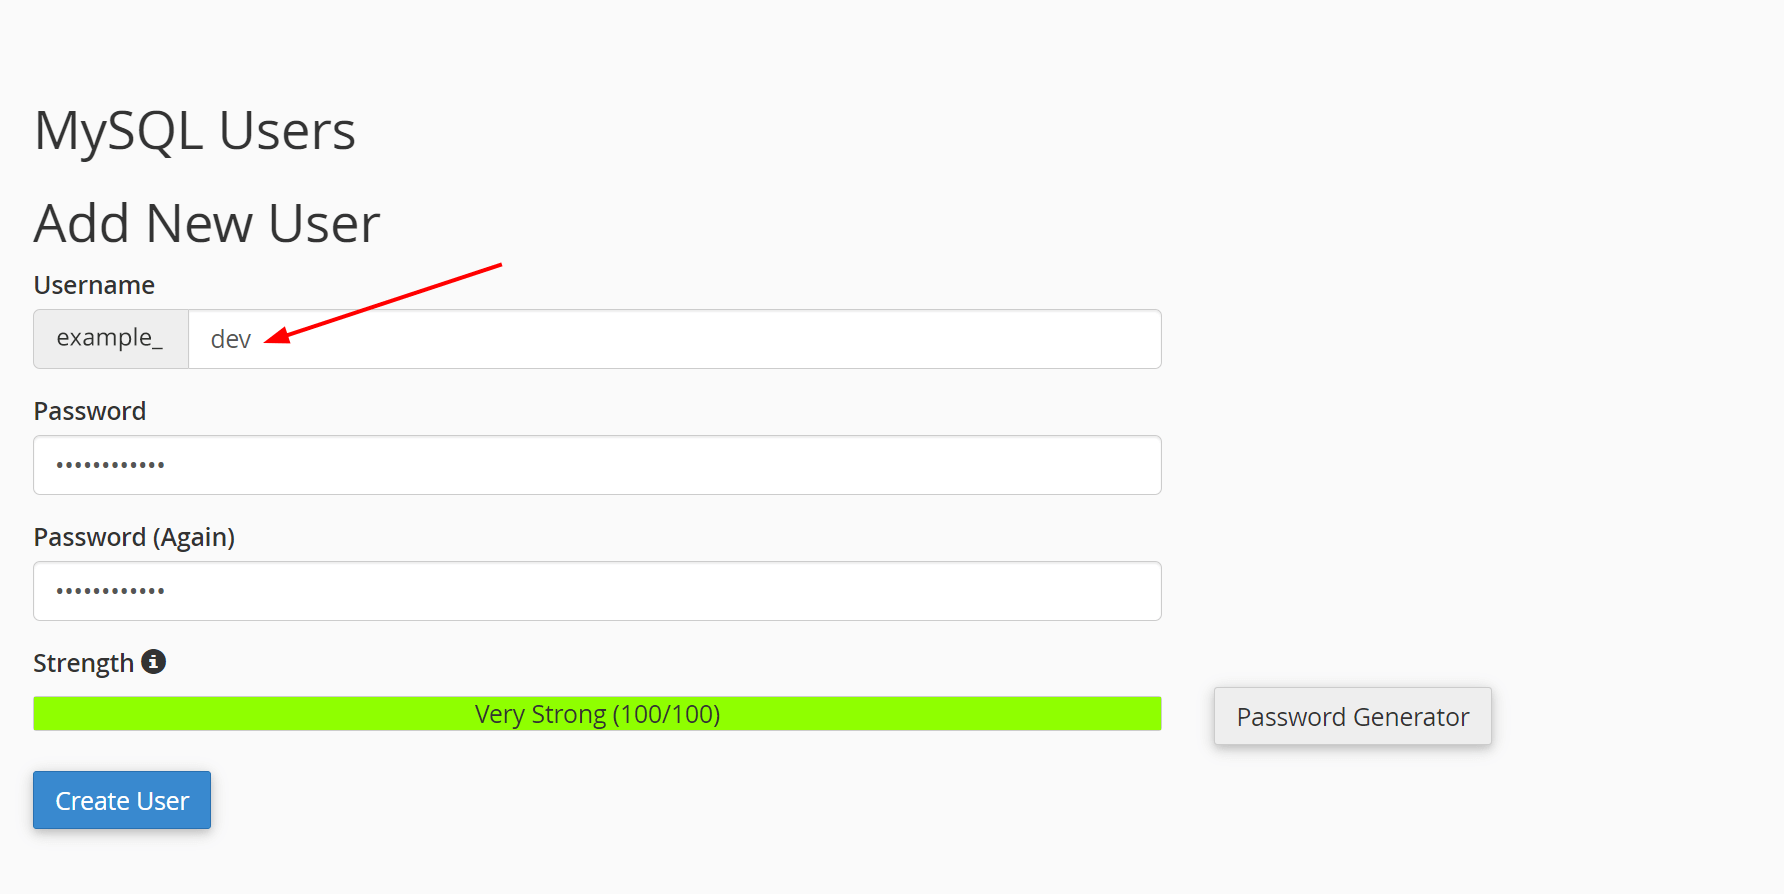
Create a new user.

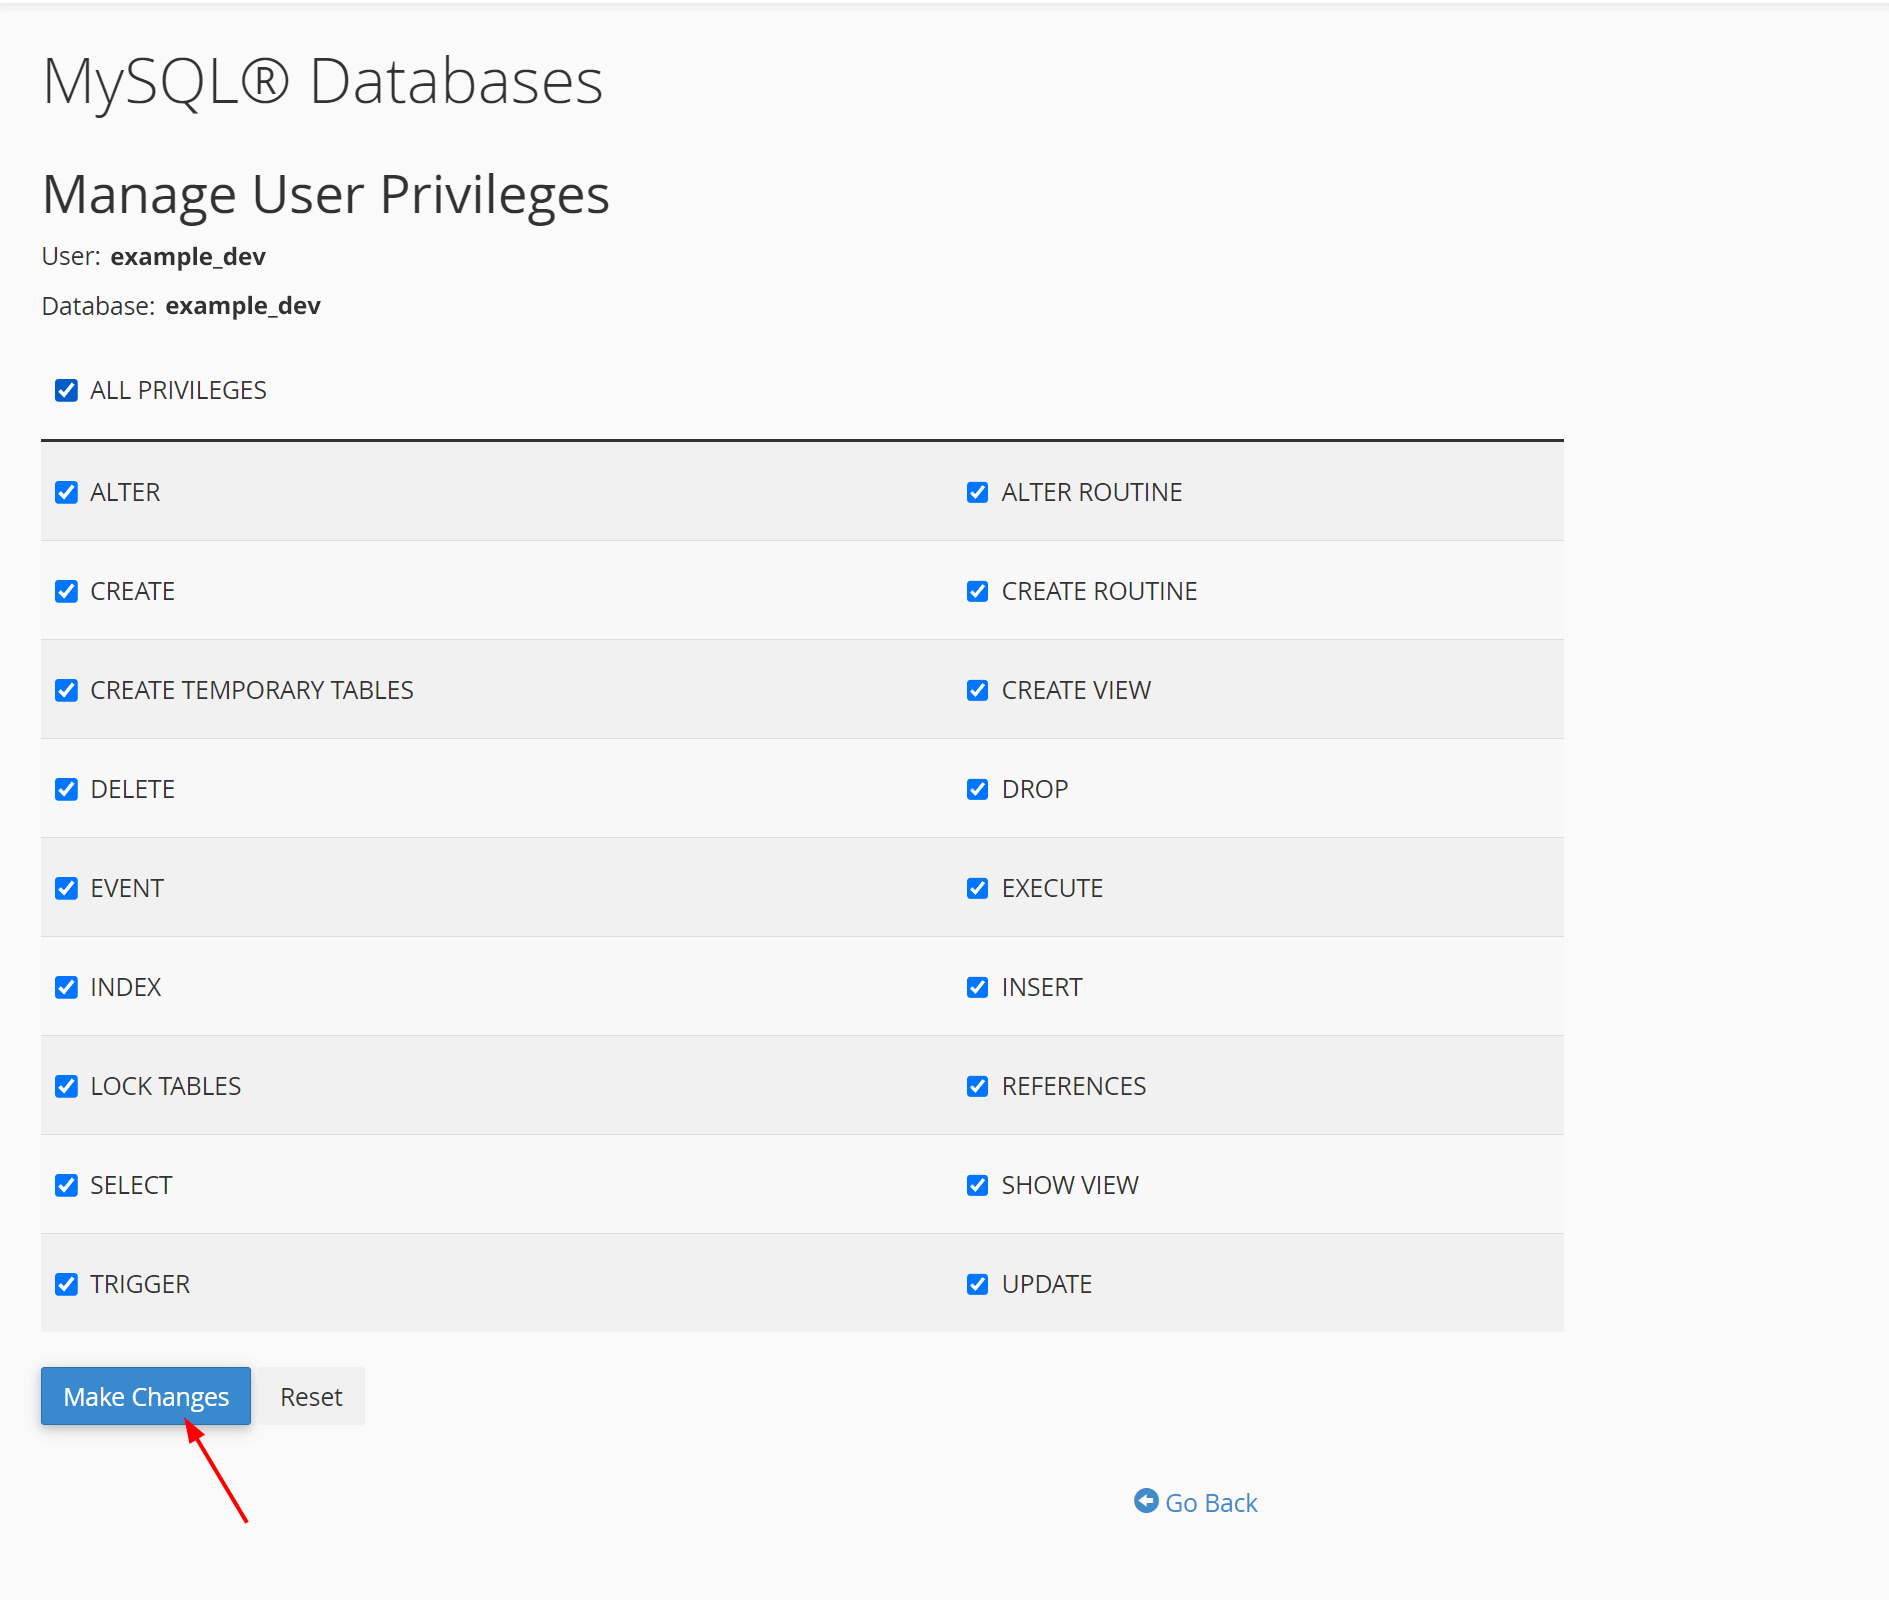
Add the new user to the database, then assign all privileges to the user:

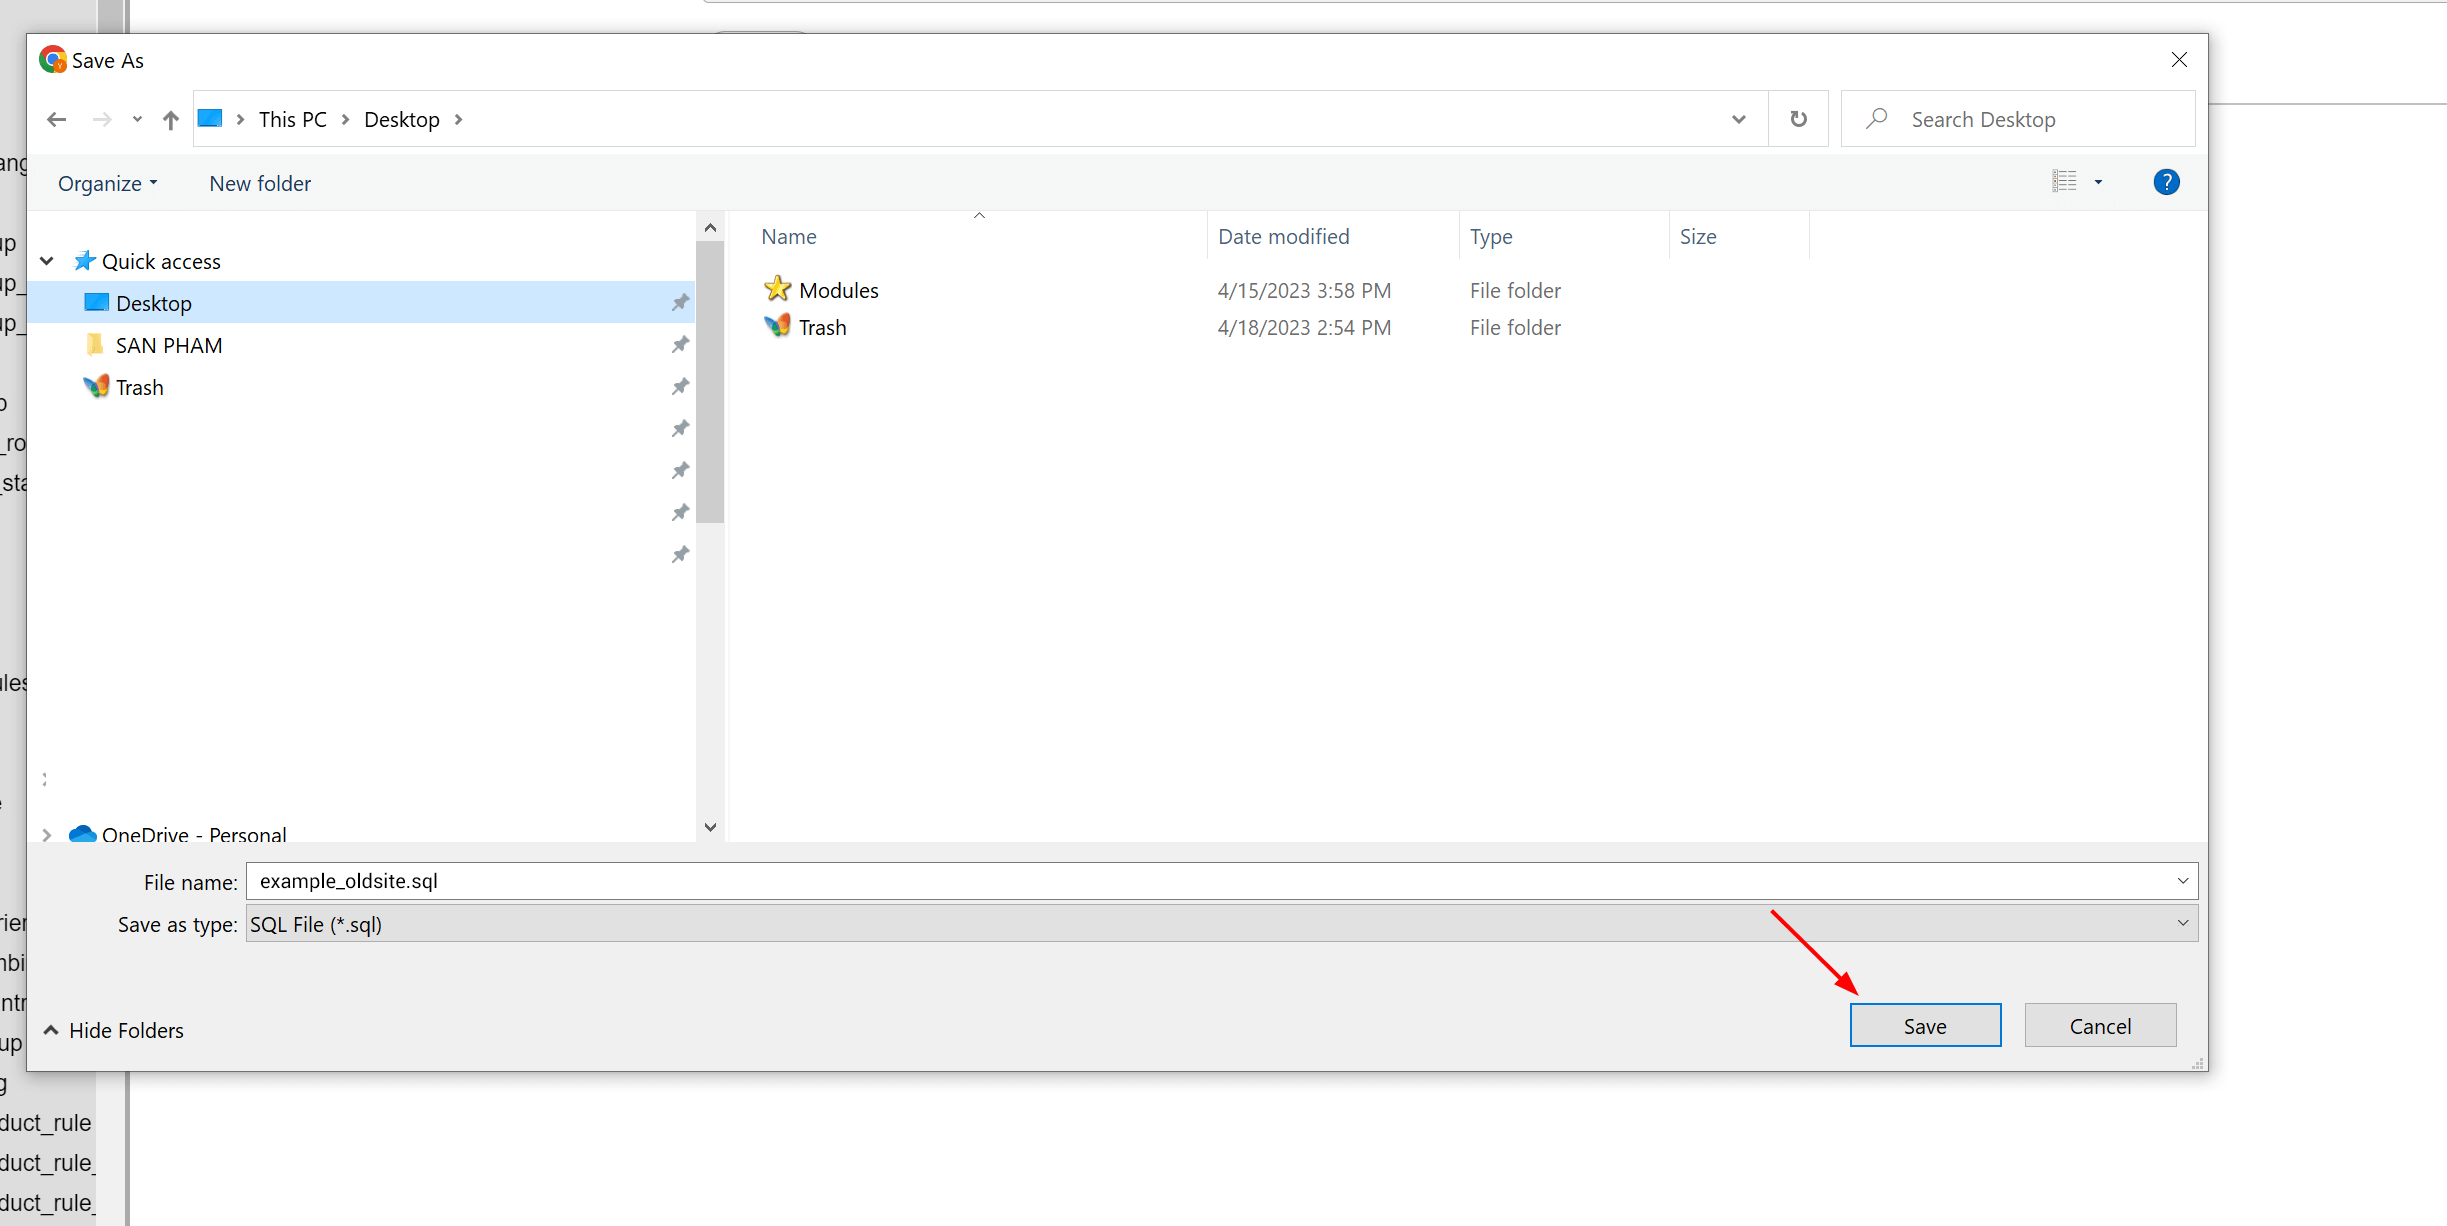
Log into your site’s database, find and select the current database of your live website. Go to the “Export” tab and export to .sql file.


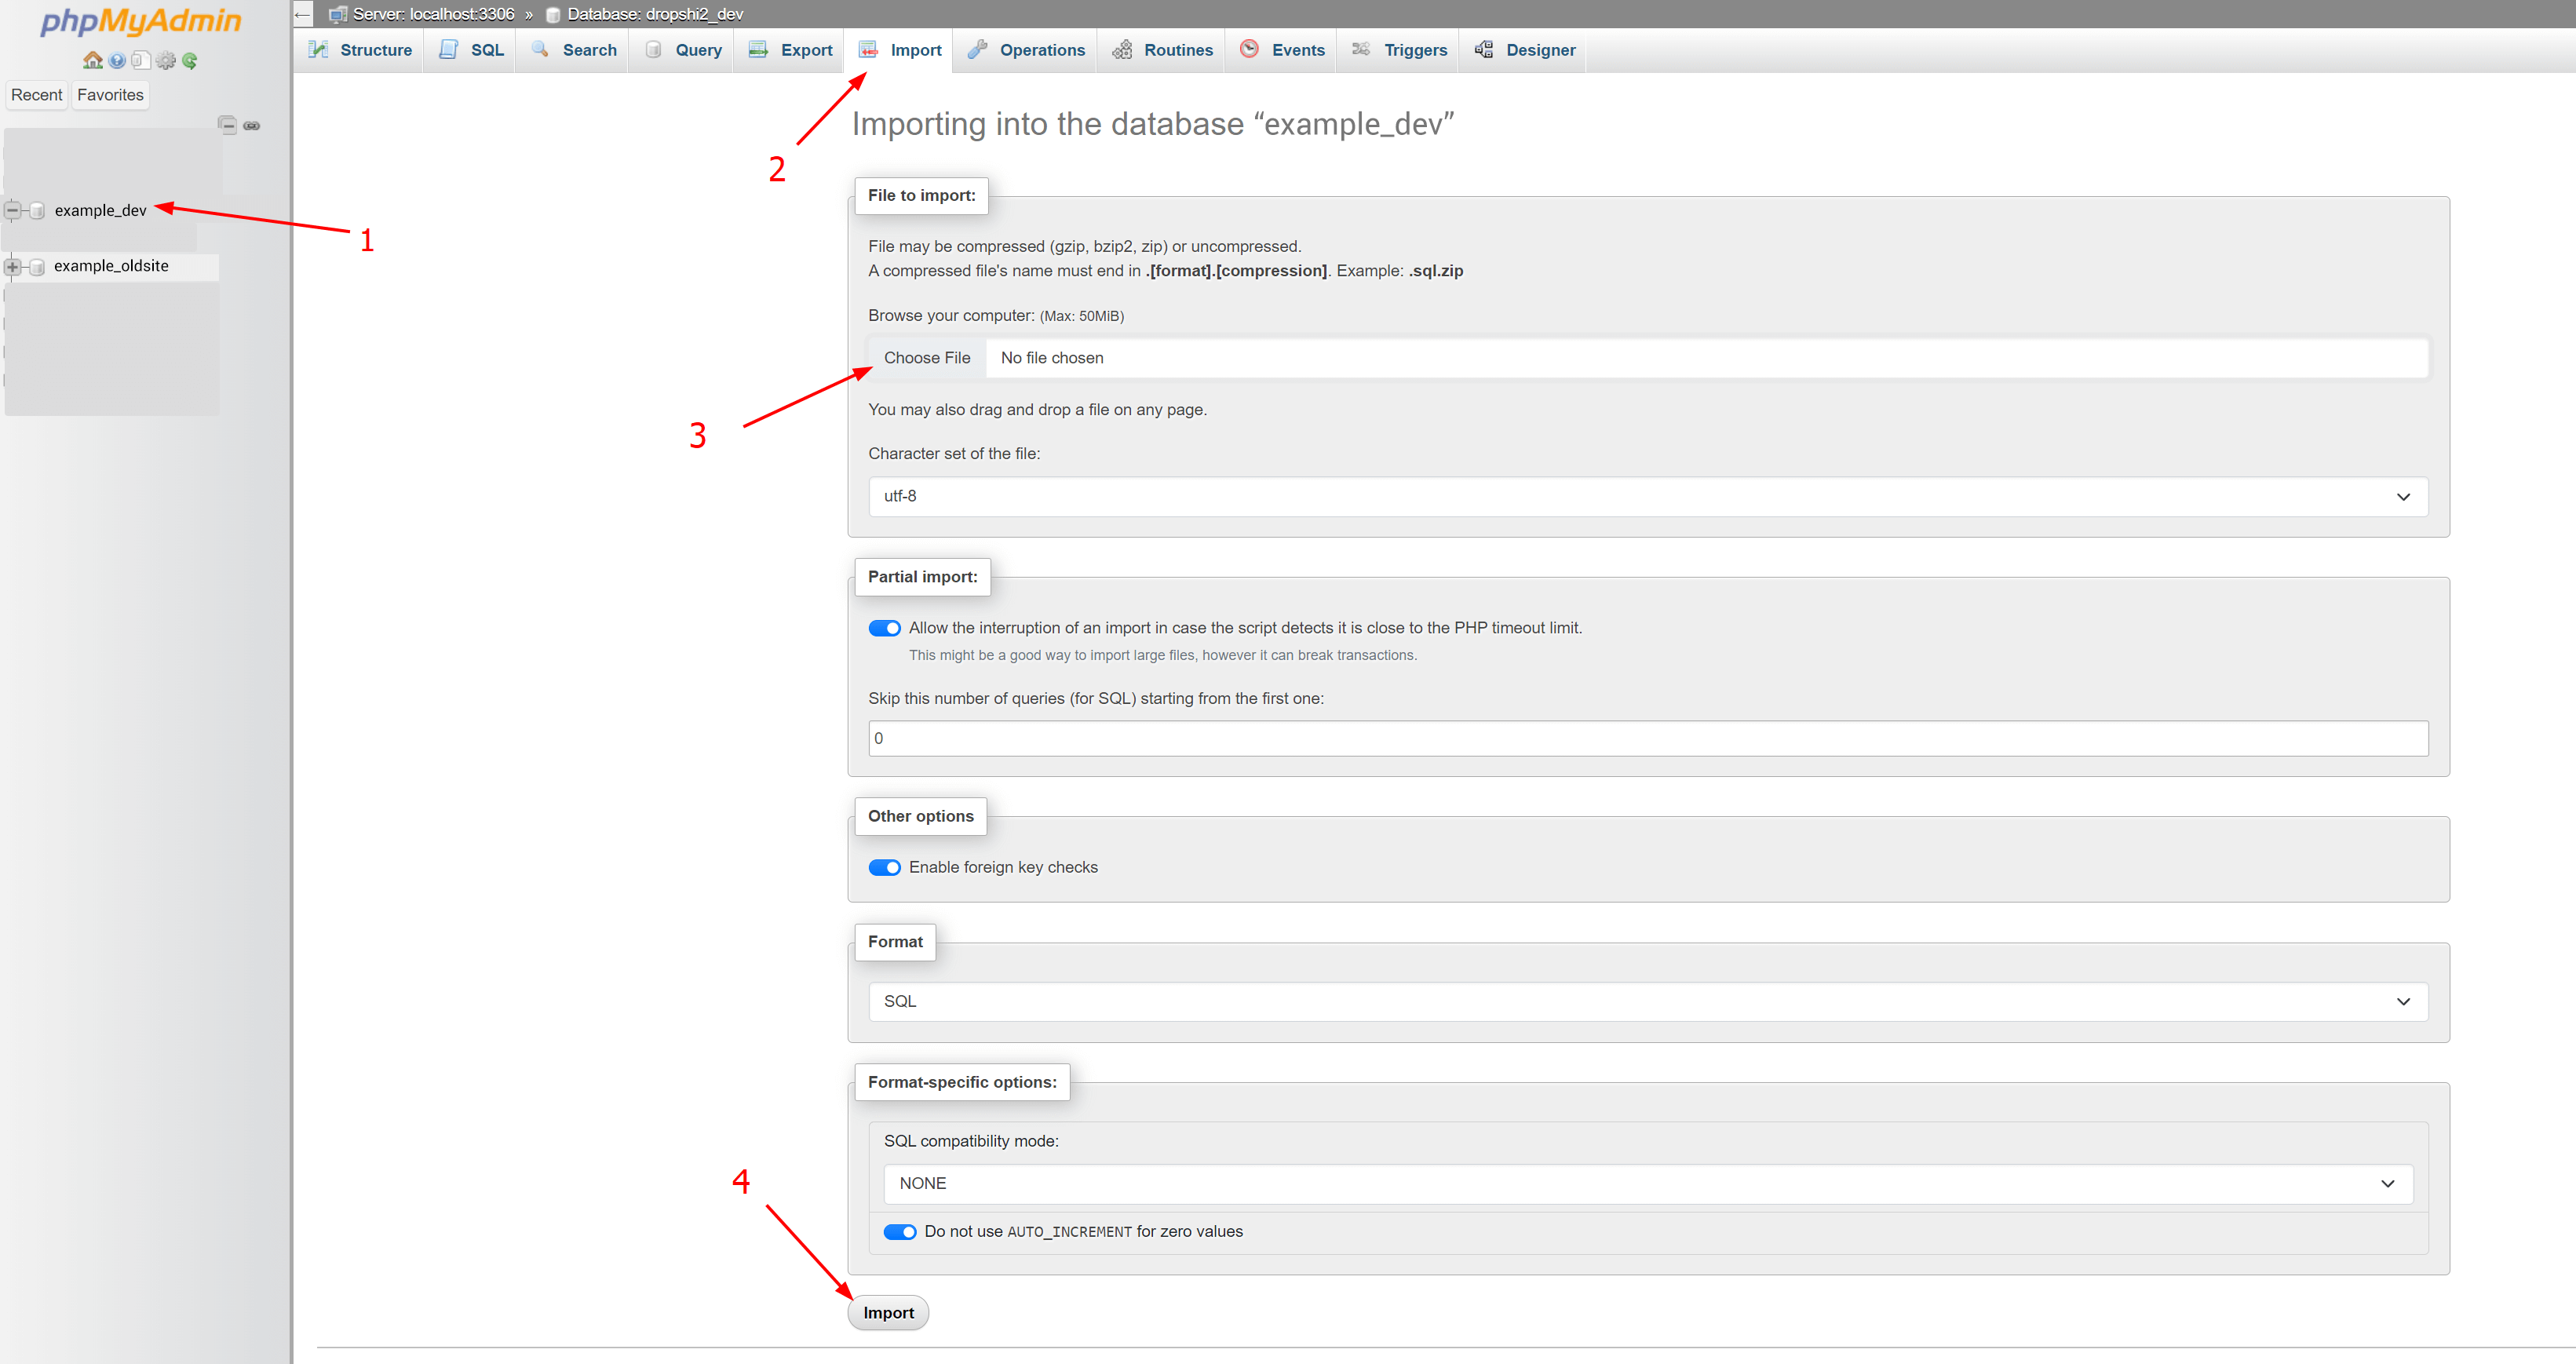
Go to the “dev” database that you created => import the .sql file that you have just exported from the live site.
Step 3: Configuration
Open the configuration file in the code file of the "dev" site => then enter the database information to connect the "dev" site to its database.
- For the site using PrestaShop version 1.7.x to 8.x: Find and open /dev/app/config/parameters.php file in the “dev” folder.
- For the site using PrestaShop 1.6.x: Find and open /dev/config/settings.inc.php file in the “dev” folder, then do the same as site 1.7.x
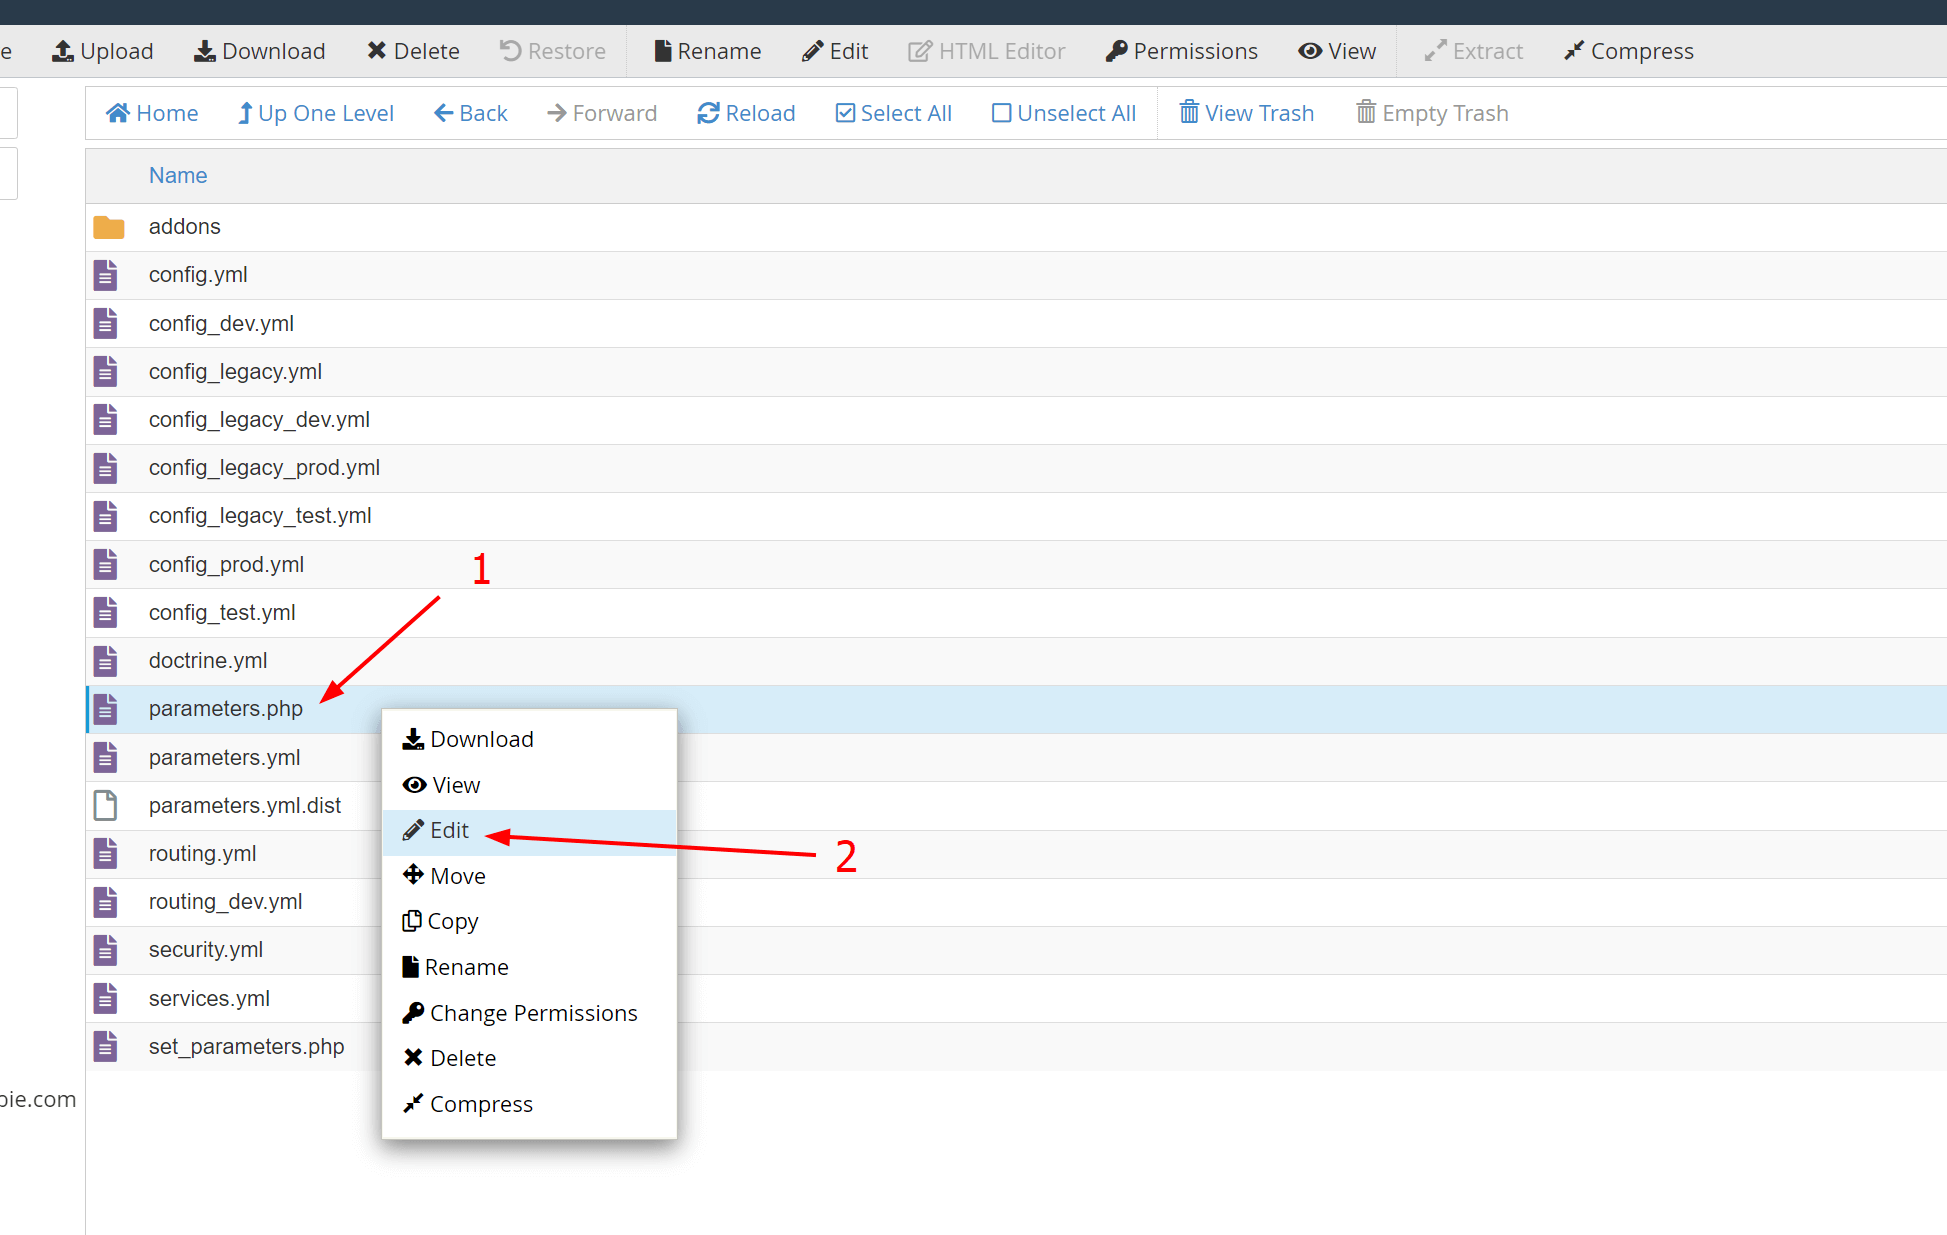
Change these parameters to the ones you set up for the new database: database name + database user + database password.

Configure "shop_url” table:
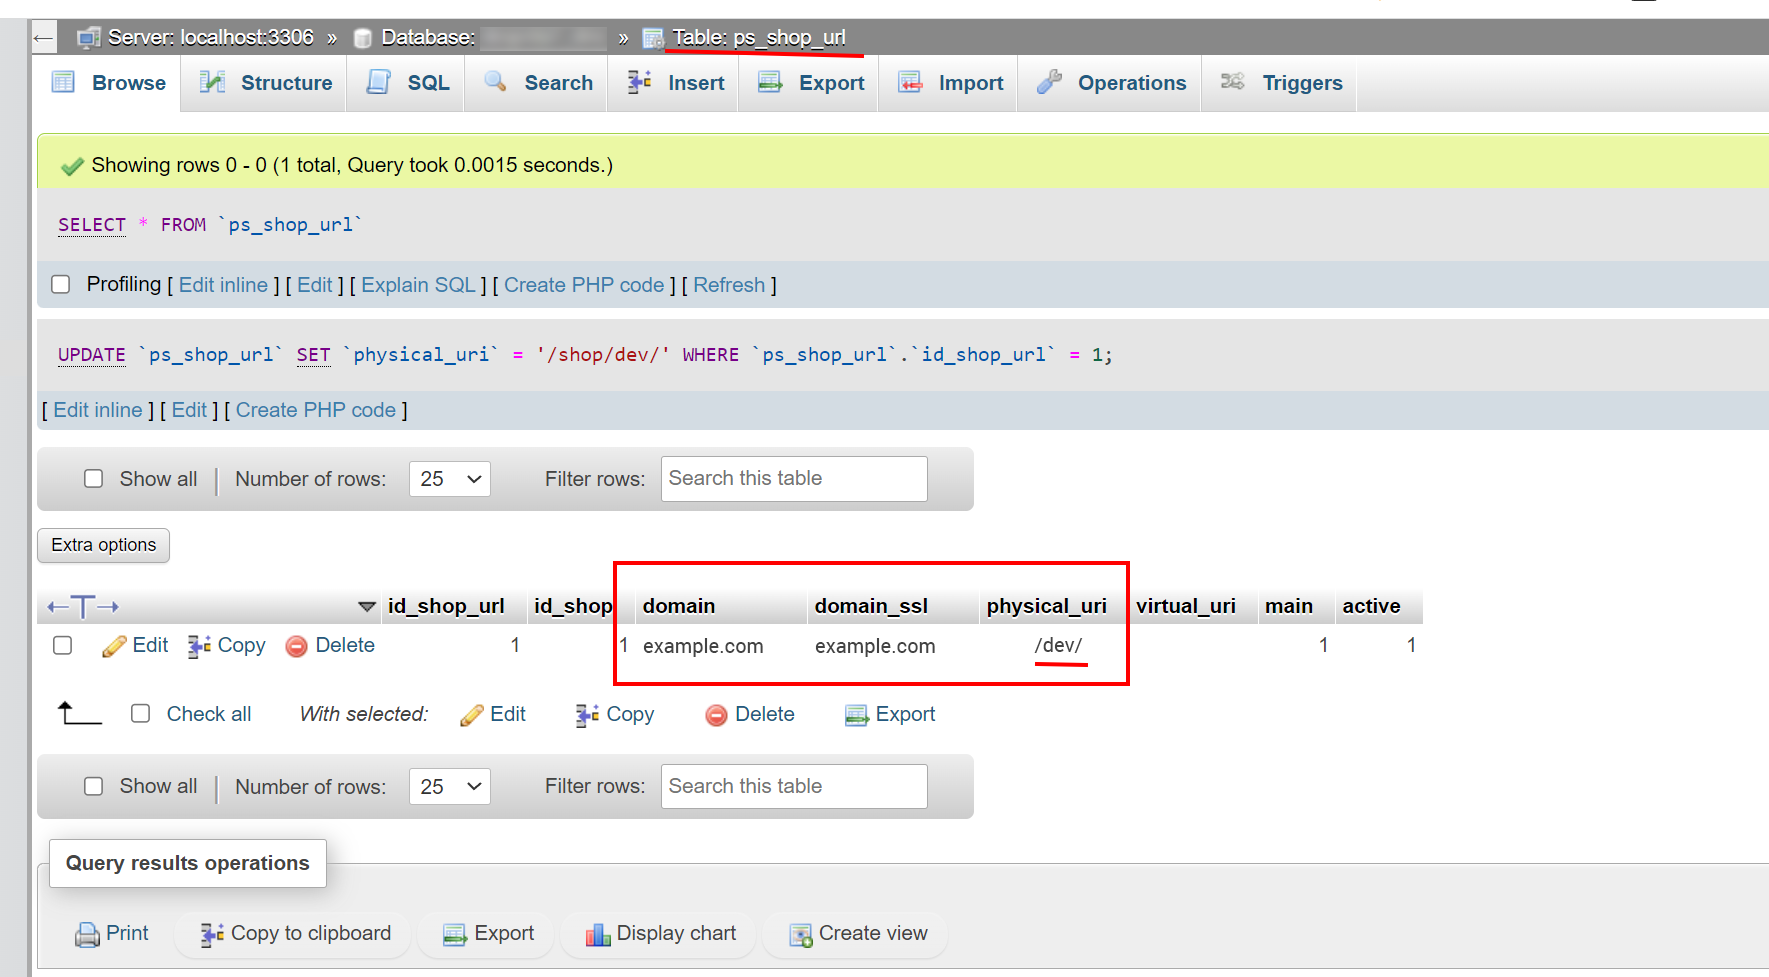
- Go to the “dev” database of the newly created site => find the "shop_url" table
- Change the values of the “domain” and “physical_uri” columns in table “shop_url” table of the “dev” database to the domain and URI of your “dev” site.
Configure “ps_configuration” table:
- Open the “ps_configuration” table of the “dev” database.
- On the Filter section: enter the “250” value for “Number of rows”; enter the “domain” value for “Filter rows” to search.
- In the search results, replace the domain of the "dev" site in the value column of the two lines:
- PS_SHOP_DOMAIN
- PS_SHOP_DOMAIN_SSL

Access the Back Office of the new copy site via the domain: your_domain/your_dev_folder/admin_folder
E.g.: example.com/dev/admin1
Step 4: generate friendly URLs and clear cache
Tips for convenience:
- Edit the "htaccess" file if back-office access issues arise.
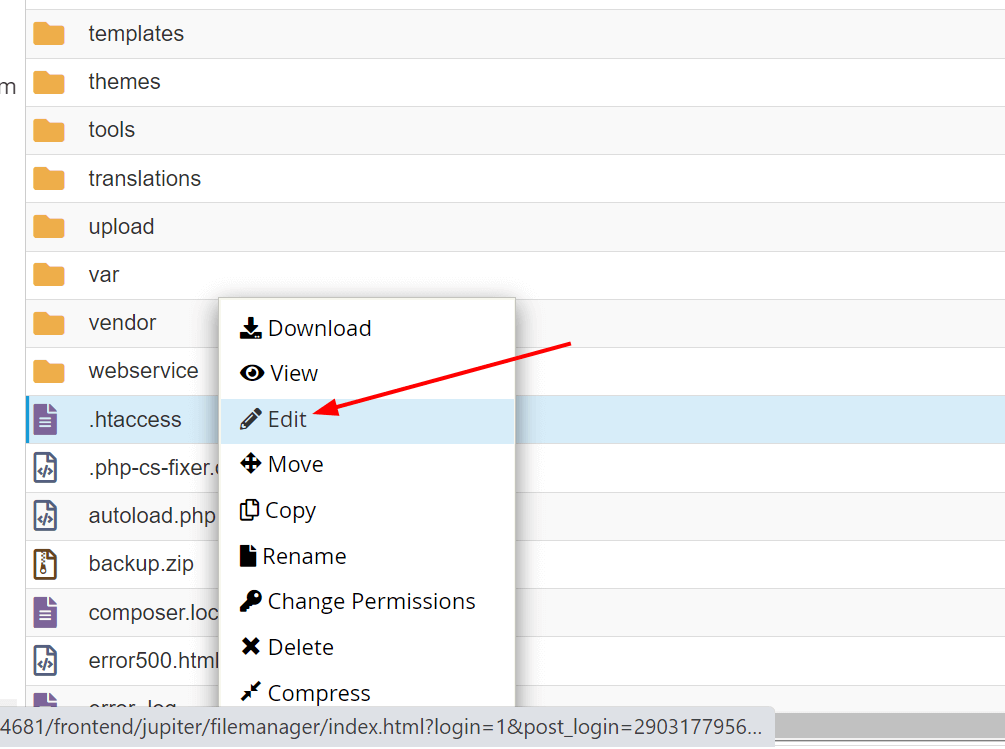
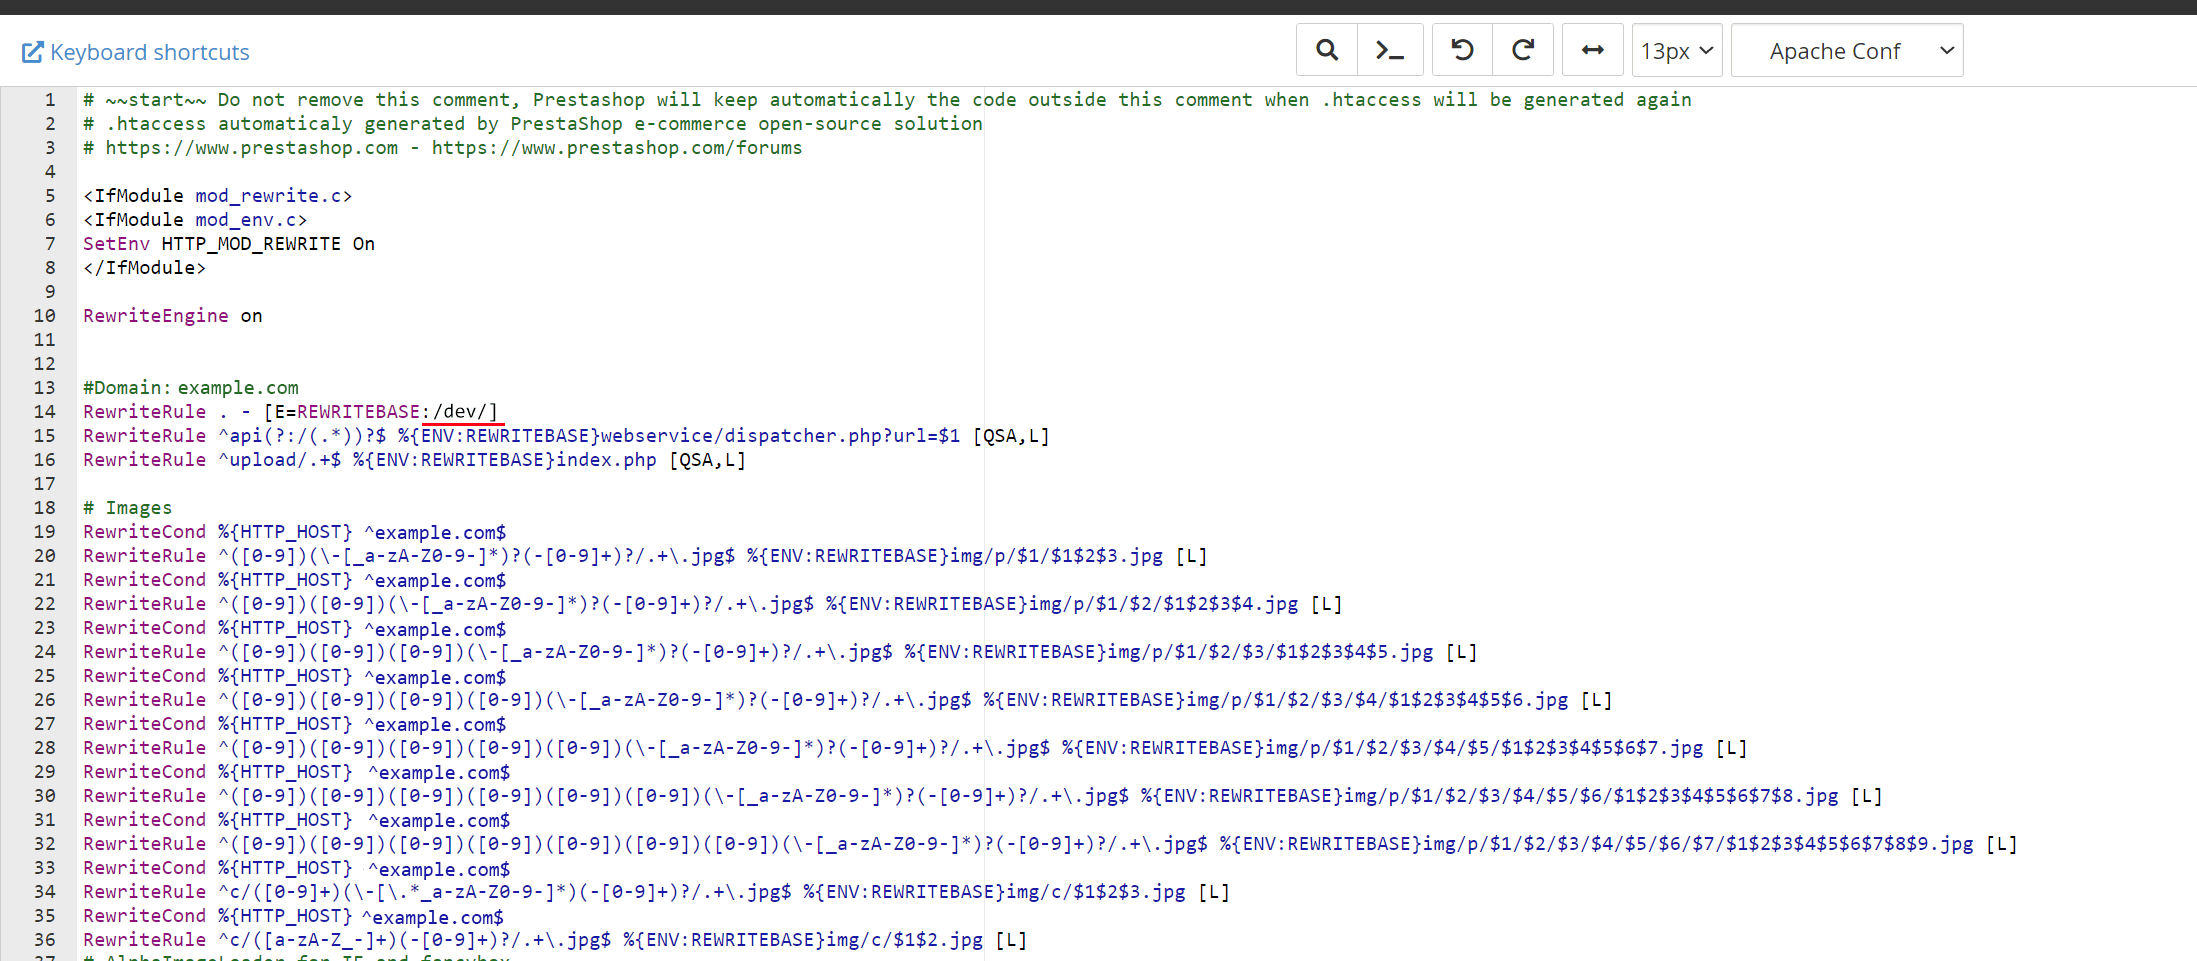
- Enable/disable Friendly URLs in "Shop Parameters > Traffic & SEO".

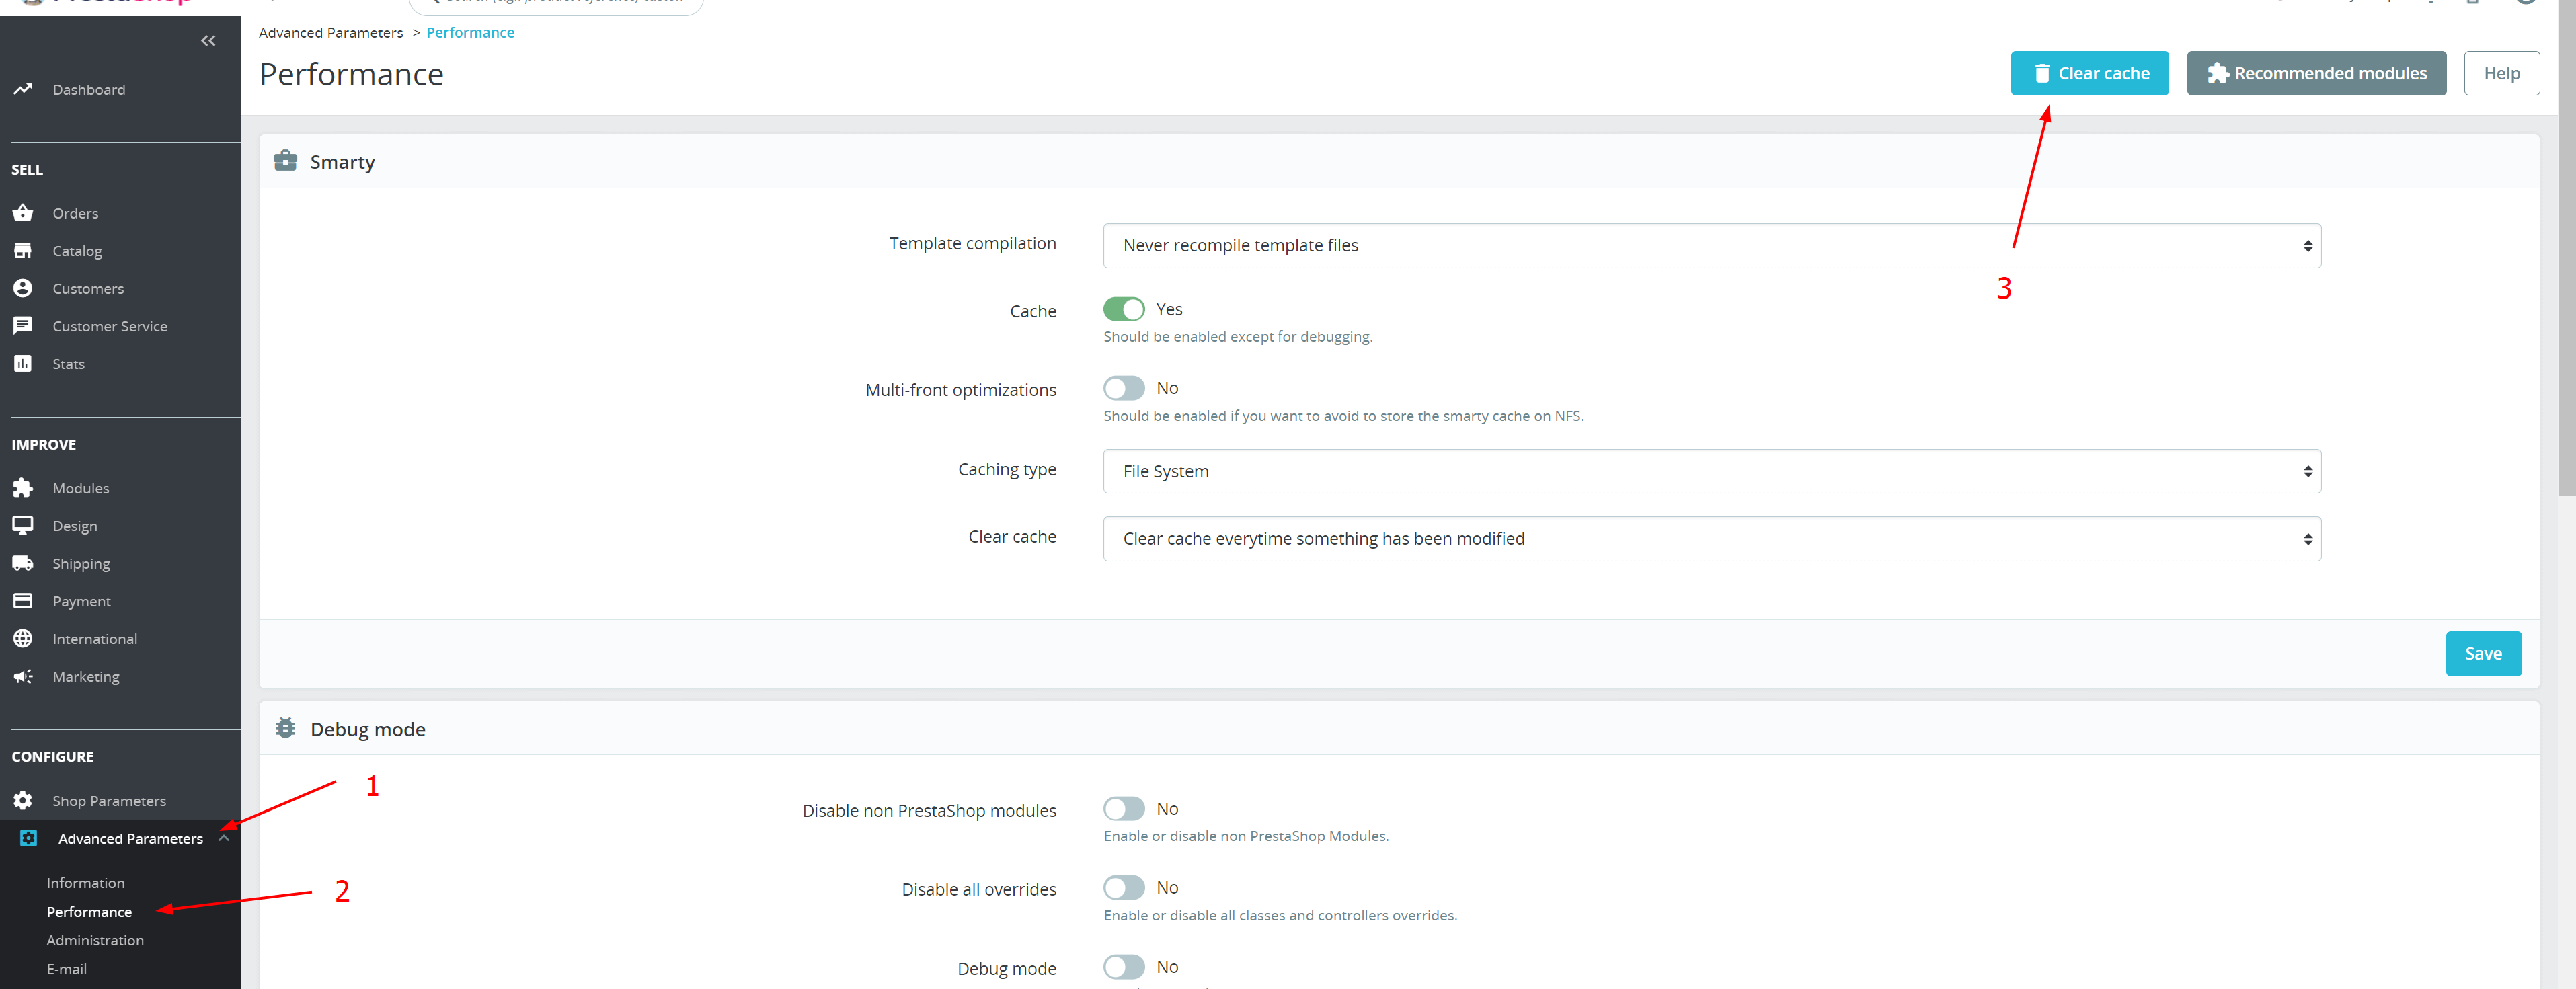
- Clear cache in "Advanced Parameters > Performance".
Conclusion
Creating a PrestaShop copy site might sound complex, but it's a crucial and manageable process. Follow the outlined steps to clone your store successfully, and refer to the provided tips for added convenience. Your replicated PrestaShop site is now ready for comprehensive testing and updates.

