What Data Fields Can I Add to the Order Listing Page in PrestaShop?
Managing orders efficiently means having quick access to relevant order details at a glance. With the Order Manager module, you can customize the order listing page by adding and arranging different data fields to suit your needs.
This guide will show you how to:
- Select additional data fields to display on the order listing page.
- Rearrange fields for better visibility and workflow optimization.
Why customize the order listing page?
By default, PrestaShop displays basic information on the order listing page. However, depending on your store’s operations, you may need quick access to other details, such as:
- Purchased products – See what items are in each order without opening the details page.
- Shipping cost – Quickly check delivery charges.
- Shipping & billing addresses – Ensure correct order fulfillment.
- Order status & tracking codes – Monitor deliveries efficiently.
Customizing your order listing page lets you streamline order processing and improve efficiency for your team.
How to add and arrange data fields on the order listing page
Step 1: Access the Order Manager settings
- Log in to your PrestaShop Back Office.
- Navigate to Modules > Module Manager.
- Find the Order Manager module and click Configure.
Step 2: Customize the order listing page
Click on the cogwheel icon in the top - right corner of the Orders page. Select the Customize Order List option to open the settings popup.

You will see a list of available data fields that you can add to your order listing page.
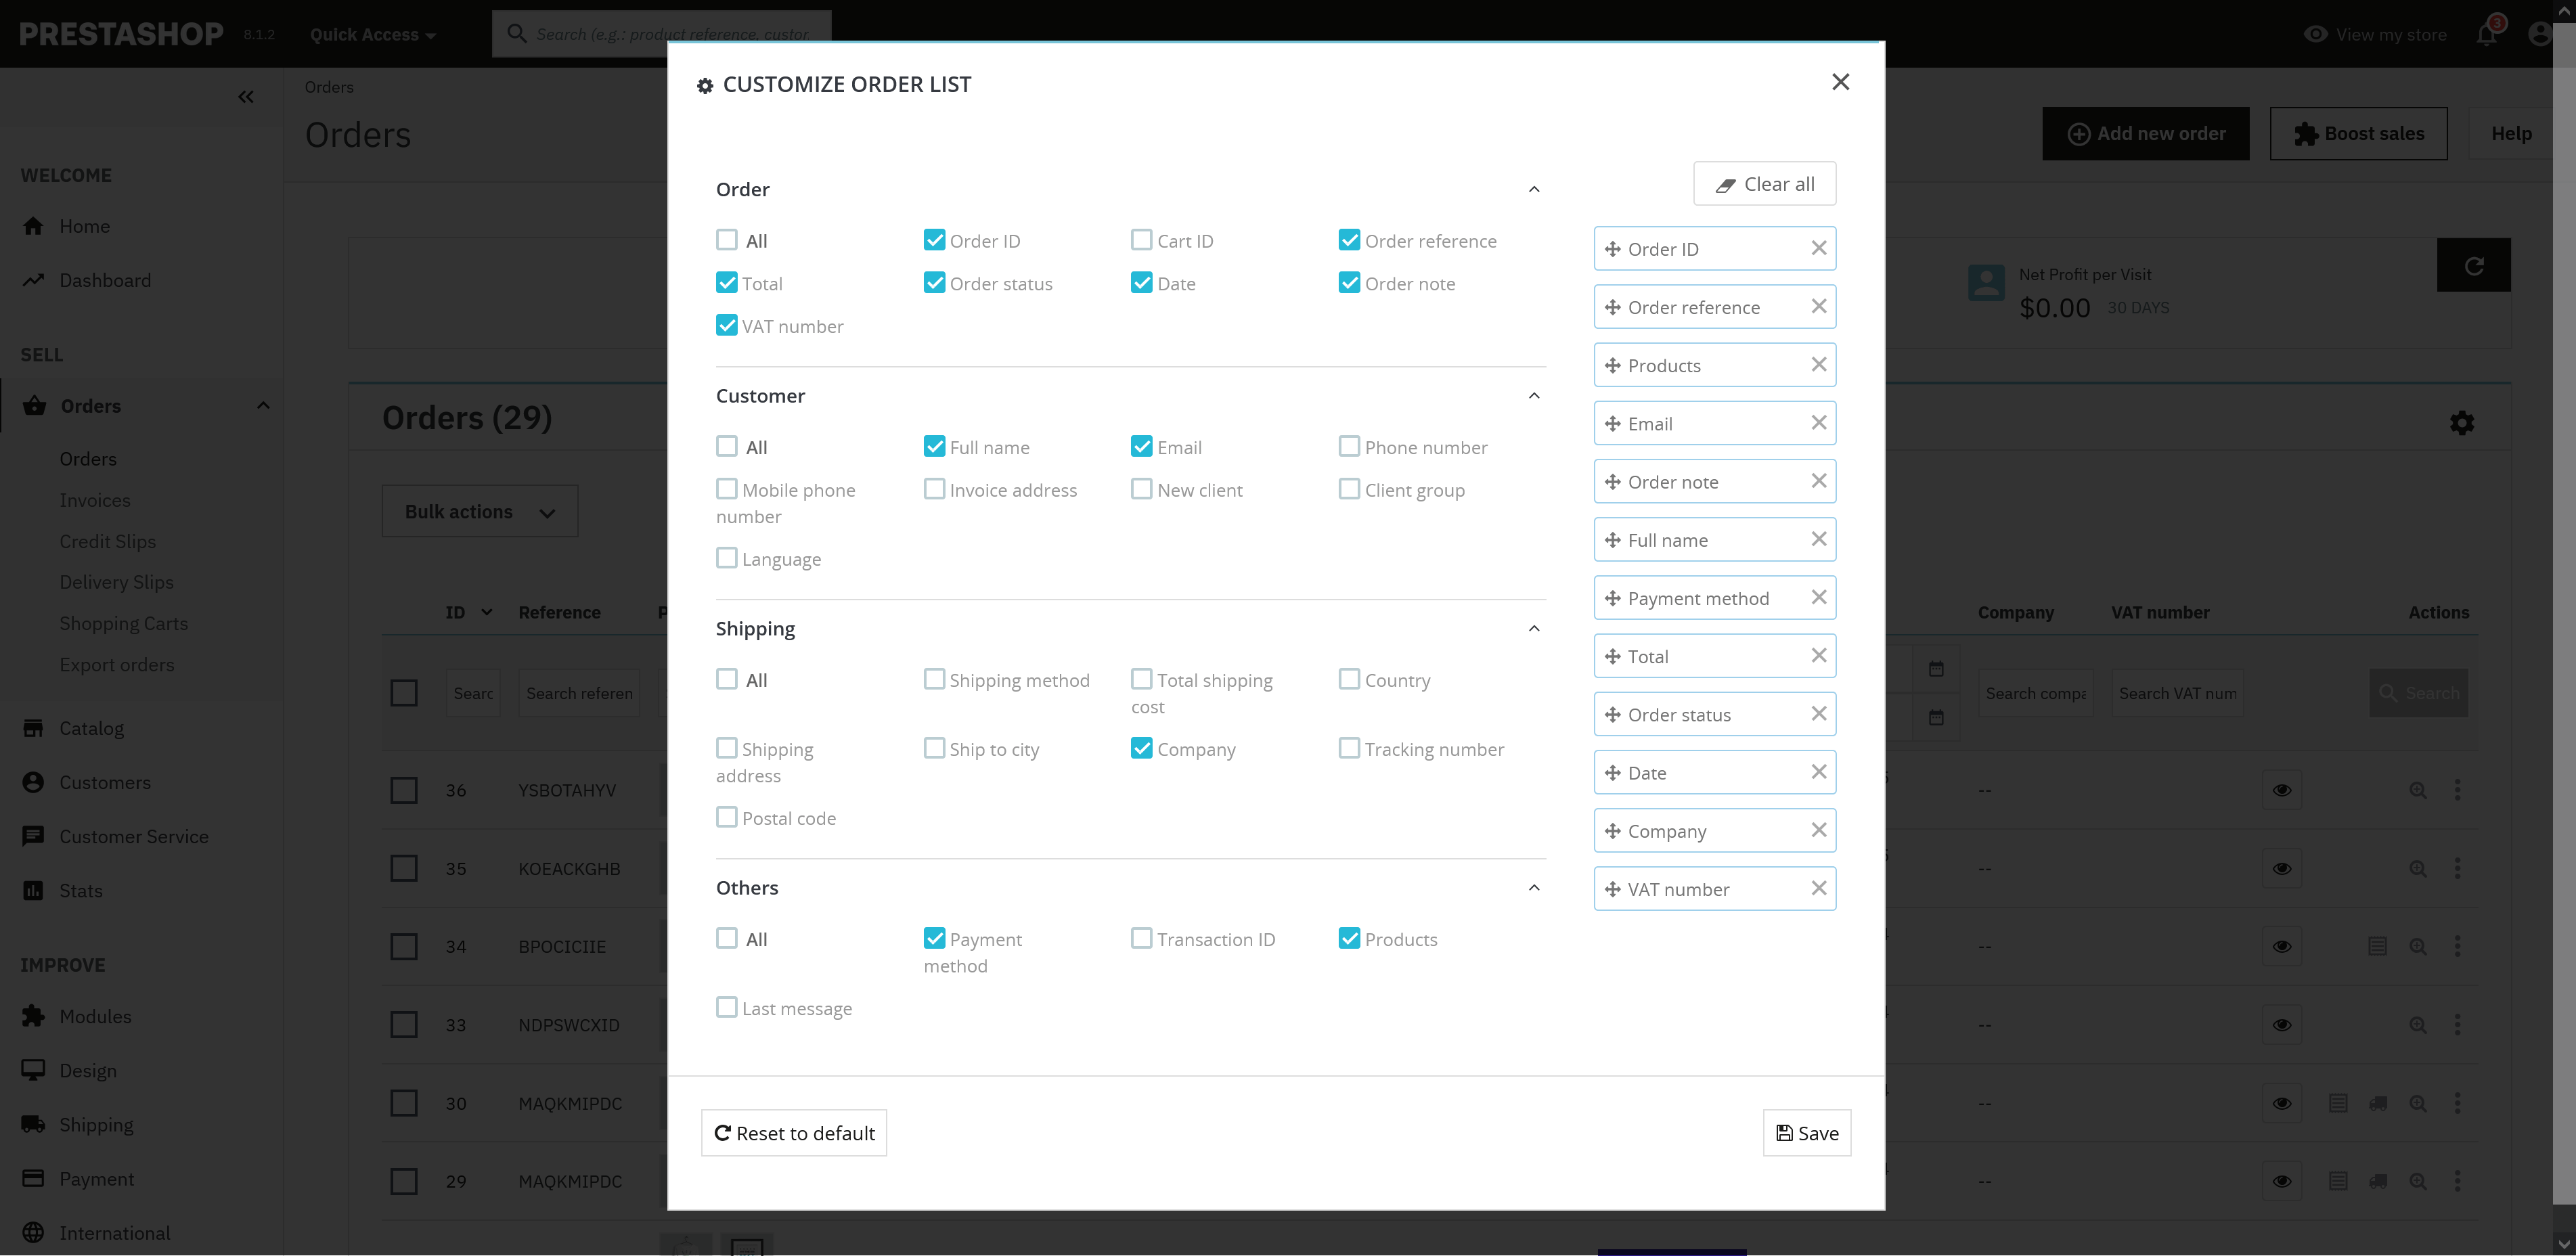
Step 3: Select data fields to display
To choose which fields to display, check the boxes next to the fields you want to add.
Some common options include:
- Purchased products
- Order date
- Order status
- Shipping cost
- Shipping address
- Billing address
- Payment method
💡 Tip: Select only the fields that are most relevant to your workflow to keep your order list clean and readable.
Step 4: Arrange data fields
Once you’ve selected the desired fields, you can rearrange them by dragging and dropping. This helps prioritize the most important information at the top of the order listing page.
For example, if your team frequently checks shipping costs, you can place that field closer to the order reference number for quick access.
Step 5: Save your changes
Click Save to apply the updates to your order listing page.
Your selected fields will now appear in the Orders section of your PrestaShop back office.
Customizing the order listing page in PrestaShop helps improve efficiency and accuracy when managing orders. By selecting and arranging the most useful data fields, your team can process orders faster and more effectively.