How to Generate Instagram Access Token for a Business Account
Follow these step-by-step instructions to generate and retrieve an Instagram access token for your business account.
***Note: Ensure you have a business Instagram account linked to a Facebook page. If you’re using a personal Instagram account, you’ll need to convert it to a business account. Refer to Facebook’s guide on how to make this conversion.
STEP 1: Connect Your Instagram Account to Your Facebook Page
Before you begin
- You’ll need a creator or business account on Instagram. Learn how to set up a creator account or set up a business account on Instagram.
- You'll need a Facebook Page.
- You'll need a Facebook personal account that has an admin role on your Facebook Page.
Connect your Facebook Page to your Instagram Account
You can connect from Instagram or from Facebook:
On Instagram (mobile/web):
- Open Instagram → Profile → Edit profile.
- Under Public business information, choose Page → Connect or create a Facebook Page, then follow the prompts.
From Facebook Page / Business Suite:
- Open your Page (or Meta Business Suite) → Settings → Linked accounts / Instagram.
- Connect the account and sign in to the Instagram Business/Creator account.
Note: If your Facebook Page is added to your Meta Business Account in Business Manager, you must also add the professional Instagram account to the same Meta Business Account before you can connect them.
STEP 2: Create An App On Facebook For Developers
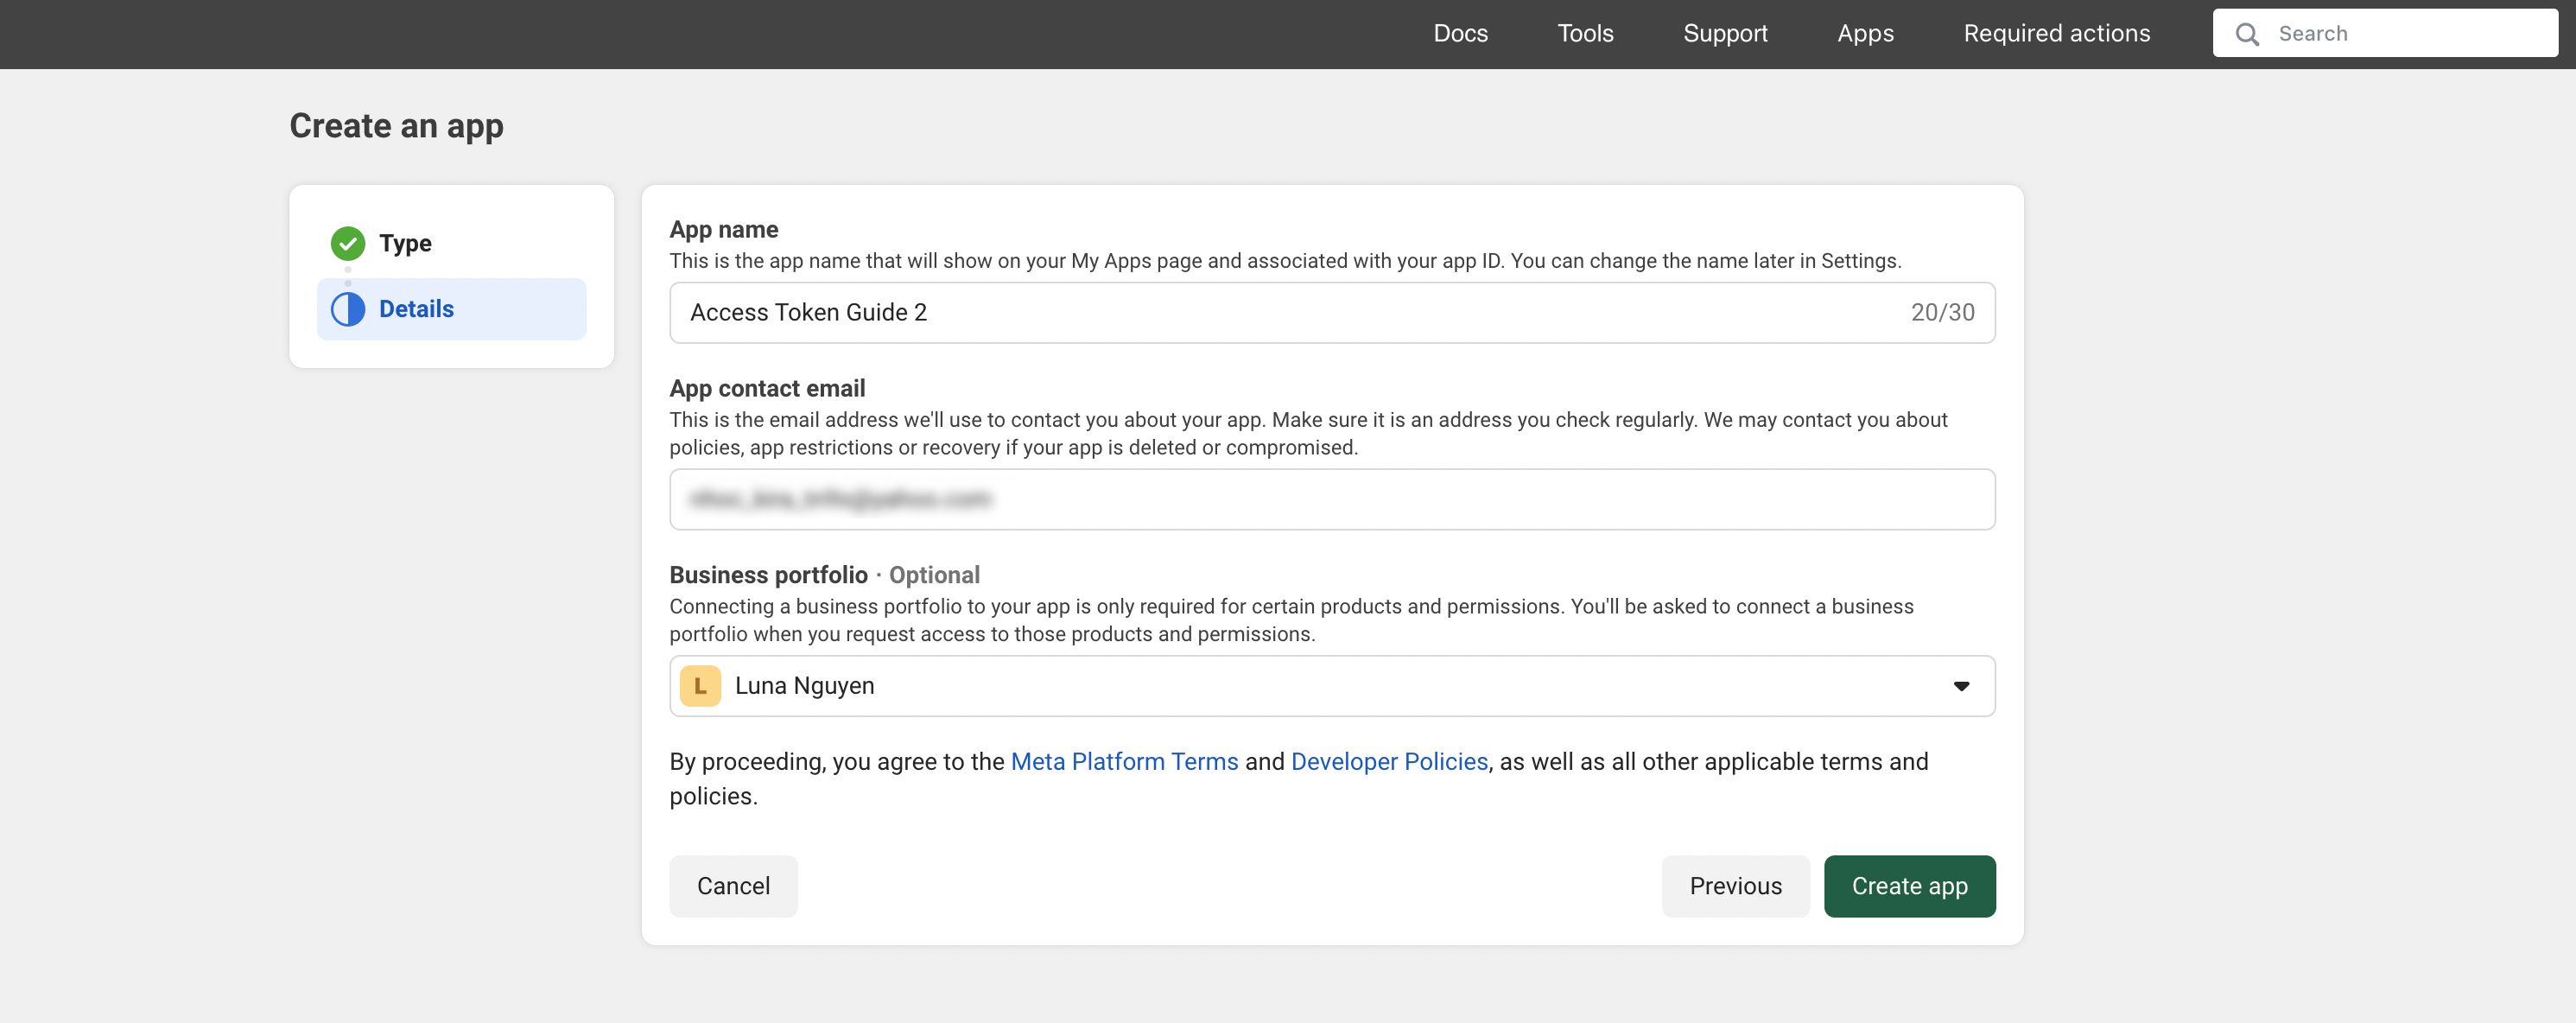
To get the access token from Instagram, you’ll need to create an app on Facebook Developers. Log in to your Facebook account, then go to your Facebook Developers Account. Select “Apps” in the menu and click the “Create App” button.

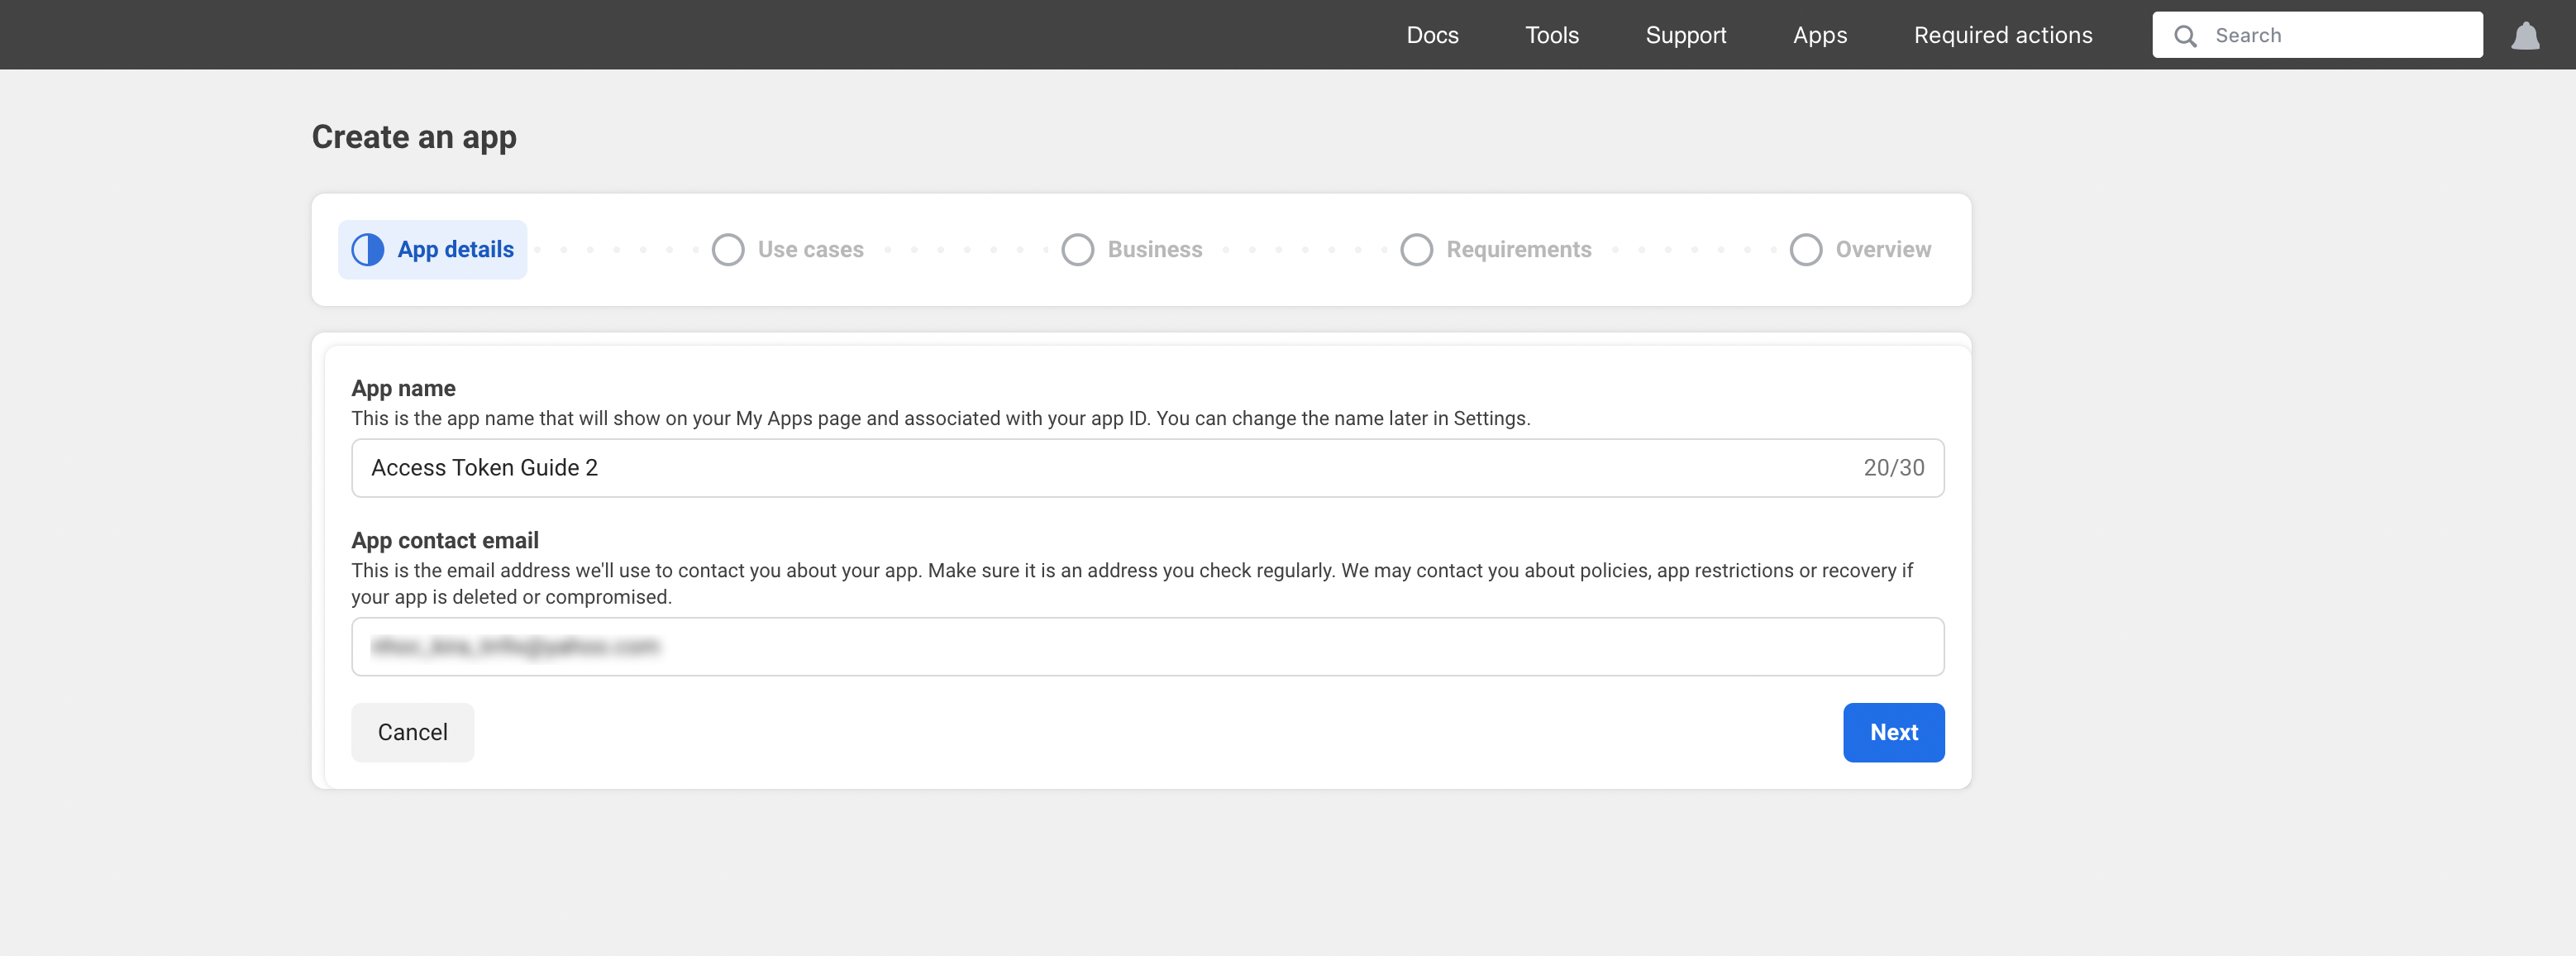
Enter your app name and app contact email. Click “Next”.
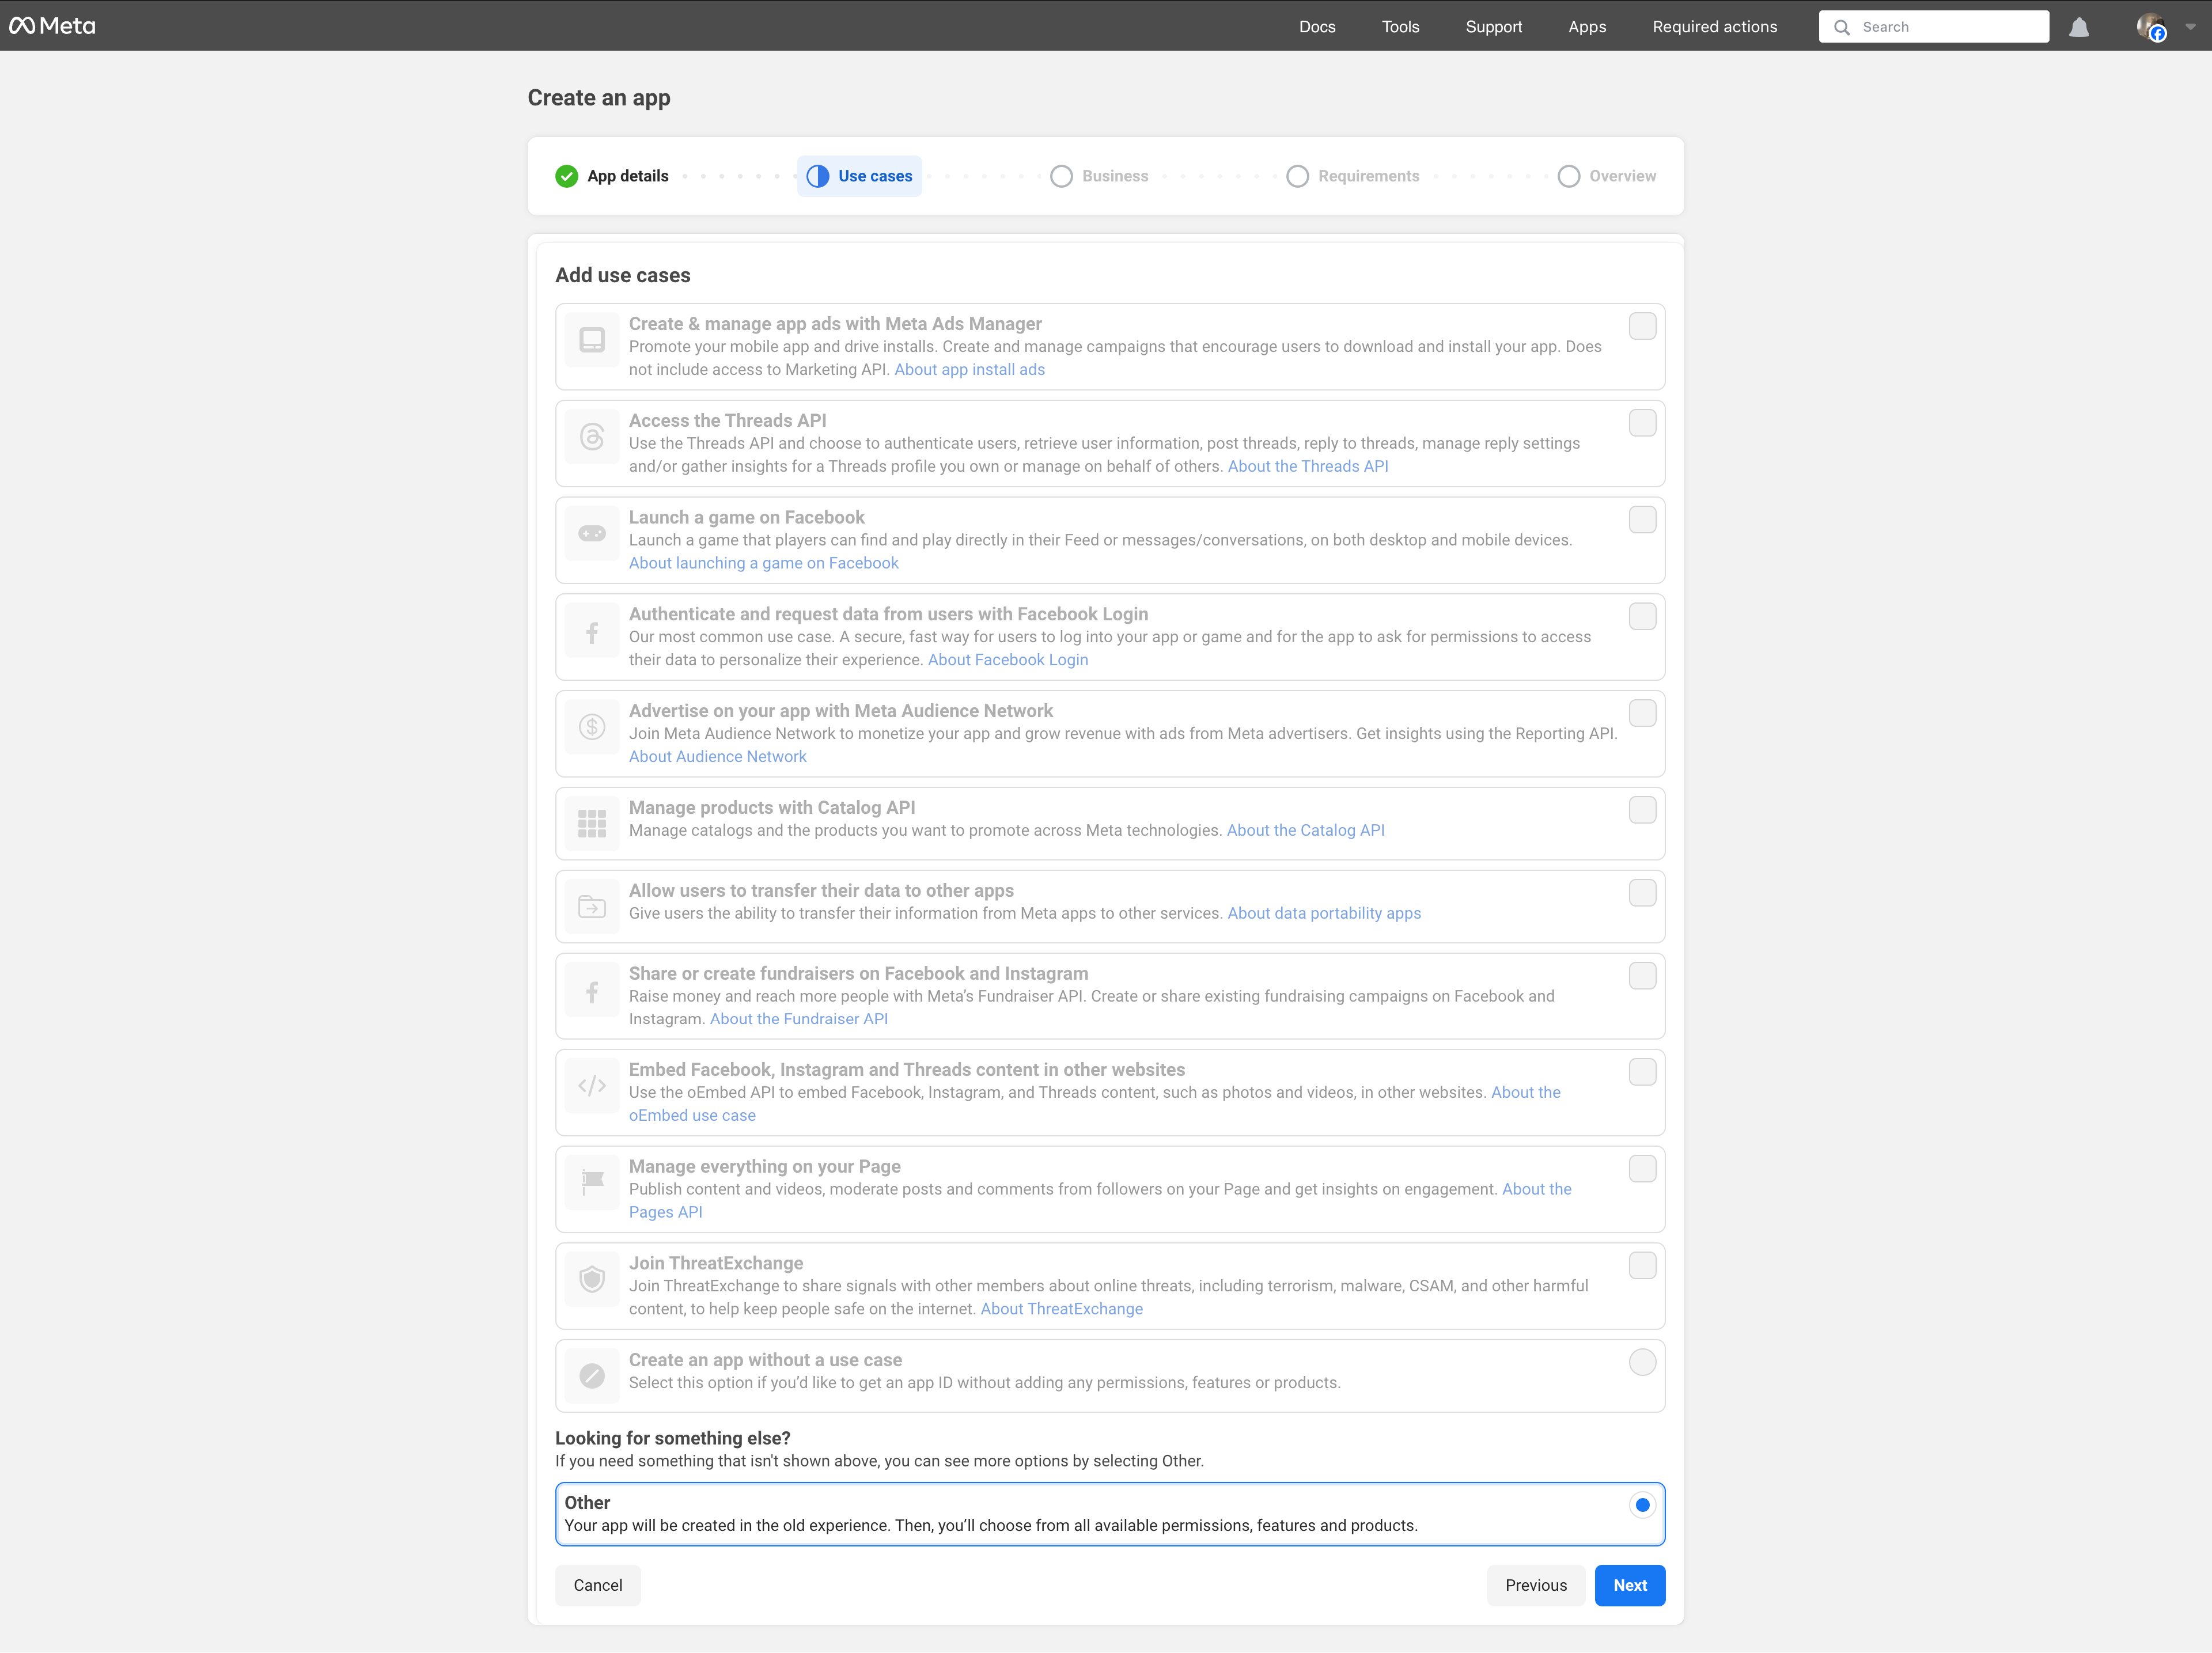
A screen will appear asking you to specify what your app will do. Choose the “Other” option, then click “Next”.
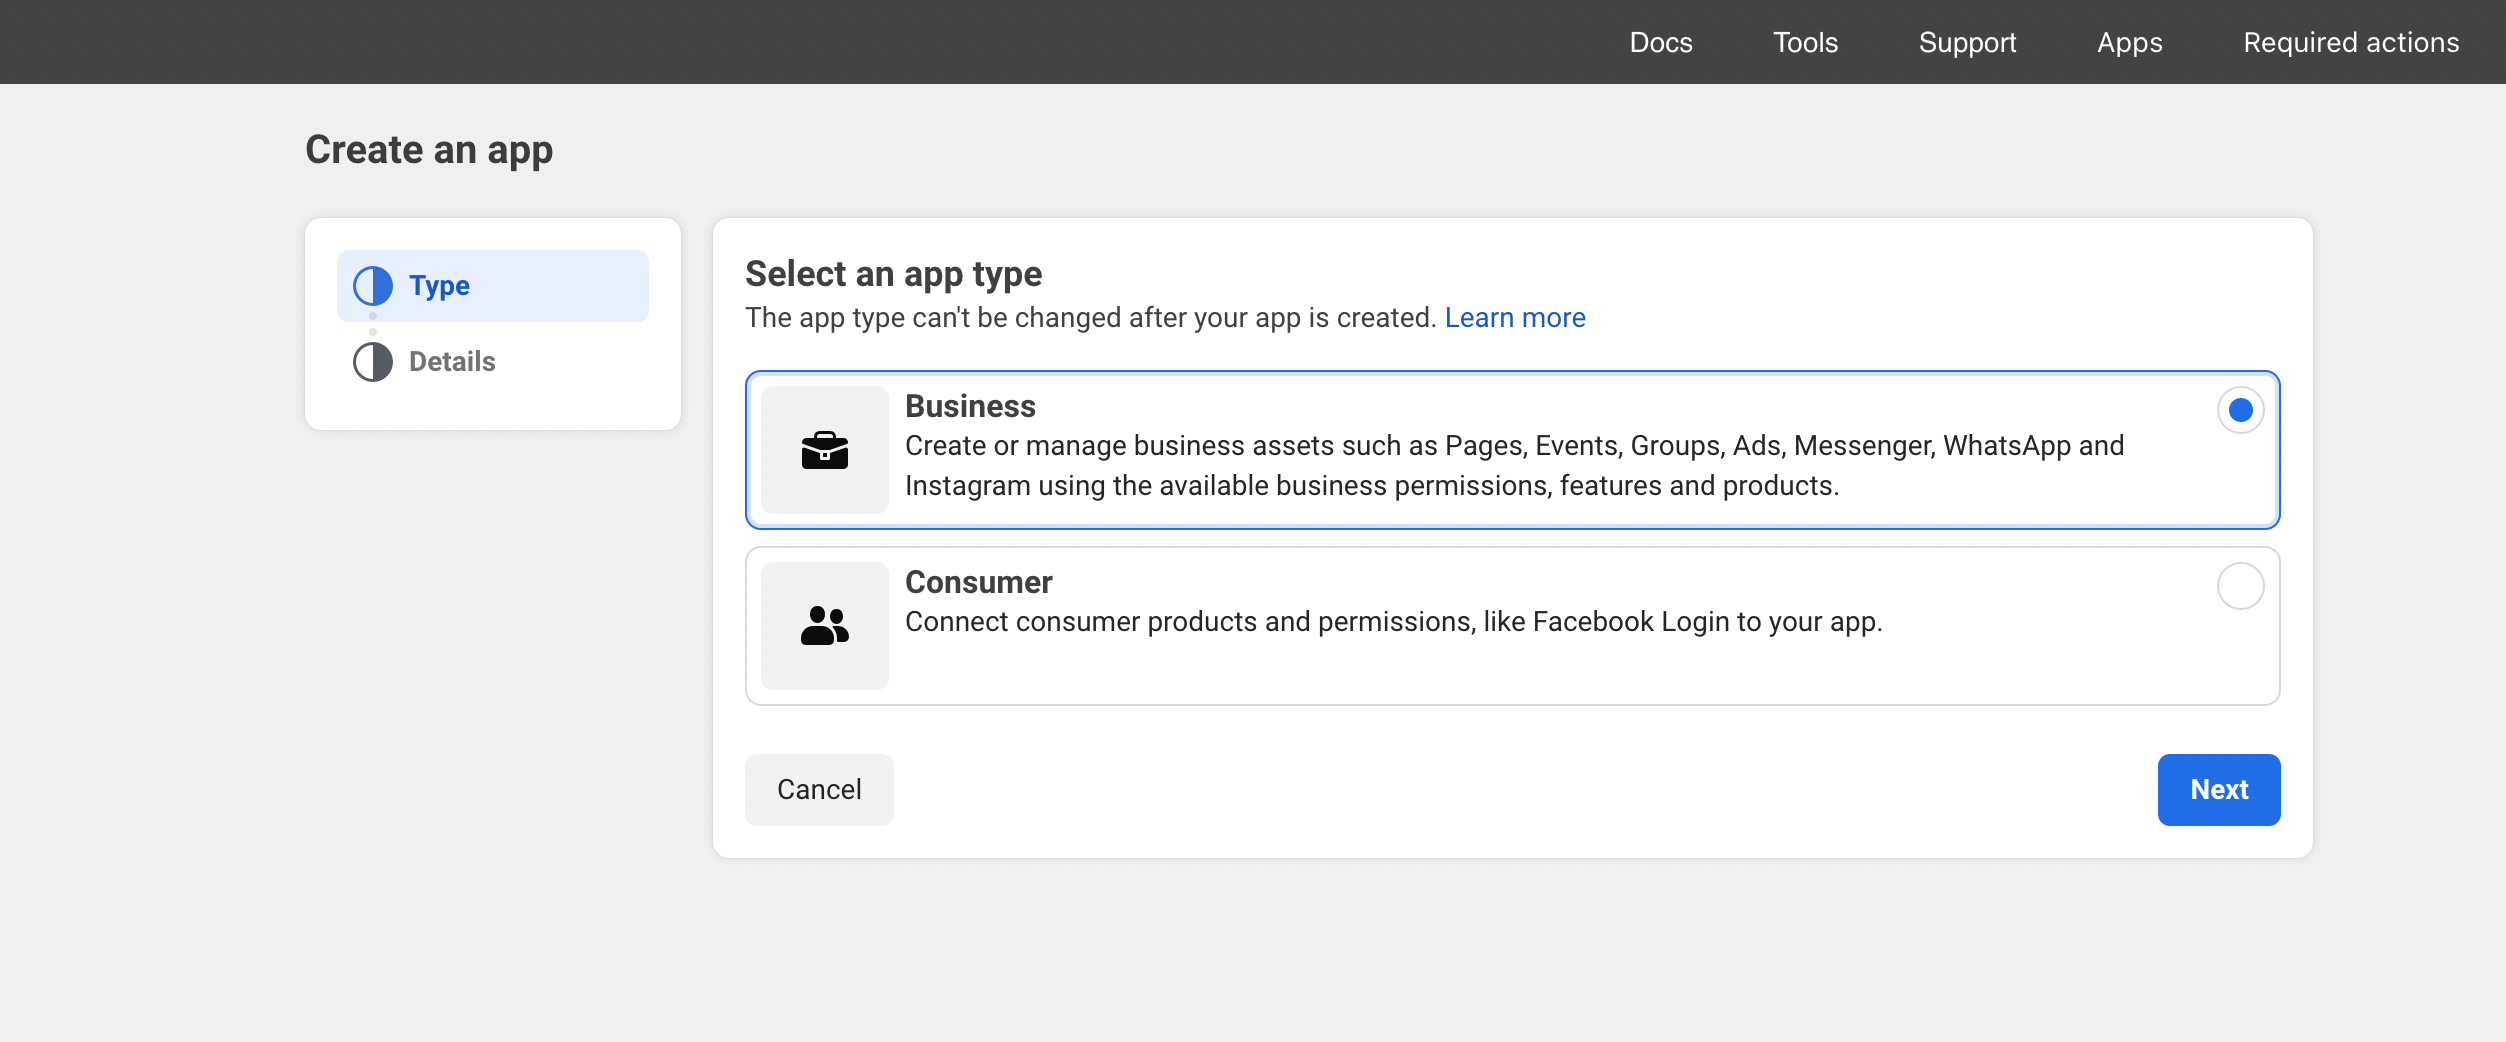
On the following screen, select the “Business” option, then click "Next".
Fill in the required fields: “App Name”, “App Contact Email”, and “Business Portfolio”. Then, click “Create App”.
STEP 3: Configure the app & add Instagram API
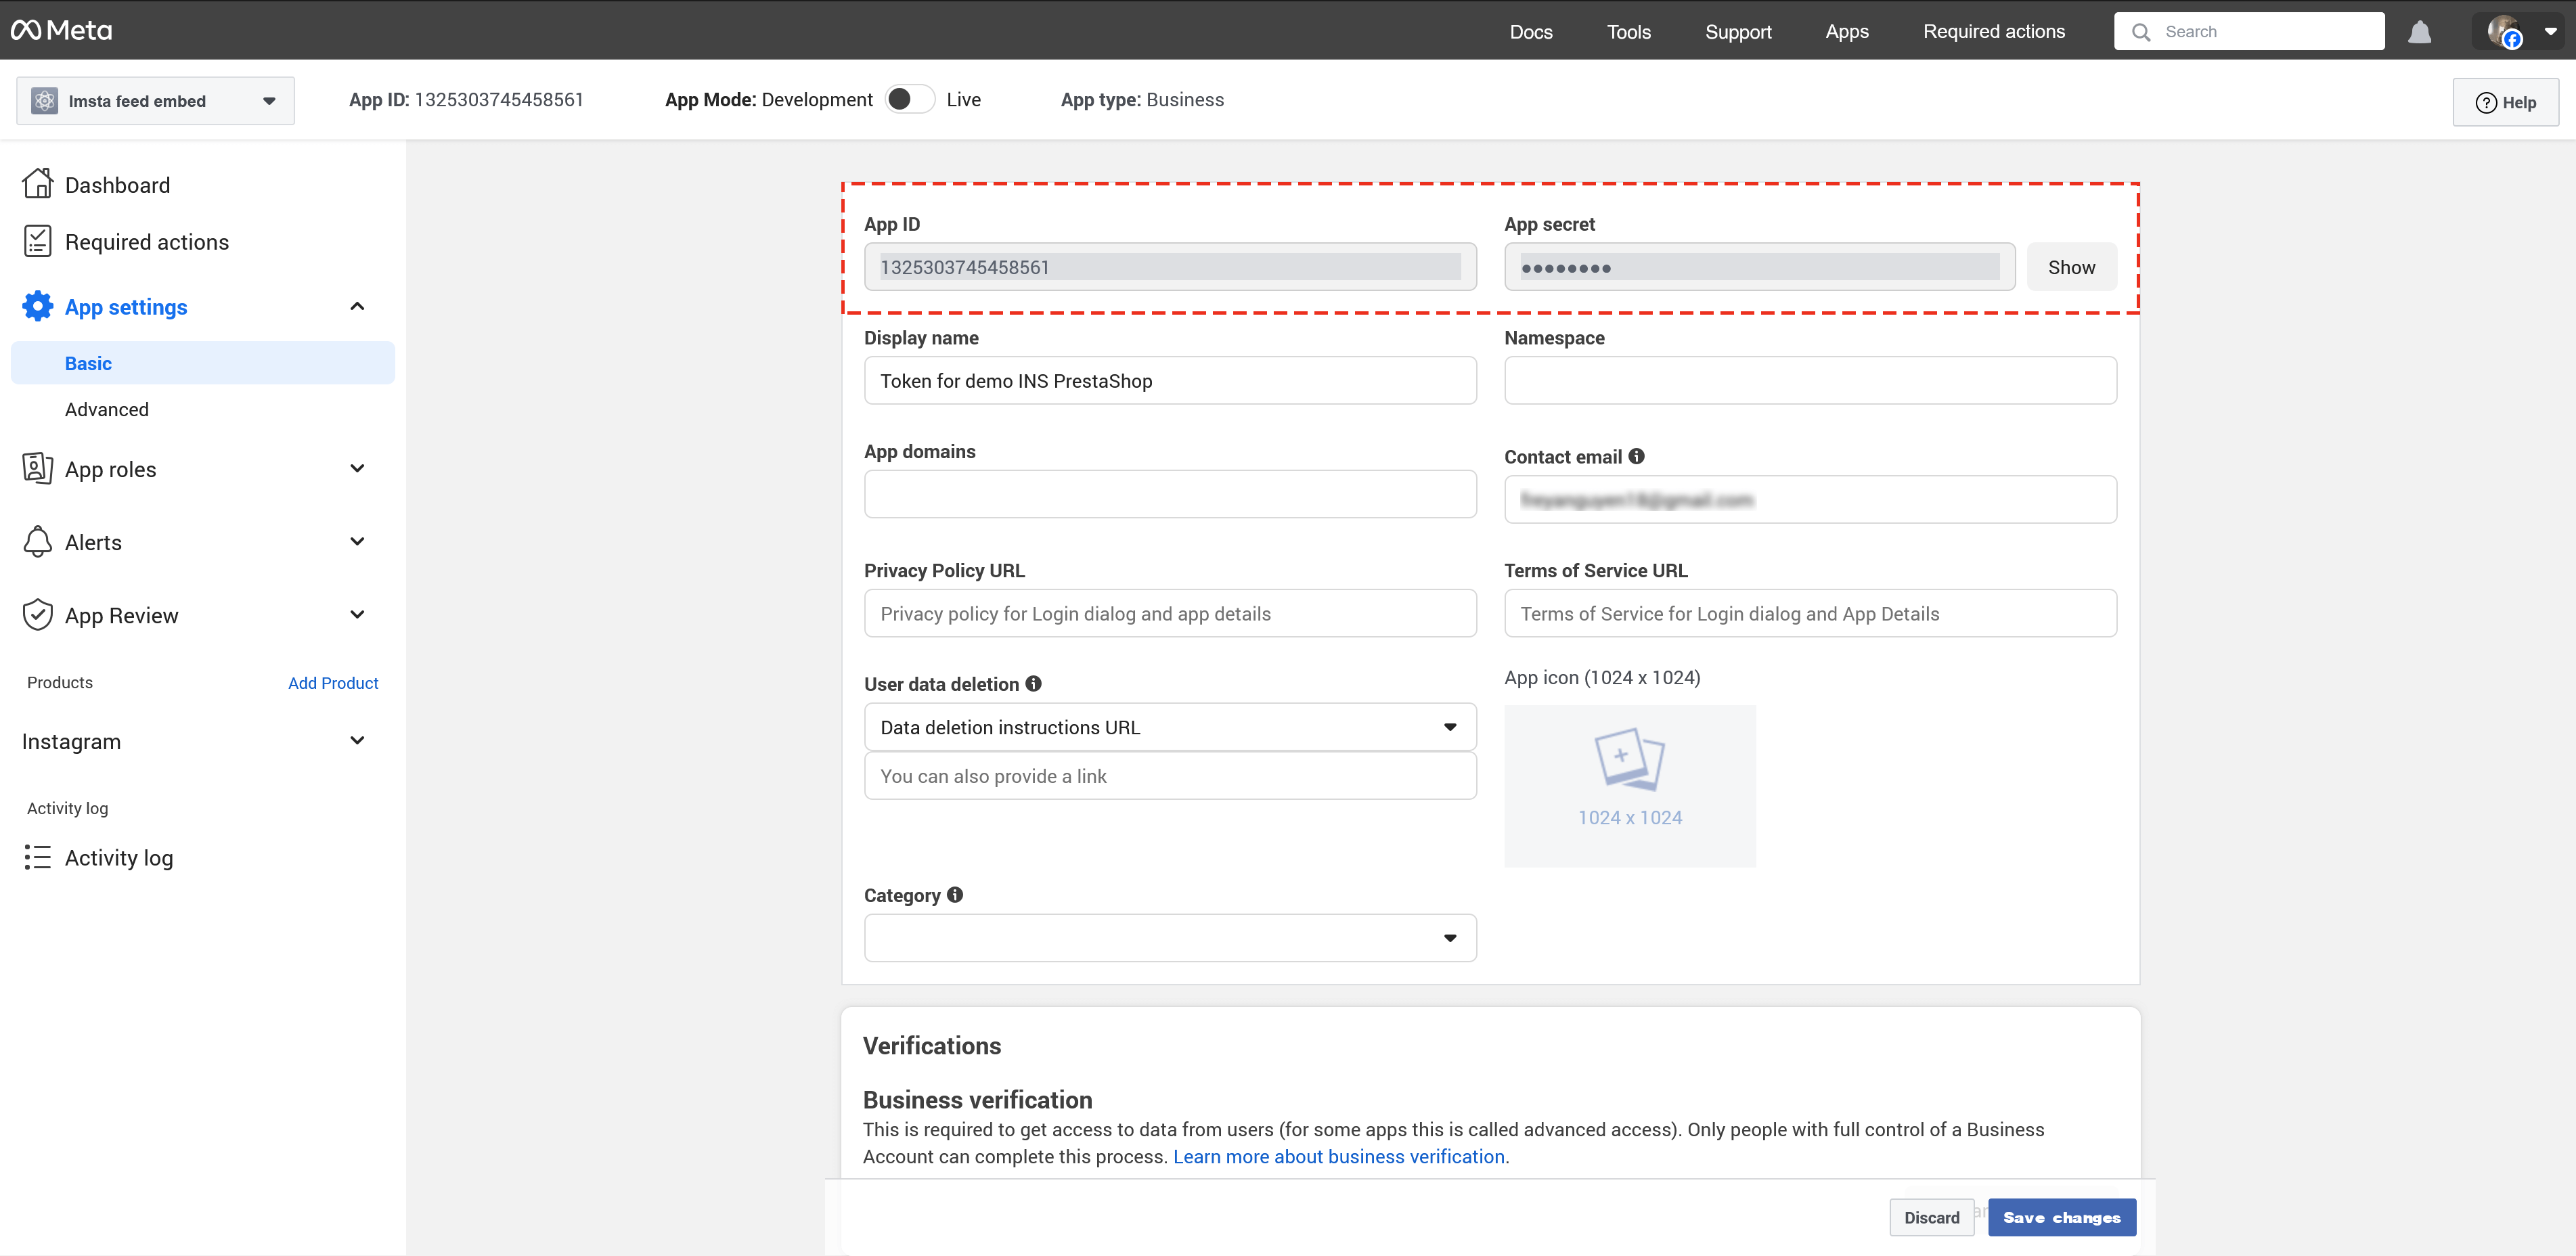
In Dashboard → App settings → Basic, fill in required fields (App domain, privacy policy URL, terms and conditions URL, etc.). Click on the “Save changes” button.
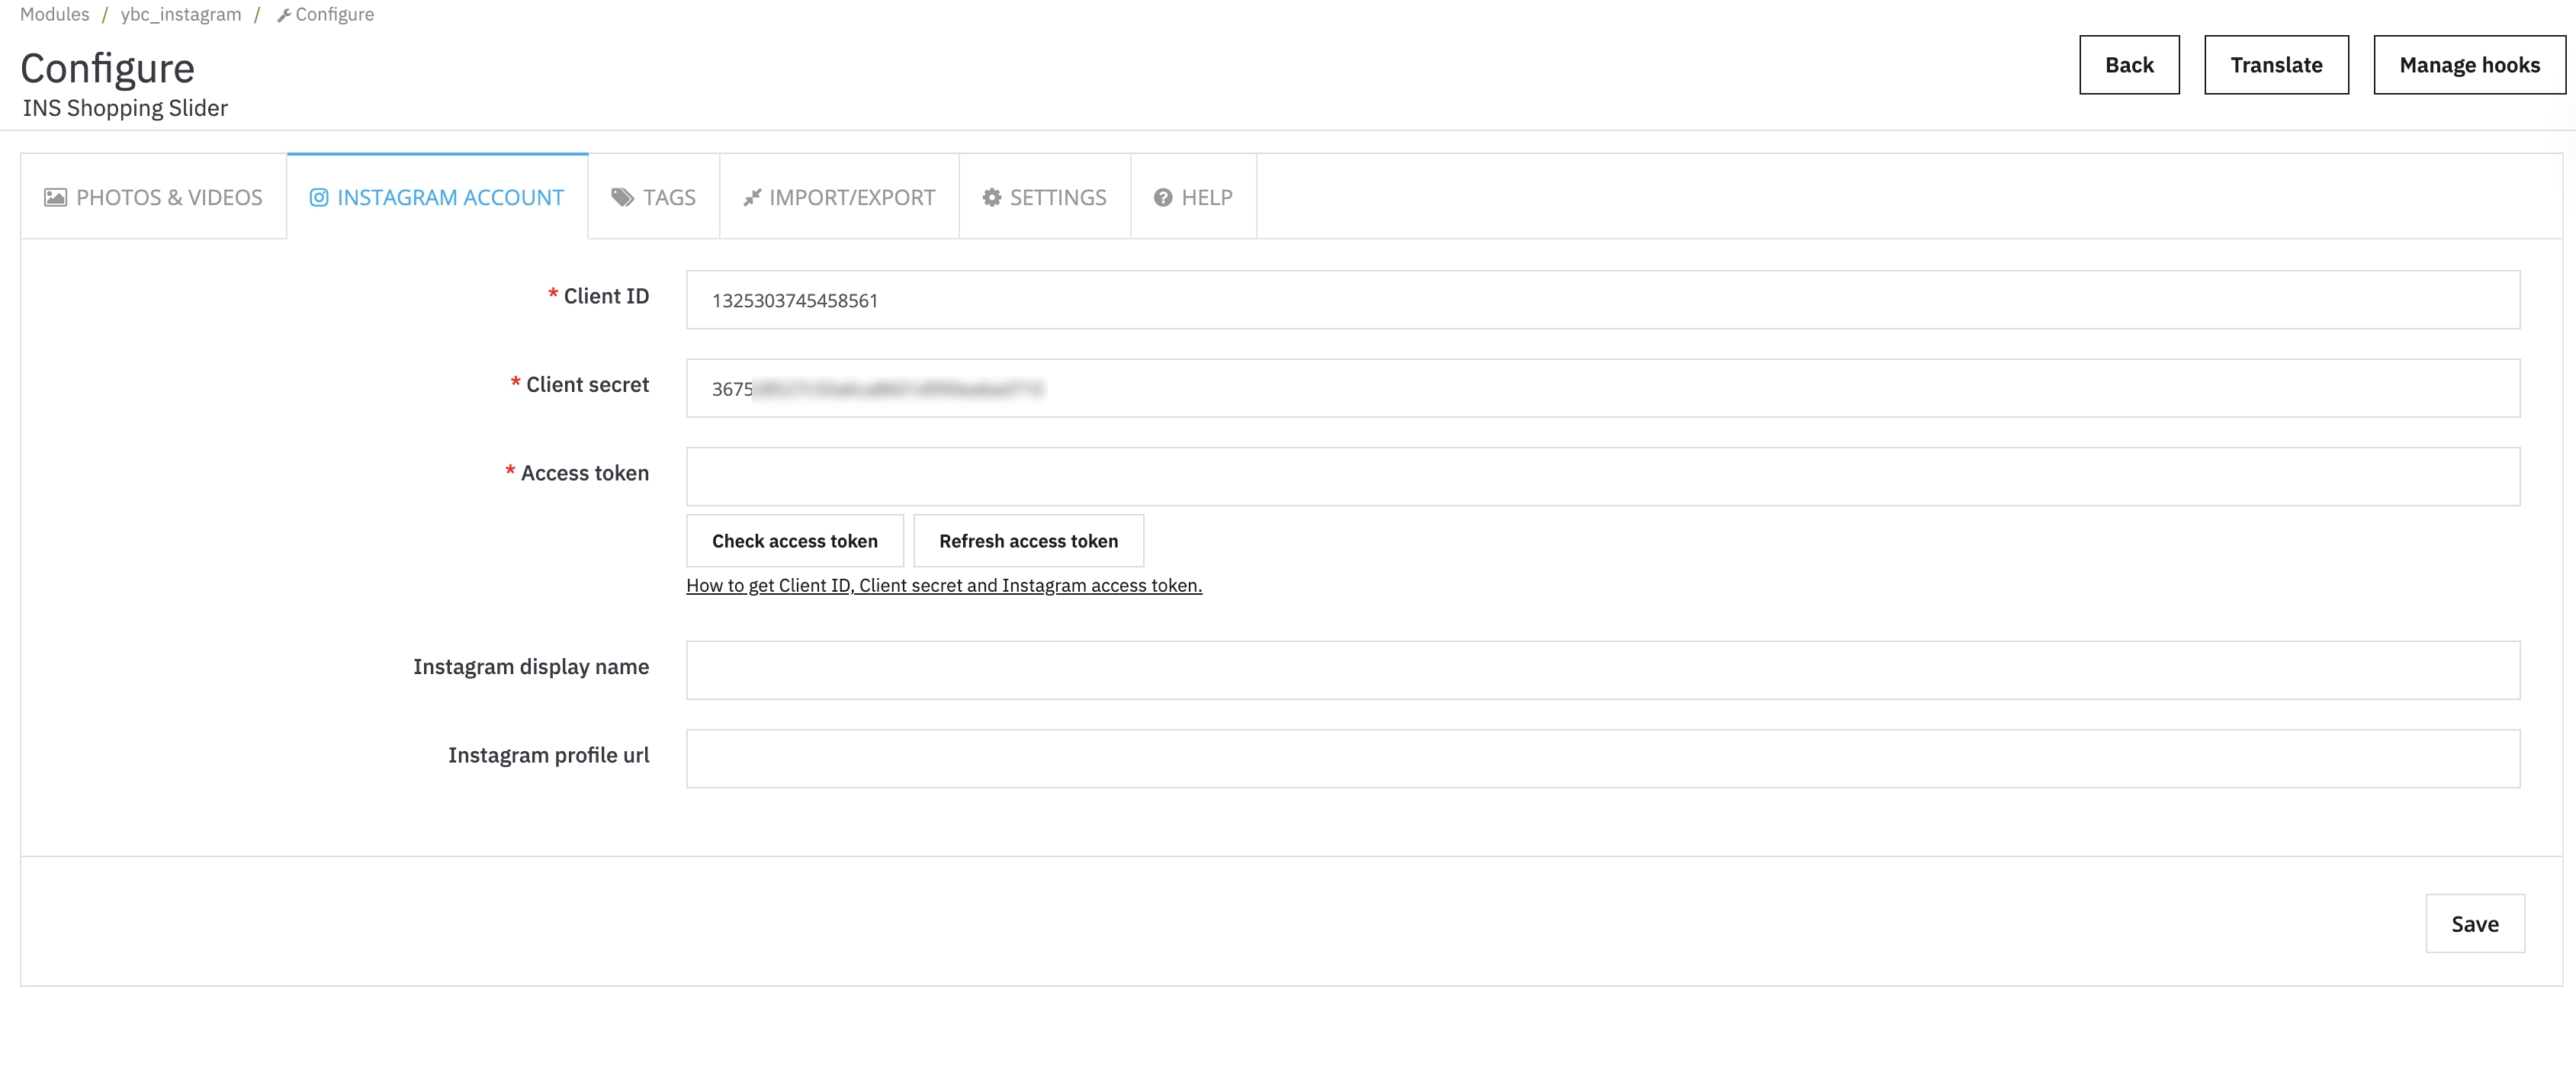
Copy the App ID and App secret key and paste them into the configuration page of the “INS Shopping Slider” module:
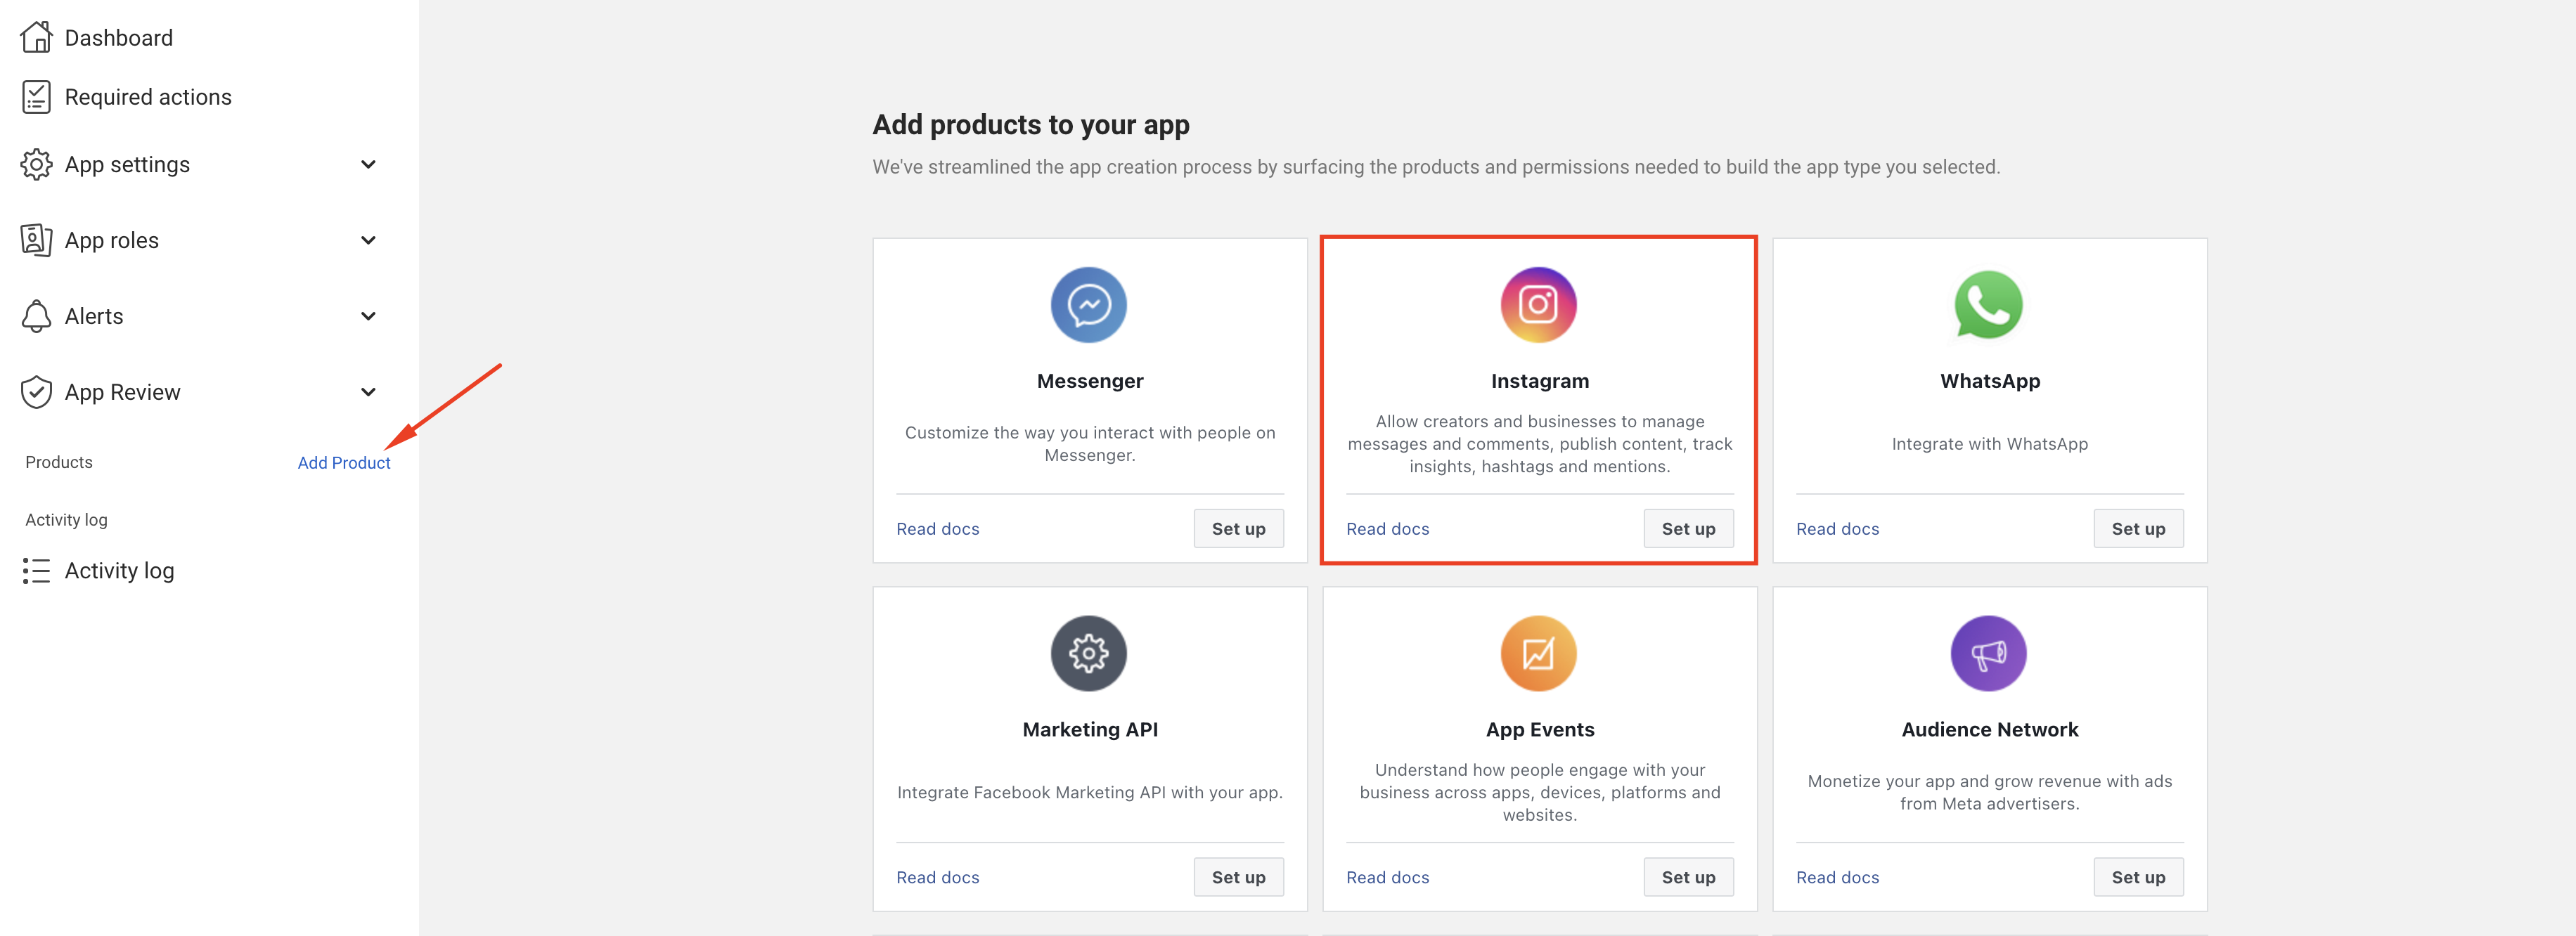
On the sidebar menu, click on the “Add Product” link. Find the “Instagram” section, then click “Set up” (this is the Instagram API with Instagram Login).
STEP 4: Add an Instagram tester
While your app is in Development mode, only people with roles can use it.
Add tester in the App Dashboard:
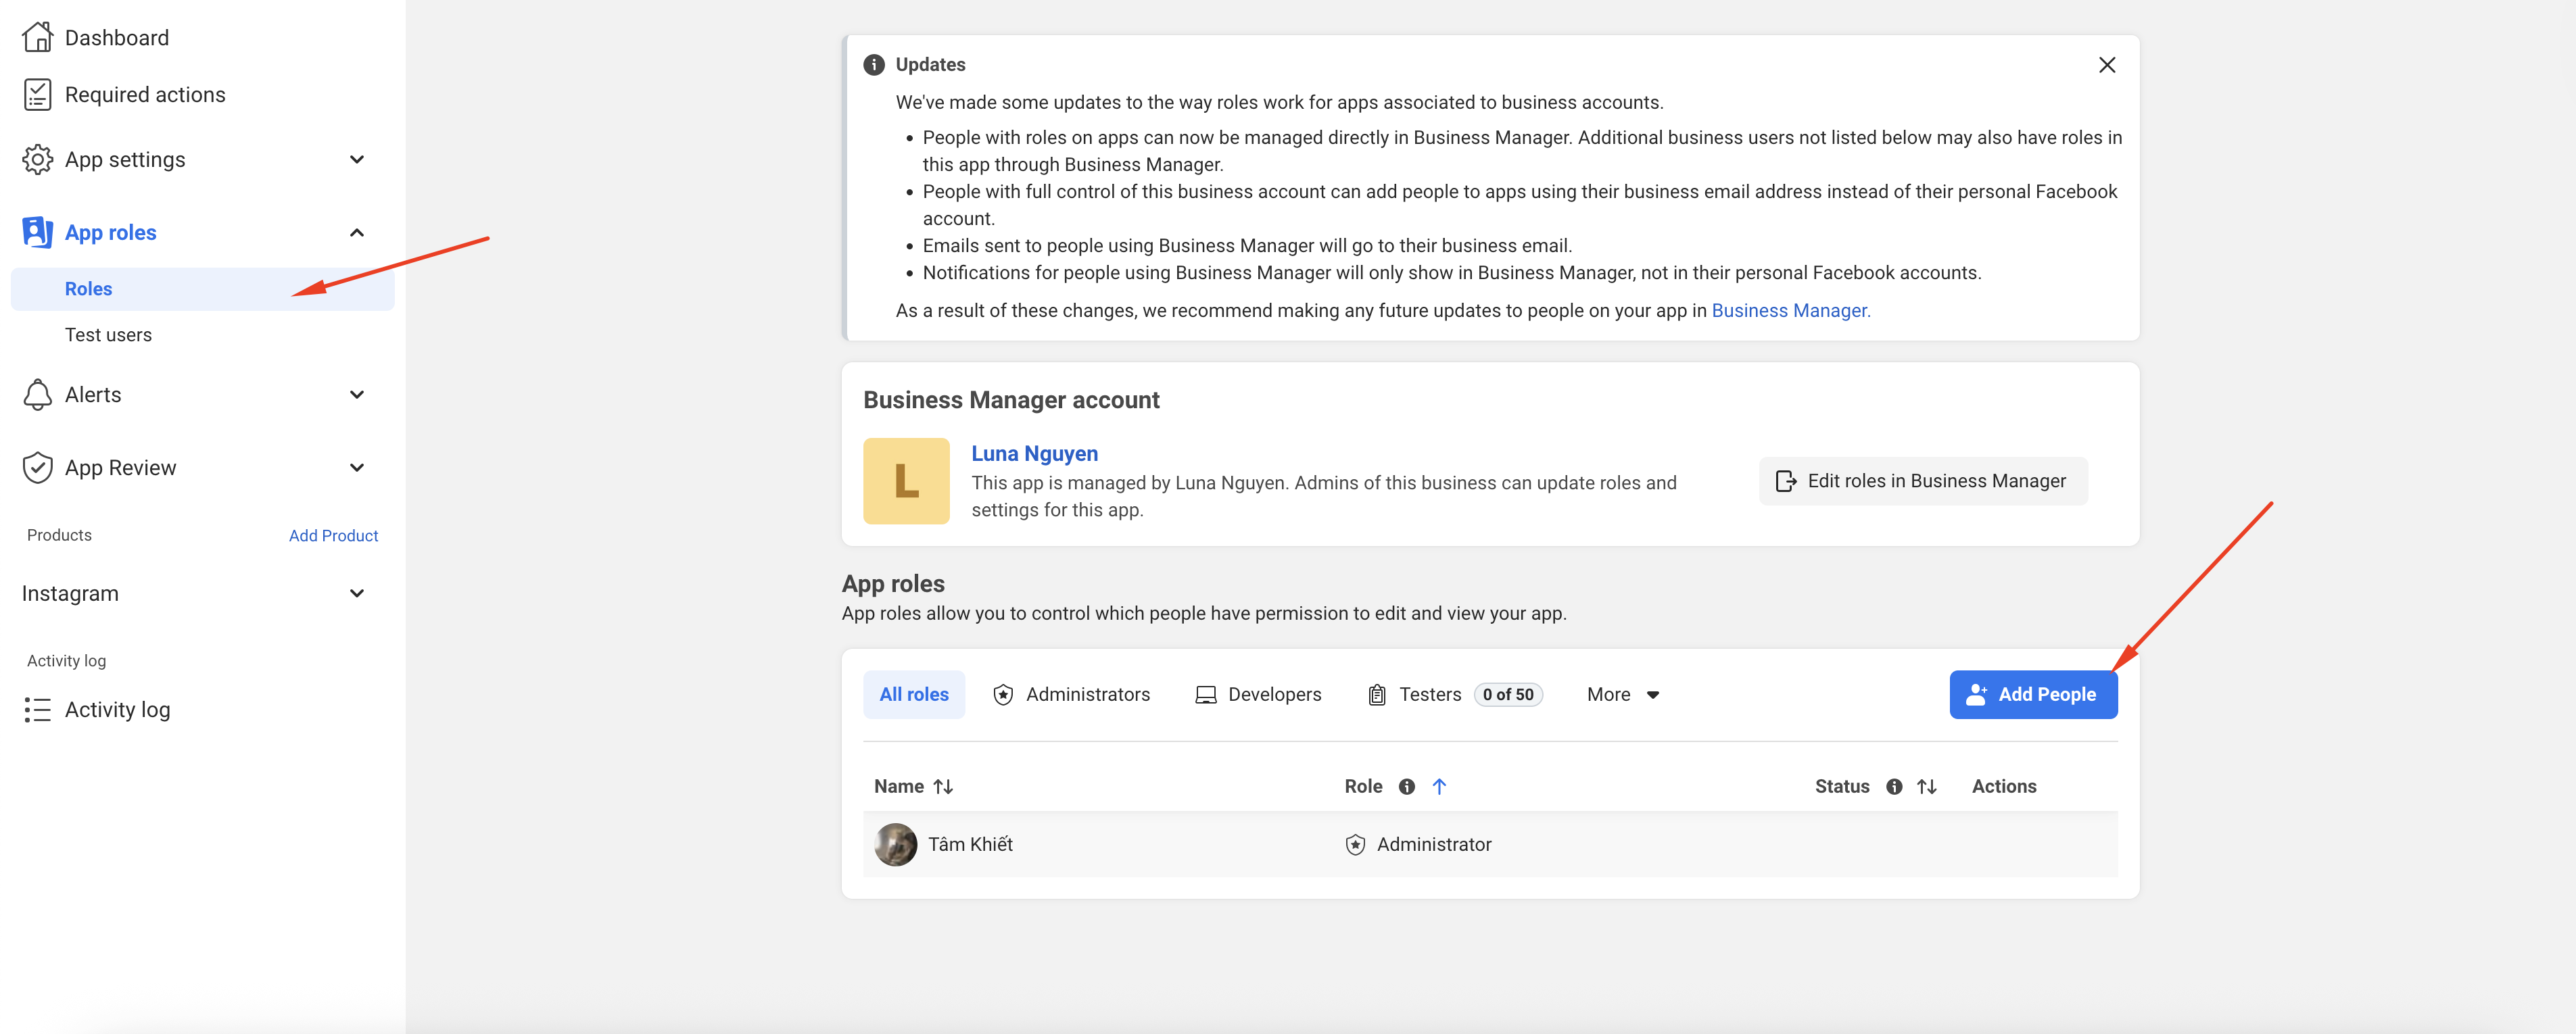
From the sidebar menu, navigate to App roles → Roles → click on “Add People” button.
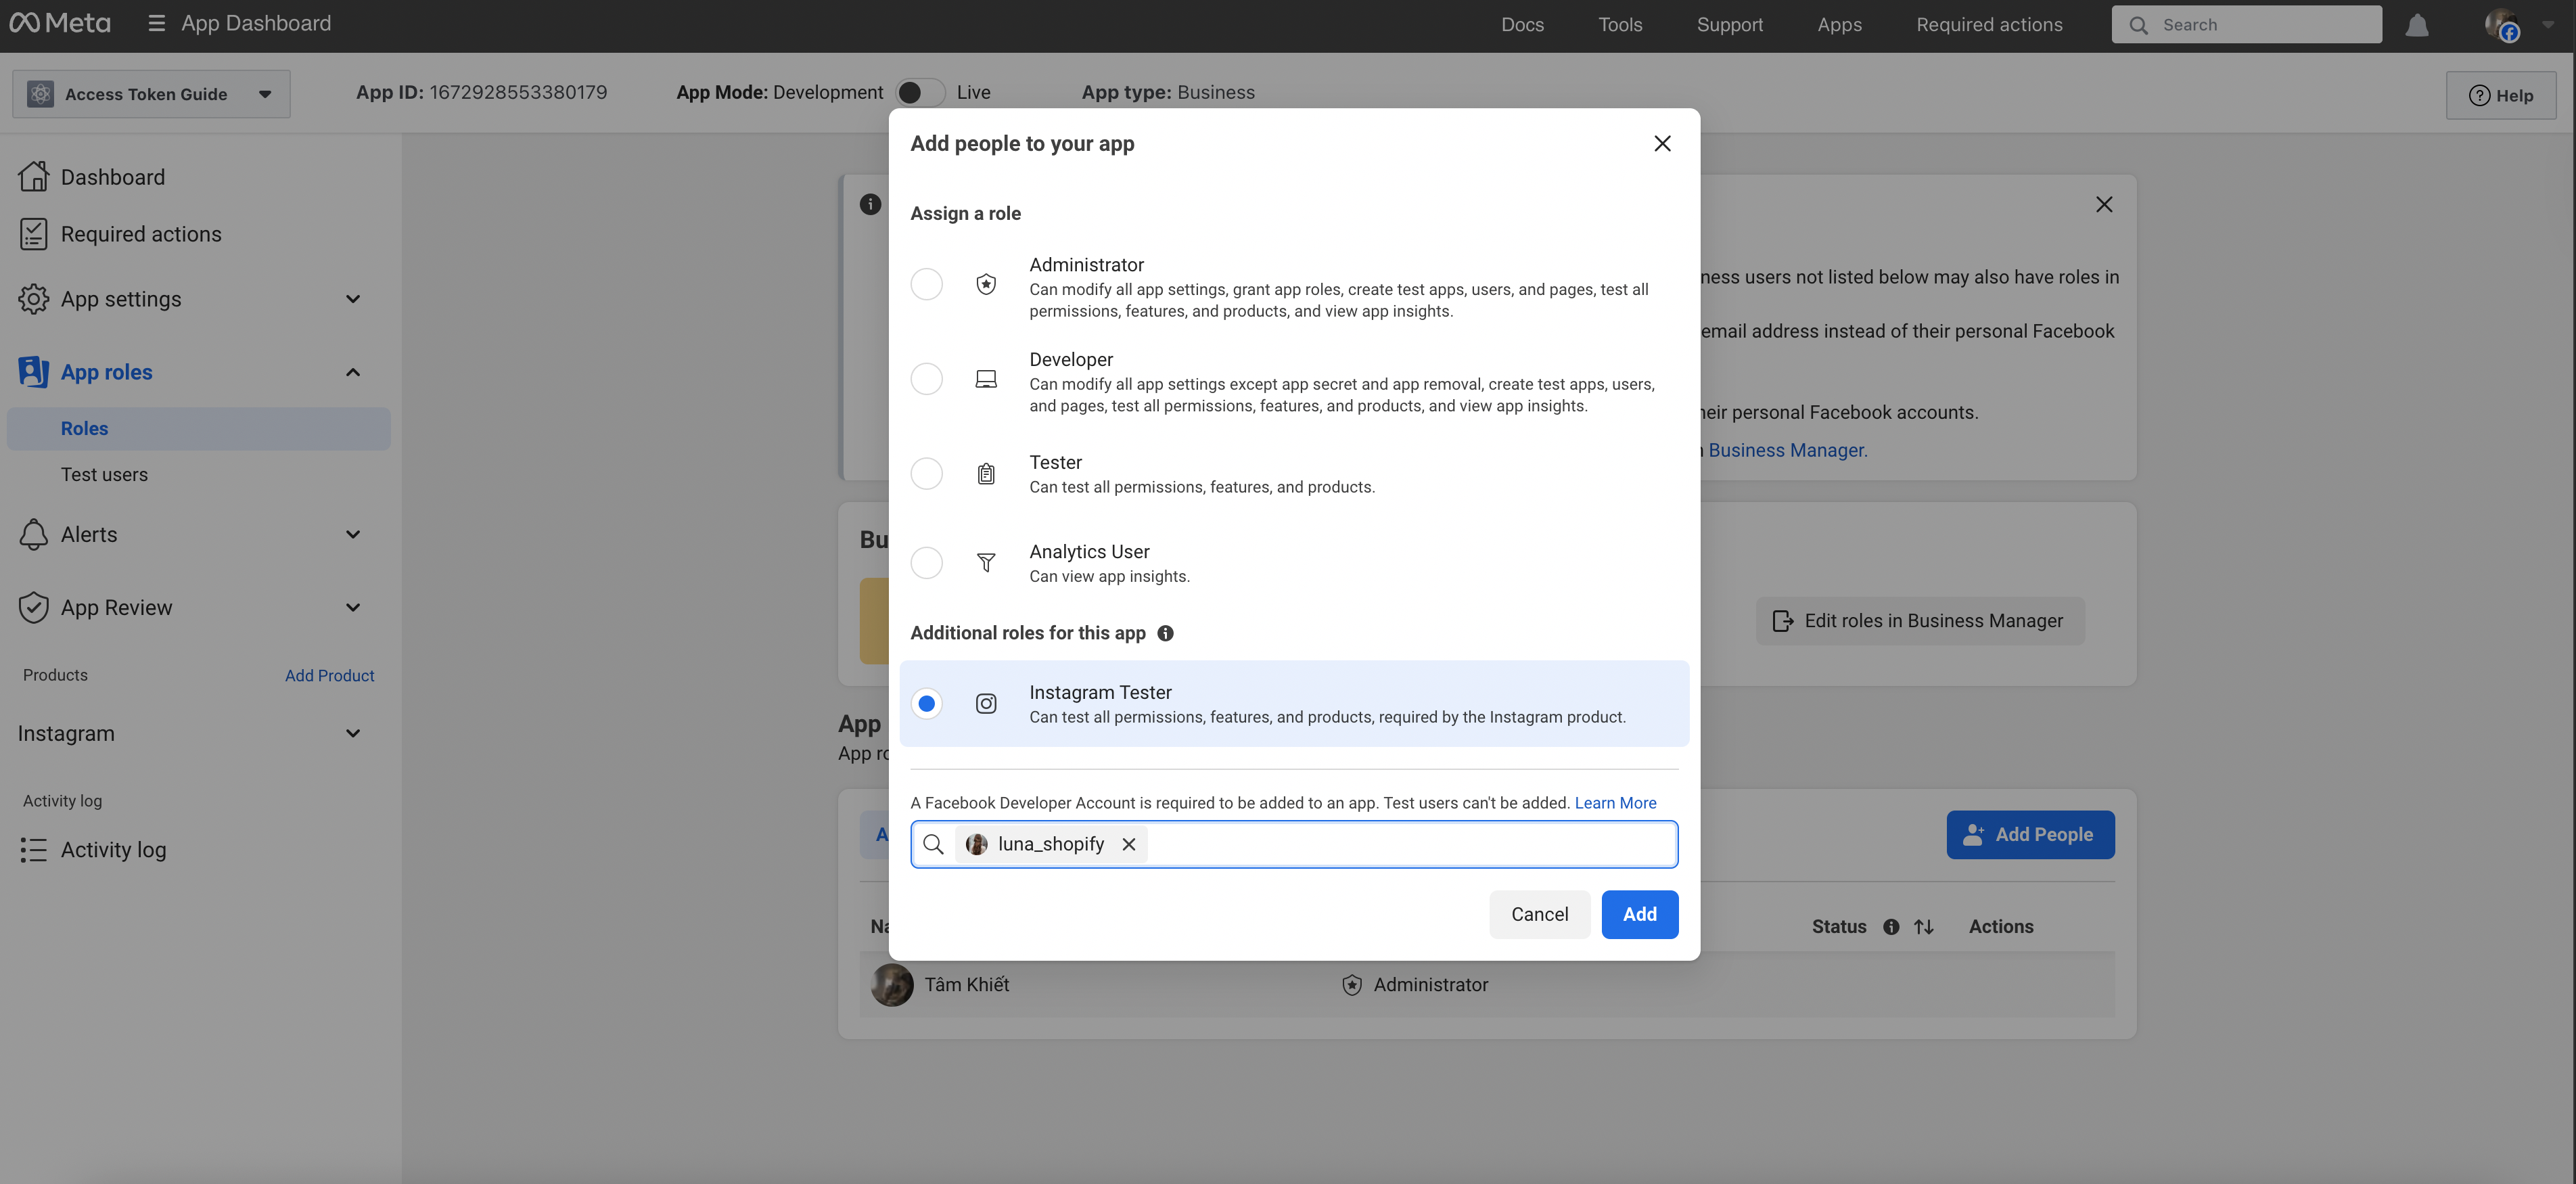
On the popup, select “Instagram Tester” option, then enter your Instagram username in the search box. Click on your account to select it. Then click the “Add” button.
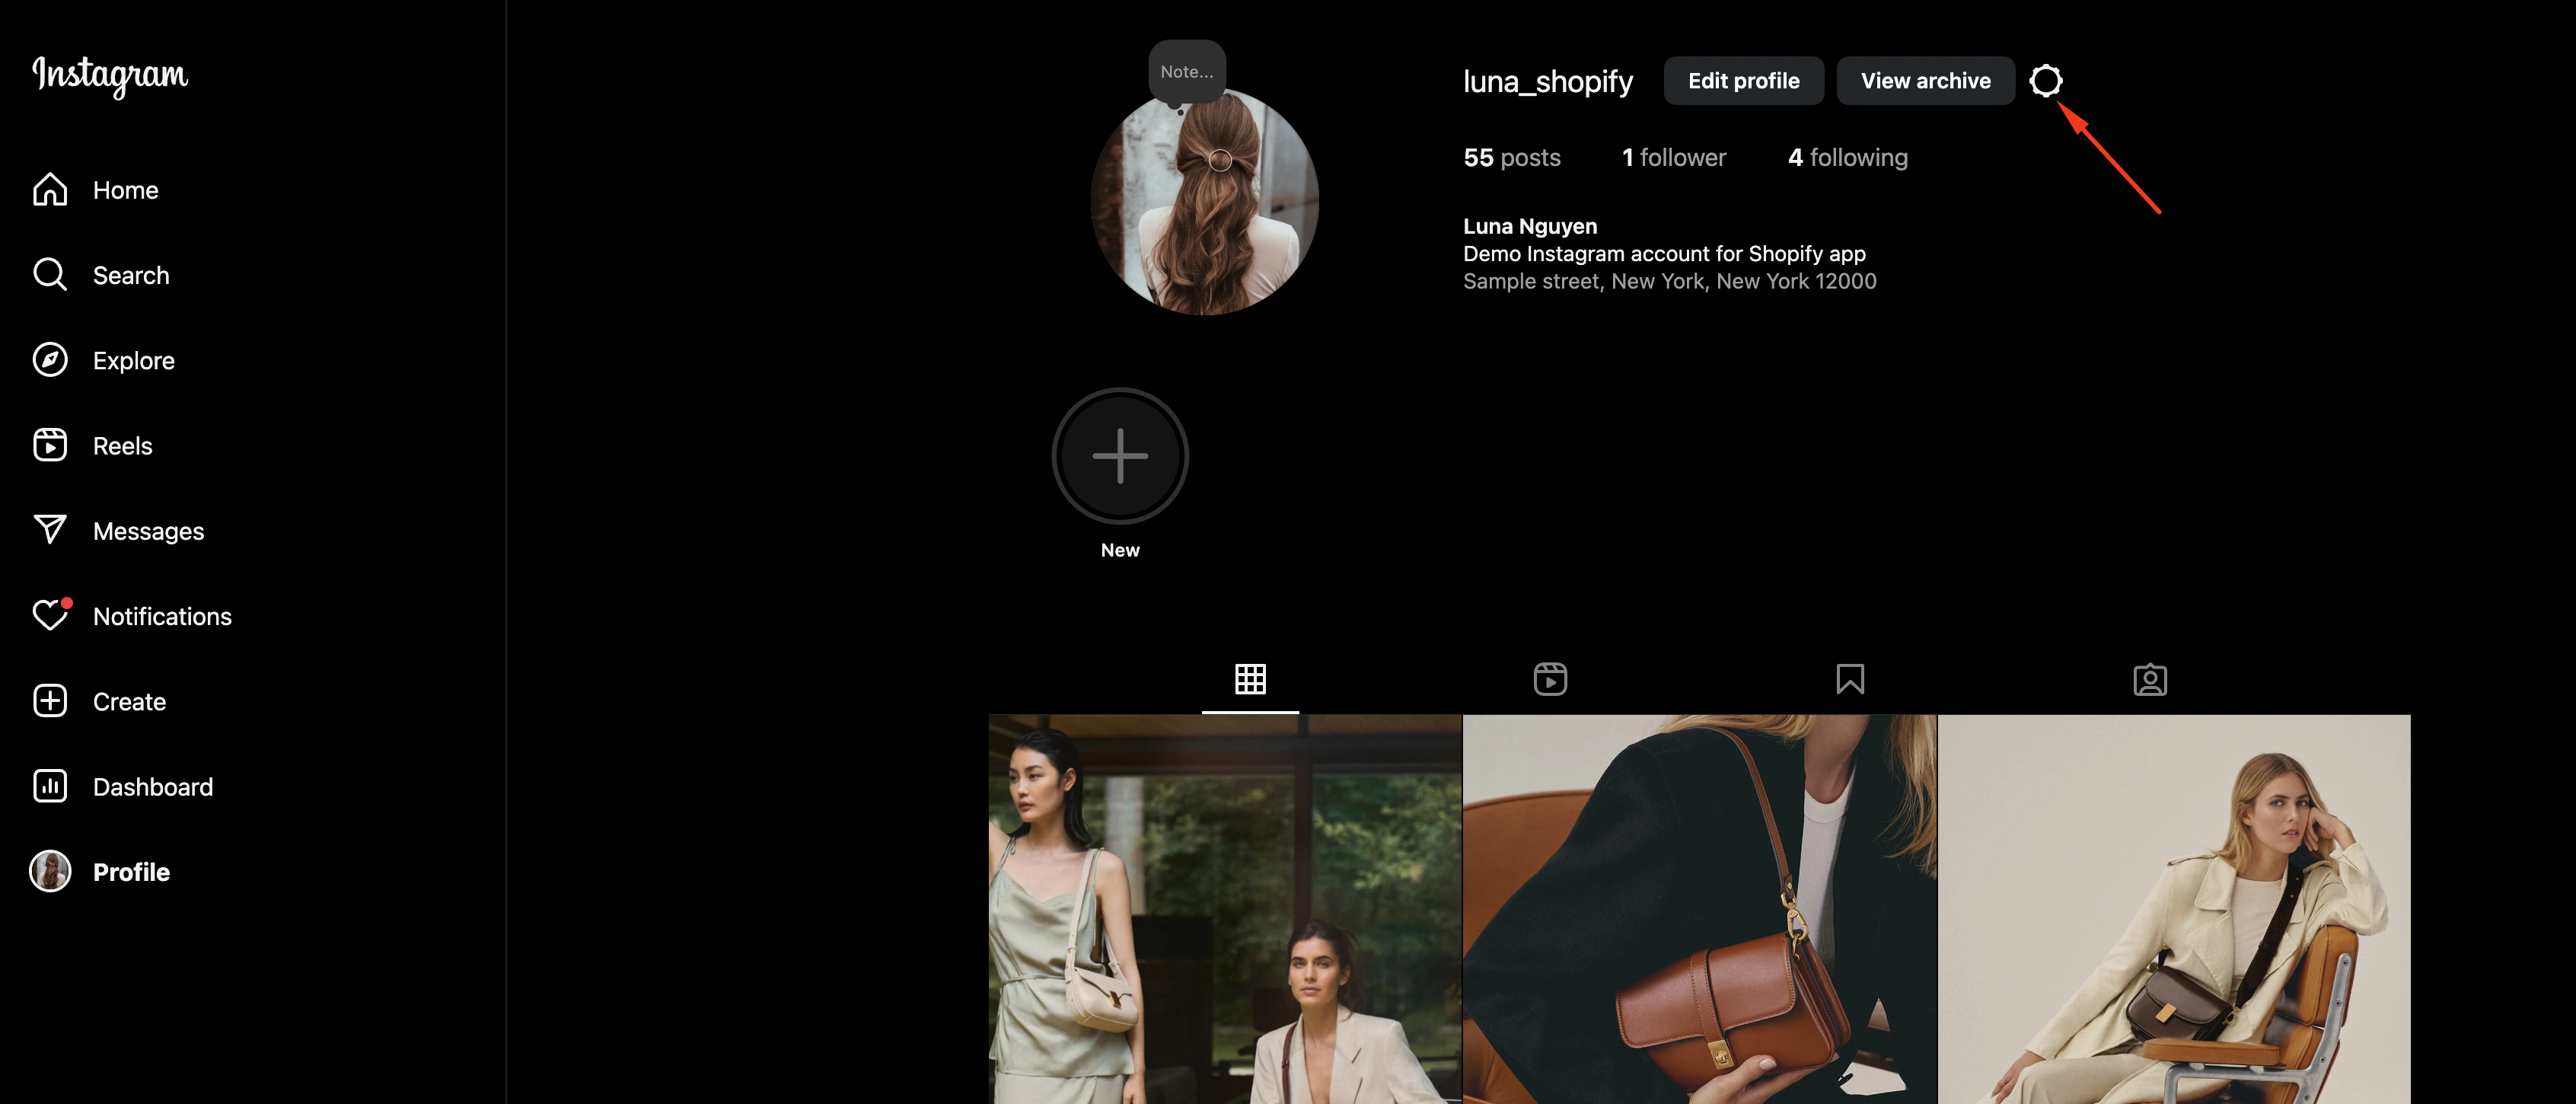
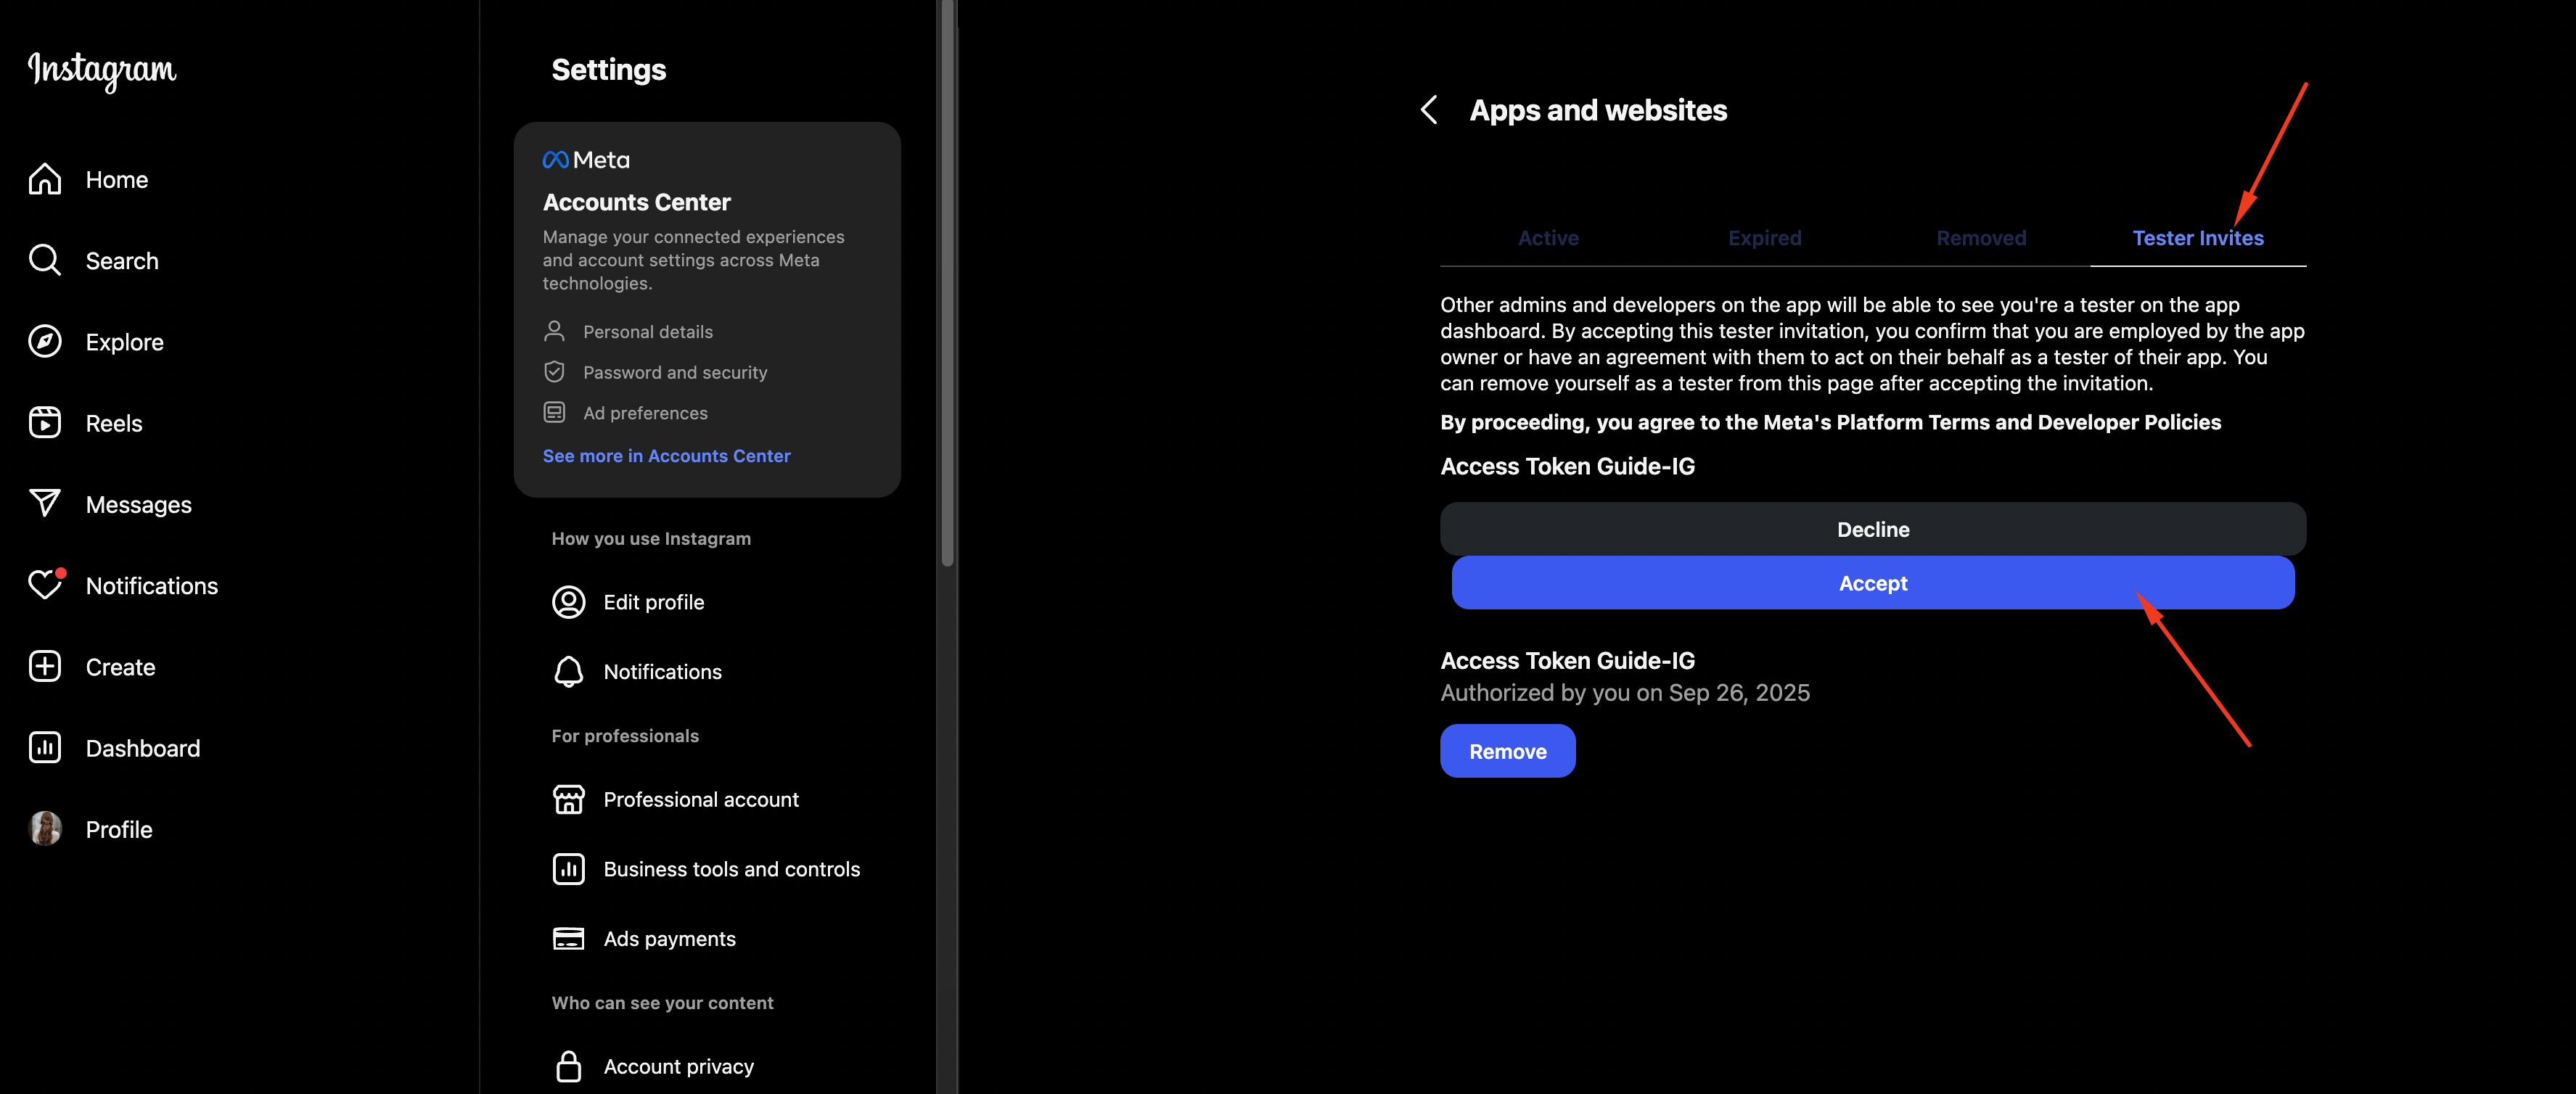
Open a new web browser tab, log in to your Instagram account. Open the Profile page, click on the “Settings” icon.
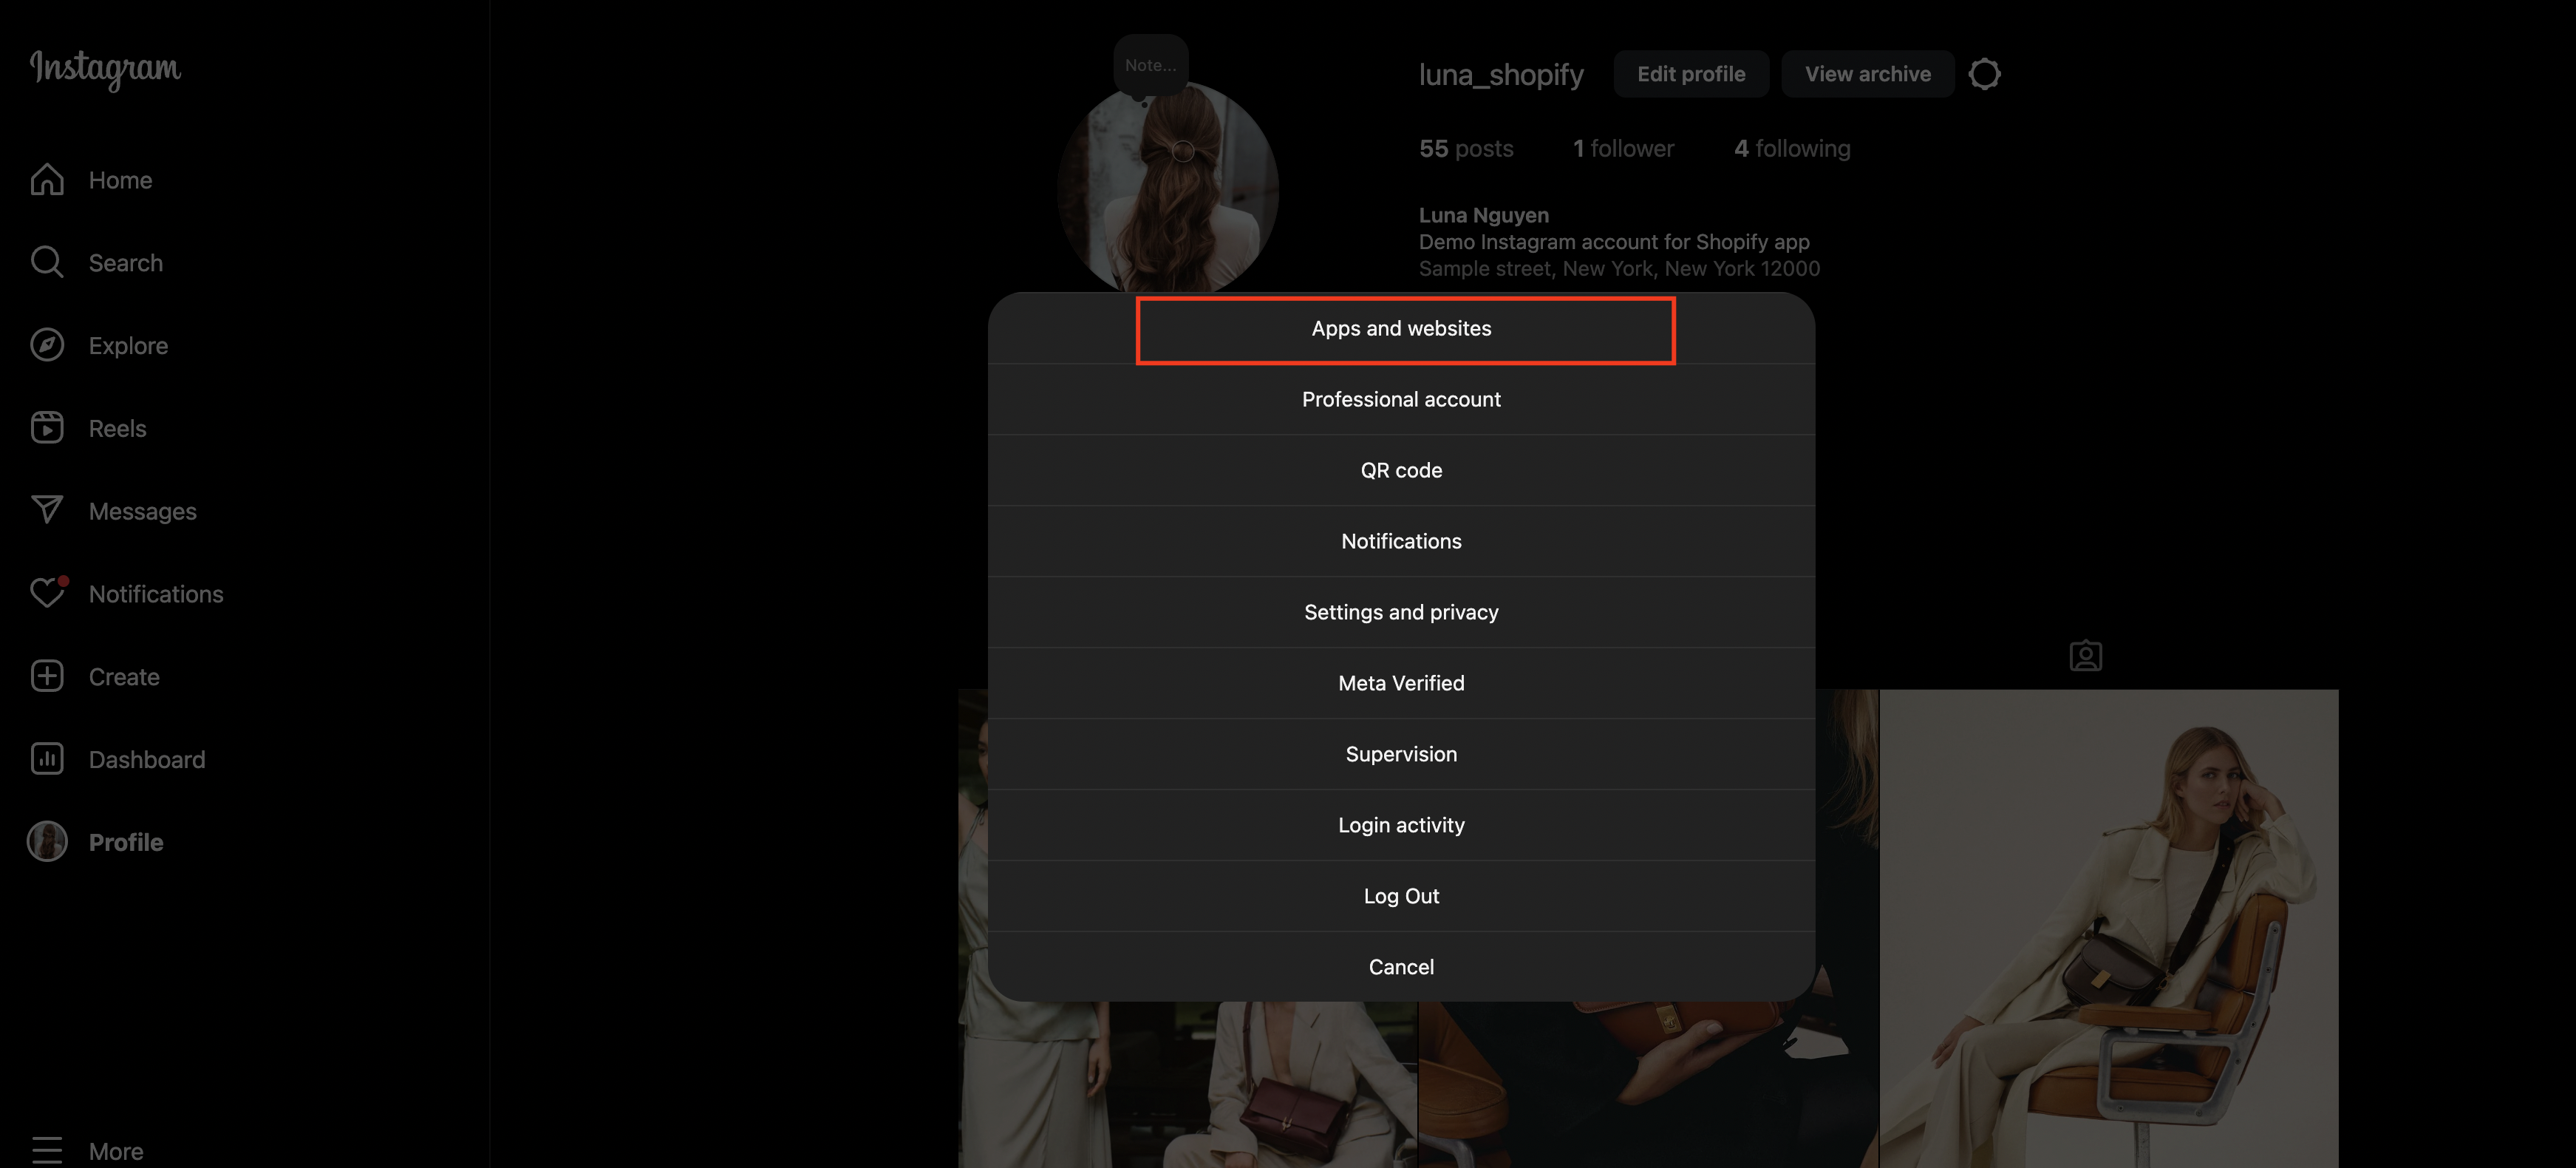
Select the “Apps and Websites” option.
Navigate to “Tester Invites” tab. Click on the “Accept” button.
STEP 5: Generate a short-lived User Access Token (for the tester)
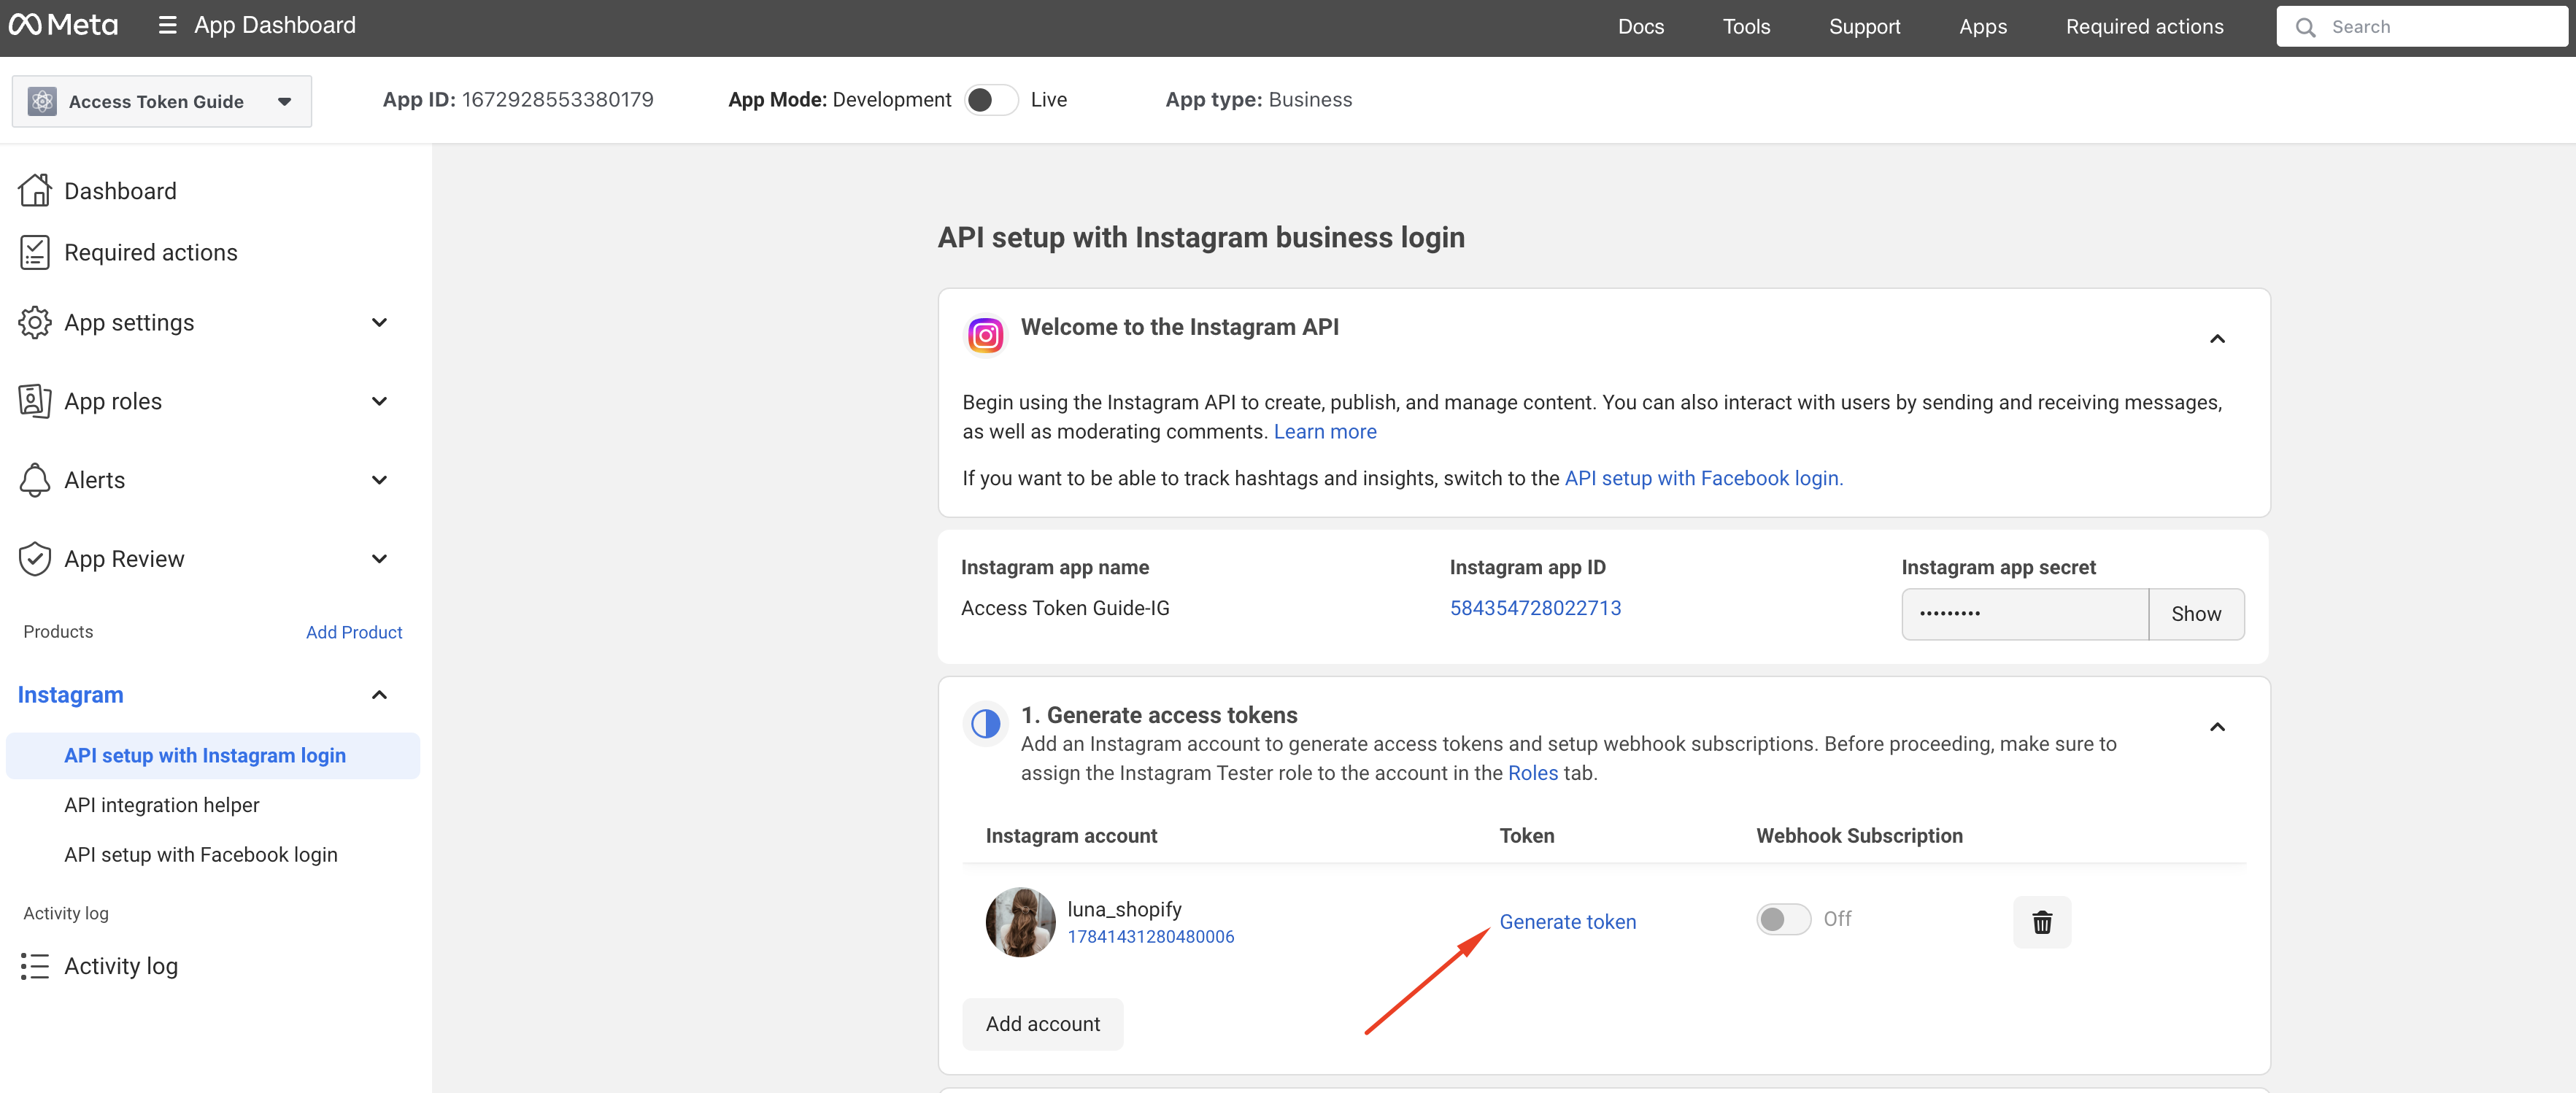
Back to the Meta Developer page. Navigate to “Instagram” → “API setup with Instagram login”. You will see your Instagram account on the list. Click on the “Generate token” link.
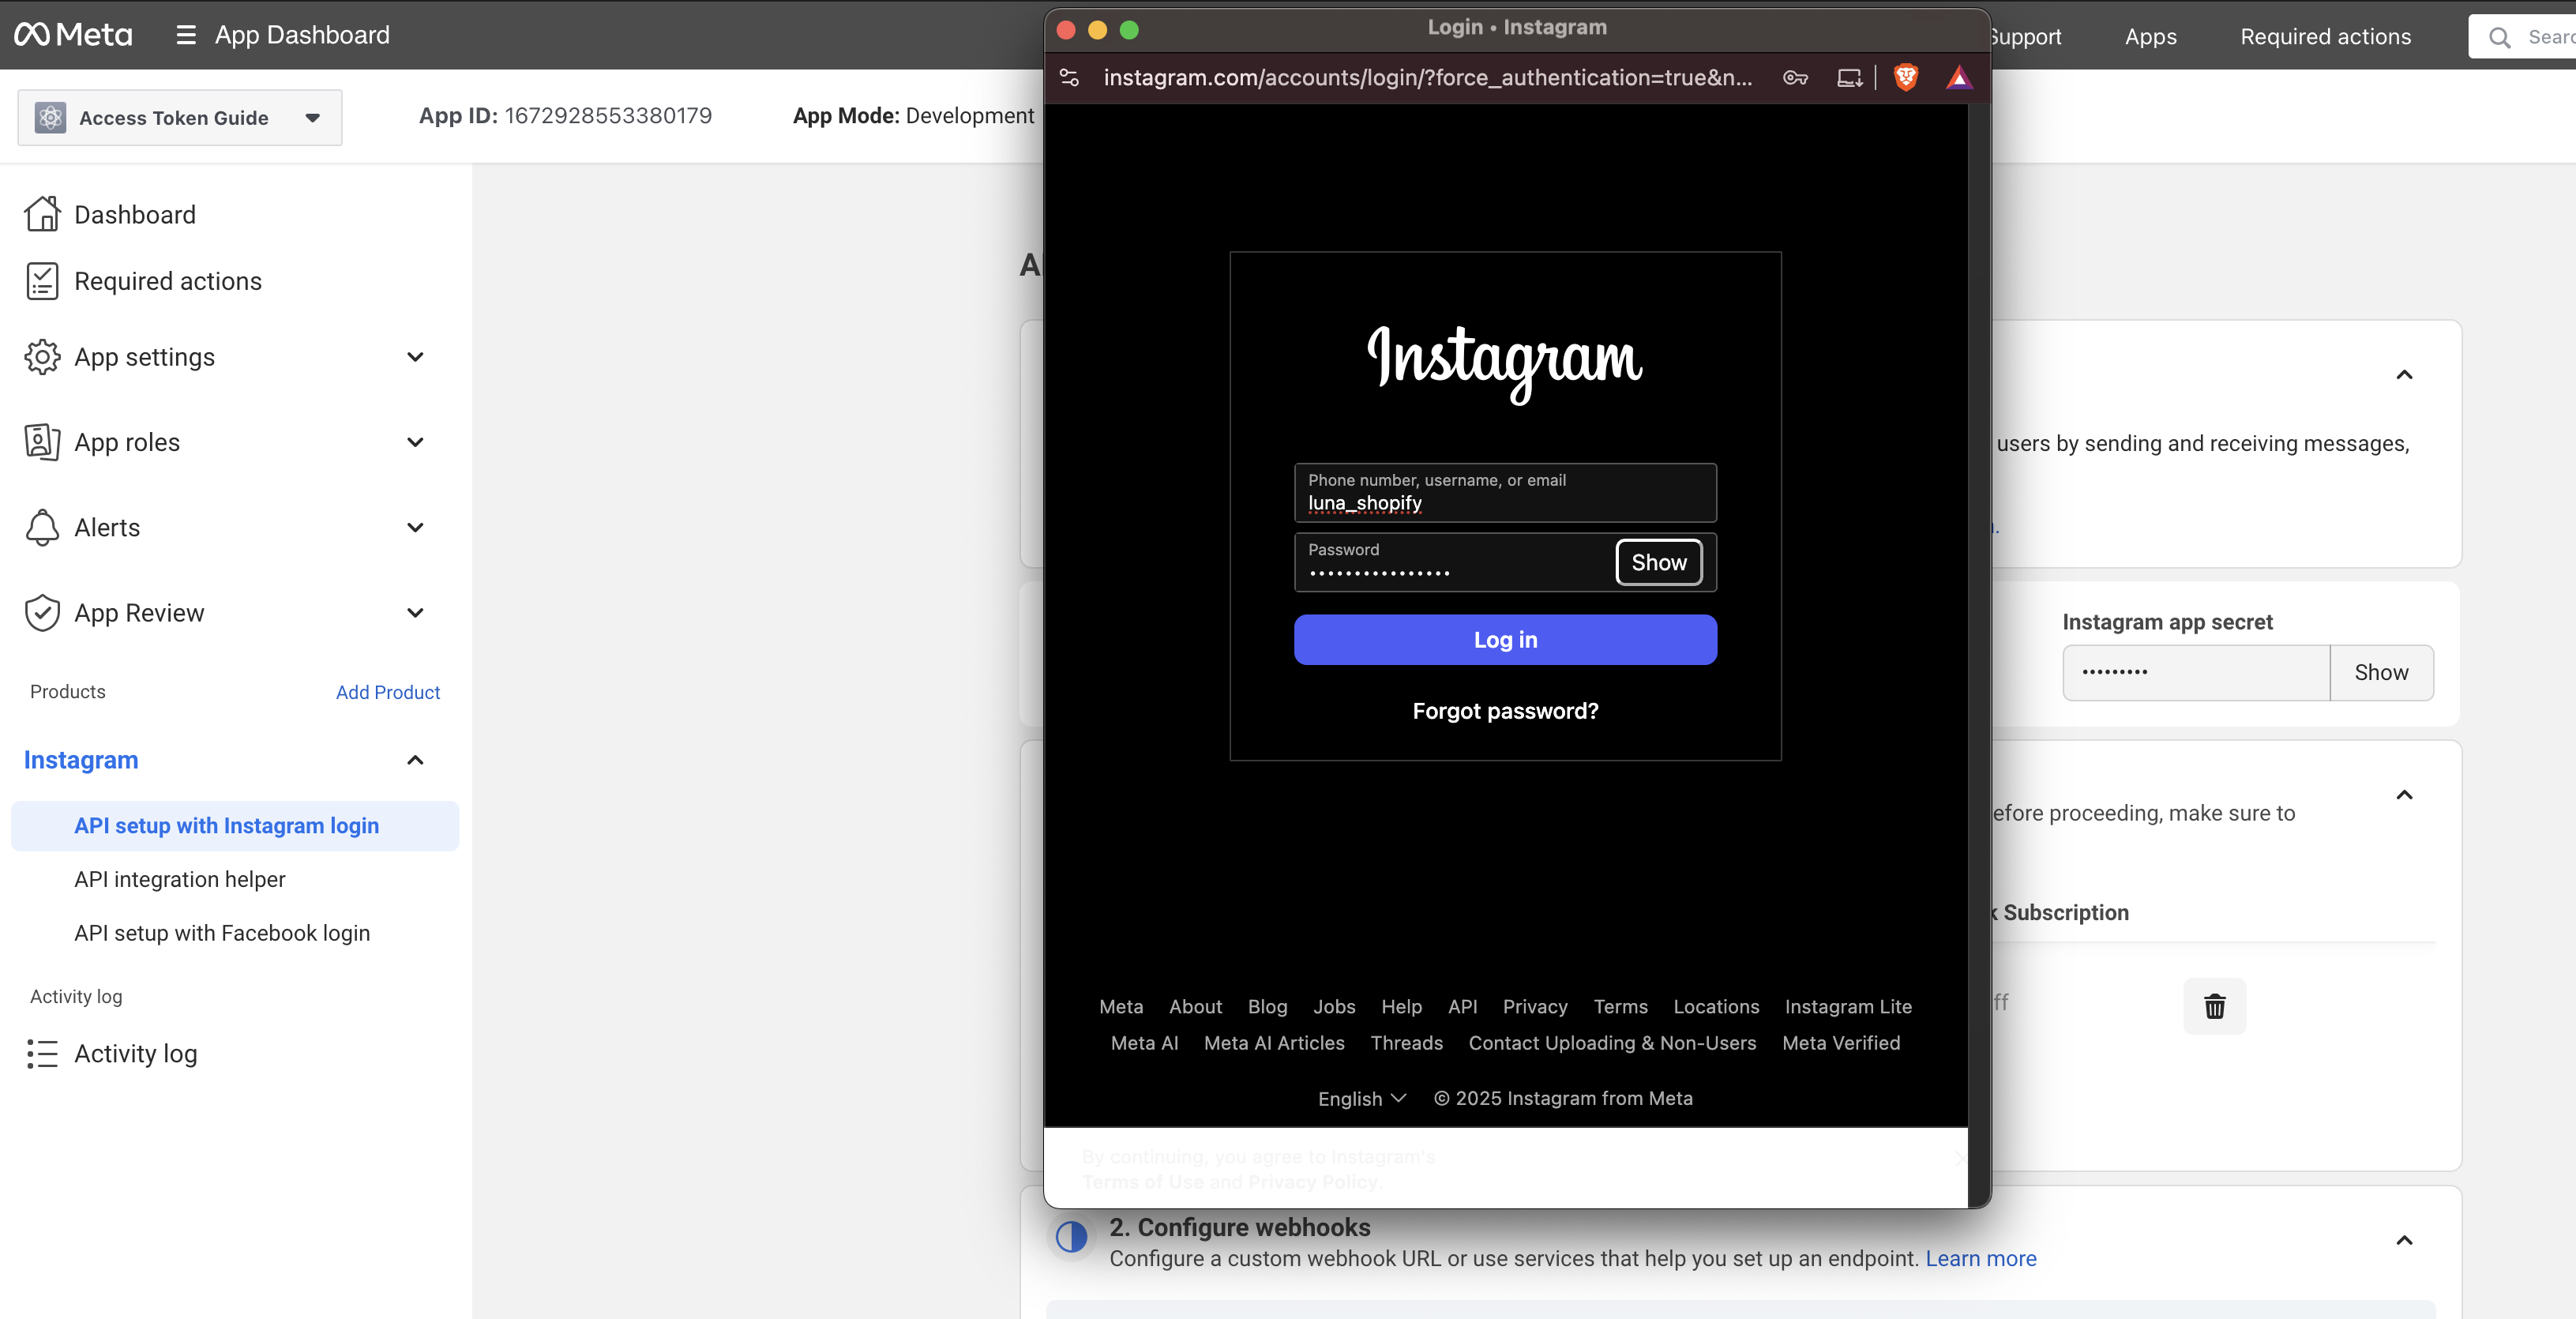
Log in with your Instagram account.
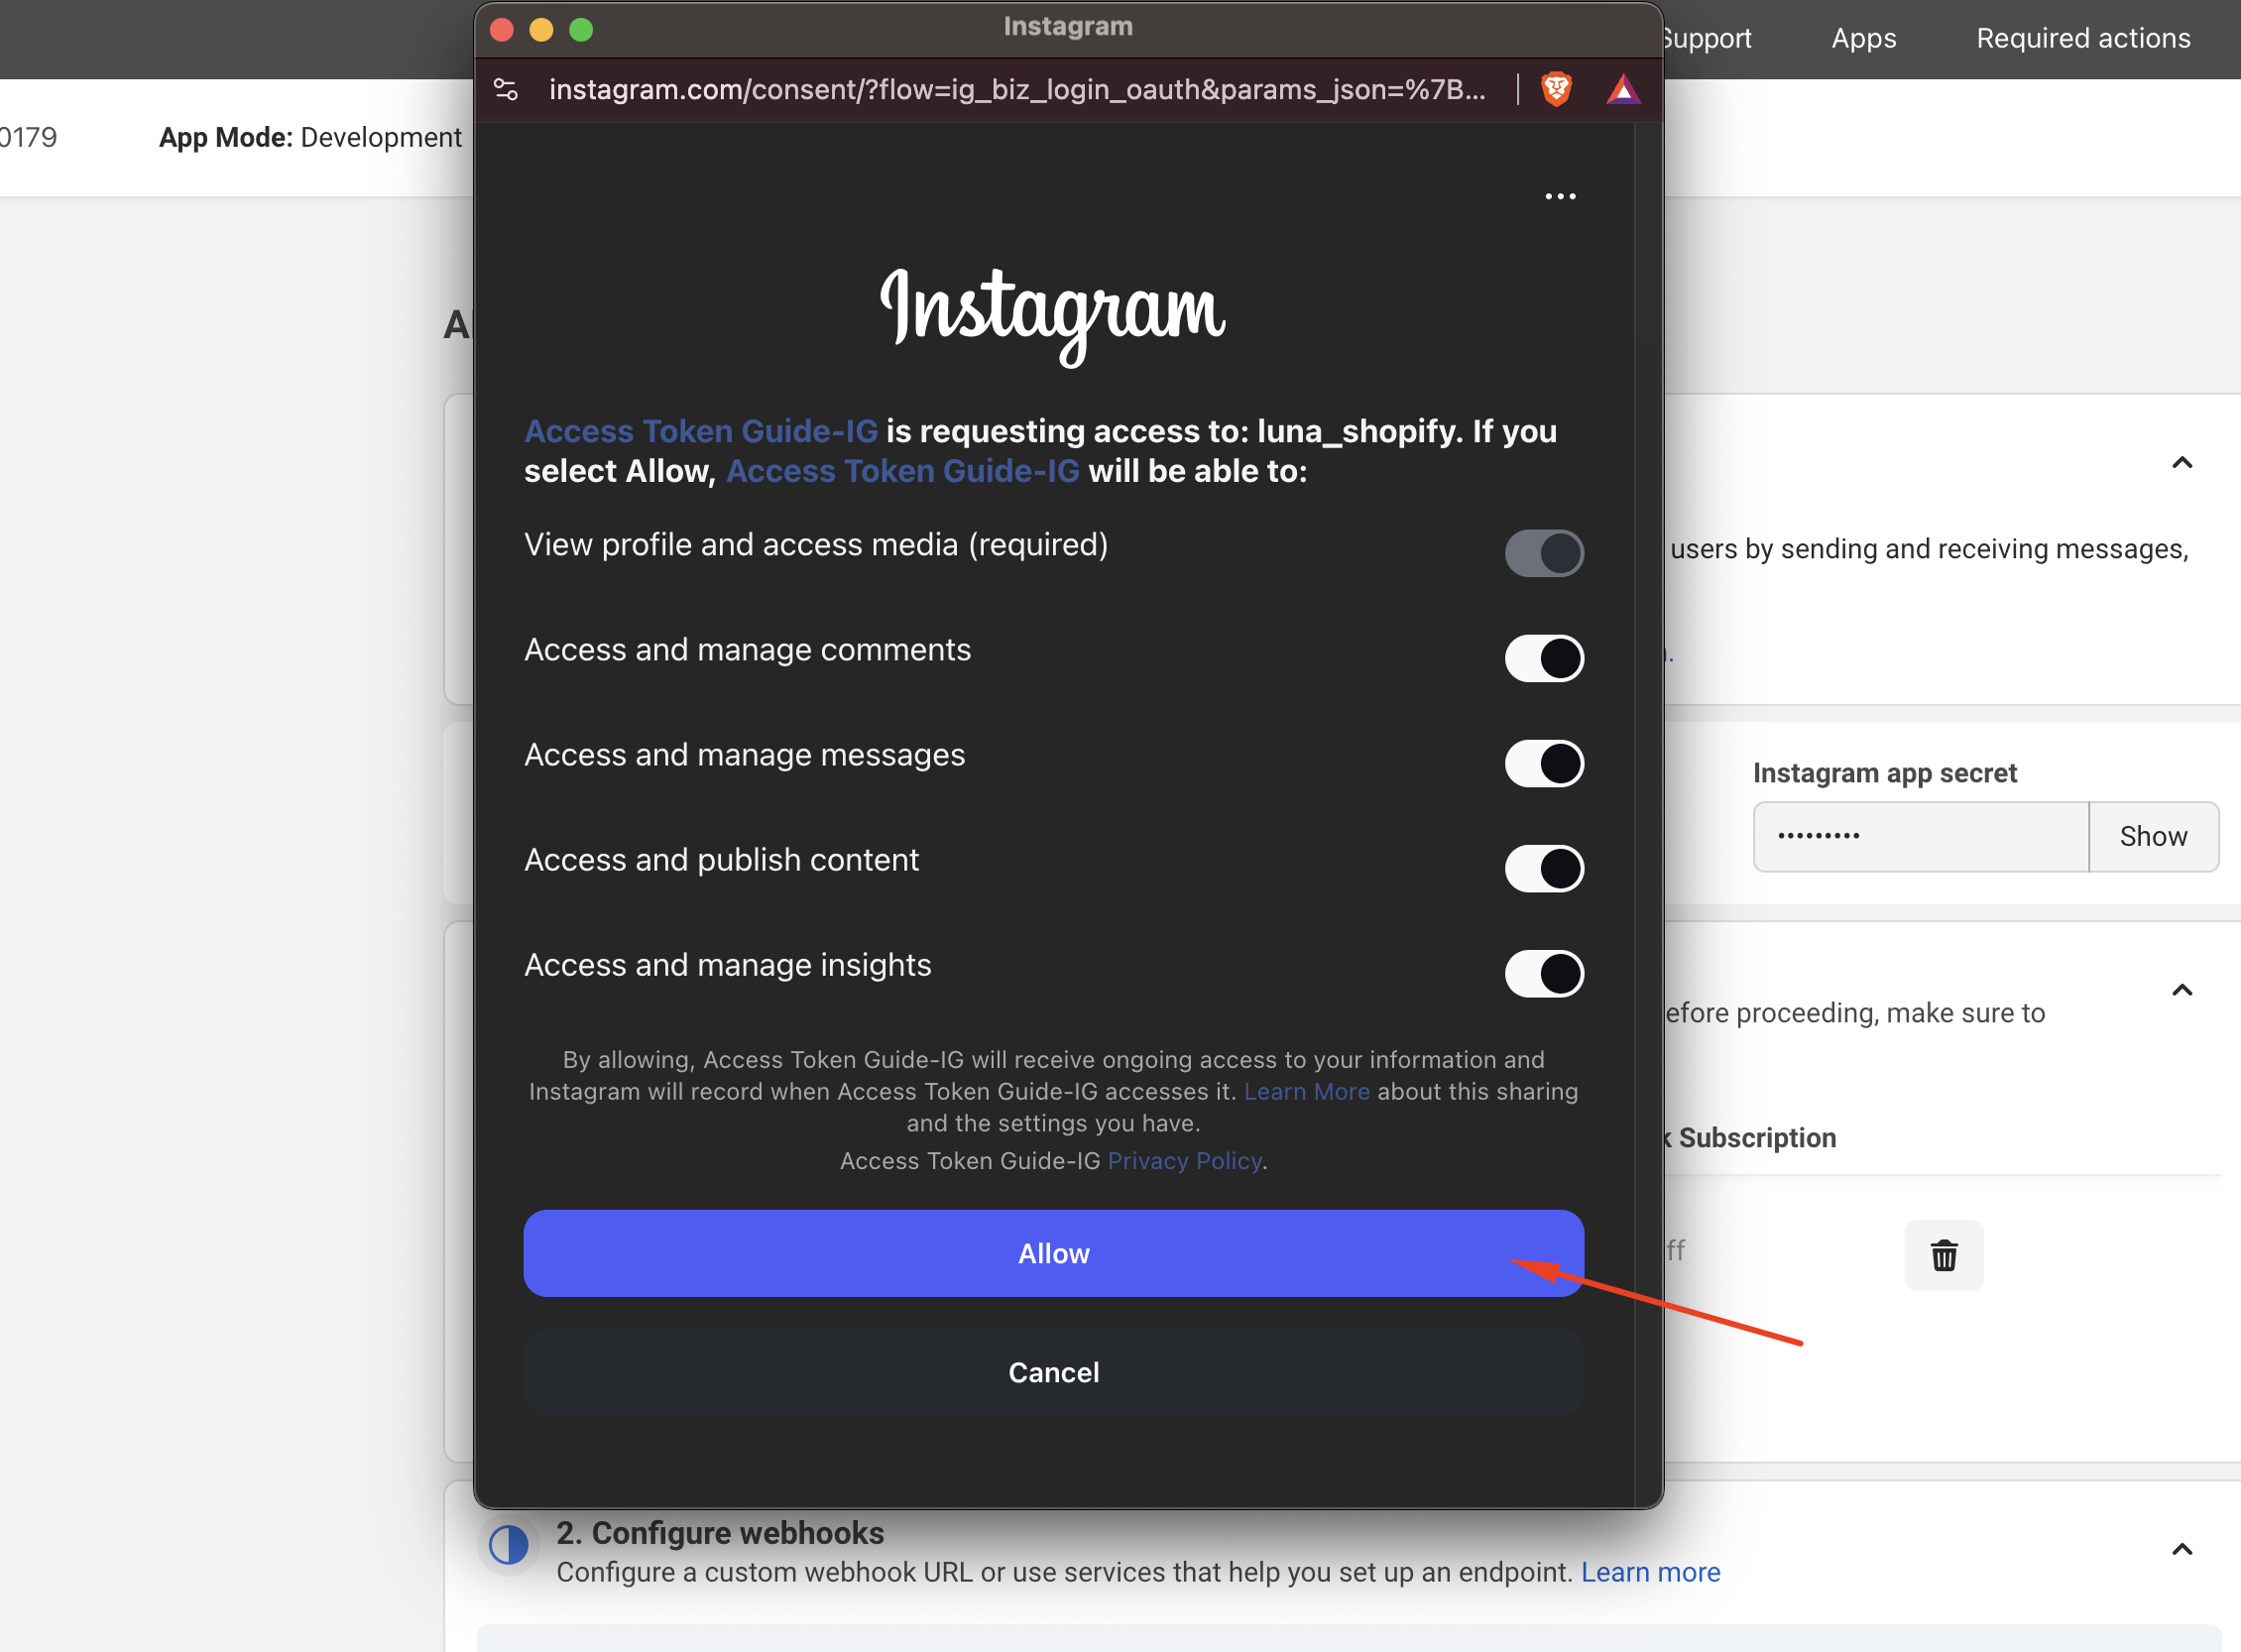
Click on the "Allow" button.
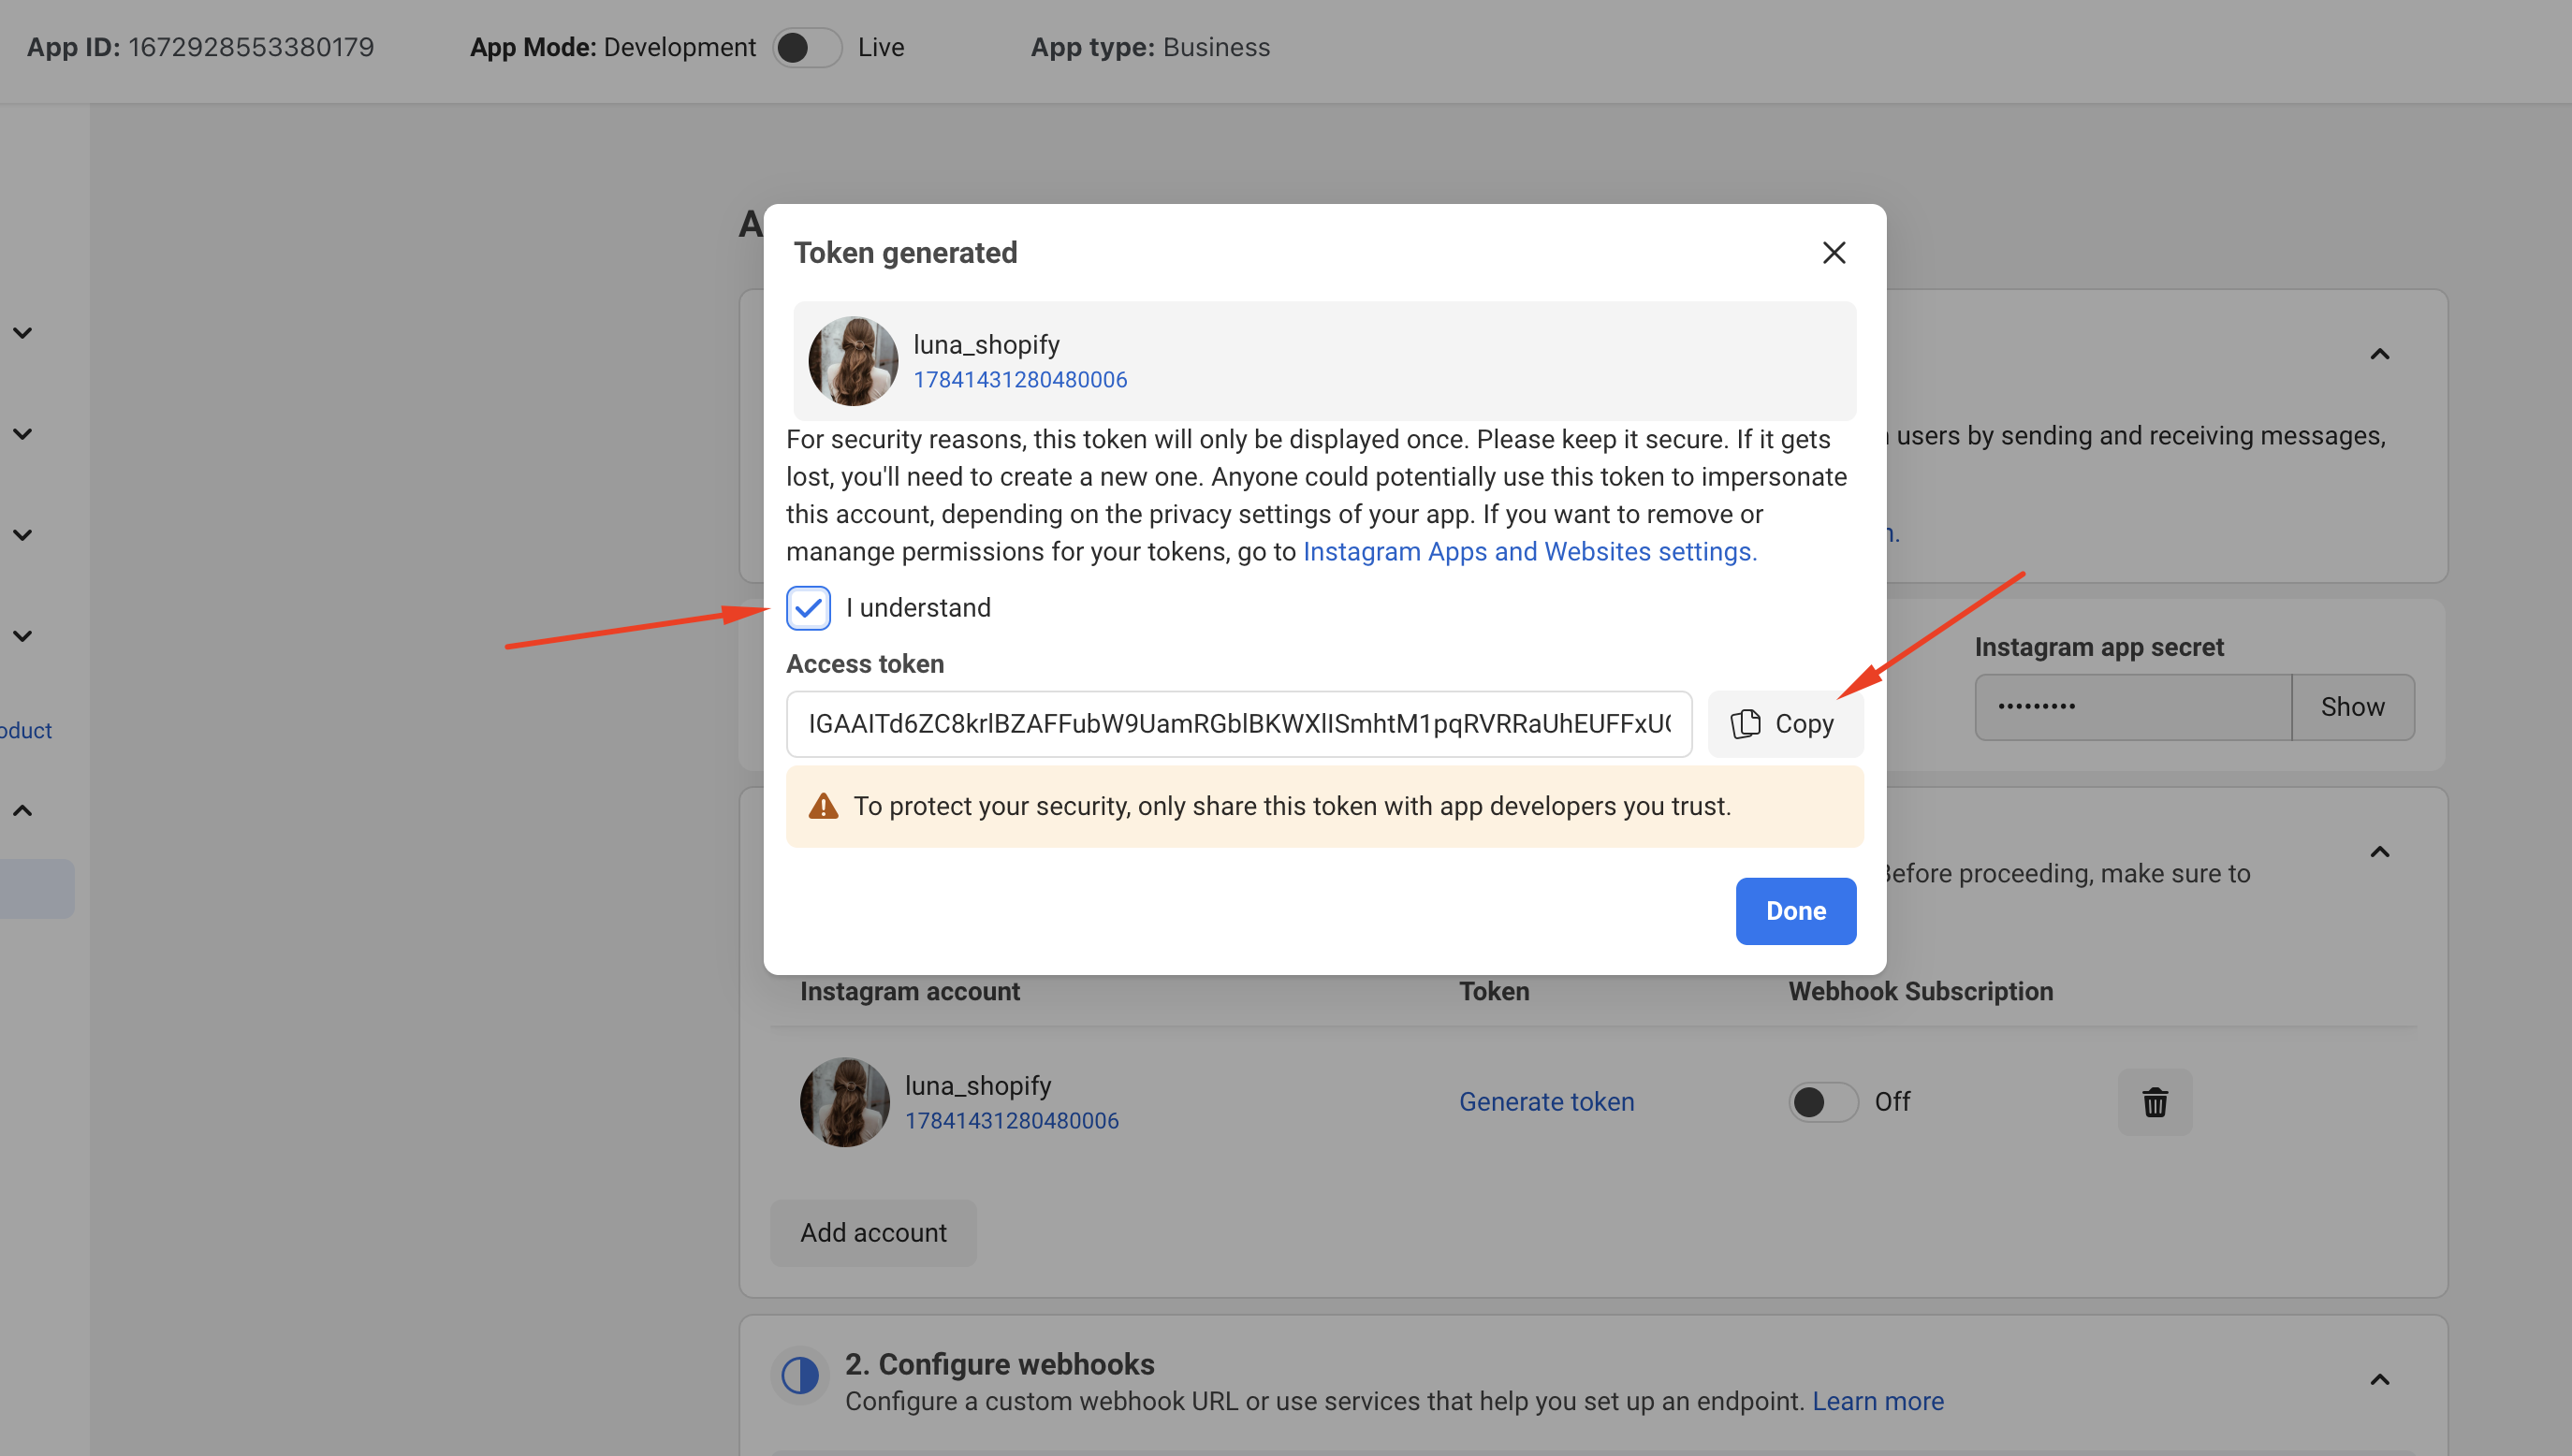
Tick on the “I understand” checkbox. Copy your Instagram Access Token.
