How to Display Social Login Buttons in Your PrestaShop Front Office
Social login buttons are a powerful tool to improve the user experience on your website by offering a seamless and quick way for customers to log in or register. By strategically placing social login buttons across your store, you can increase customer engagement, reduce abandonment rates, and make the login process hassle-free.
In this guide, we'll show you how to configure and display social login buttons in different positions on your PrestaShop store's front office using the SOCIAL LOGIN module.
Step-by-step guide to configure button positions
Step 1: Access the "Positions" menu
From your PrestaShop admin panel, navigate to the SOCIAL LOGIN module configuration page.
Select the “Positions” menu to access the available display options for social login buttons.
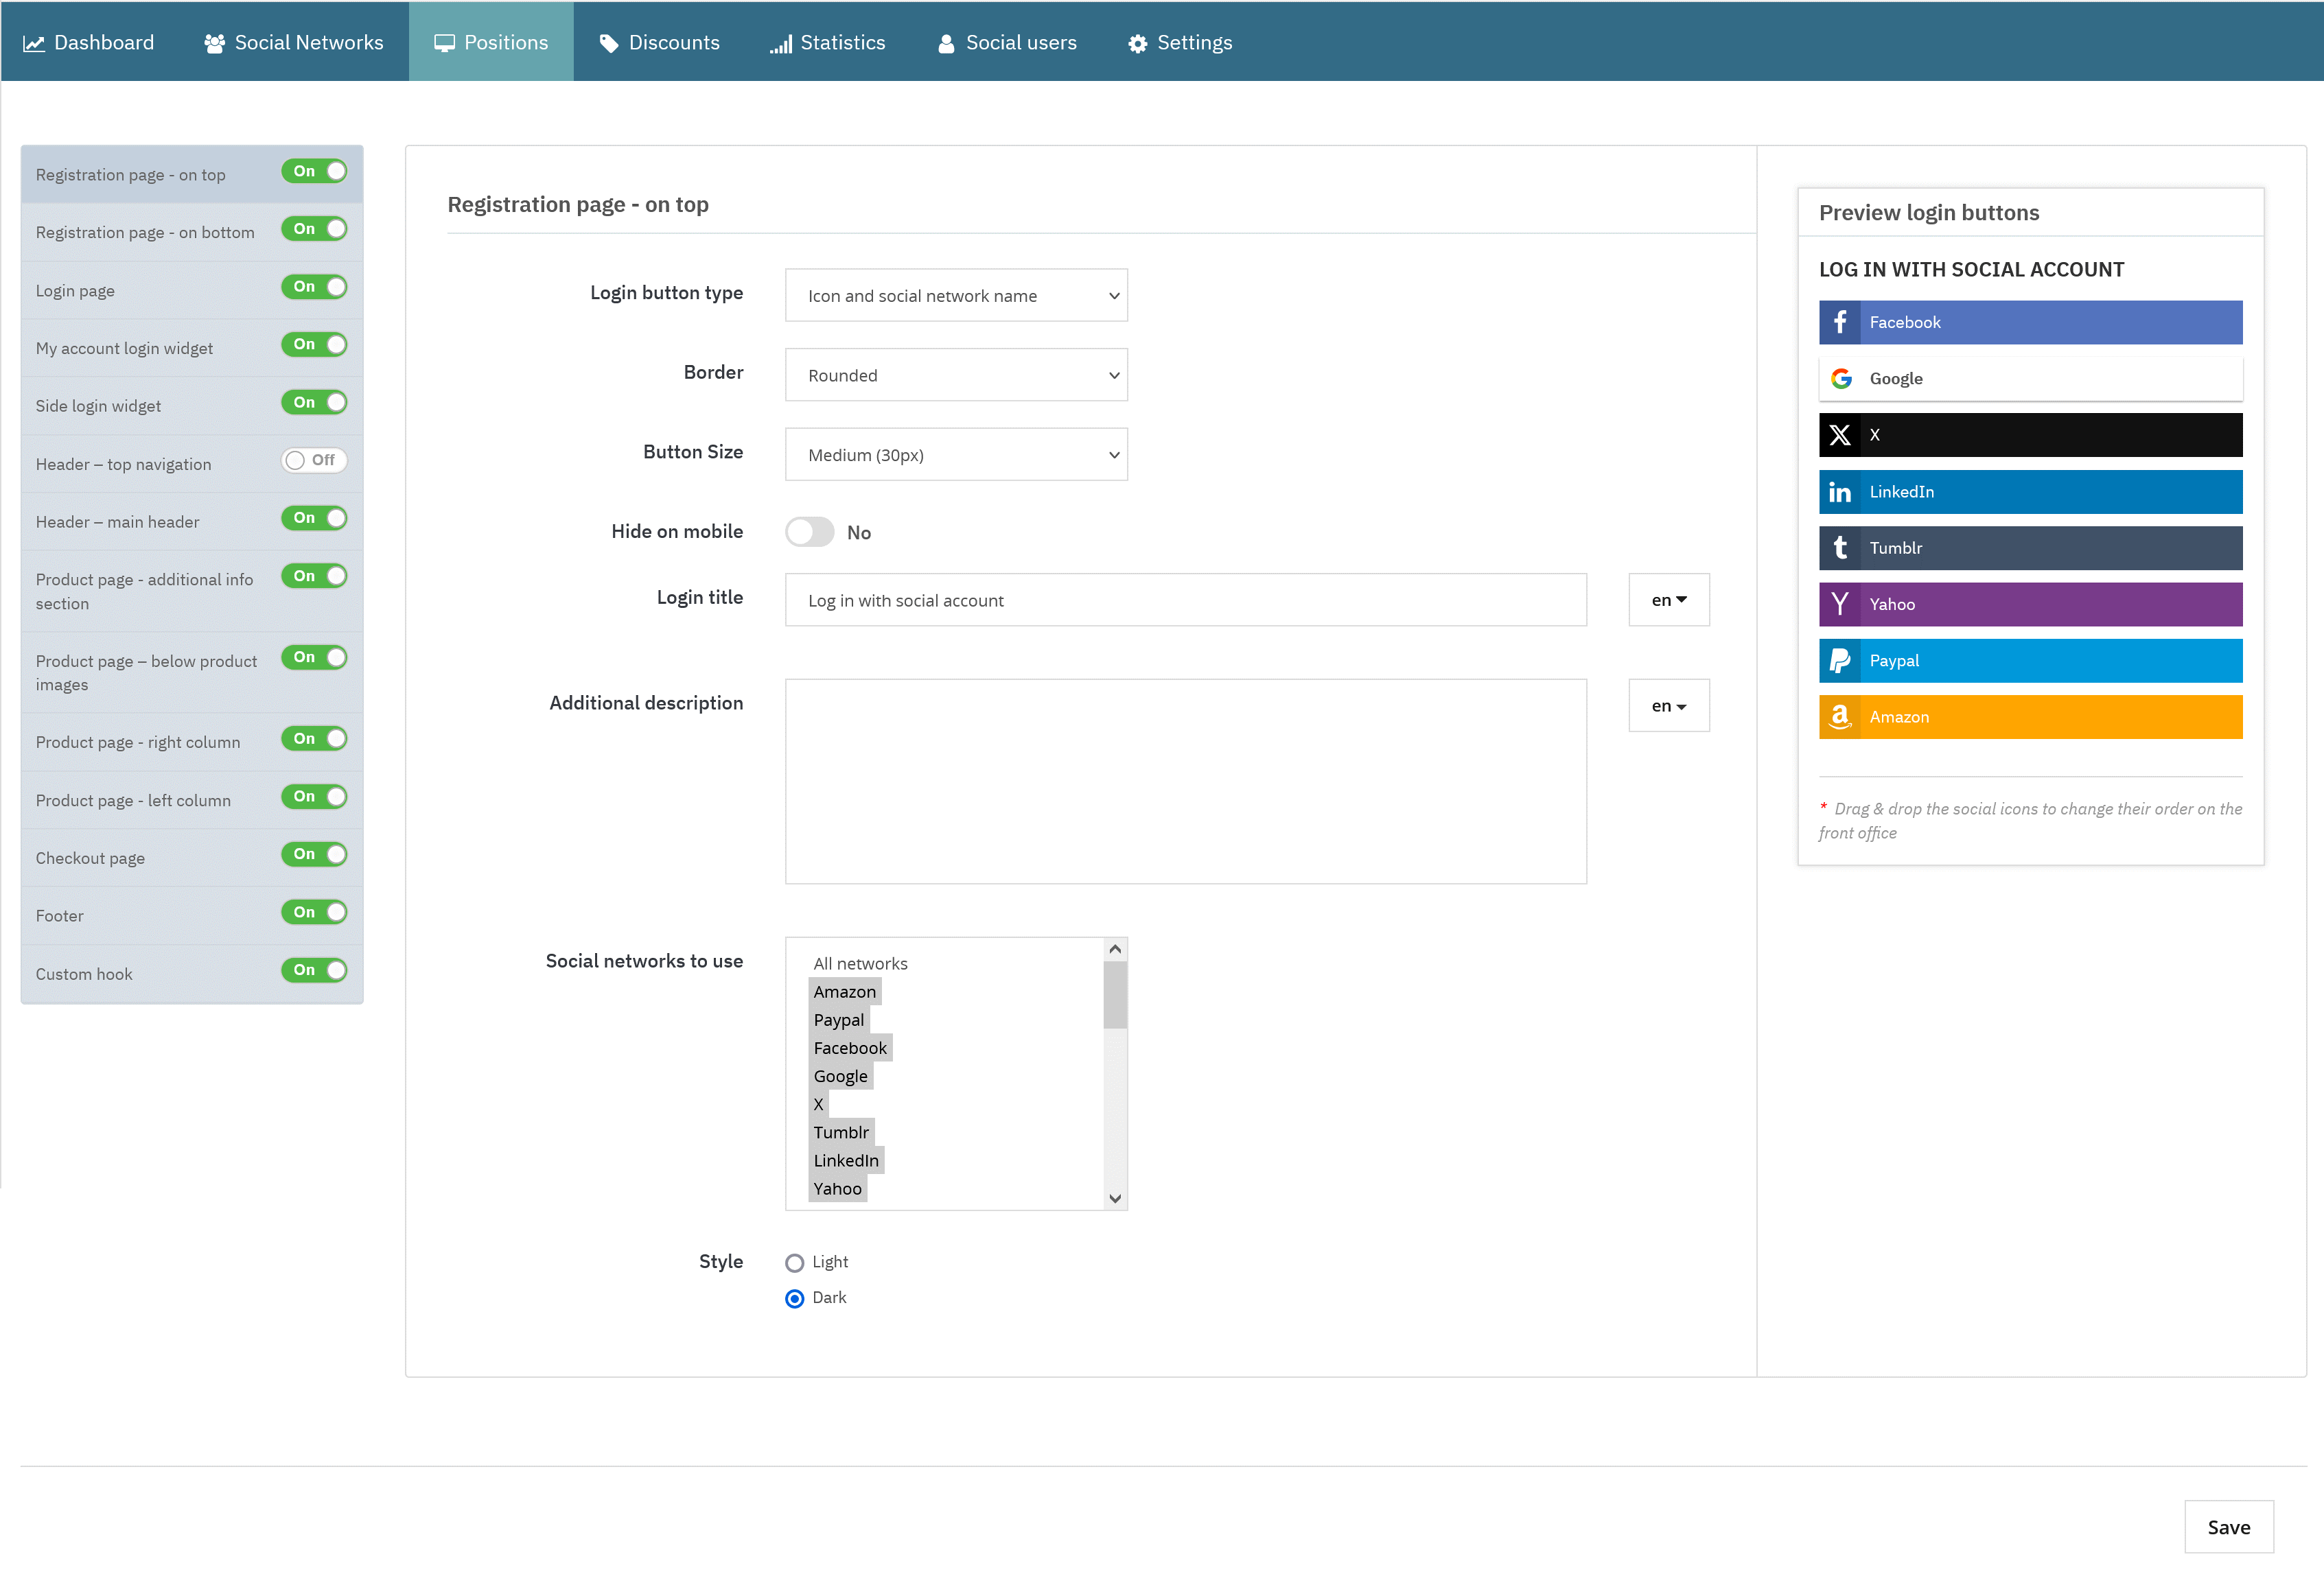
Step 2: Available button positions
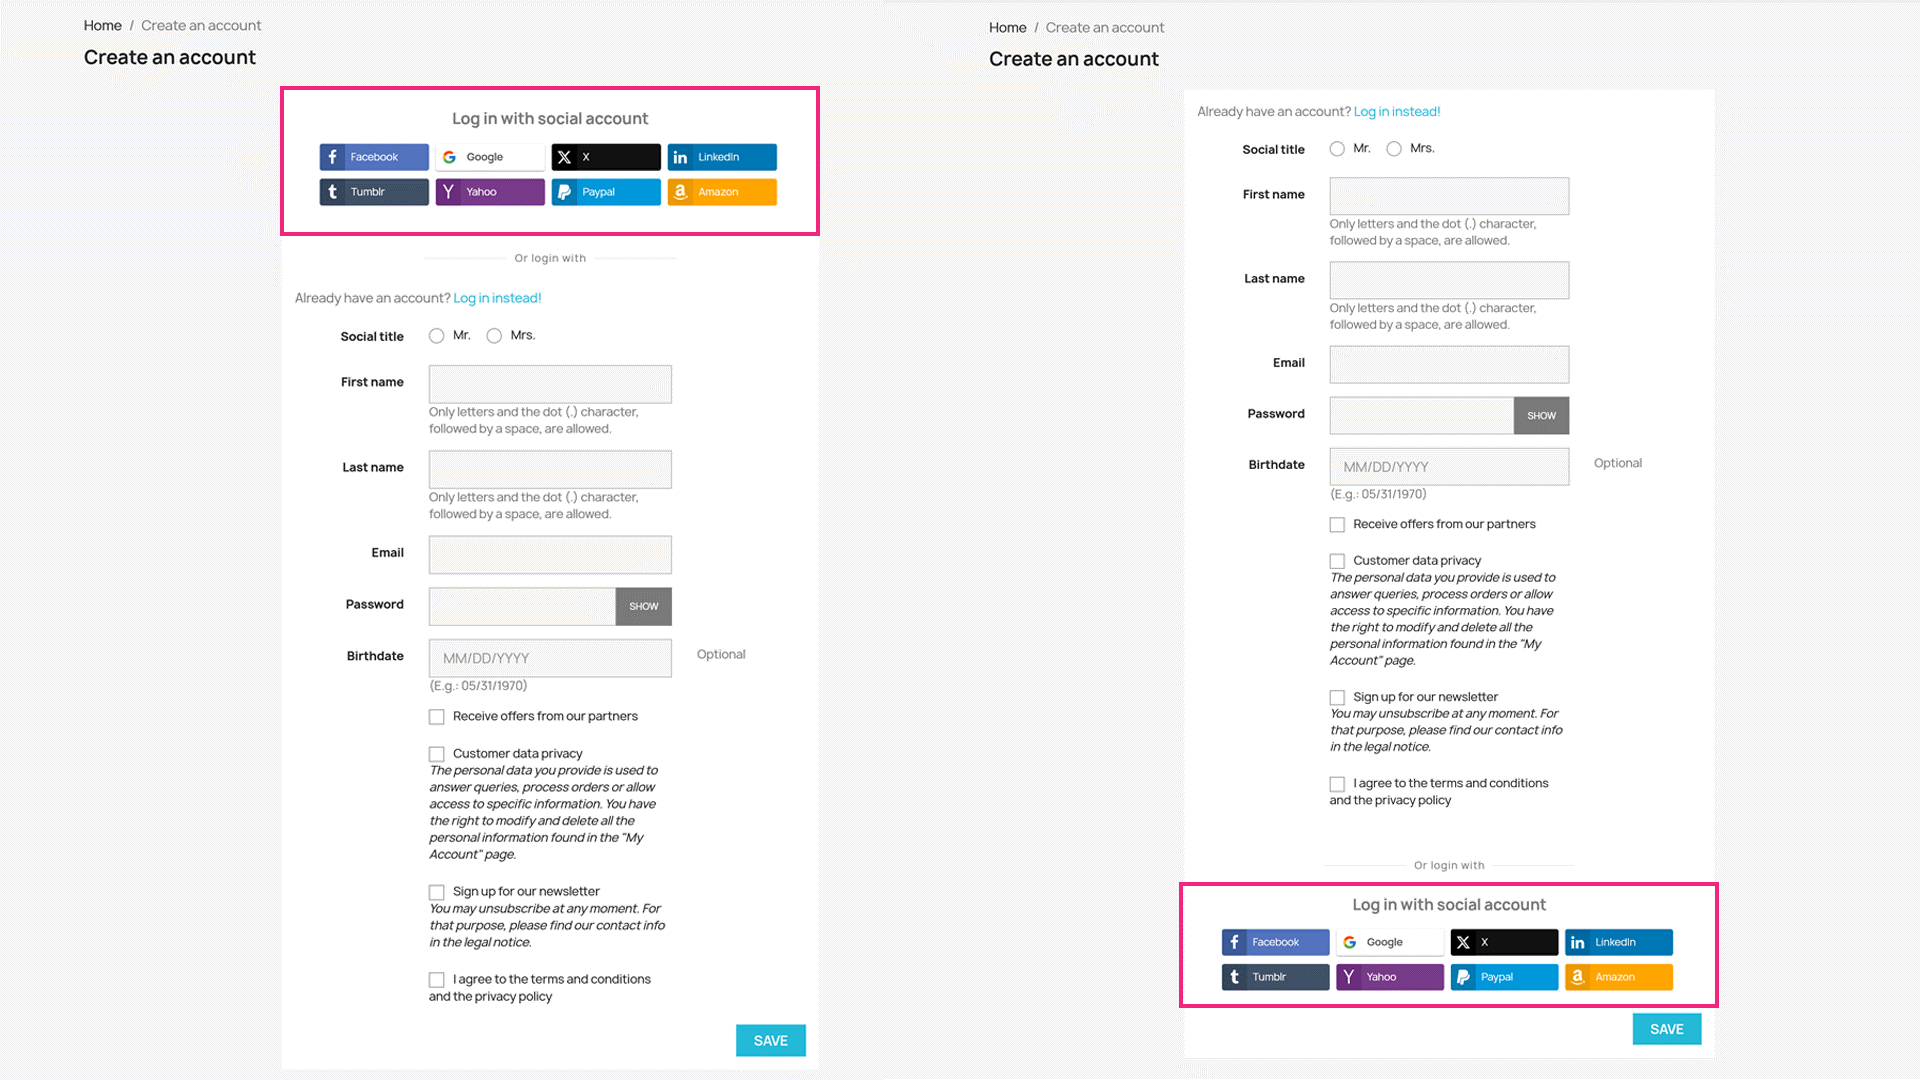
2.1. Registration page
You can display social login buttons at:
- The top of the registration page.
- The bottom of the registration page.
- Both the top and bottom of the registration page.
To enable a position:
- Toggle the switch next to your preferred position.
- Customize the display style of the social login buttons.
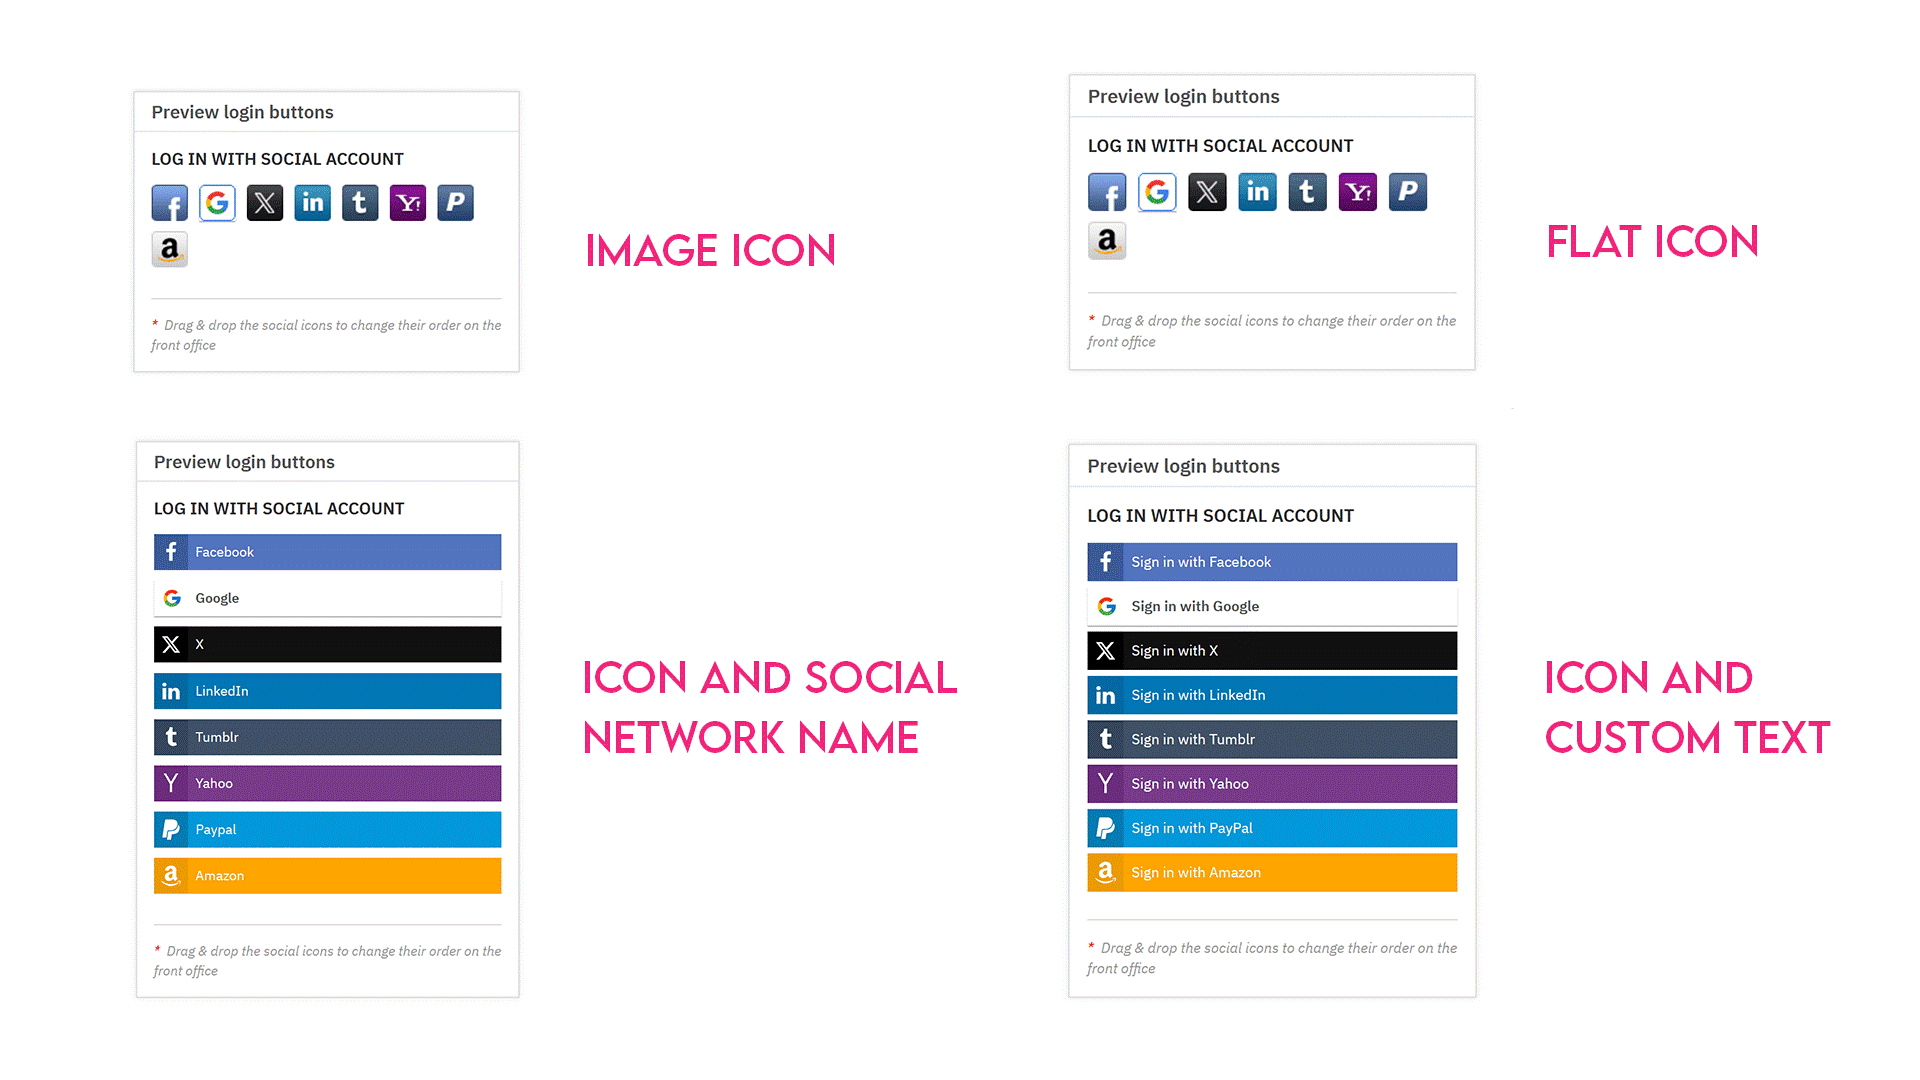
Customization options:
Button types:
- Image icon
- Flat icon
- Icon & social network name
- Icon & custom text
Button sizes:
- Small (24 x 24 pixels)
- Medium (30 x 30 pixels)
- Large (45 x 45 pixels)
You can also drag and drop the social icons in the preview panel to rearrange their order as they appear in the front office.
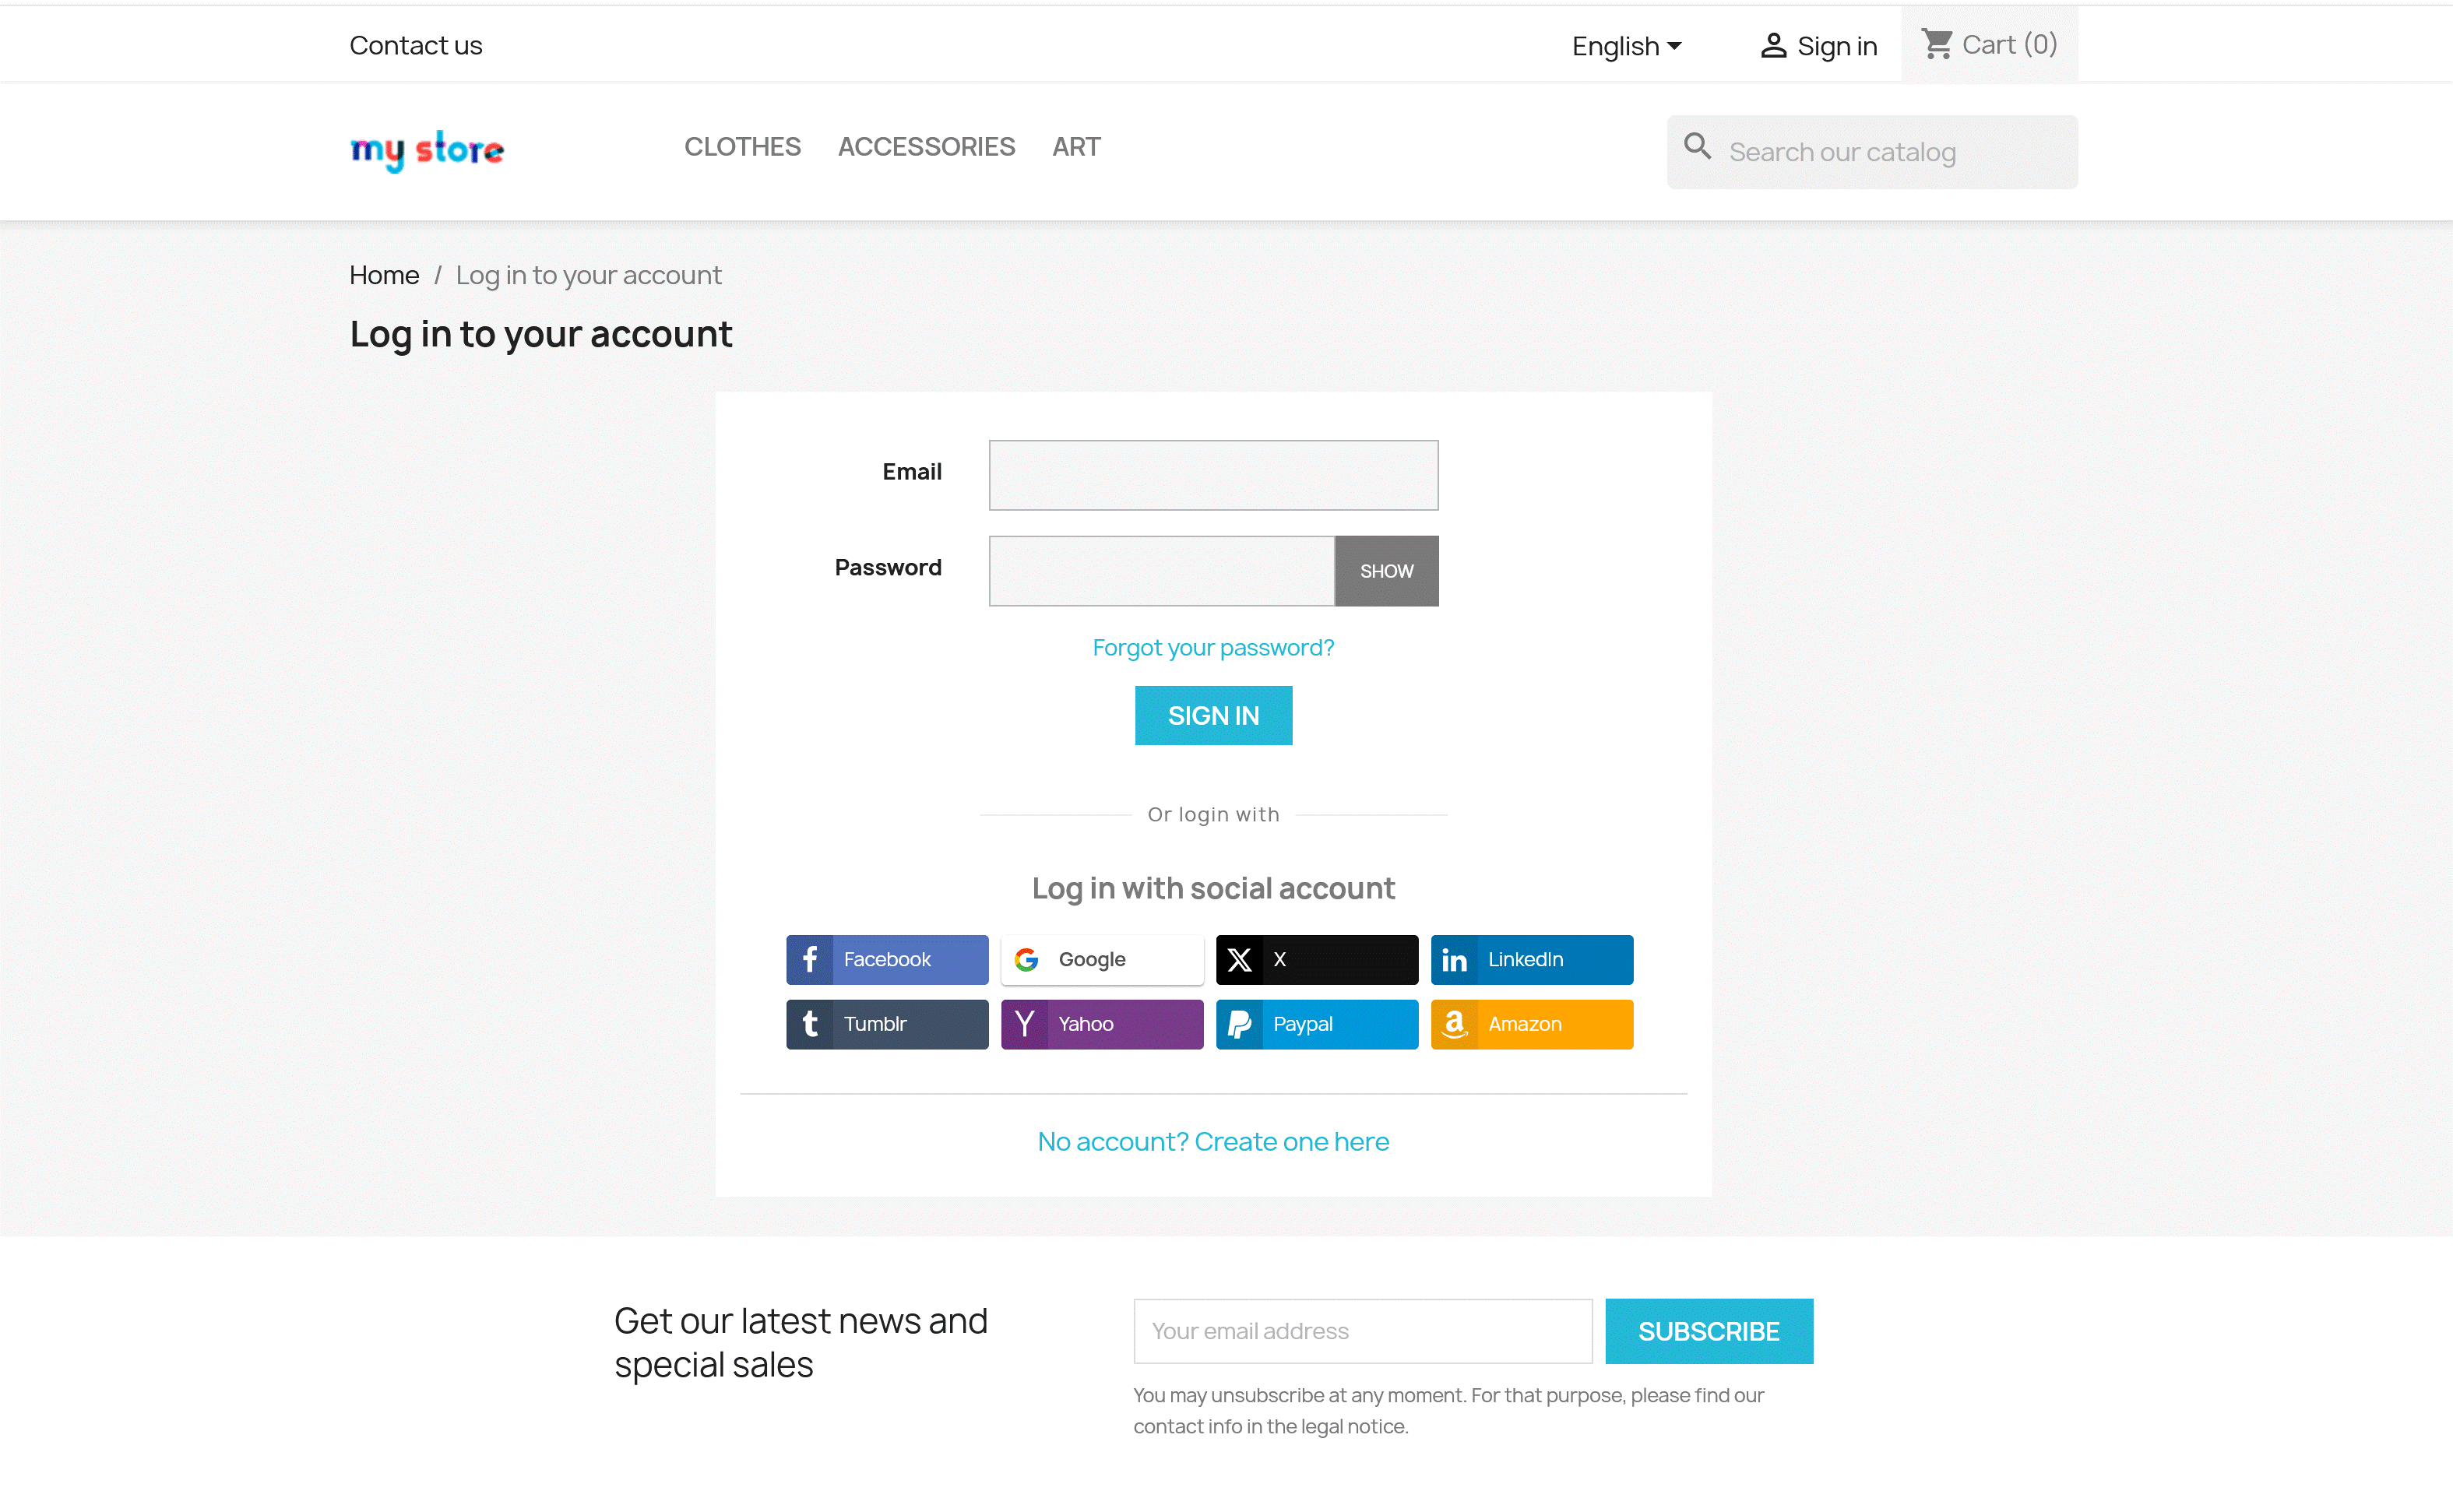
2.2. Login page
Similar to the registration page, you can configure how social login buttons will appear on the login page. Adjust positions and styles to align with your store’s design.
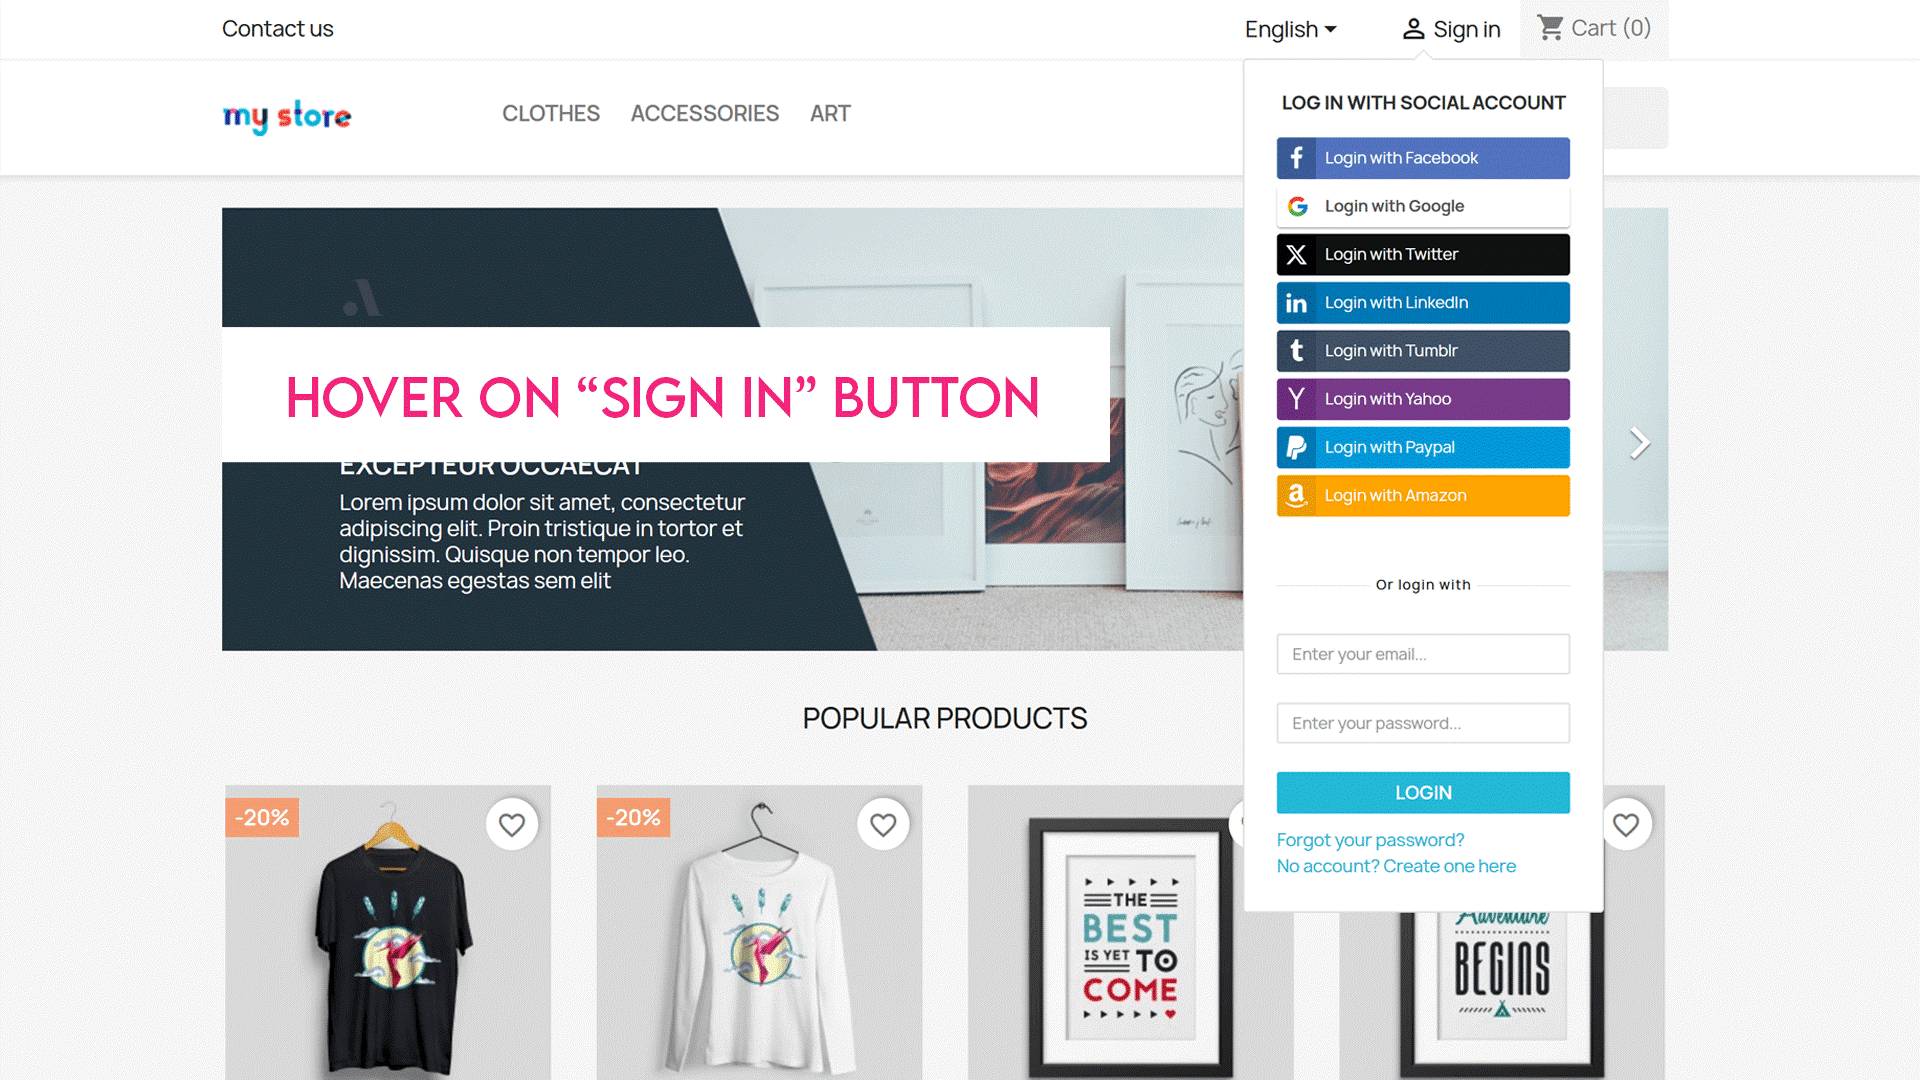
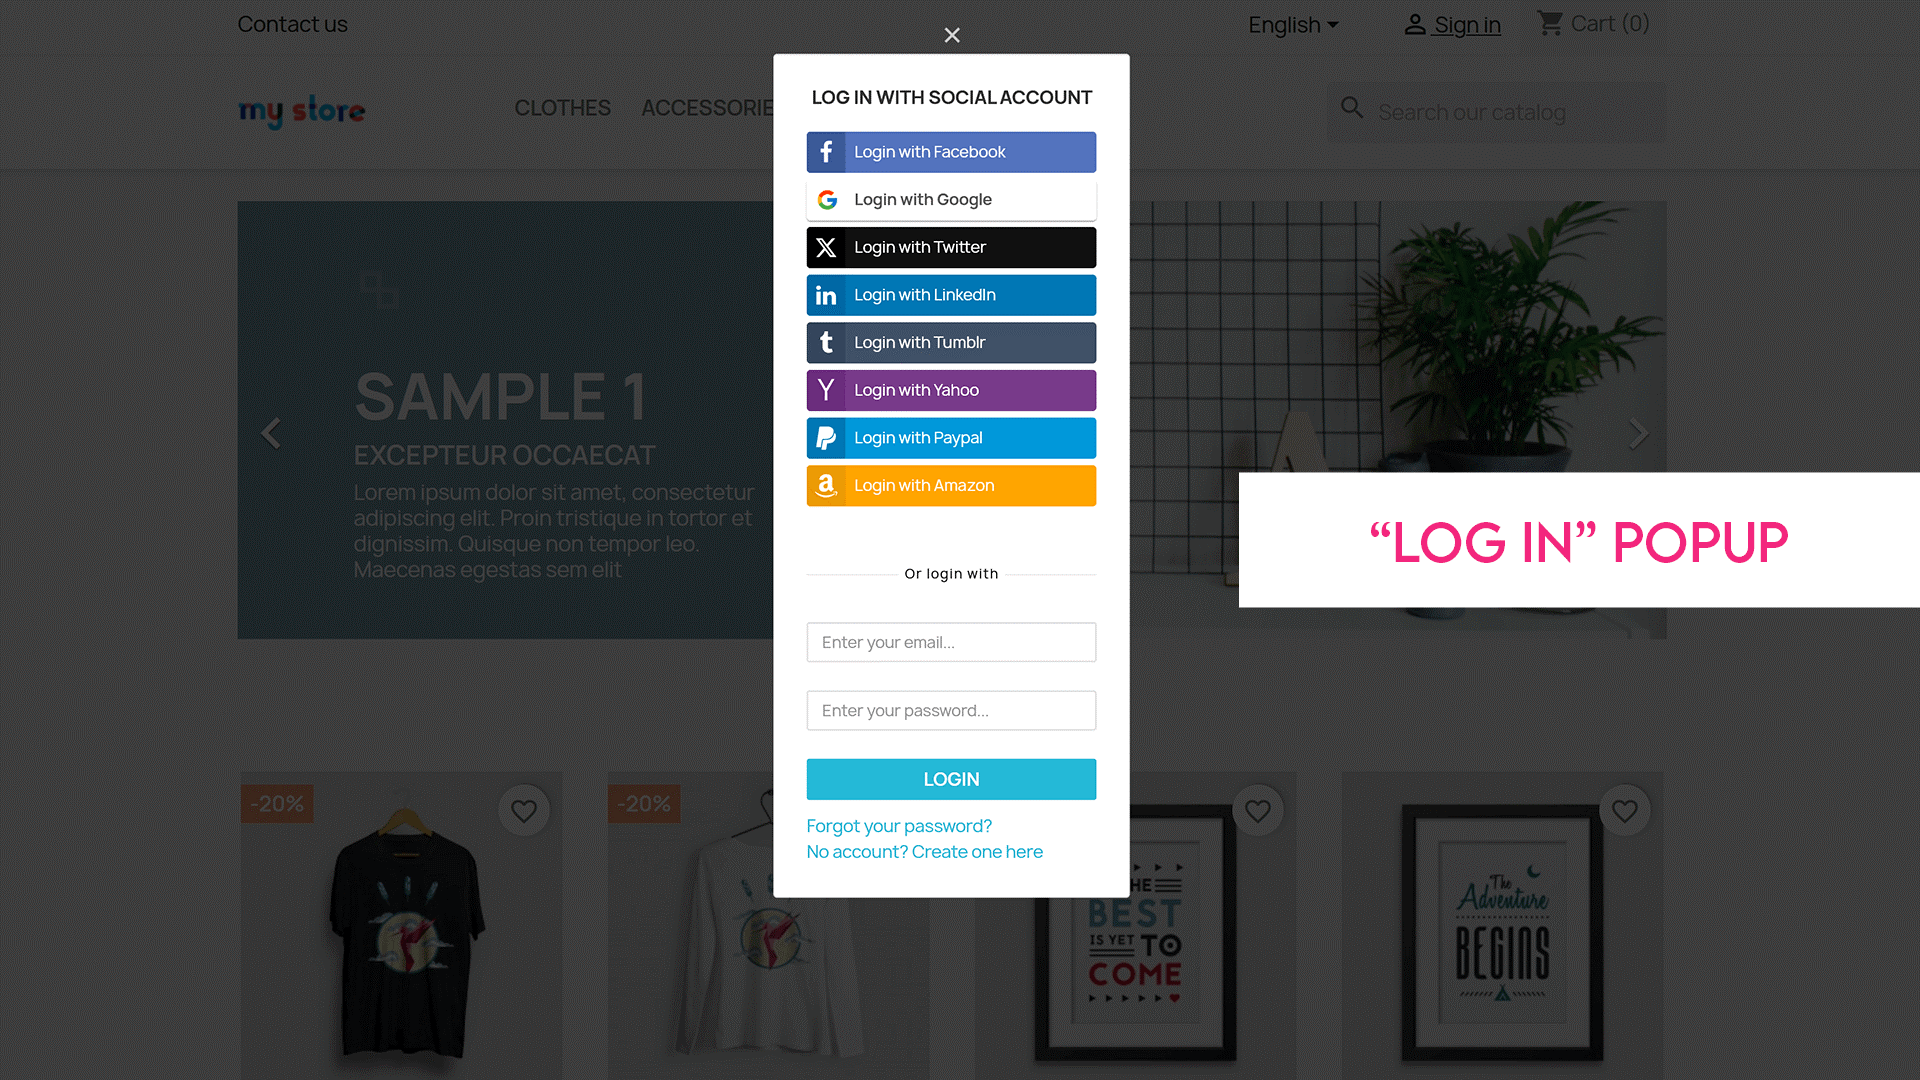
2.3. "My Account" login widget
You can enable a login widget under the “My Account” section:
- Customers can hover over the Sign In button in the top navigation or click it to access a login widget.
- The widget allows customers to log in using a social network or a standard email and password combination.
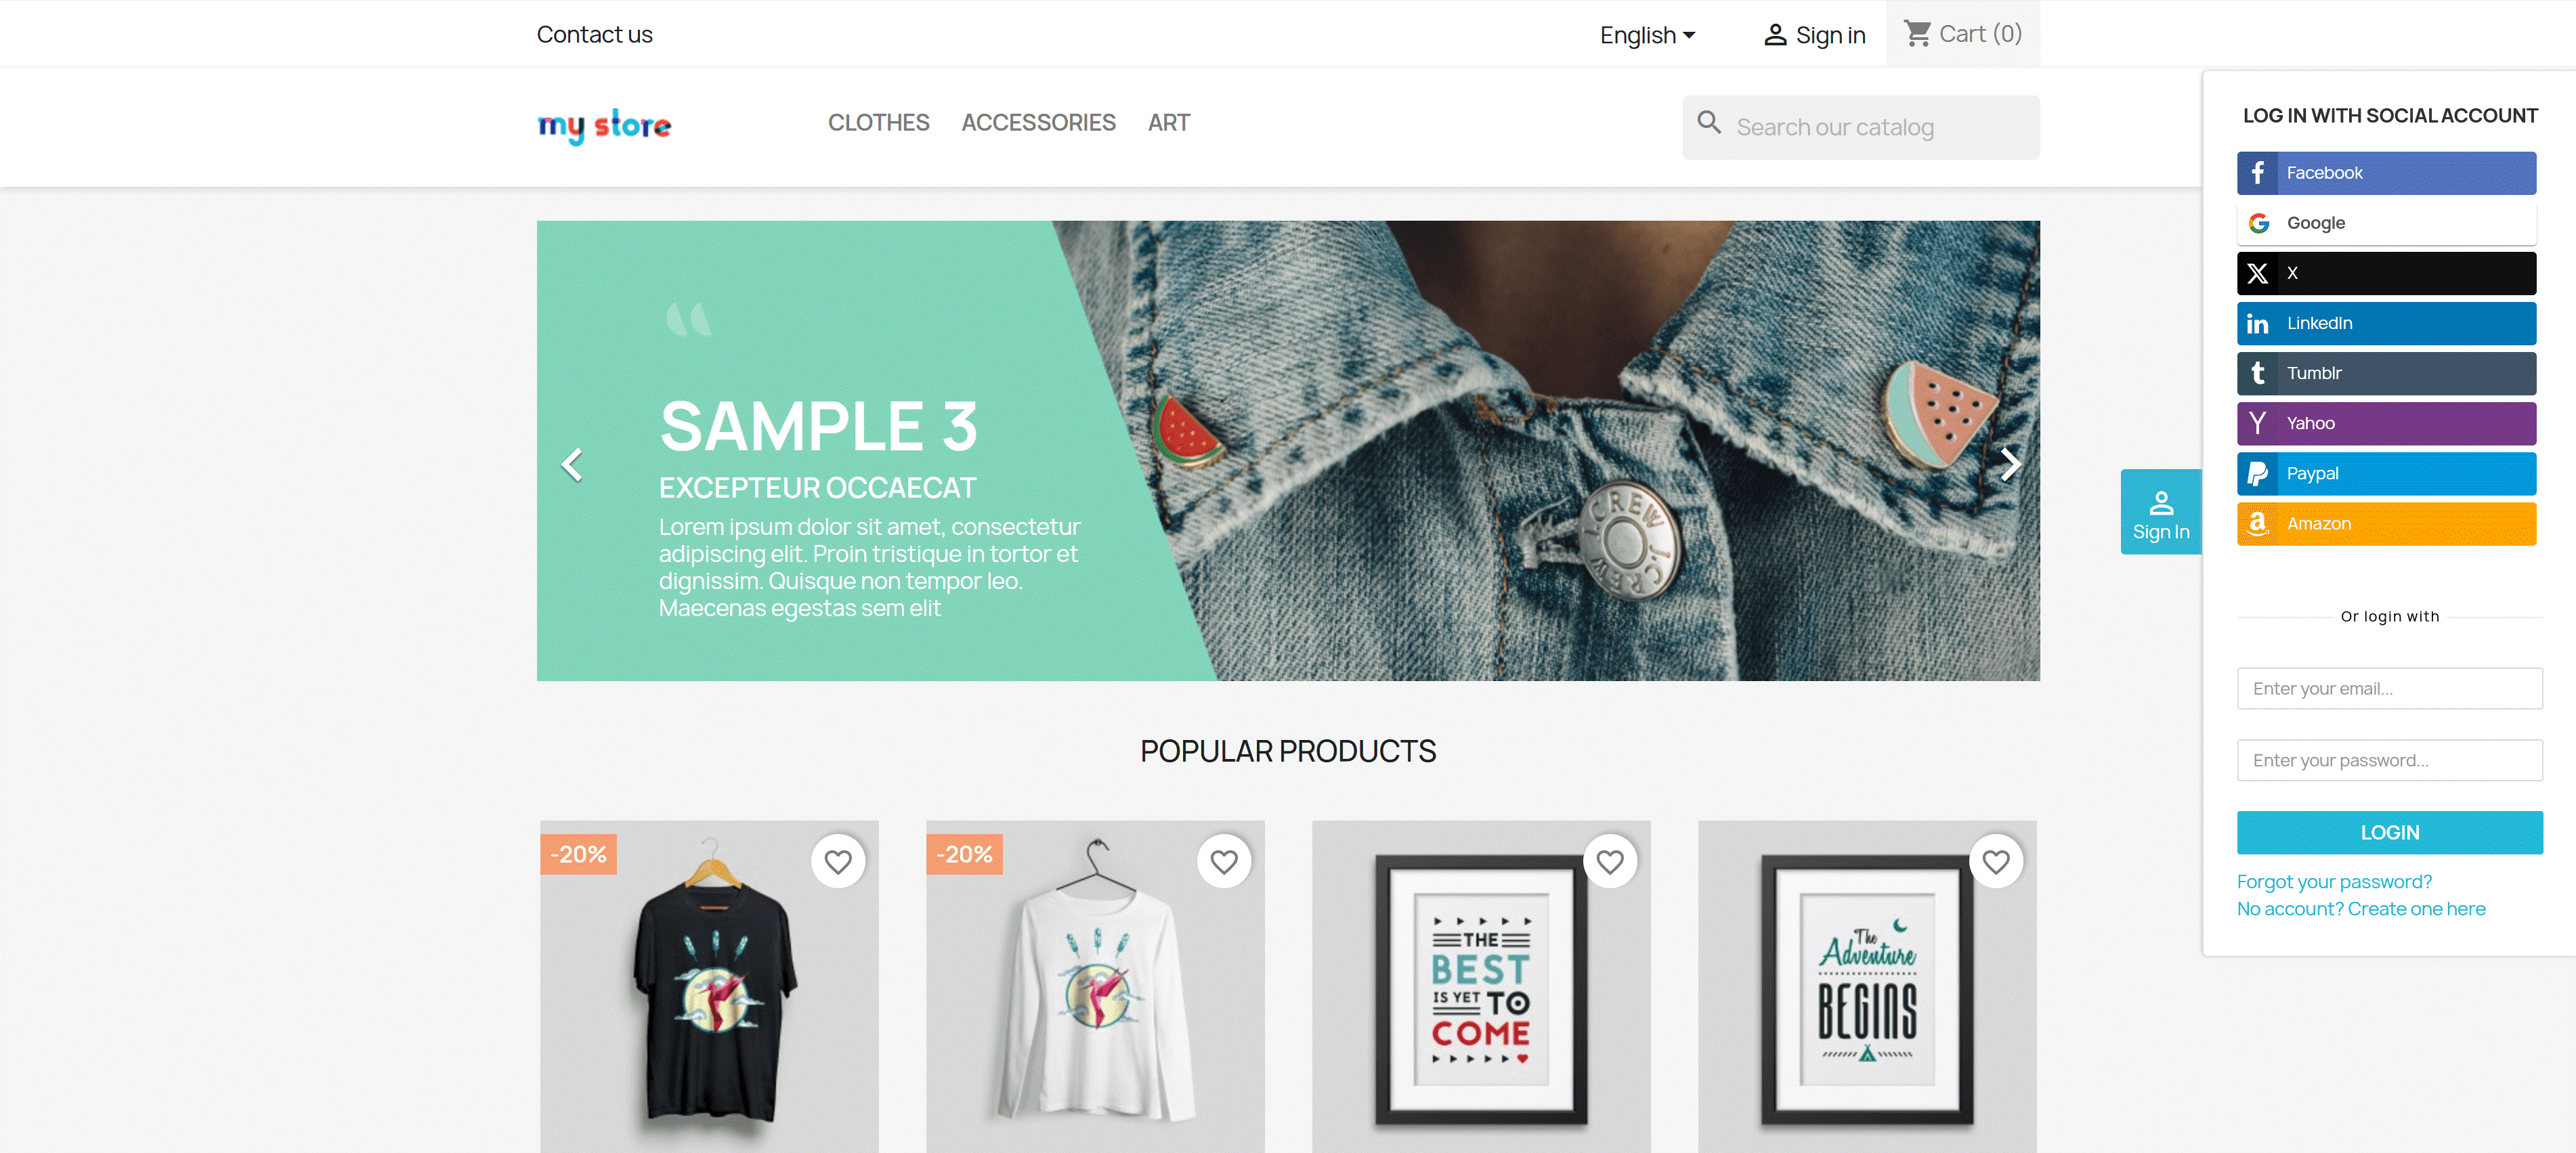
2.4. Side login widget
Enable a sticky Sign In button that appears on the left or right side of the screen. When customers click this button, a side login widget appears.
You can customize the appearance of the sticky button to suit your store’s layout.
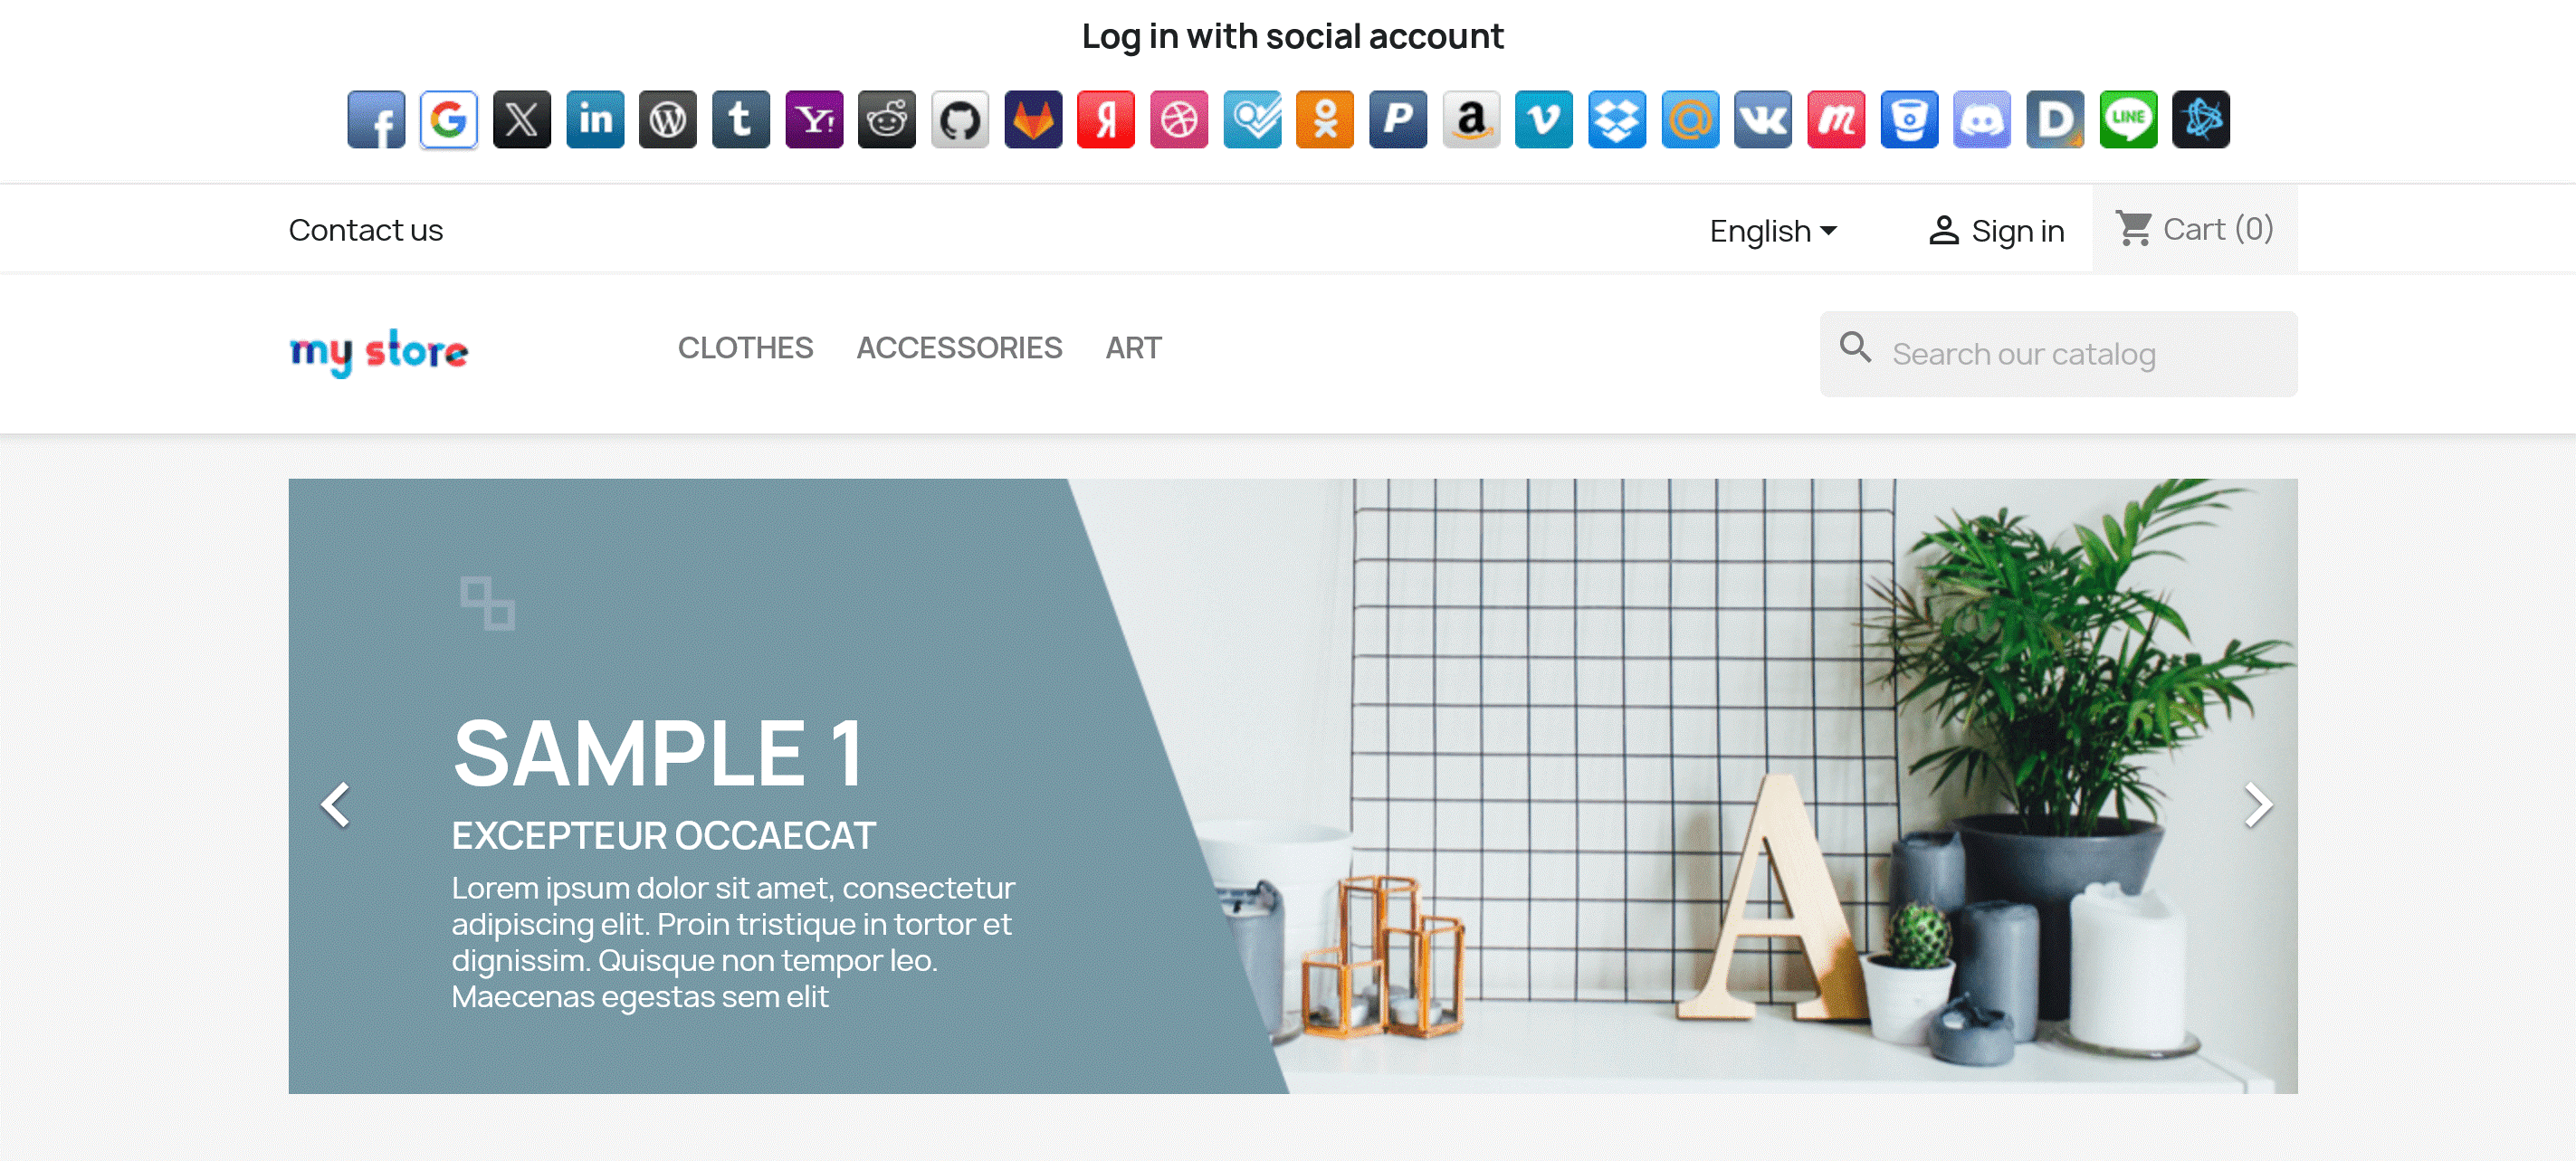
2.5. Header
Social login buttons can be displayed in the top navigation or main header for quick access.
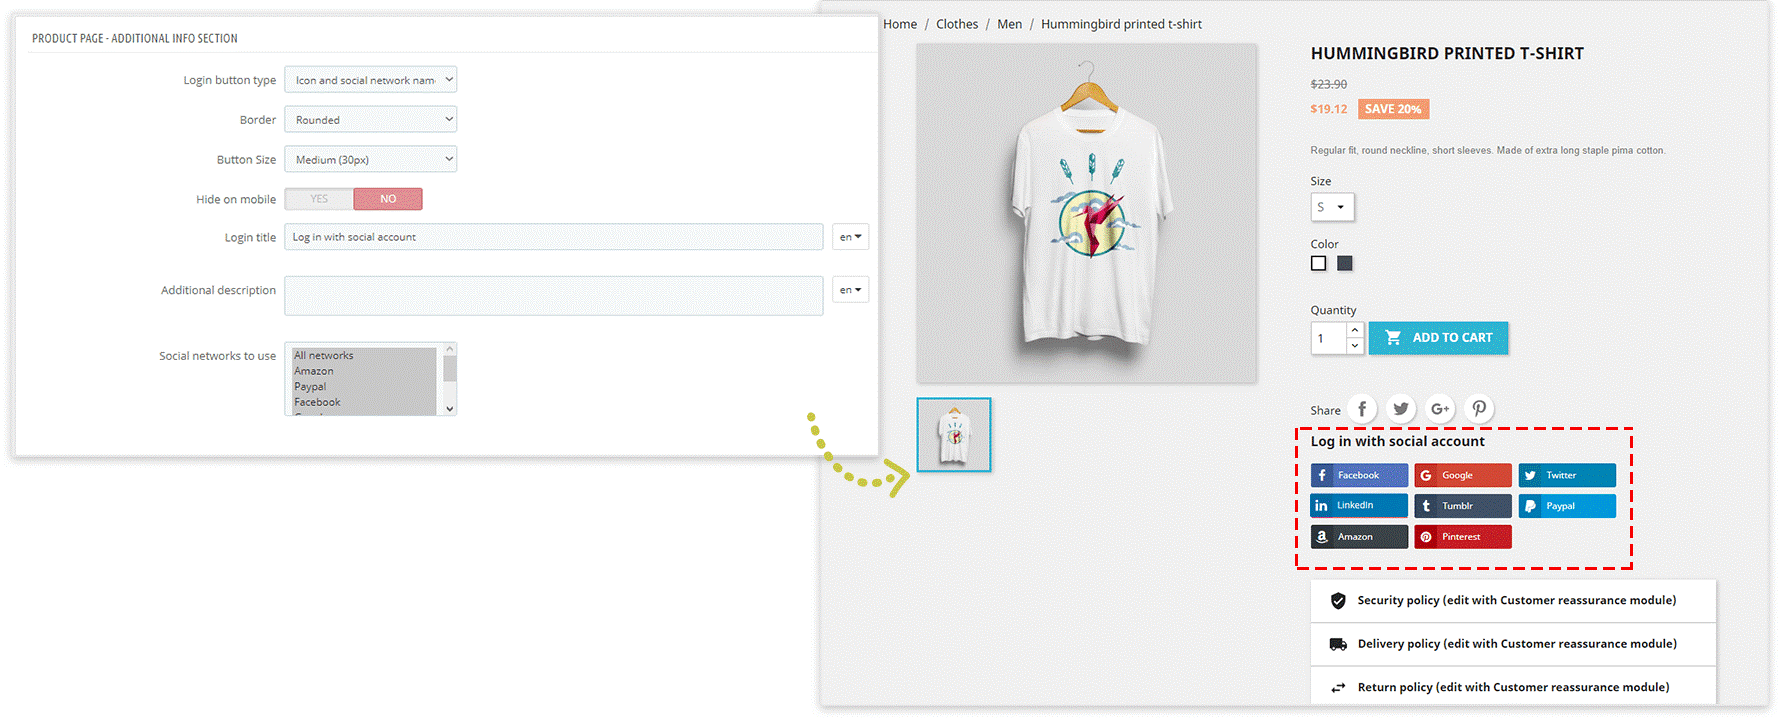
2.6. Product page
You can showcase social login buttons in four areas of the product page:
- Additional info section
- Below product images
- Right column
- Left column
2.7. Checkout page
Display social login buttons during the checkout process to make account creation or login quick and effortless for customers.

2.8. Footer
Add social login buttons to your footer, allowing customers to log in or register from any page of your store.

2.9. Custom hook
For advanced customization, you can use a custom hook to place social login buttons in any template file of your store.
To use the custom hook, copy and paste the following code into the desired .tpl file of your theme: {hook h="displaySoLoSocialLogin"}
Displaying social login buttons strategically across your PrestaShop store helps enhance customer convenience, improve the user experience, and reduce friction during the login or registration process. The SOCIAL LOGIN module makes it easy to configure and customize these buttons for various positions in your store.
If you have questions or need assistance, check out the module's documentation or contact our support team for help.