How to Create reCAPTCHA Keys in Google Cloud Console
1. Introduction
Google has officially begun transitioning all reCAPTCHA Classic (also known as Legacy reCAPTCHA) to reCAPTCHA Enterprise, a more secure and scalable version of the service designed for modern websites and applications. This change affects all PrestaShop merchants using reCAPTCHA in their contact forms, checkout pages, customer registration, blog comments, live chat, and other modules that rely on spam protection.
As part of this update, all PrestaHero modules listed in this document have been upgraded to support both Legacy and Enterprise reCAPTCHA keys, ensuring a smooth migration before Google fully deprecates the Classic API.
1.1. Why Google is migrating reCAPTCHA Classic to reCAPTCHA Enterprise
Since 2024, Google has been consolidating all reCAPTCHA services under the Google Cloud Console, where Enterprise reCAPTCHA provides:
- A more secure and advanced bot detection system
- Built-in machine-learning-based risk analysis
- Higher accuracy (fewer false positives)
- Better integration with Google Cloud services
- Unified API and centralized key management
By late October 2025, Google automatically migrated all active reCAPTCHA Classic keys into Google Cloud projects whenever possible. The Classic “reCAPTCHA Admin Console” is being phased out, and the old siteverify endpoint will no longer be supported.
This means websites relying on Legacy keys must prepare for this transition to prevent the CAPTCHA system from breaking.
1.2. Legacy keys are still creatable until December 2025 (but will be disabled in 2026)
Even though Google has migrated keys automatically in October 2025, merchants can still manually create Legacy reCAPTCHA keys using the old reCAPTCHA Admin Console until December 2025. These keys include:
- Site key
- Secret key
However, starting from 2026, Legacy keys and the Classic API will be disabled. Once the Classic API is shut down, all Legacy keys — old or newly created — will immediately stop working.
To avoid interruption on your PrestaShop storefront, you must migrate to reCAPTCHA Enterprise, which uses:
- Key ID
- Project ID
- API Key (Google Cloud Credential)
If your Legacy key was not automatically migrated by Google, you can follow the manual migration guide here: https://prestahero.com/help-center/general-configuration/289-migrate-recaptcha-classic-to-google-cloud
1.3. Which PrestaHero modules support the new Enterprise integration
All major PrestaHero modules that integrate with reCAPTCHA have been updated to support both Legacy Keys and reCAPTCHA Enterprise.
The following modules now include the new reCAPTCHA Enterprise settings (Key ID, Project ID, API Key):
- CAPTCHA – reCAPTCHA: https://prestahero.com/90-prestashop-captcha-module.html
- Contact Form Ultimate: https://prestahero.com/123-contact-form-ultimate-module.html
- Contact Form 7: https://prestahero.com/84-prestashop-contact-form.html
- One Page Checkout & Social Login: https://prestahero.com/136-prestashop-one-page-check-out.html
- BLOG Module: https://prestahero.com/91-prestashop-blog-module.html
- Product Reviews, Ratings & Q&A: https://prestahero.com/155-prestashop-product-reviews-ratings-qa.html
- Live Chat, Contact Form & Ticket System: https://prestahero.com/82-prestashop-live-chat-module.html
- Marketplace Builder: https://prestahero.com/135-prestashop-marketplace-module.html
- Newsletter Popup: https://prestahero.com/80-newsletter-popup.html
All updated versions allow you to switch between:
- Legacy Mode (Site Key + Secret Key)
- Enterprise Mode (Key ID + Project ID + API Key)
This ensures merchants have full flexibility during the 2025–2026 transition period.
2. Understanding the Difference: Classic vs Enterprise
Google’s transition from reCAPTCHA Classic to reCAPTCHA Enterprise marks a major shift in how websites integrate spam and bot protection. While both versions share the same purpose — to protect your website from automated abuse — they work in different ways, use different APIs and require different types of keys.
This section explains the differences clearly so that PrestaShop merchants understand why the migration is necessary and how it impacts their PrestaHero modules.
2.1. What is reCAPTCHA Classic (Legacy)?
reCAPTCHA Classic, also called Legacy reCAPTCHA, is the traditional version that most websites have used for many years. It includes:
- reCAPTCHA v2 Checkbox (“I’m not a robot”)
- reCAPTCHA v2 Invisible
- reCAPTCHA v3 Score-based
Classic keys are created in the old admin panel: https://www.google.com/recaptcha/admin
Classic provides:
- Site key (public key)
- Secret key (private key)
- Verification using the REST endpoint:
https://www.google.com/recaptcha/api/siteverify
However, starting from 2026, Google will shut down the Classic API endpoint, meaning all Classic keys, old or newly created, will stop working. That's why merchants need to migrate their spam protection setup to the new Enterprise format.
2.2. What is reCAPTCHA Enterprise?
reCAPTCHA Enterprise is the modern, cloud-based version of reCAPTCHA, built on top of Google Cloud’s security infrastructure.
Enterprise keys are managed directly inside Google Cloud Console, and they use a new structure:
- Key ID (instead of Site key)
- Project ID (Google Cloud project identifier)
- API Key (Google Cloud credential for server-side verification)
3. Requirements Before Configuring reCAPTCHA Enterprise
Before you can integrate reCAPTCHA Enterprise into your PrestaShop modules, you must prepare a few essential components inside your Google Cloud Console. Unlike the Legacy version, which only required a Site key and Secret key, Enterprise reCAPTCHA relies on Google Cloud infrastructure, so several setup steps are mandatory.
This section explains each requirement clearly to ensure a smooth configuration process.
3.1. A Google Cloud account
To use reCAPTCHA Enterprise, you must sign in with a Google account and access the Google Cloud Console:
https://console.cloud.google.com
If you do not have a Google Cloud account yet:
- Sign in with your existing Gmail or Google Workspace account
- Accept the Google Cloud terms of service
- Complete the initial onboarding steps
3.2. A Google Cloud Project
Every reCAPTCHA Enterprise key must belong to a Google Cloud Project. A project is like a container where Google stores:
- your reCAPTCHA Enterprise keys
- API configurations
- usage logs
- billing and quotas
- security settings
If you already have a Google Cloud project, you can use it. Otherwise, you need to create one.
To create a new project:
- Go to: Google Cloud Console → IAM & Admin → Manage Resources
- Click Create Project
- Enter a project name (e.g.,
my-prestashop-store,yourshop-security,prestahero-recaptcha) - Click Create
Your project will be assigned a unique Project ID, for example: yourshop-48291. This Project ID is required later when configuring the PrestaHero module.
3.3. Billing must be enabled
Google requires billing activation to use the reCAPTCHA Enterprise API. Billing is required even if your usage is small because Enterprise APIs run on Google Cloud infrastructure.
To enable billing:
- Open Google Cloud Console
- Go to Billing
- Create or connect a billing account
- Link the billing account to your project
3.4. reCAPTCHA Enterprise API must be enabled
After creating the project and activating billing, you must enable the reCAPTCHA Enterprise API, otherwise, the verification requests made by your PrestaHero modules will fail.
To enable the API:
- Go to Cloud Console
- Navigate to: APIs & Services → Library
- Search for reCAPTCHA Enterprise API
- Click Enable
4. Create a reCAPTCHA Enterprise Key
After preparing your Google Cloud environment, the next step is to create a reCAPTCHA Enterprise key. This key replaces the old “Site Key” used by Legacy reCAPTCHA and will be required when configuring your PrestaHero modules.
Follow the steps below to generate your Key ID.
4.1. Create an Enterprise key
To create the key:
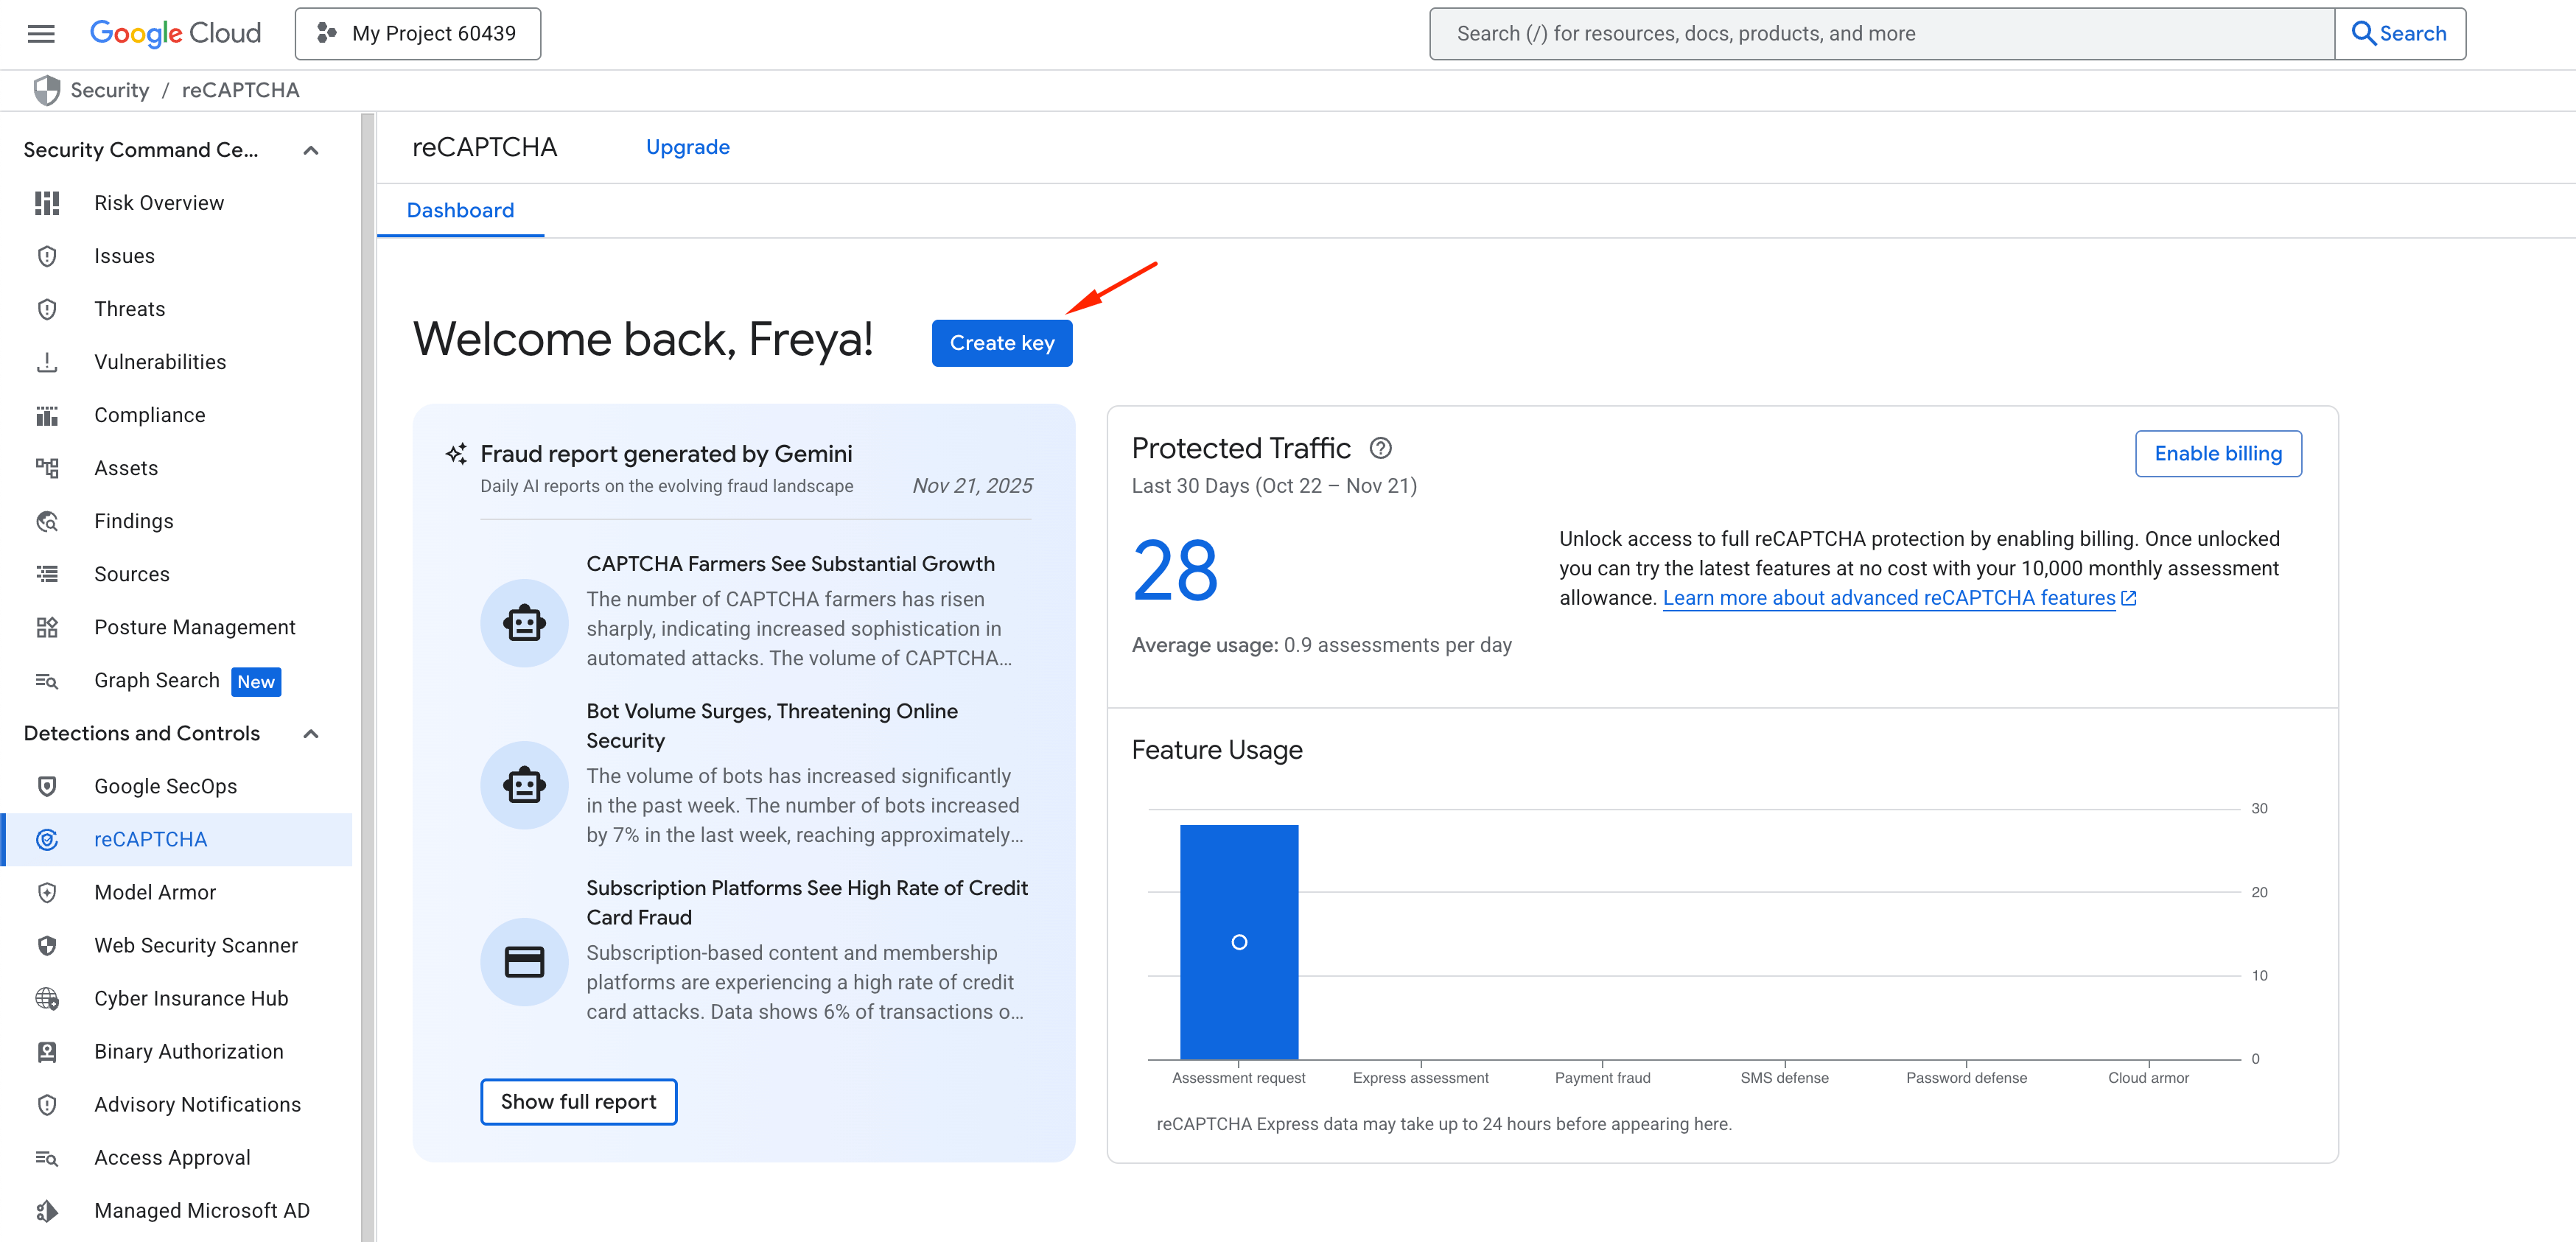
In Cloud Console, go to: Security → reCAPTCHA. Click Create Key.
Choose the application type: Website. Enter a name for the key (e.g., Prestashop Contact Forms, Ecommerce Checkout, etc.).
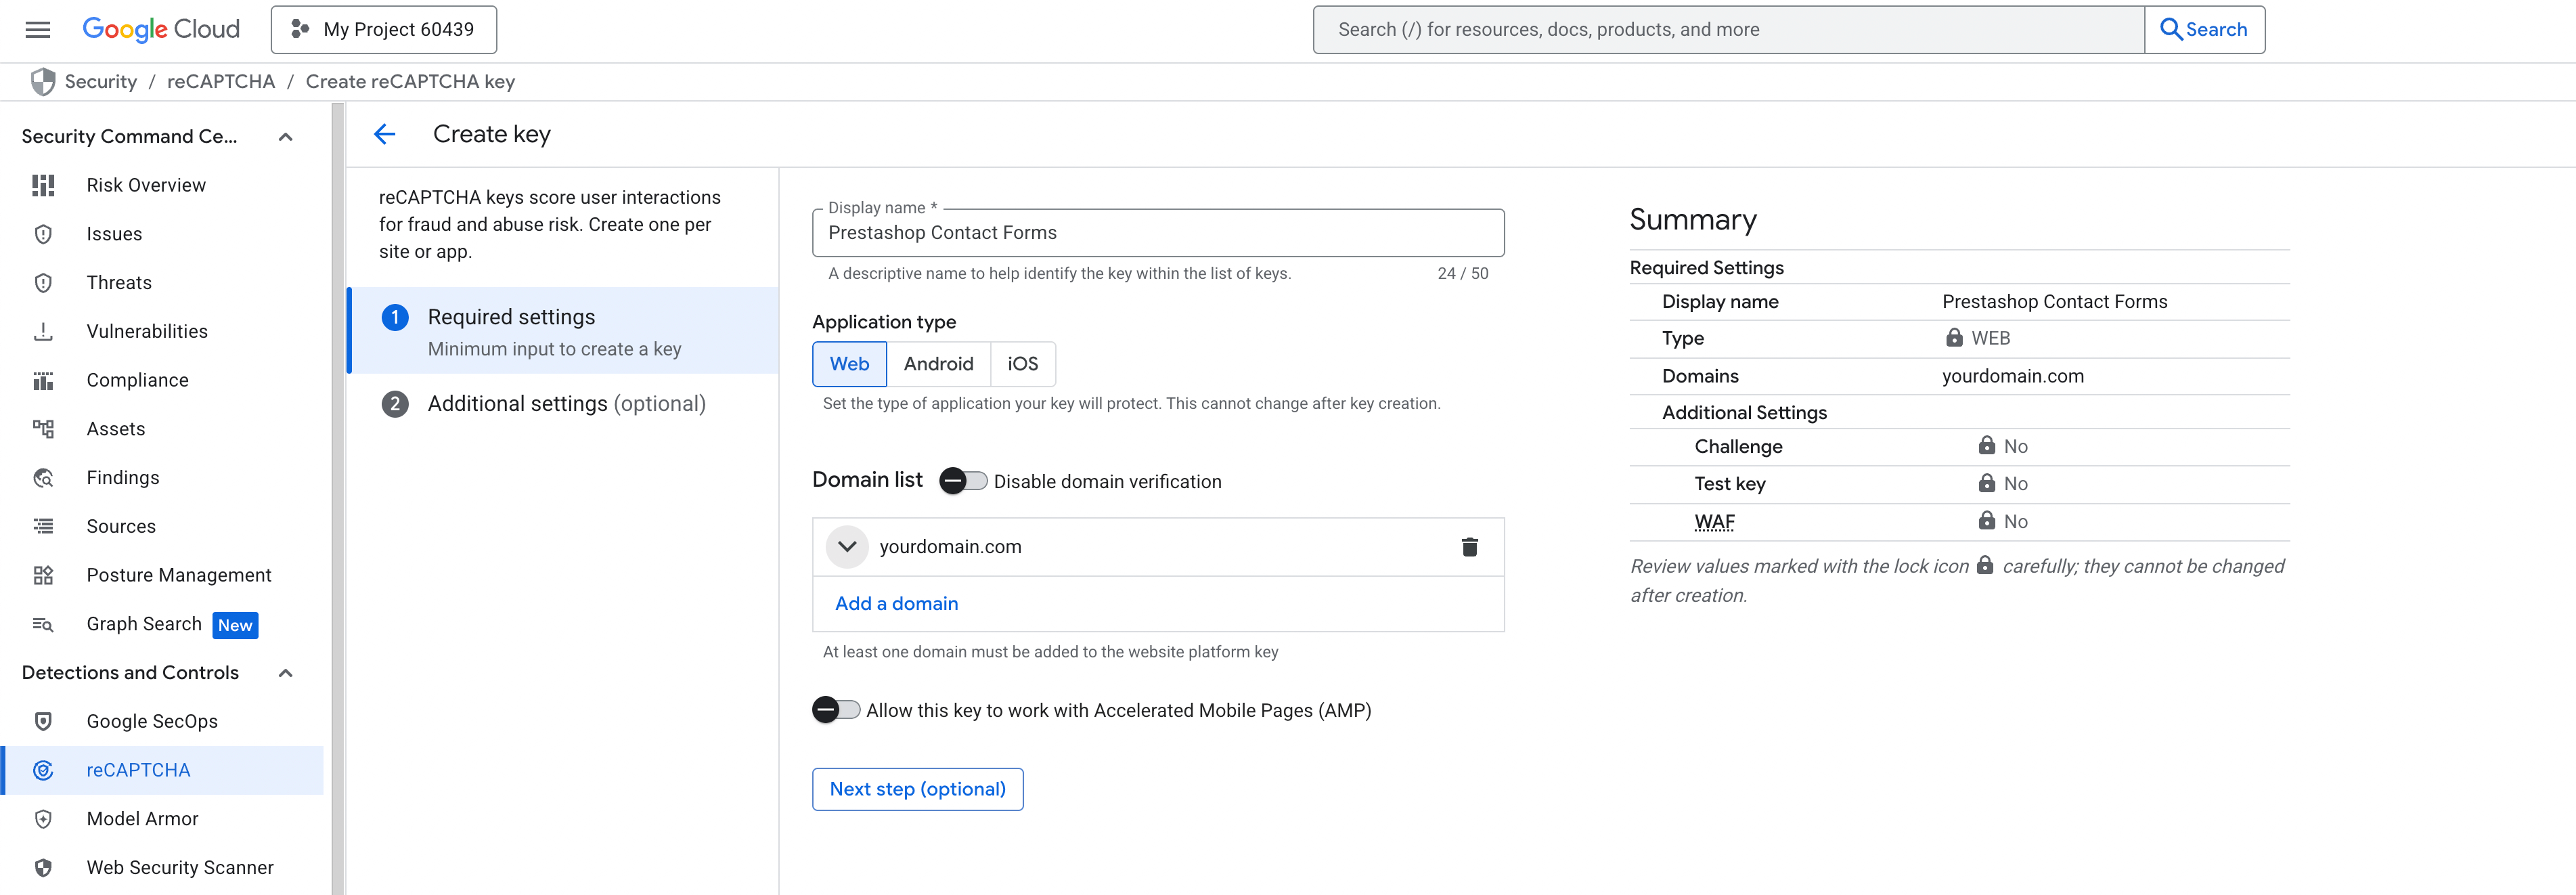
To ensure your captcha key works only on your authorized website, add your domain to the Domain list:
- Click Add a domain
- Enter your store domain(s). Do not include
https://or/paths, only pure domain names.
This domain restriction prevents others from using your CAPTCHA key illegally. Then, click on the Next step button.
4.2. Select key type (Checkbox or Score-based)
Google offers two Enterprise key types:
1. Score-based (similar to Legacy reCAPTCHA v3)
Invisible to users and evaluates each request with a score (0.0–1.0). Recommended for: one-page checkout, login forms, high-volume forms requiring frictionless UX, etc. This is a default option when you create a new key.
Click Create key button. Once created, Google will generate a Key ID, which you will need later.
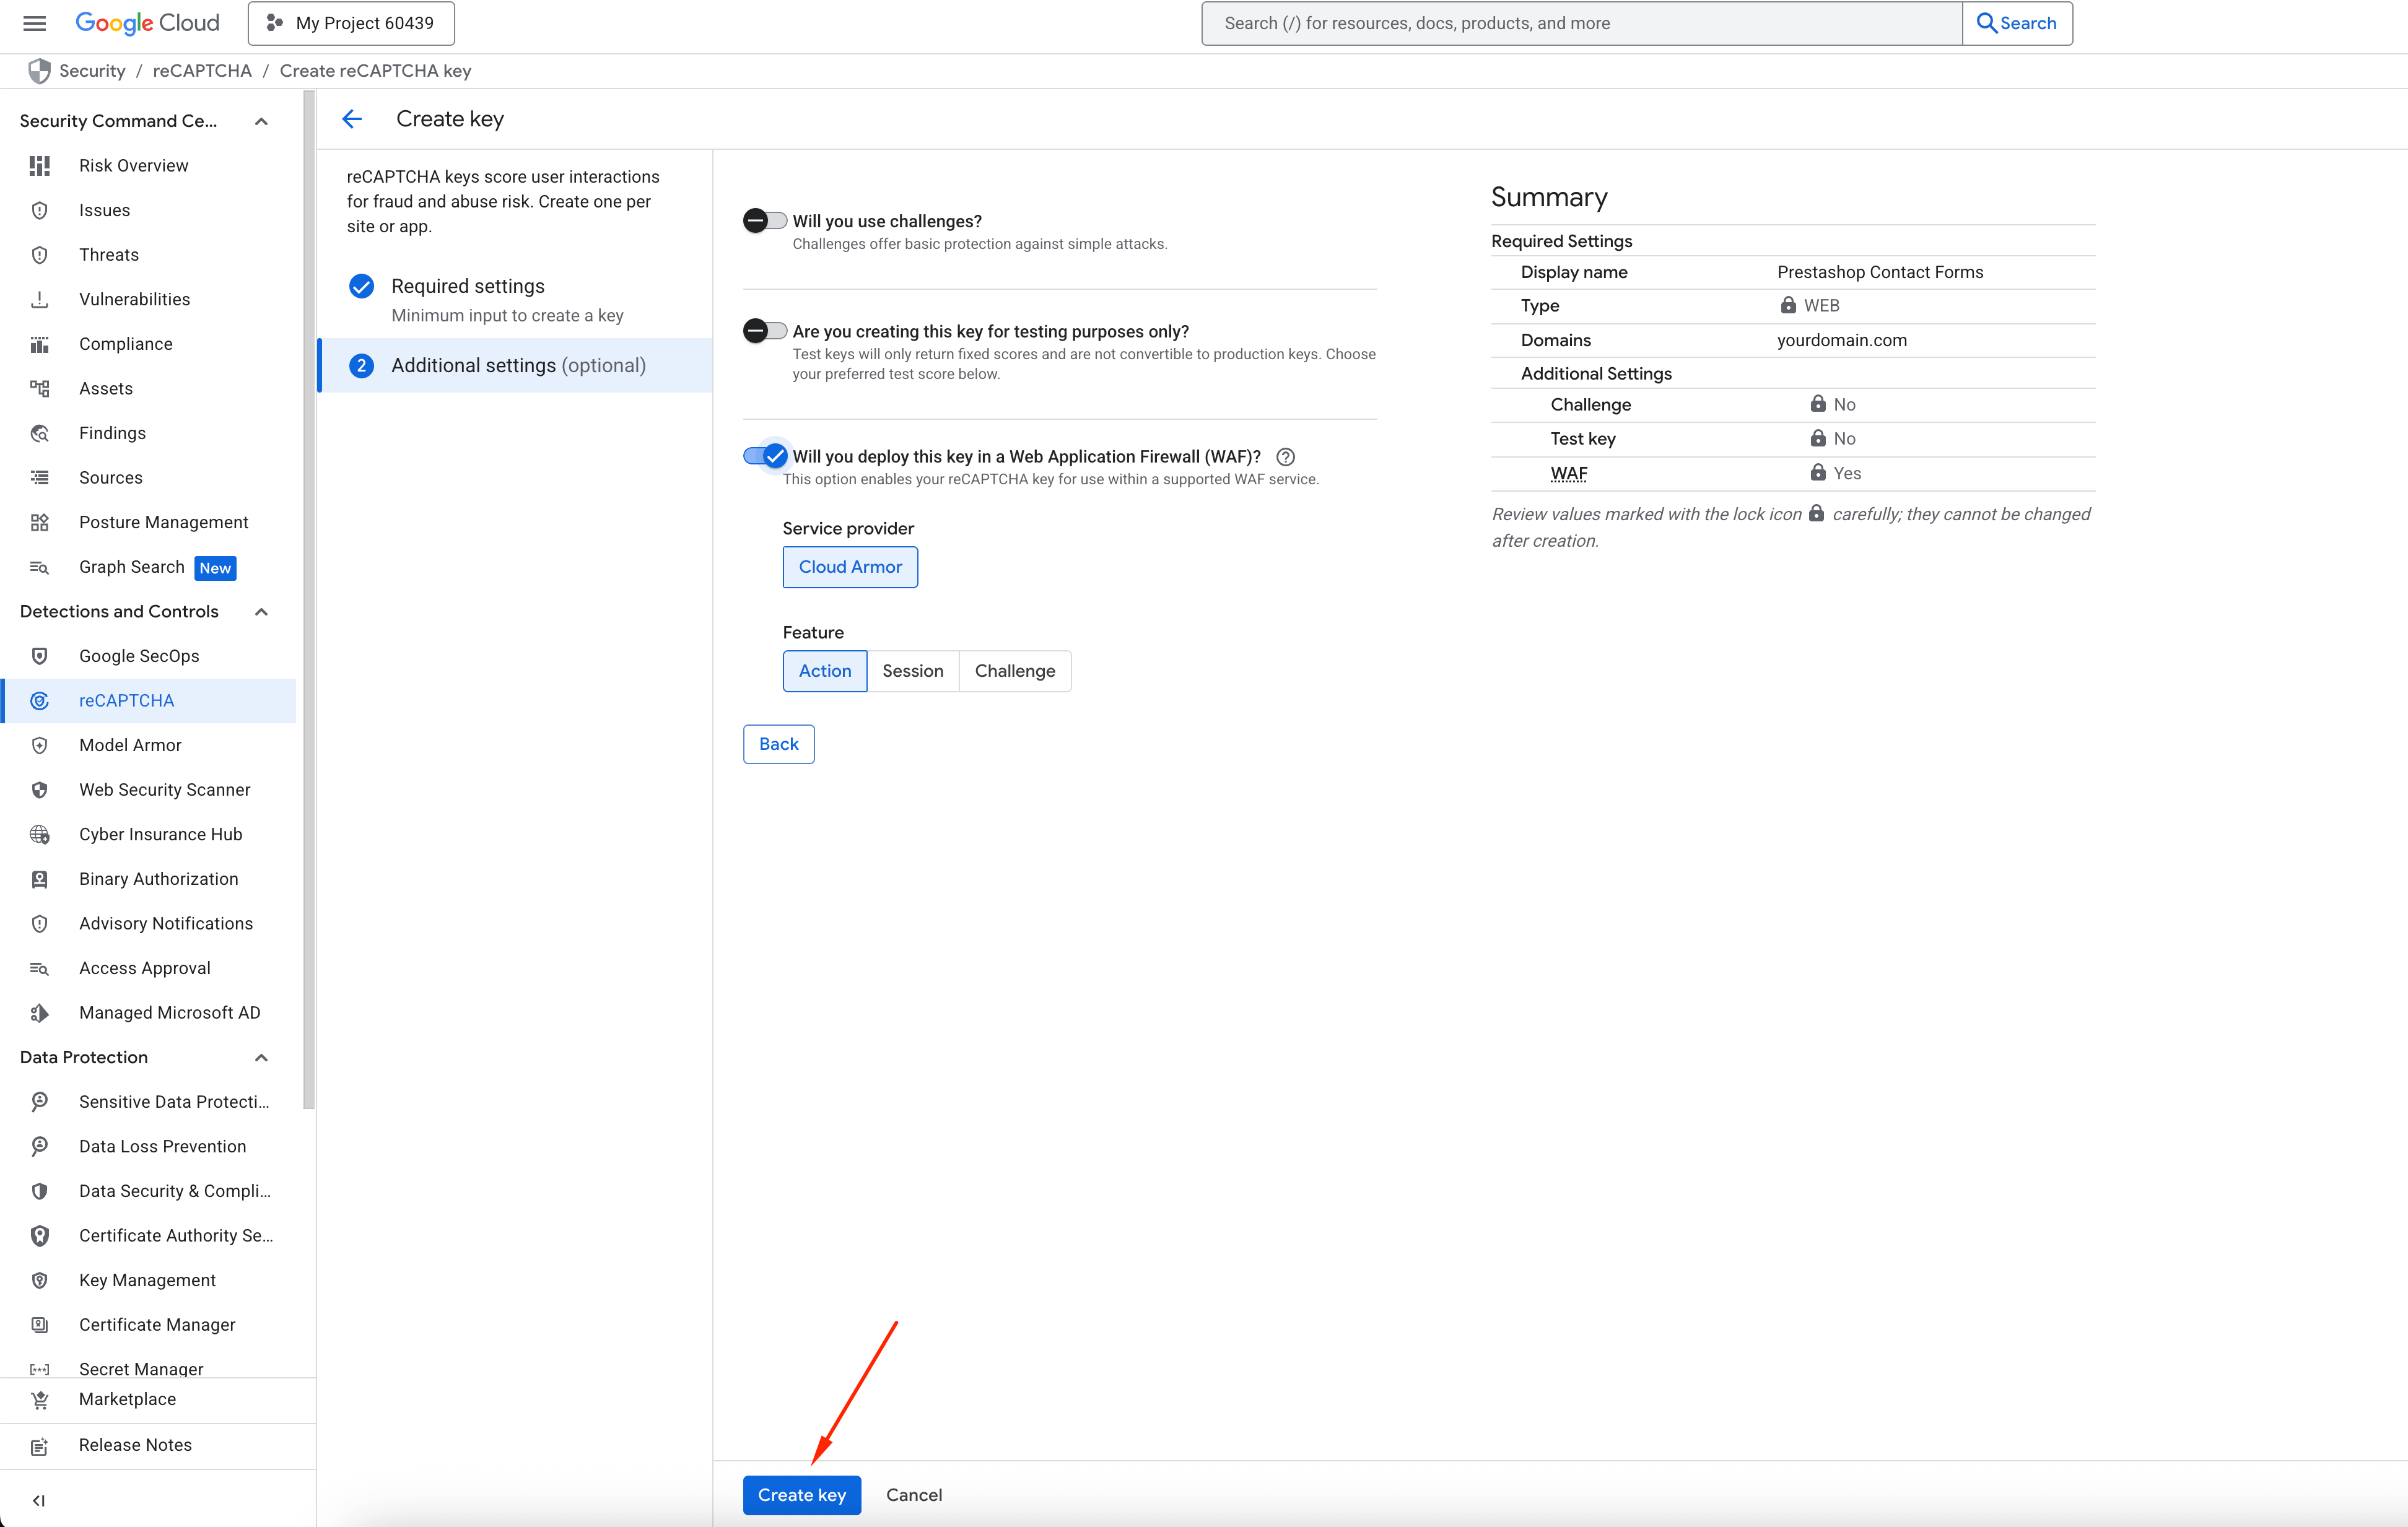
Important note:
Please enable the option “Will you deploy this key in a Web Application Firewall (WAF)?” only if you are currently using or plan to use Google Cloud Armor. If you are not using Cloud Armor, enabling this option will cause the token returned from the website to be considered invalid, preventing users from submitting the form.
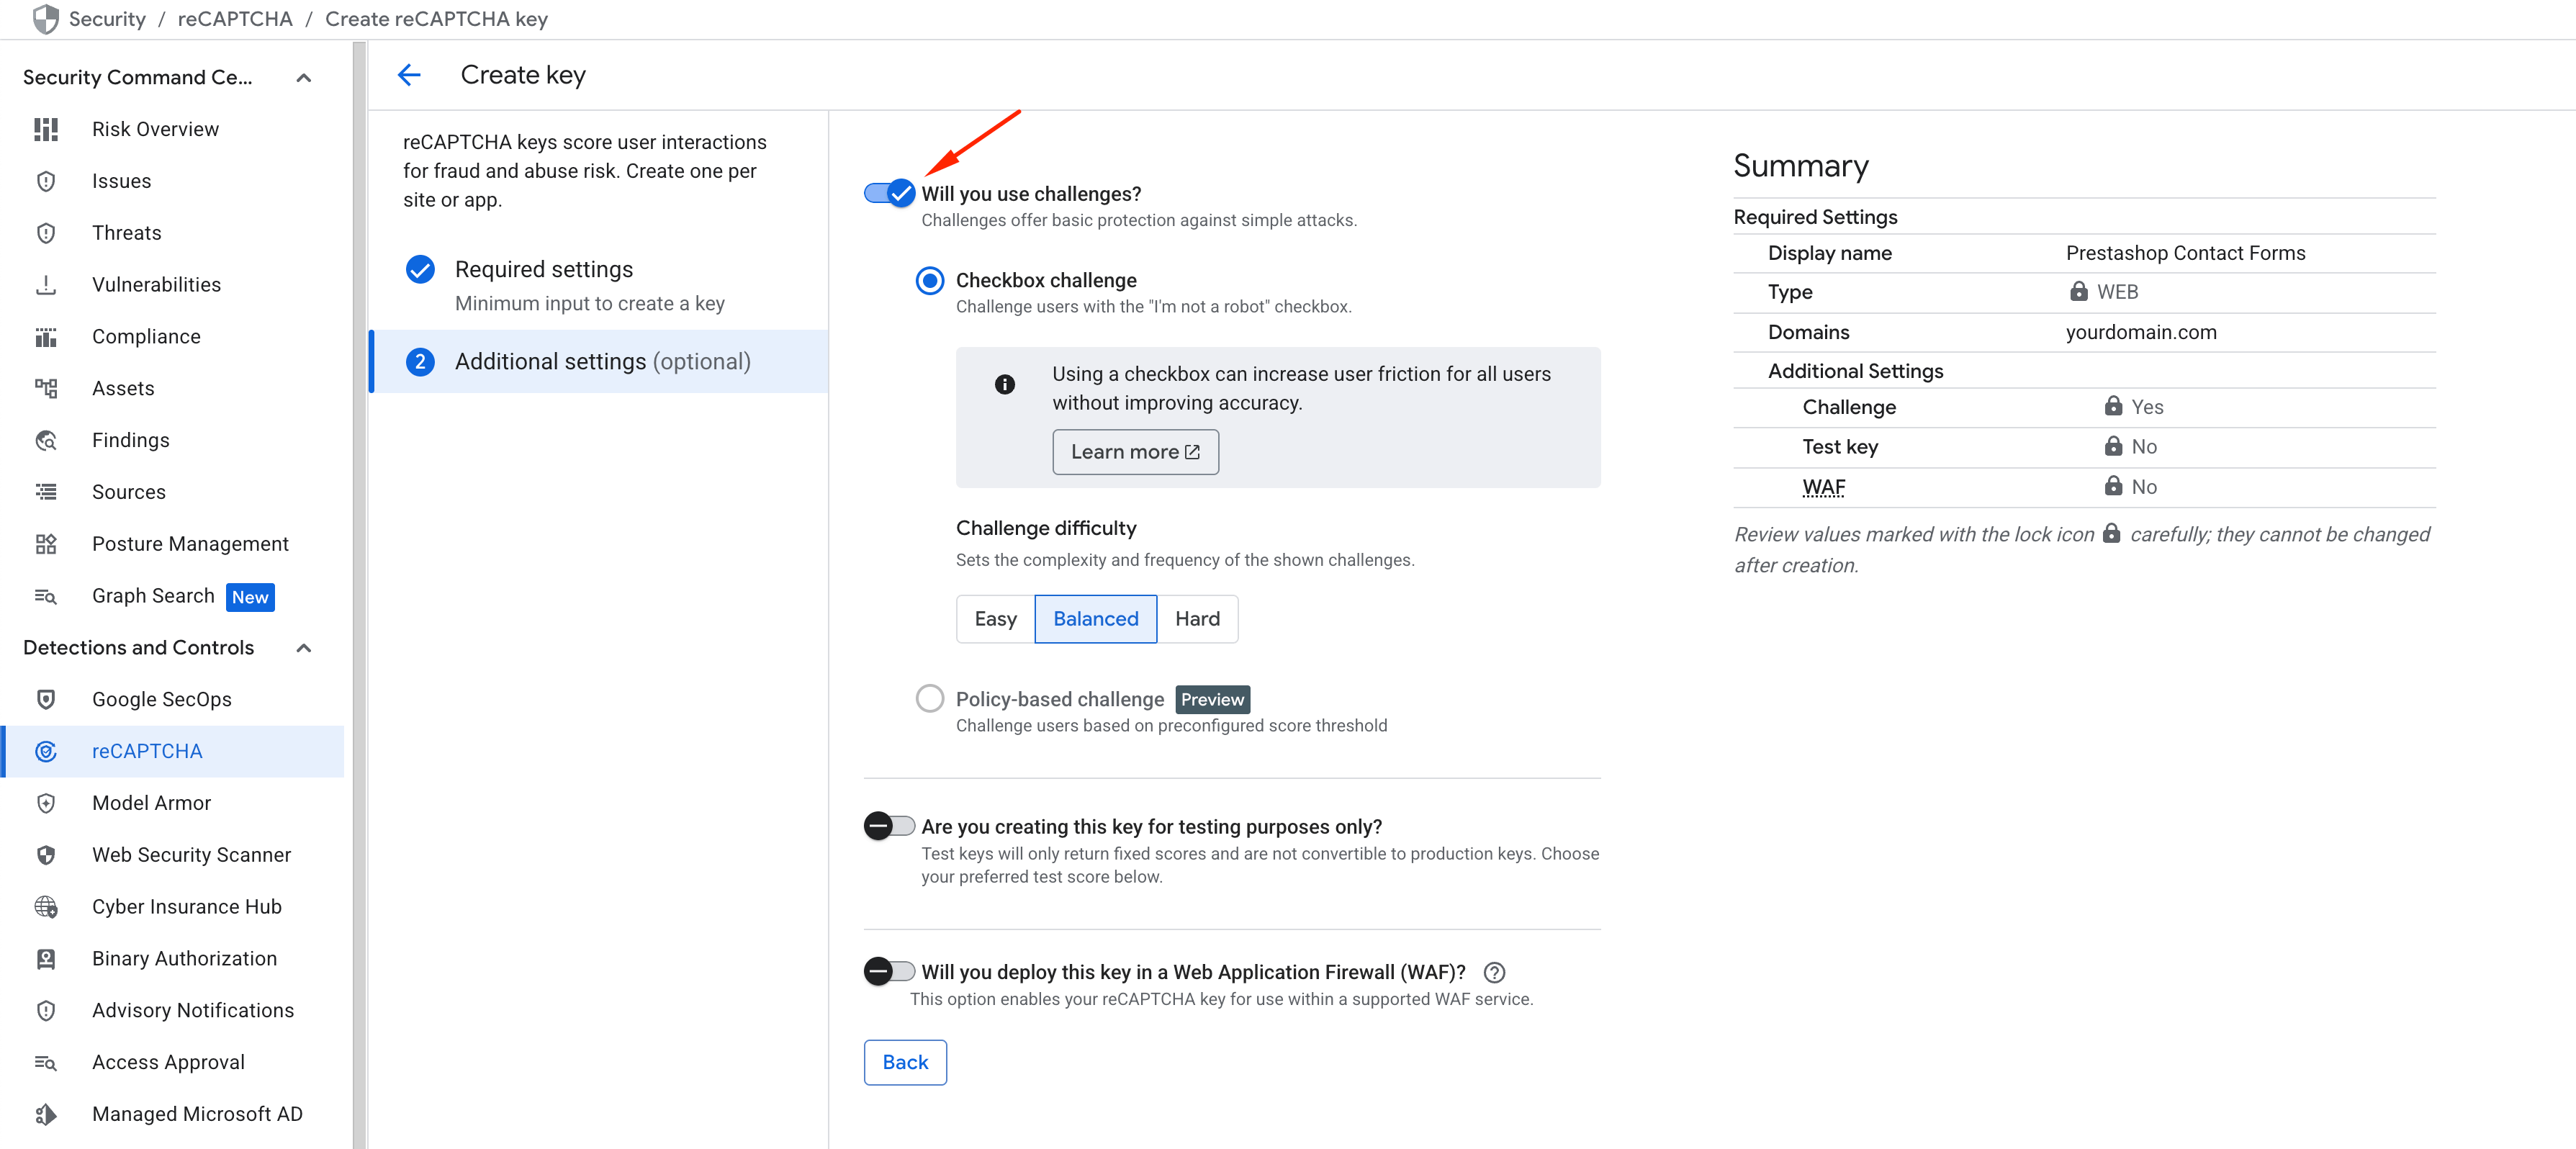
2. Checkbox (similar to Legacy reCAPTCHA v2)
Displays the familiar “I’m not a robot” box. Recommended for: contact forms, blog comments, registration forms, newsletter popups.
- Turn on Will you use challenges? switch.
- Select the Challenge difficulty level:
Harder difficulty: more secure but more challenges for users.
Easiest challenge difficulty: fewer challenges but lower security. - Click Create key button. Once created, Google will generate a Key ID, which you will need later.
4.3. Copy the Key ID
After saving the key, Google will show your Key ID.
Example format: 6Lf12345AAAAAI7hDxxxxx_xxxxxxx12345
You will need this Key ID later when configuring the Enterprise mode inside your PrestaHero modules.
Keep this Key ID secure and do not share it publicly.
5. Retrieve Your Project ID
Your Project ID is required by both Google Cloud and your PrestaHero modules to identify which project owns the captcha key and where verification requests should be sent.
5.1. Where to find Project ID
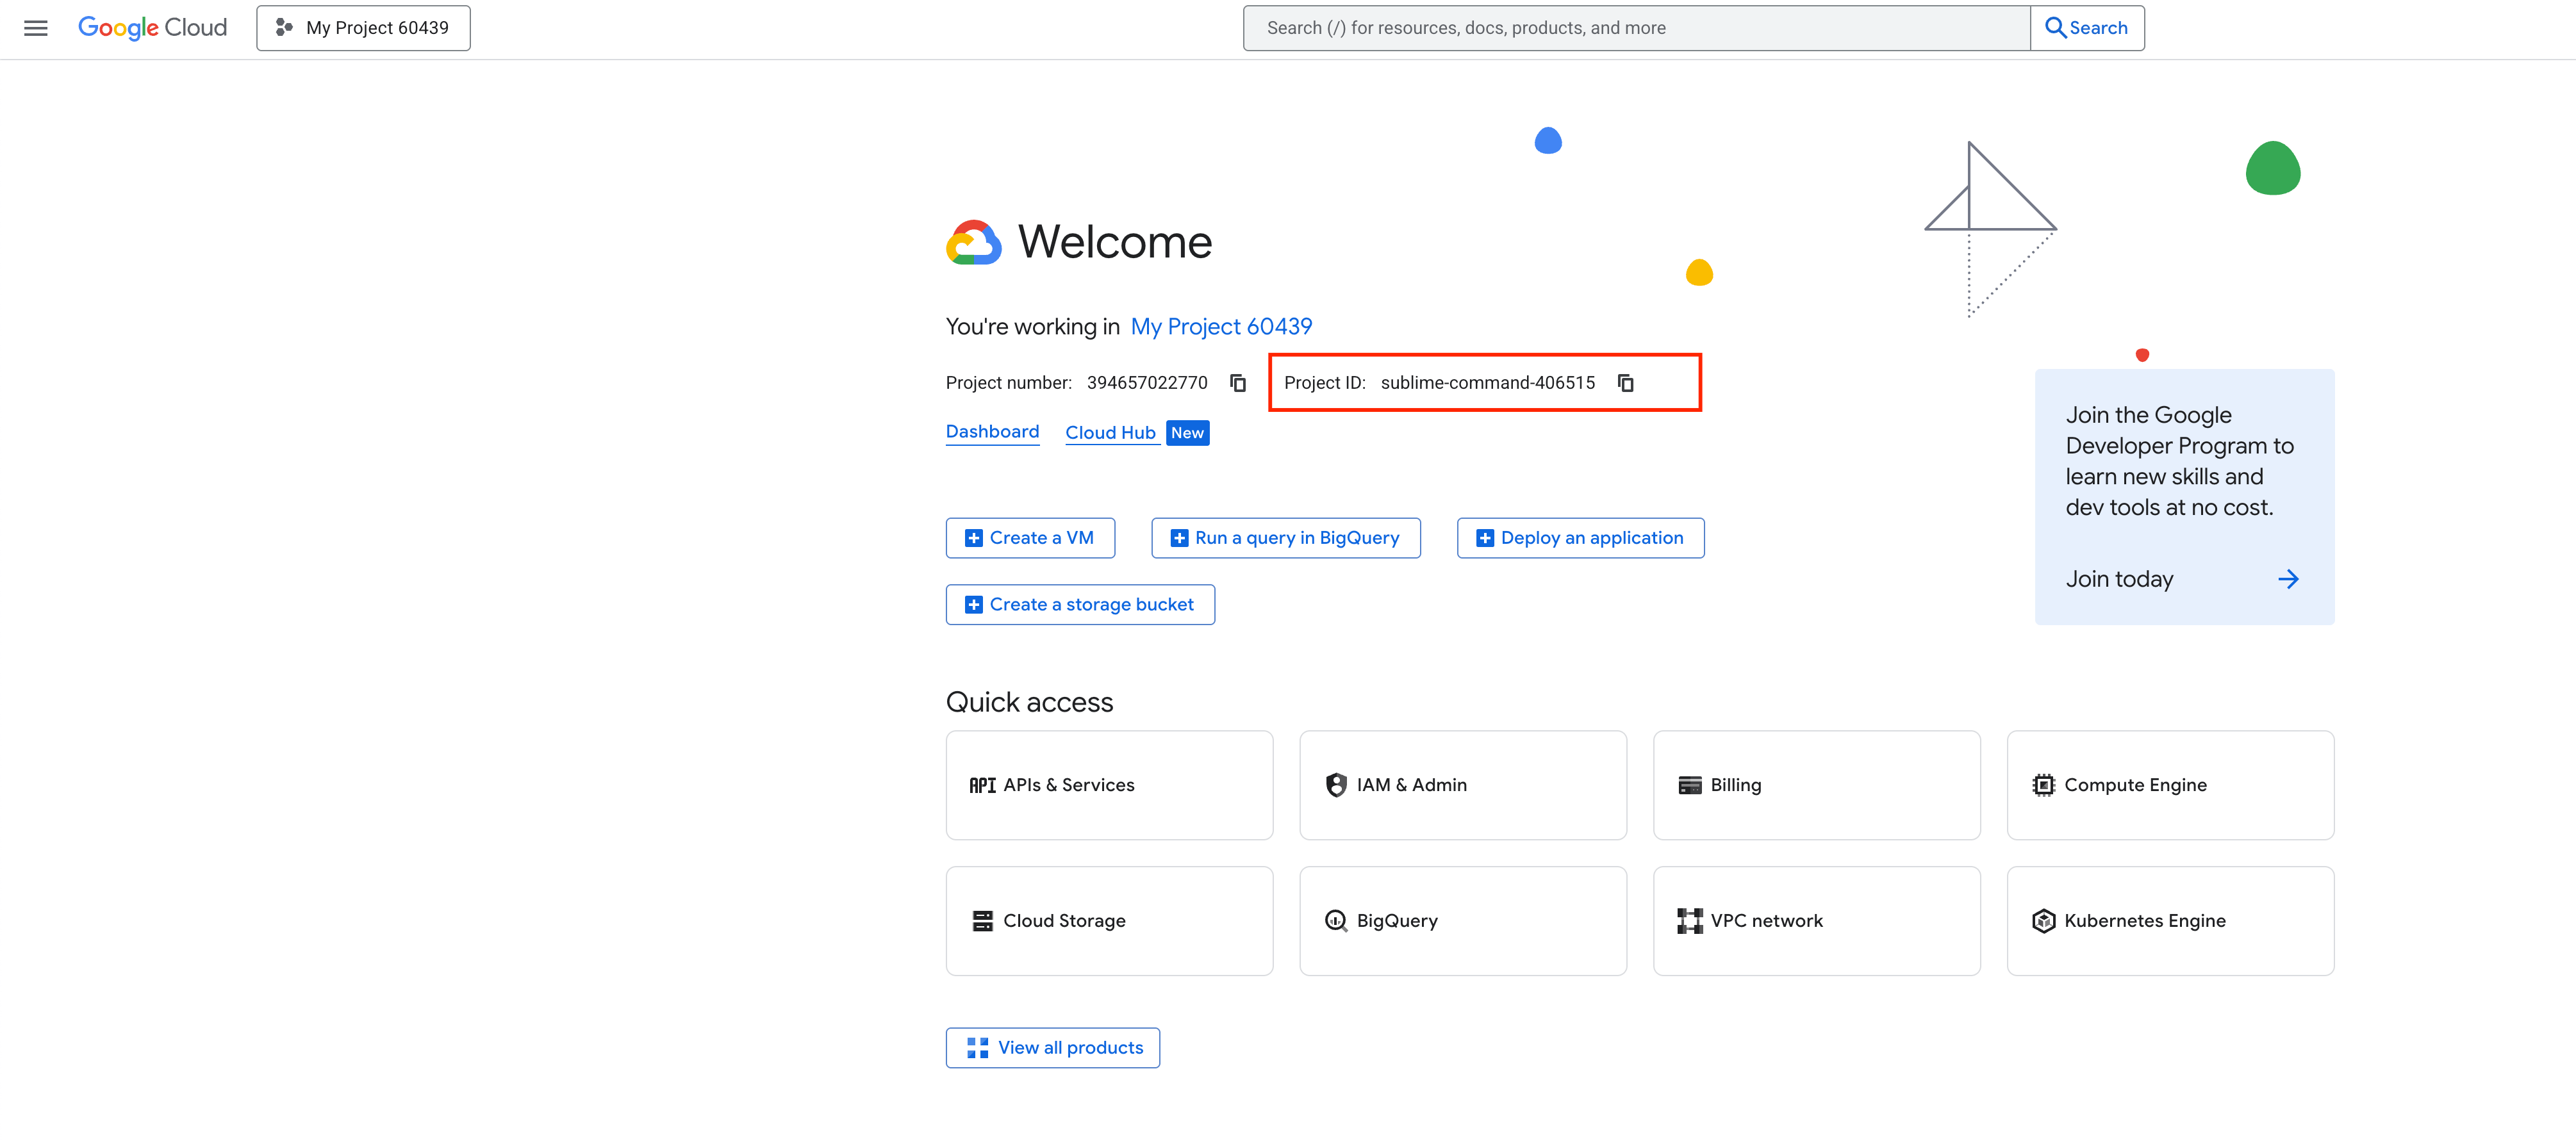
There are 2 places where you can find your Project ID:
Option 1: Top navigation bar
- Look at the top Google Cloud header
- Click the Project name
- The Project ID appears next to the project name
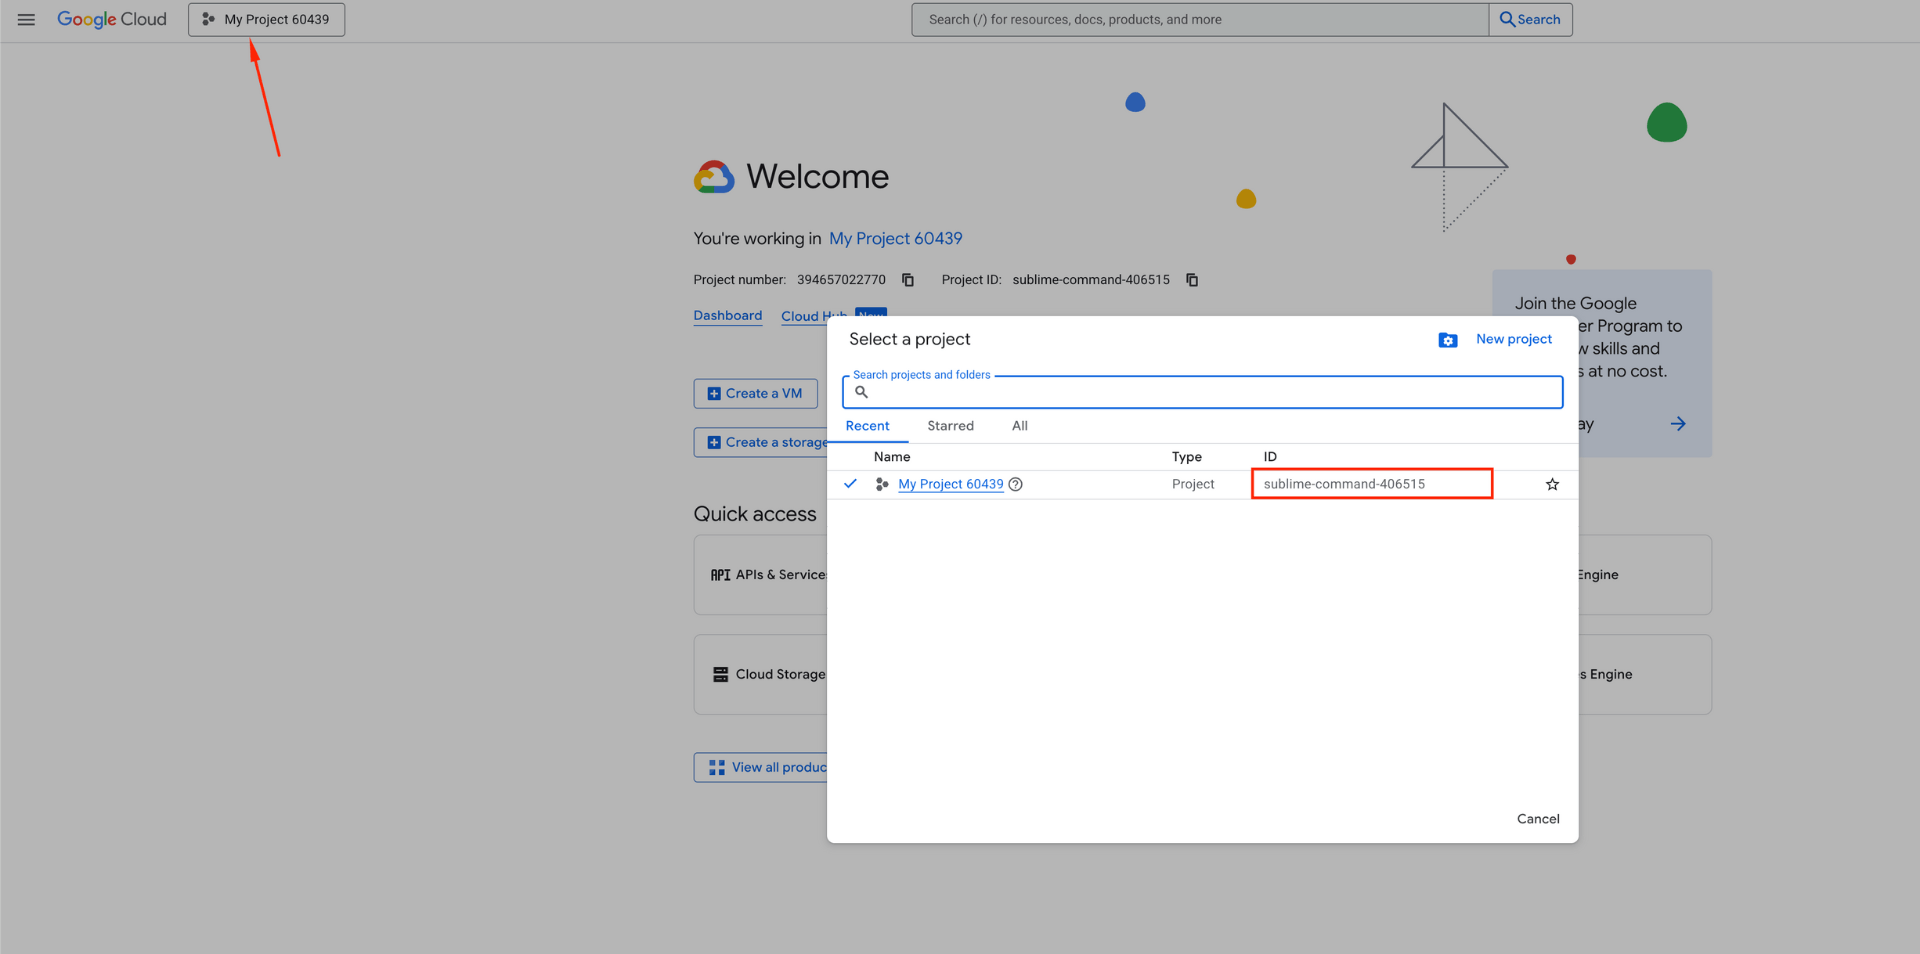
Option 2: Project Dashboard
- Go to the project dashboard
- Look for the field Project ID
6. Create Your Google Cloud API Key
Your API Key is used by your server (via your PrestaHero module) to verify captcha responses with the Enterprise API endpoint. Without this key, verification will fail.
Go to: APIs & Services → Credentials
Click Create Credentials. Select API Key.

Enter your API key’s name.
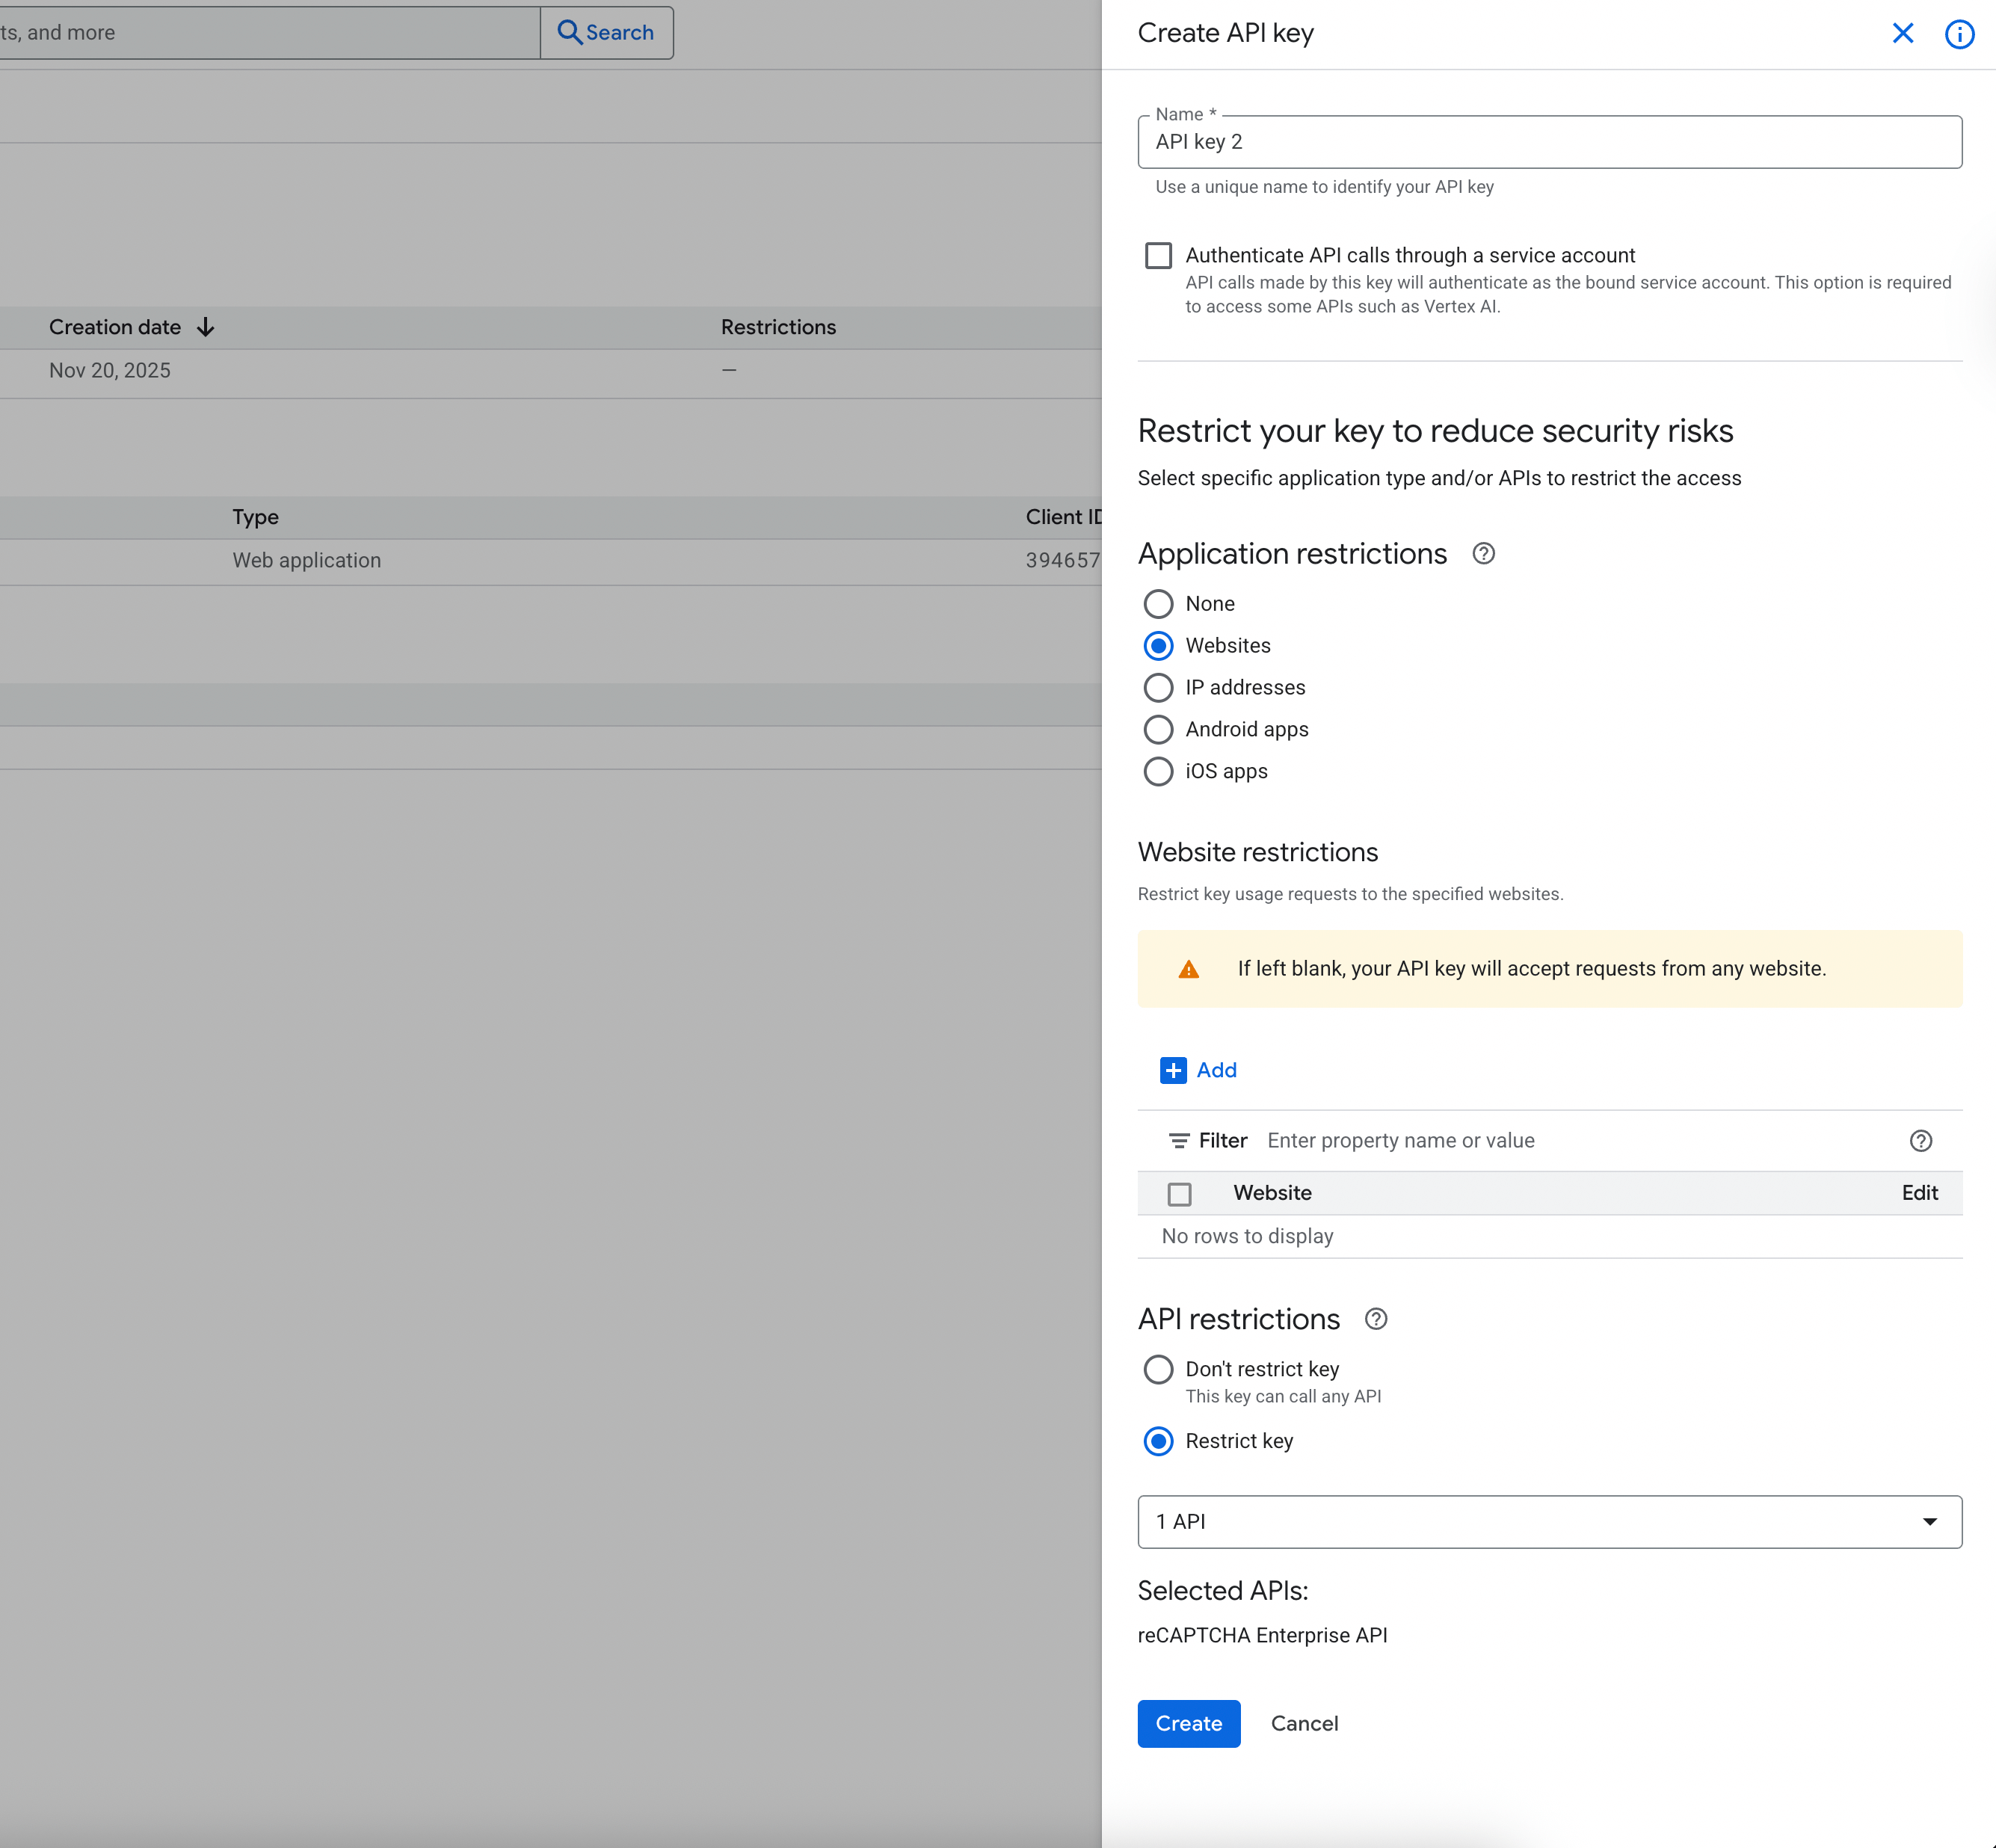
For security reasons, you should restrict this key so it cannot be used for unauthorized Google services. This prevents the key from being used for unrelated Google APIs.
- Go to API Restrictions
- Select Restrict Key
- Choose: reCAPTCHA Enterprise API
- Save the settings
Click Create button. Google will generate a new API key instantly.
Example API key format: AIzaSyB4...xxxxxxxxxxxx
This key must be kept private.
7. Configure reCAPTCHA Enterprise in PrestaHero Modules
Once you have your Key ID, Project ID and API Key from Google Cloud Console, the next step is to configure them inside your PrestaHero modules. All updated modules now include a unified reCAPTCHA configuration panel that lets you switch between Legacy Mode and Enterprise Mode easily.
This section explains where to find these settings and how to apply your credentials.
7.1. Where to find reCAPTCHA settings inside each module
Every module listed earlier includes a dedicated area for reCAPTCHA configuration. You can find it in: Modules → Module Manager → (Open module settings)
Once you open the reCAPTCHA section, you will see the option to choose mode.
7.2. Choose mode
Each module now supports two modes:
Option 1: Legacy Mode (Site Key + Secret Key)
Use this if:
- You still rely on Legacy reCAPTCHA keys created via the old admin console
- You haven’t migrated to Google Cloud yet
- Your key is still functioning (before 2026)
Option 2: Enterprise Mode (Key ID + Project ID + API Key)
Recommended for all merchants.
Use this if:
- Your key is already migrated to Google Cloud
- You manually created Enterprise keys
- You want long-term compatibility and security
- You want to avoid reCAPTCHA breaking after the Classic API shutdown
7.3. Paste credentials and save changes
Depending on your newly created reCAPTCHA key, select the reCAPTCHA Enterprise - checkbox or reCAPTCHA Enterprise - score-based, then enter the corresponding keys.
Paste:
- Key ID (from Security → reCAPTCHA Enterprise → Keys)
- Project ID (from Google Cloud Console Dashboard)
- API Key (from APIs & Services → Credentials)
Make sure all three values belong to the same Google Cloud project. Then save your changes.
For example, this is the configuration page of the CAPTCHA - reCAPTCHA module.

Tips to avoid errors
- Double-check for spaces or hidden characters when pasting
- Ensure the API key is restricted to "reCAPTCHA Enterprise API"
- Ensure your domain is listed in the Enterprise key’s allowed domains
- Ensure the Project ID is correct (not the Project Name)