How to Configure SendGrid with Easy SMTP for PrestaShop
What is SendGrid
SendGrid is a cloud-based email service that helps you manage and send marketing campaigns, transactional emails, and other notifications. It's a powerful tool for businesses looking to enhance their email deliverability and manage large volumes of emails efficiently. If you use PrestaShop, integrating SendGrid via the Easy SMTP module can provide you with reliable email service and detailed analytics.
How to configure SendGrid for Easy SMTP
In this guide, we’ll walk you through the process of setting up SendGrid with the Easy SMTP module in PrestaShop.
Generate a SendGrid API key
To connect your PrestaShop store to SendGrid, you first need an API key. Here’s how to create one:
Step 1: Log in to your SendGrid account.
Step 2: Navigate to Settings on the left-hand side of the dashboard. Select API Keys from the dropdown.
Step 3: Click Create API Key.
Step 4: Name your API key (e.g., "PrestaShop Integration").
Step 5: Choose the access level for the key:
- Full access: Access to all endpoints except billing and email address validation.
- Restricted access: Customize the level of access for different parts of your account.
- Billing access: Grants access to billing endpoints only.
Step 6: Click Create & View.
Step 7: Copy the API key and store it in a secure place. You will only be shown the API key once.
Access the Easy SMTP module configuration
Now that you have your SendGrid API key, follow these steps to configure the Easy SMTP module:
Step 1: Log in to your PrestaShop Back Office.
Step 2: Navigate to Modules > Module Manager.
Step 3: Search for the "Easy SMTP" module and click Configure.
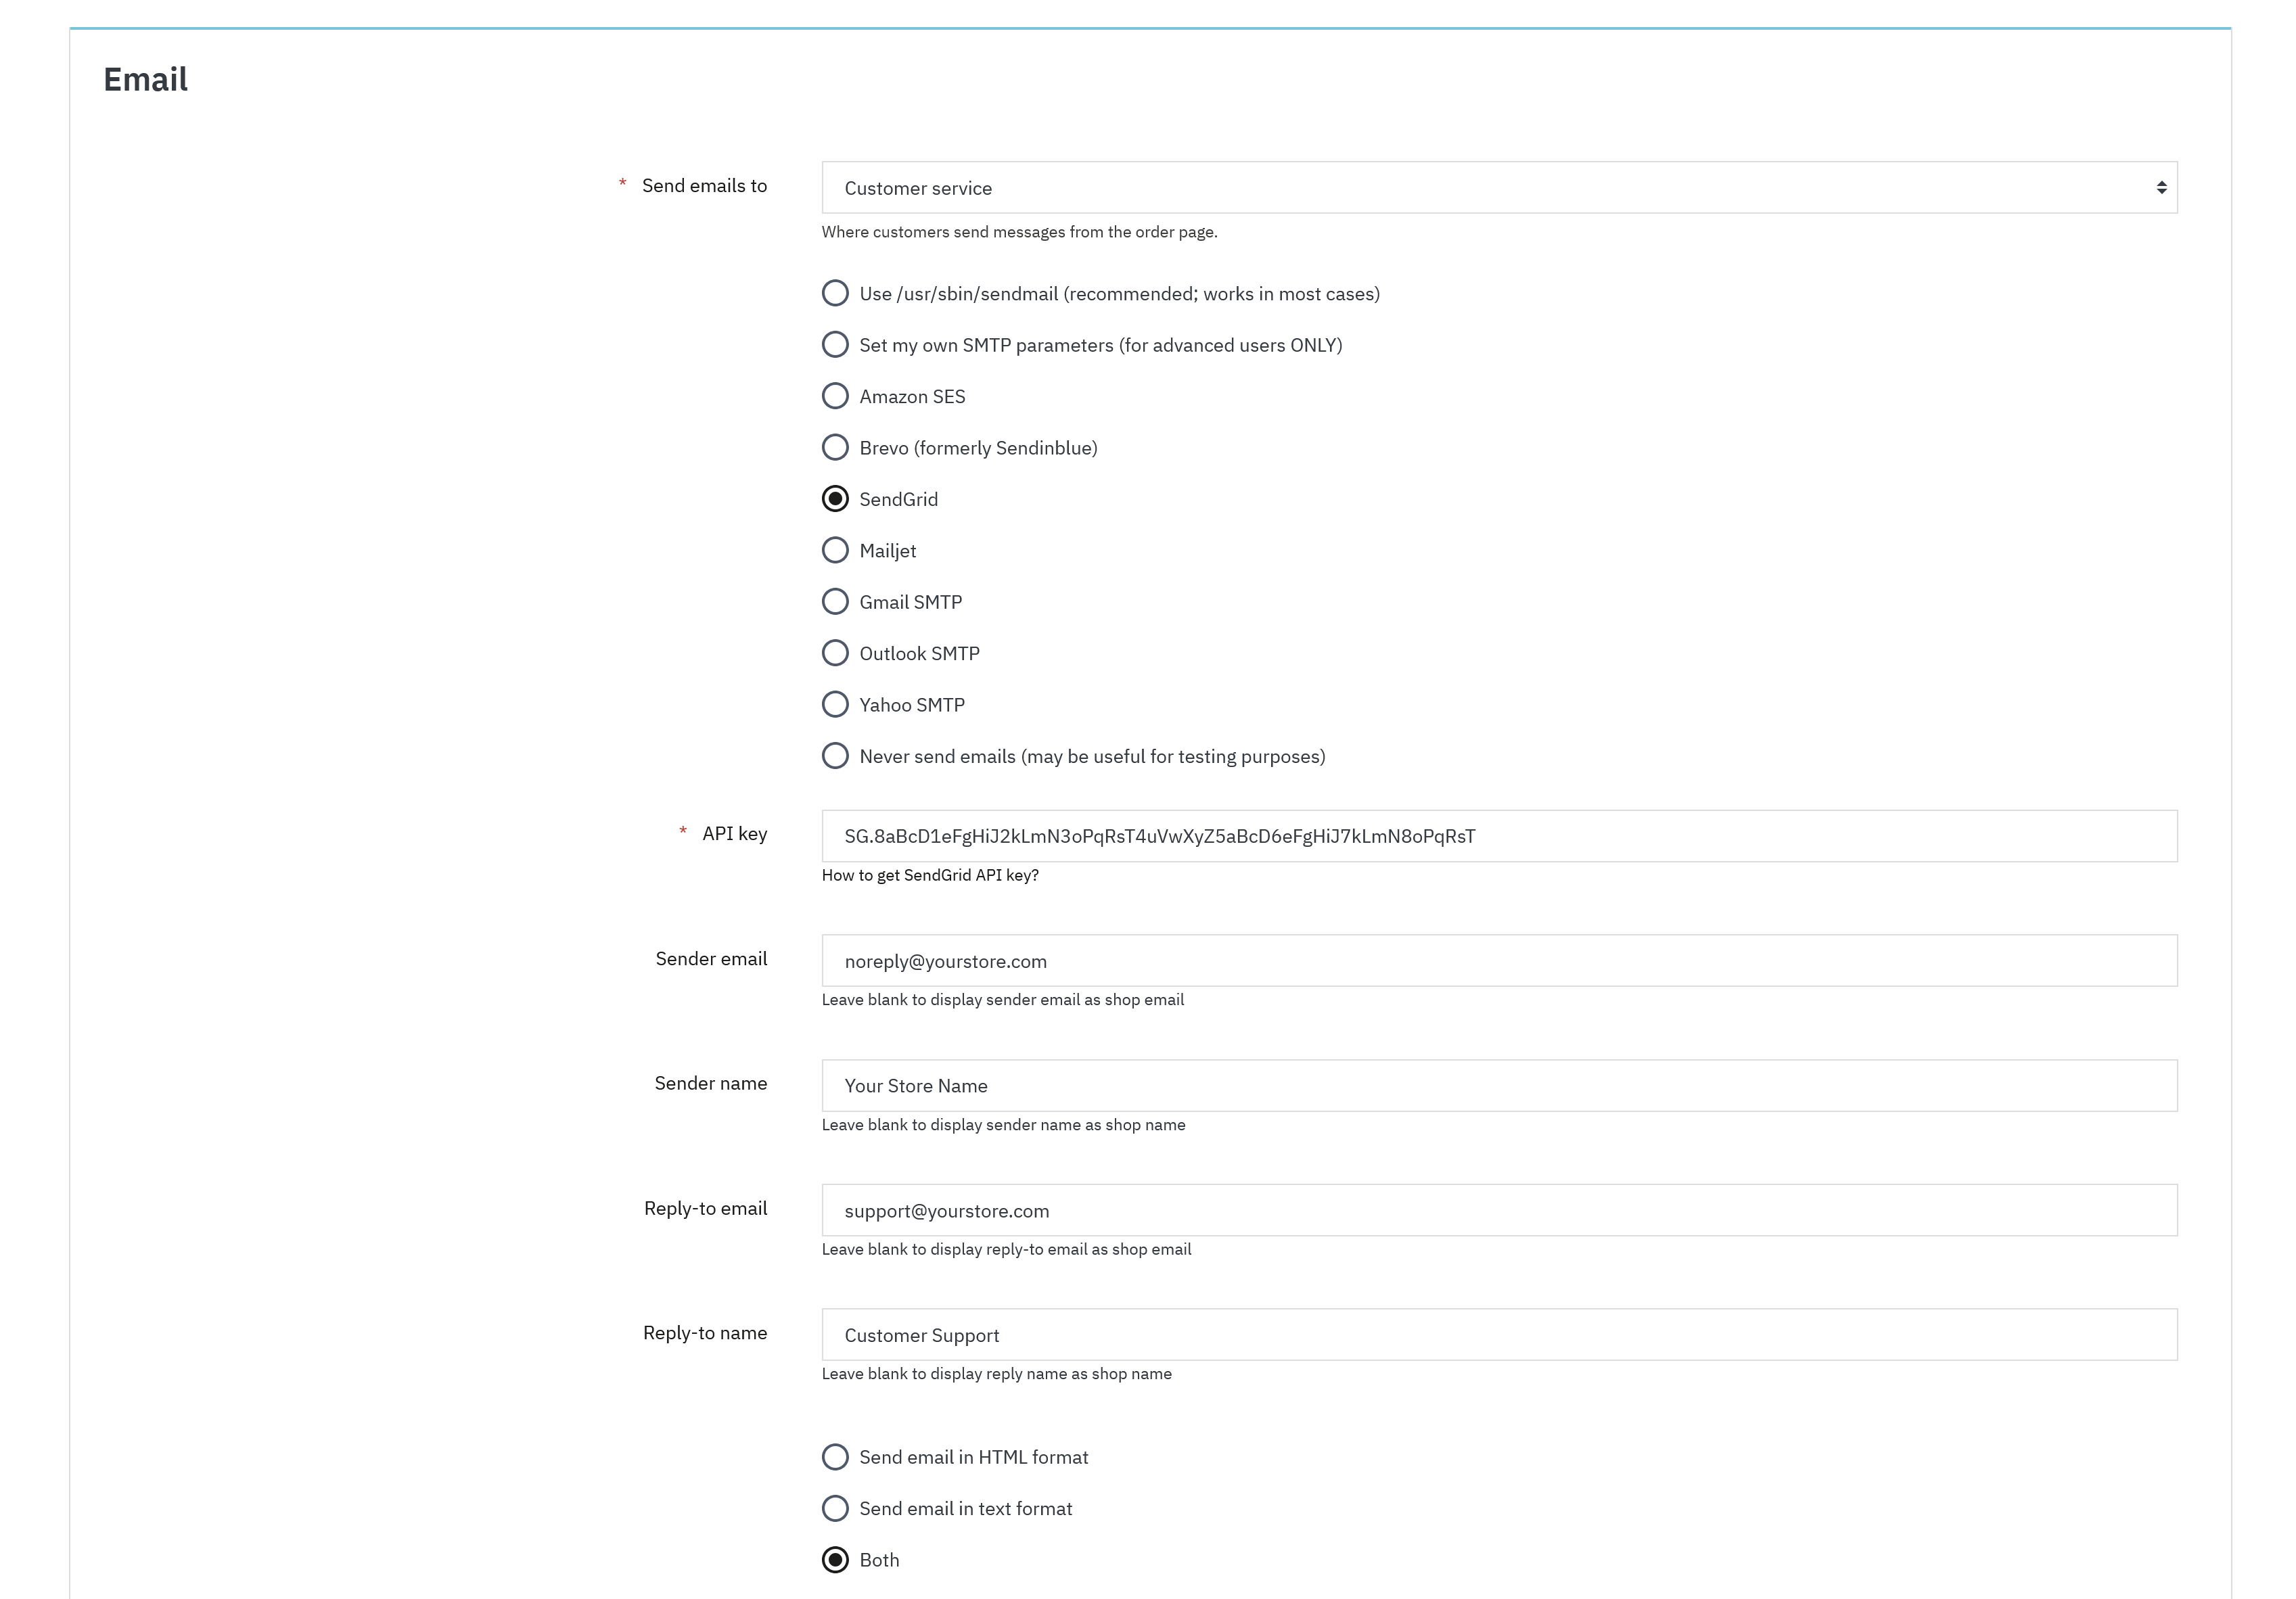
Input the SendGrid configuration details
Within the configuration page, you’ll need to input several details. Here’s what to enter:
- API Key: Paste the API key you generated from SendGrid.
- Sender Email: The email address from which you want to send emails (e.g., [email protected]).
- Sender Name: The name that appears as the sender (e.g., Your Store Name).
- Reply-to Email: The email address where replies should be sent (e.g., [email protected]).
- Reply-to Name: The name associated with the reply-to email (e.g., Customer Support).
Save your settings
After filling in all the required fields, click Save to apply the changes. Your PrestaShop store is now set up to send emails via SendGrid, providing you with a reliable and efficient email delivery solution.
Test your configuration
Send a test email to confirm that everything is set up correctly. Ensure that the email is sent and received without any issues.
By following these steps, you can integrate SendGrid with your PrestaShop store using the Easy SMTP module, ensuring your emails are delivered efficiently and securely.