How to Configure Gmail API with OAuth2 for Easy SMTP
Setting up Gmail SMTP with OAuth2 is a more secure alternative to using "Less Secure Apps" or simple App Passwords. Here is a professional, step-by-step technical guide to configuring the Gmail API for this purpose.
Step 1: Create a New Project
- Go to the Google Cloud Console.
- Click the Project Dropdown in the top left corner and select New Project.
- Enter a Project Name (e.g., Gmail SMTP Integration) and click Create.
- Ensure your new project is selected in the dropdown before proceeding.
Step 2: Enable the Gmail API
- Navigate to APIs & Services > Library from the left-hand sidebar.
- Search for "Gmail API".
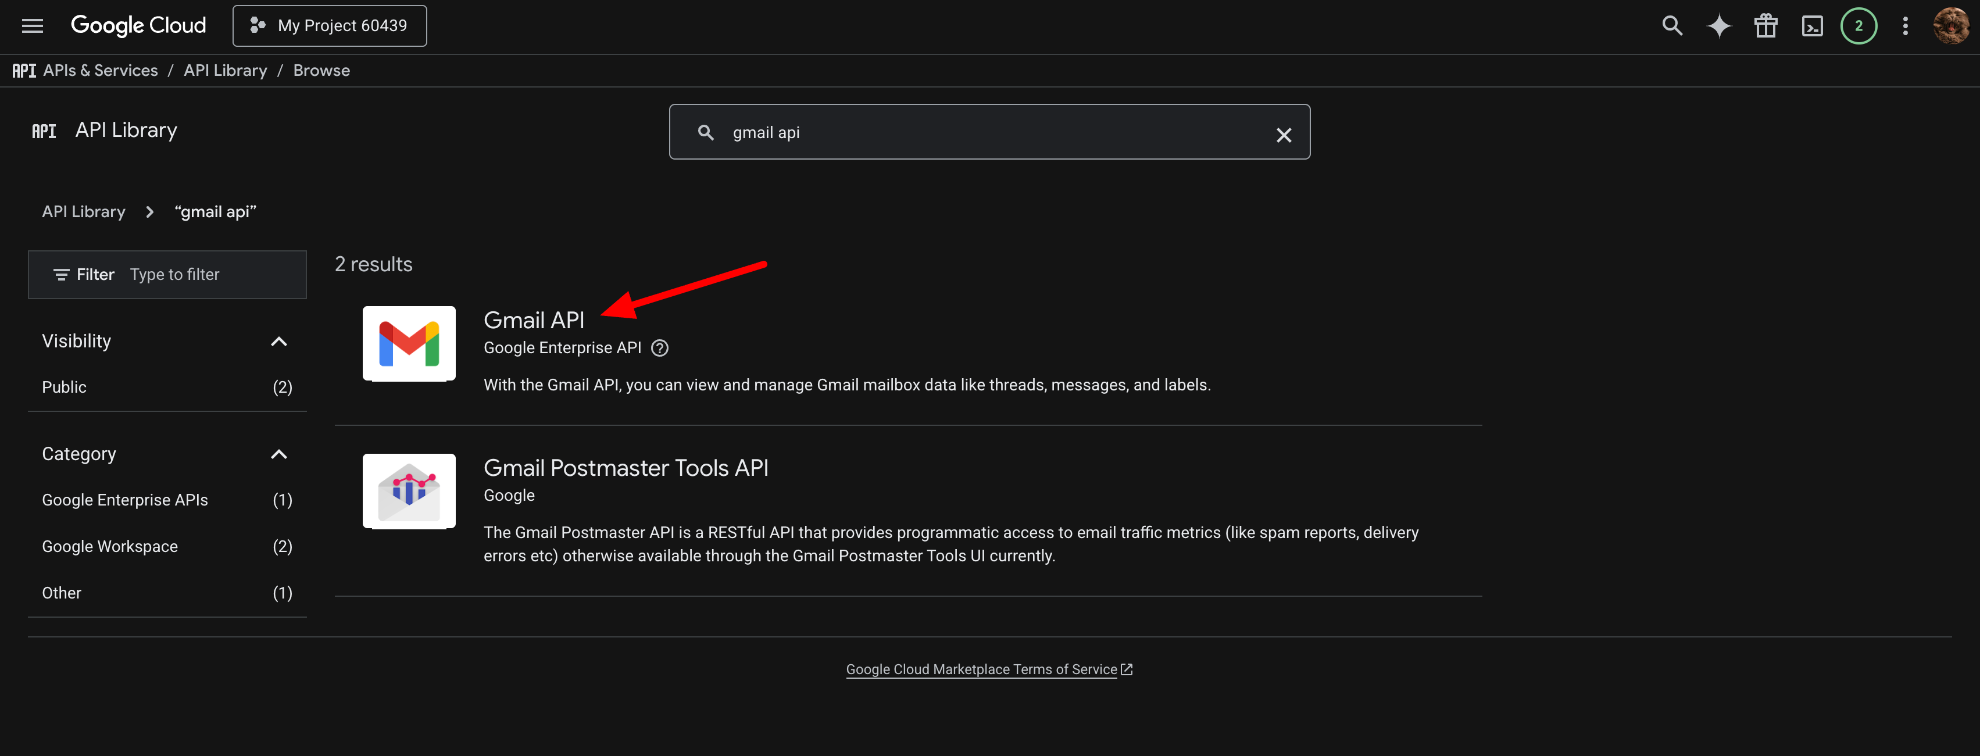
- Click on the Gmail API result and select Enable.
Step 3: Configure the OAuth Consent Screen
Before generating credentials, you must define how the application identifies itself.
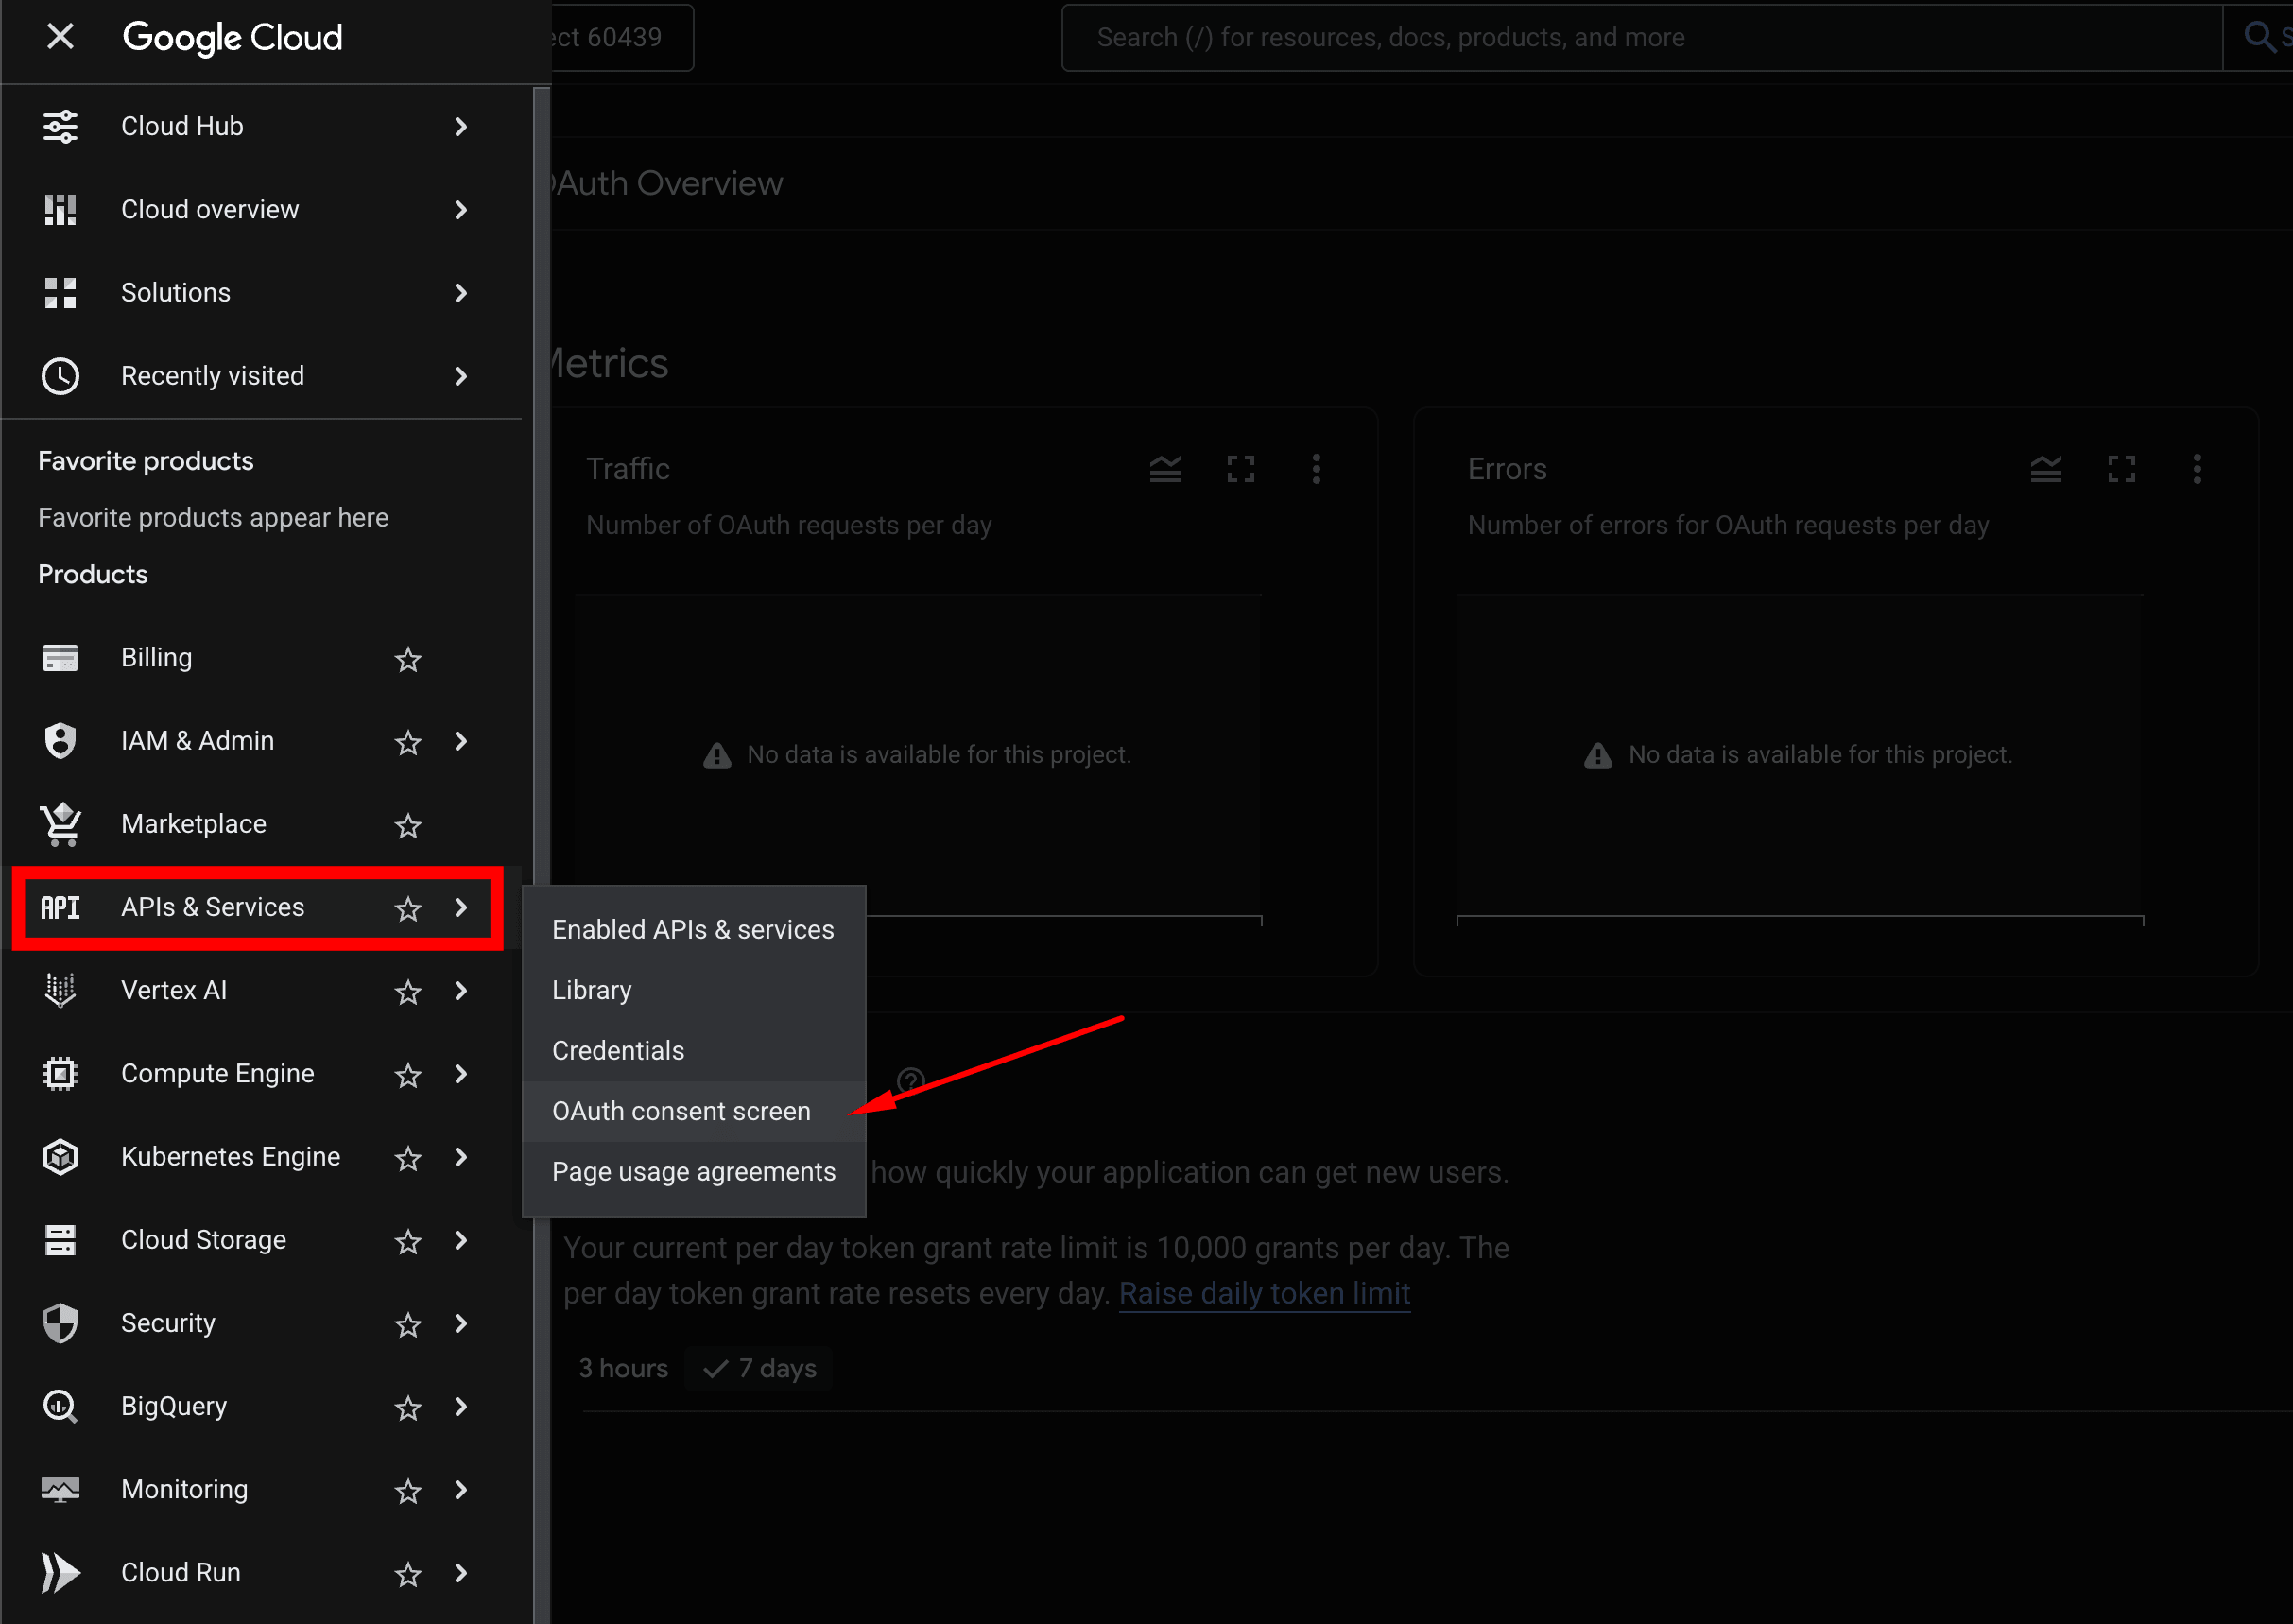
- Go to APIs & Services > OAuth consent screen.
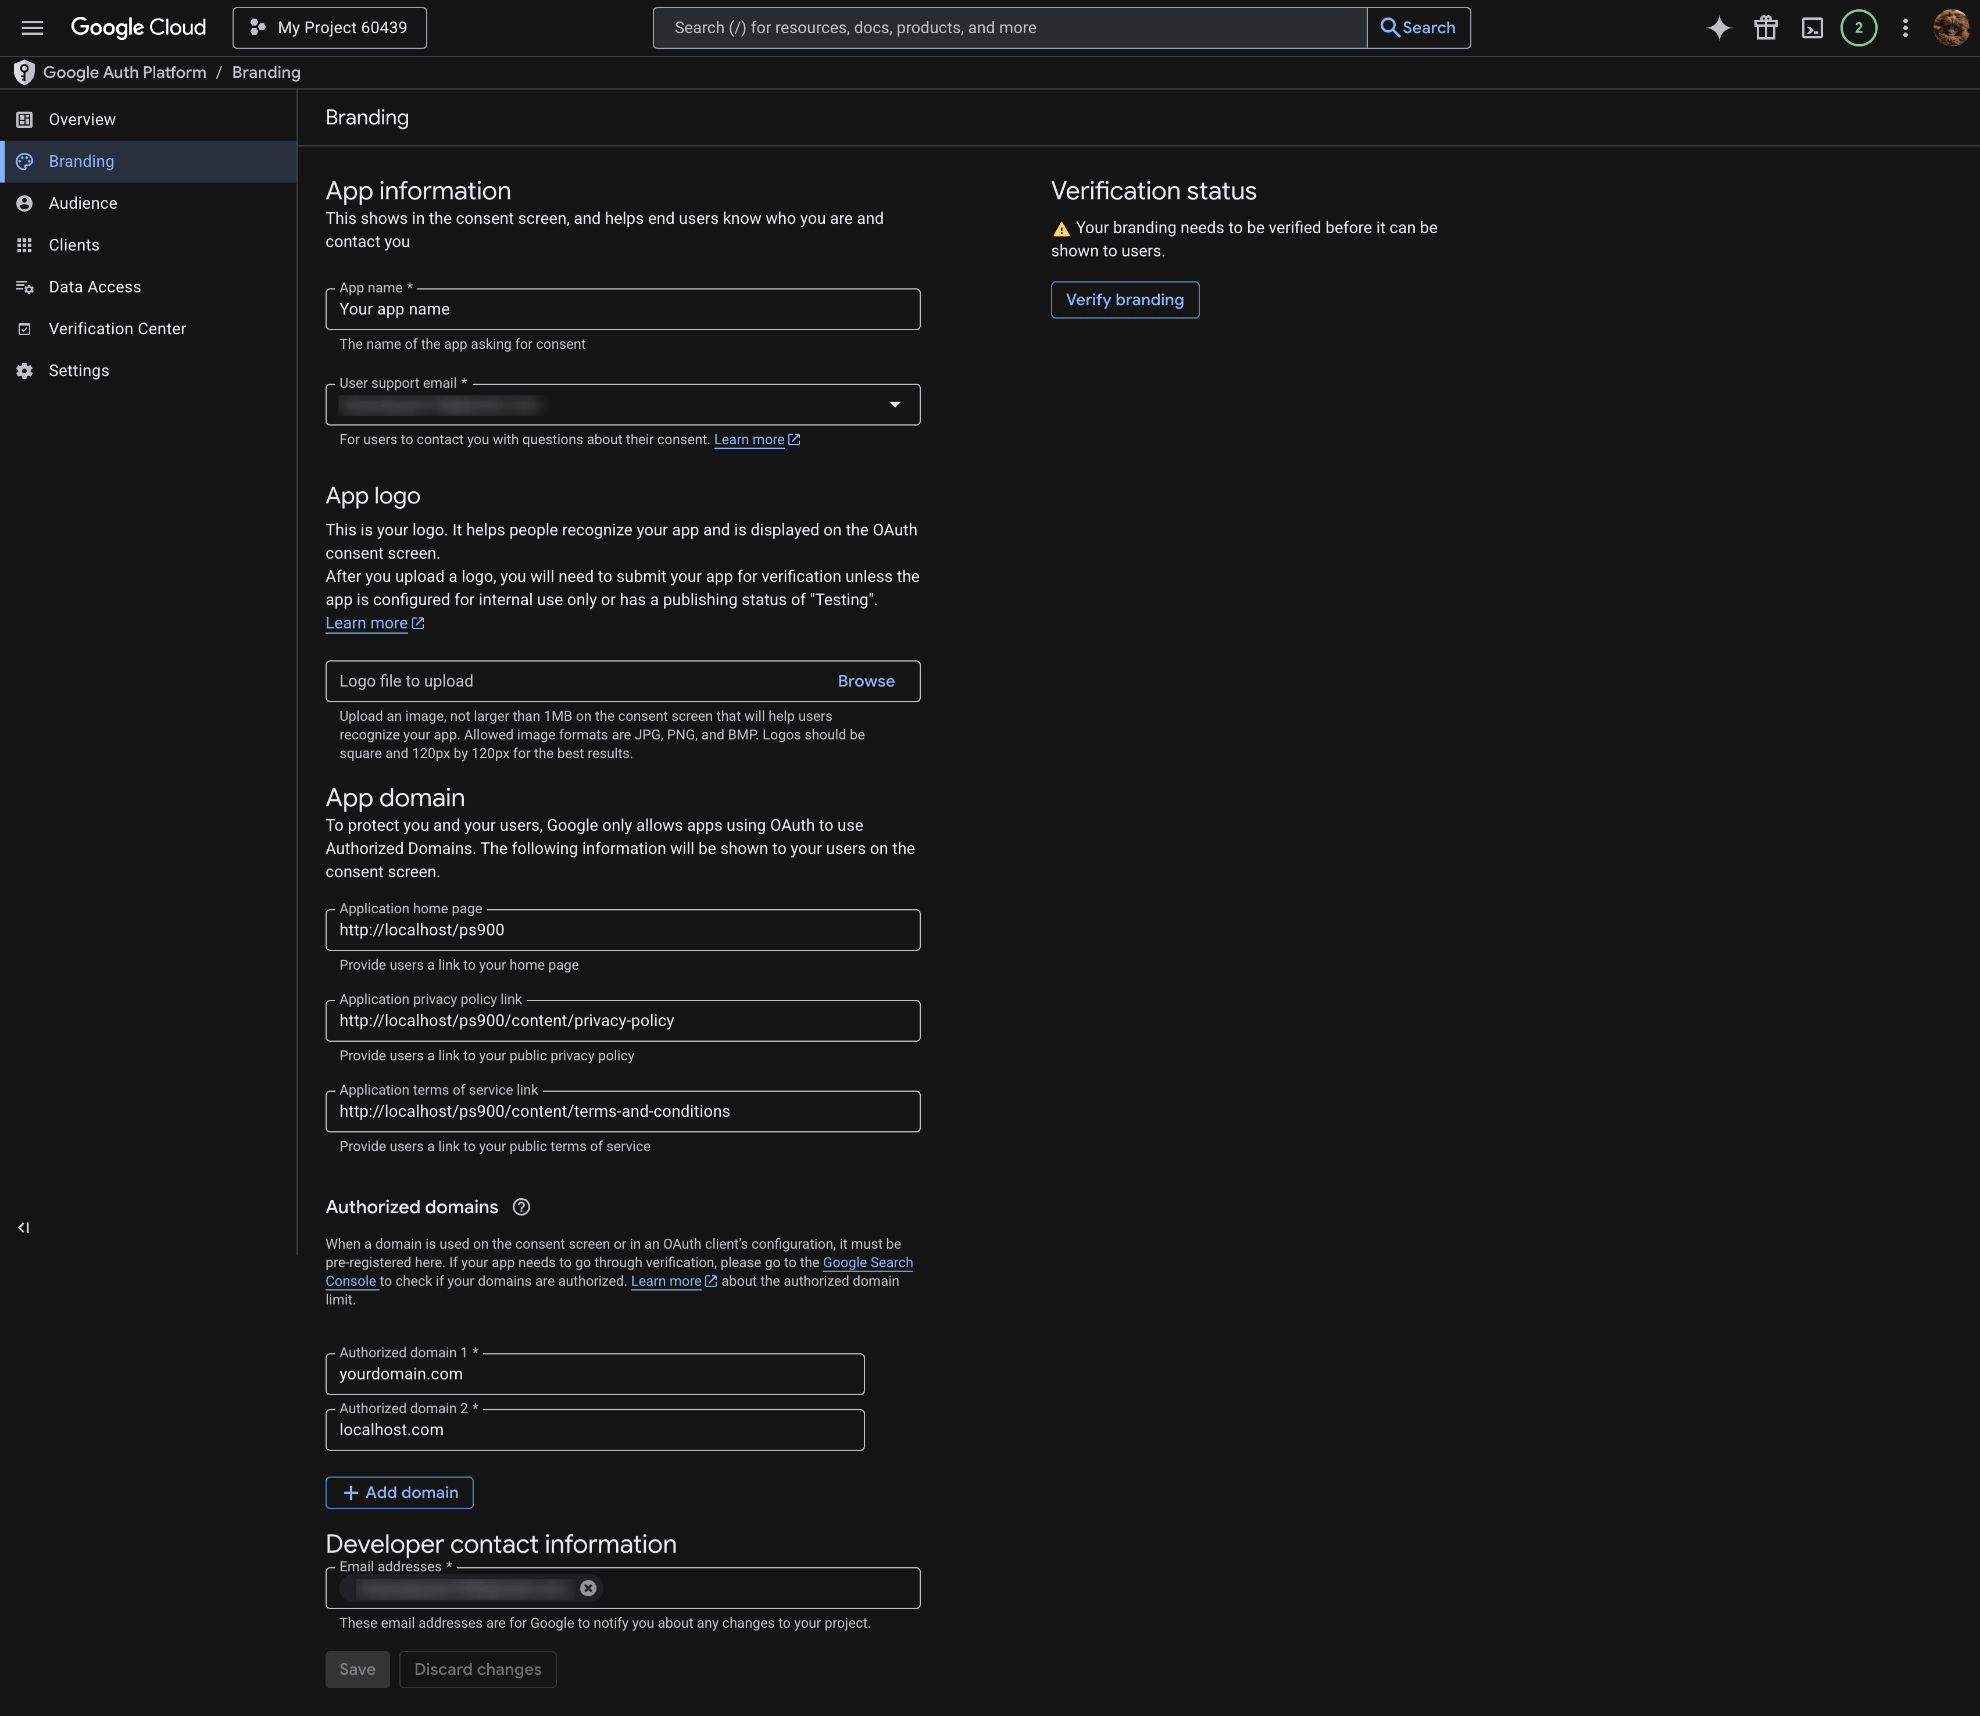
Configure the "Branding" tab
This tab helps users identify your app when they verify it. It's also where the information Google will use to evaluate your app during the verification process is displayed.
App name: Enter your app name. It should be clear and professional (e.g., [Store Name] Mail Sender or My Store SMTP). This name will be displayed on the Google verification screen.
User support email: Choose a support email address from the dropdown list. This is the email address users can contact if they have access issues.
App logo: Optional, but uploading your store logo is recommended for a more professional look. The image must be in JPG, PNG, or BMP format, with a maximum size of 1MB, and should be square (Google recommends 120x120px).
Note: Adding a logo can make your application's verification process more thorough.
App domain: This is a crucial step to transition to Production mode.
Application home page: Enter the URL of your website's homepage (e.g., https://yourdomain.com). It MUST start with https:// and must match the authorized domain below.
Application privacy policy link: Enter the URL to your website's Privacy Policy page (e.g., https://yourdomain.com/privacy-policy). Google will display this link to users before they grant permission.
Application terms of service link: Enter the URL to your website's Terms of Service page (e.g., https://yourdomain.com/terms-and-conditions).
Authorized domains: This is a list of top-level domains that your application is allowed to use. You must add your official domain here (e.g., yourdomain.com).
Click + Add domain to add your domain.
Note: Do not include http:// or https:// here.
Developer contact information: Enter the developer's email addresses so Google can send important project-related notifications (e.g., policy changes, security alerts). You can enter multiple emails separated by commas.
After filling in all the information, click the SAVE button at the bottom of the page to save the Branding tab configuration and move to the next tab.
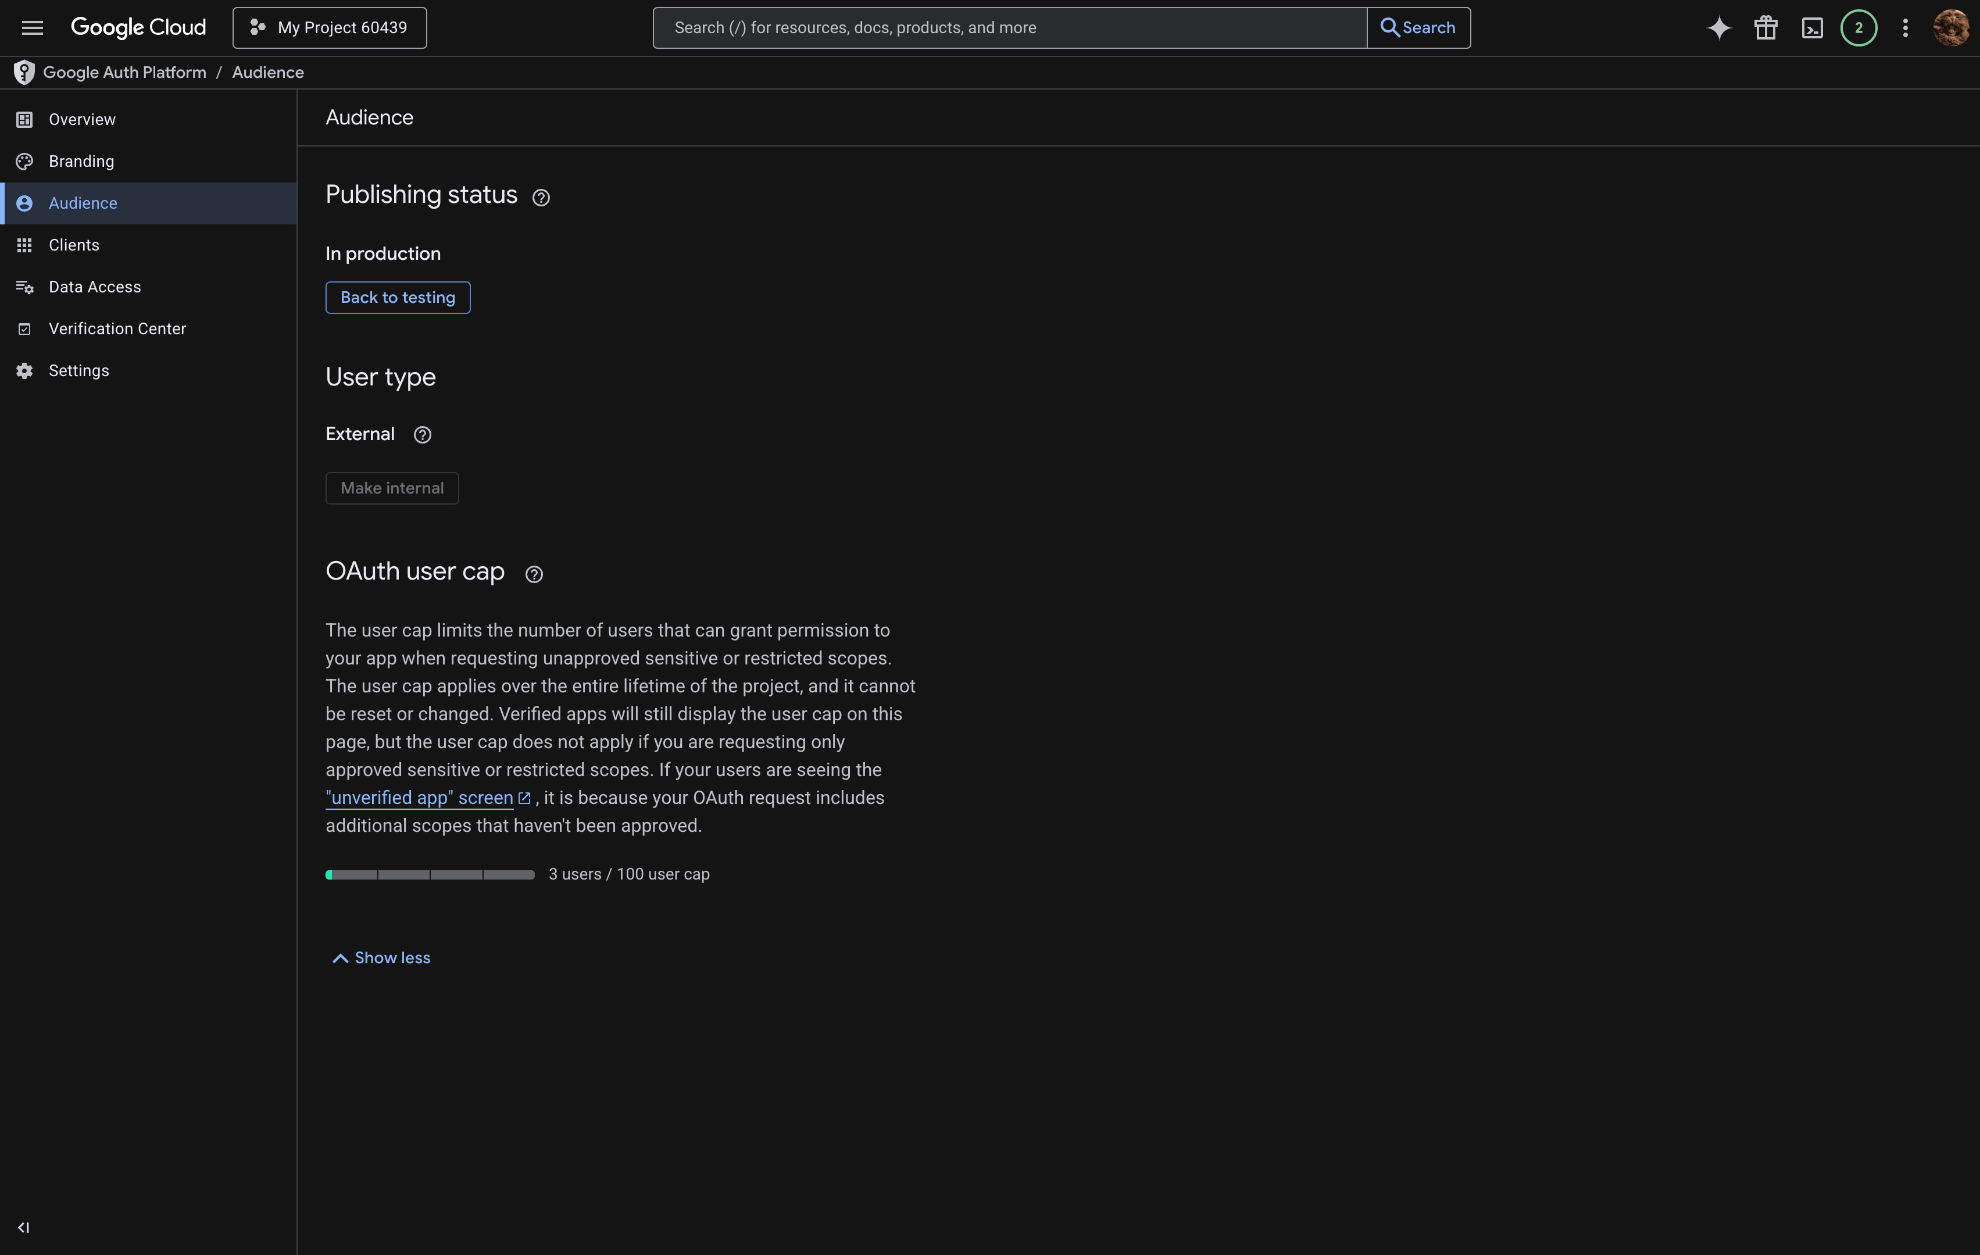
Configure the "Audience" tab
This tab determines who can use your application and its current state.
Publishing status: change to "In production" to prevent the token from expiring after 7 days.
Tip: If, for any reason, you want to return to testing mode, you can press the "Back to testing" button, but the token will be reset.
User type: change the status to External. This means any user with a Google account can be authorized (provided they are added to the Test Users list if the app is not yet authenticated, or everyone if the app is already authenticated).
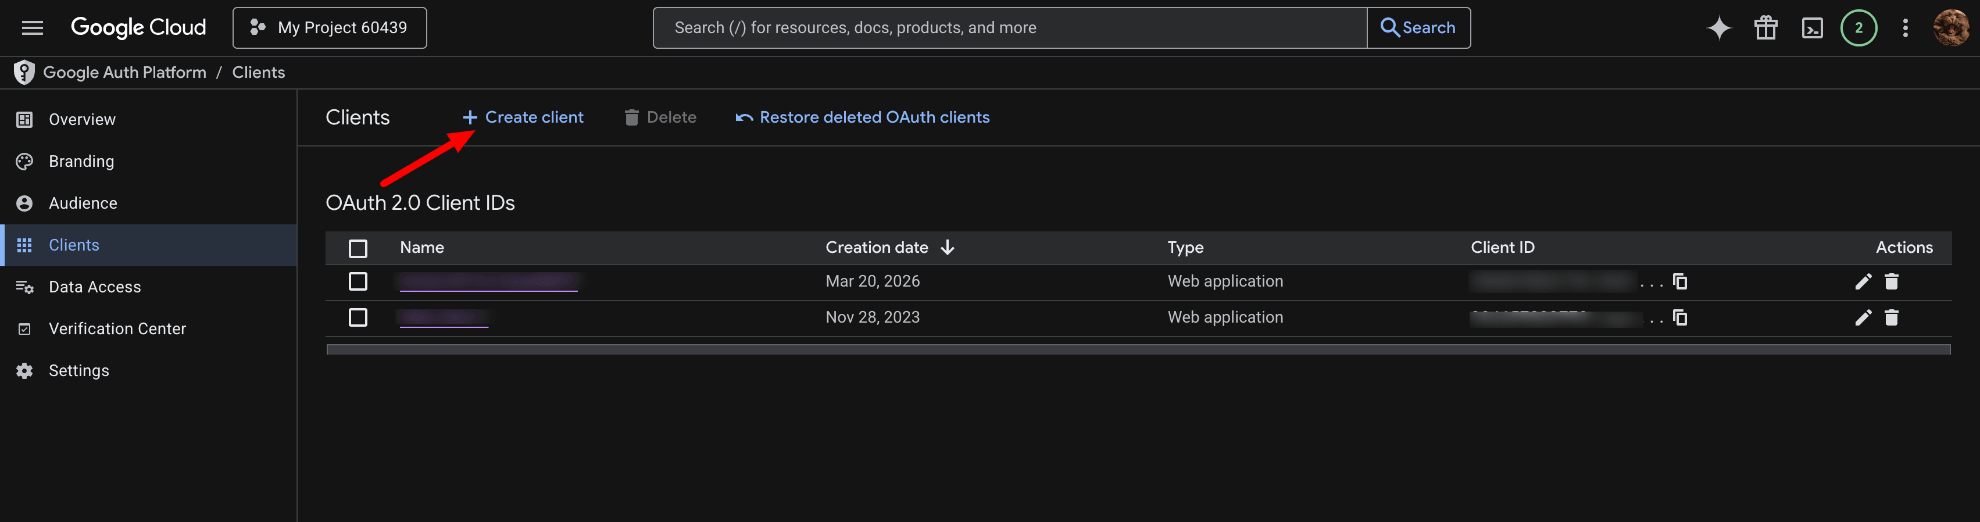
Generating Credentials in the "Clients" Tab
Once you have configured your Branding and Audience, you need to create the specific "keys" (Client ID and Secret) that allow the Easy SMTP module to communicate with Google’s servers.
Click the + Create client button at the top of the page. This starts the process of generating a new set of OAuth 2.0 credentials.
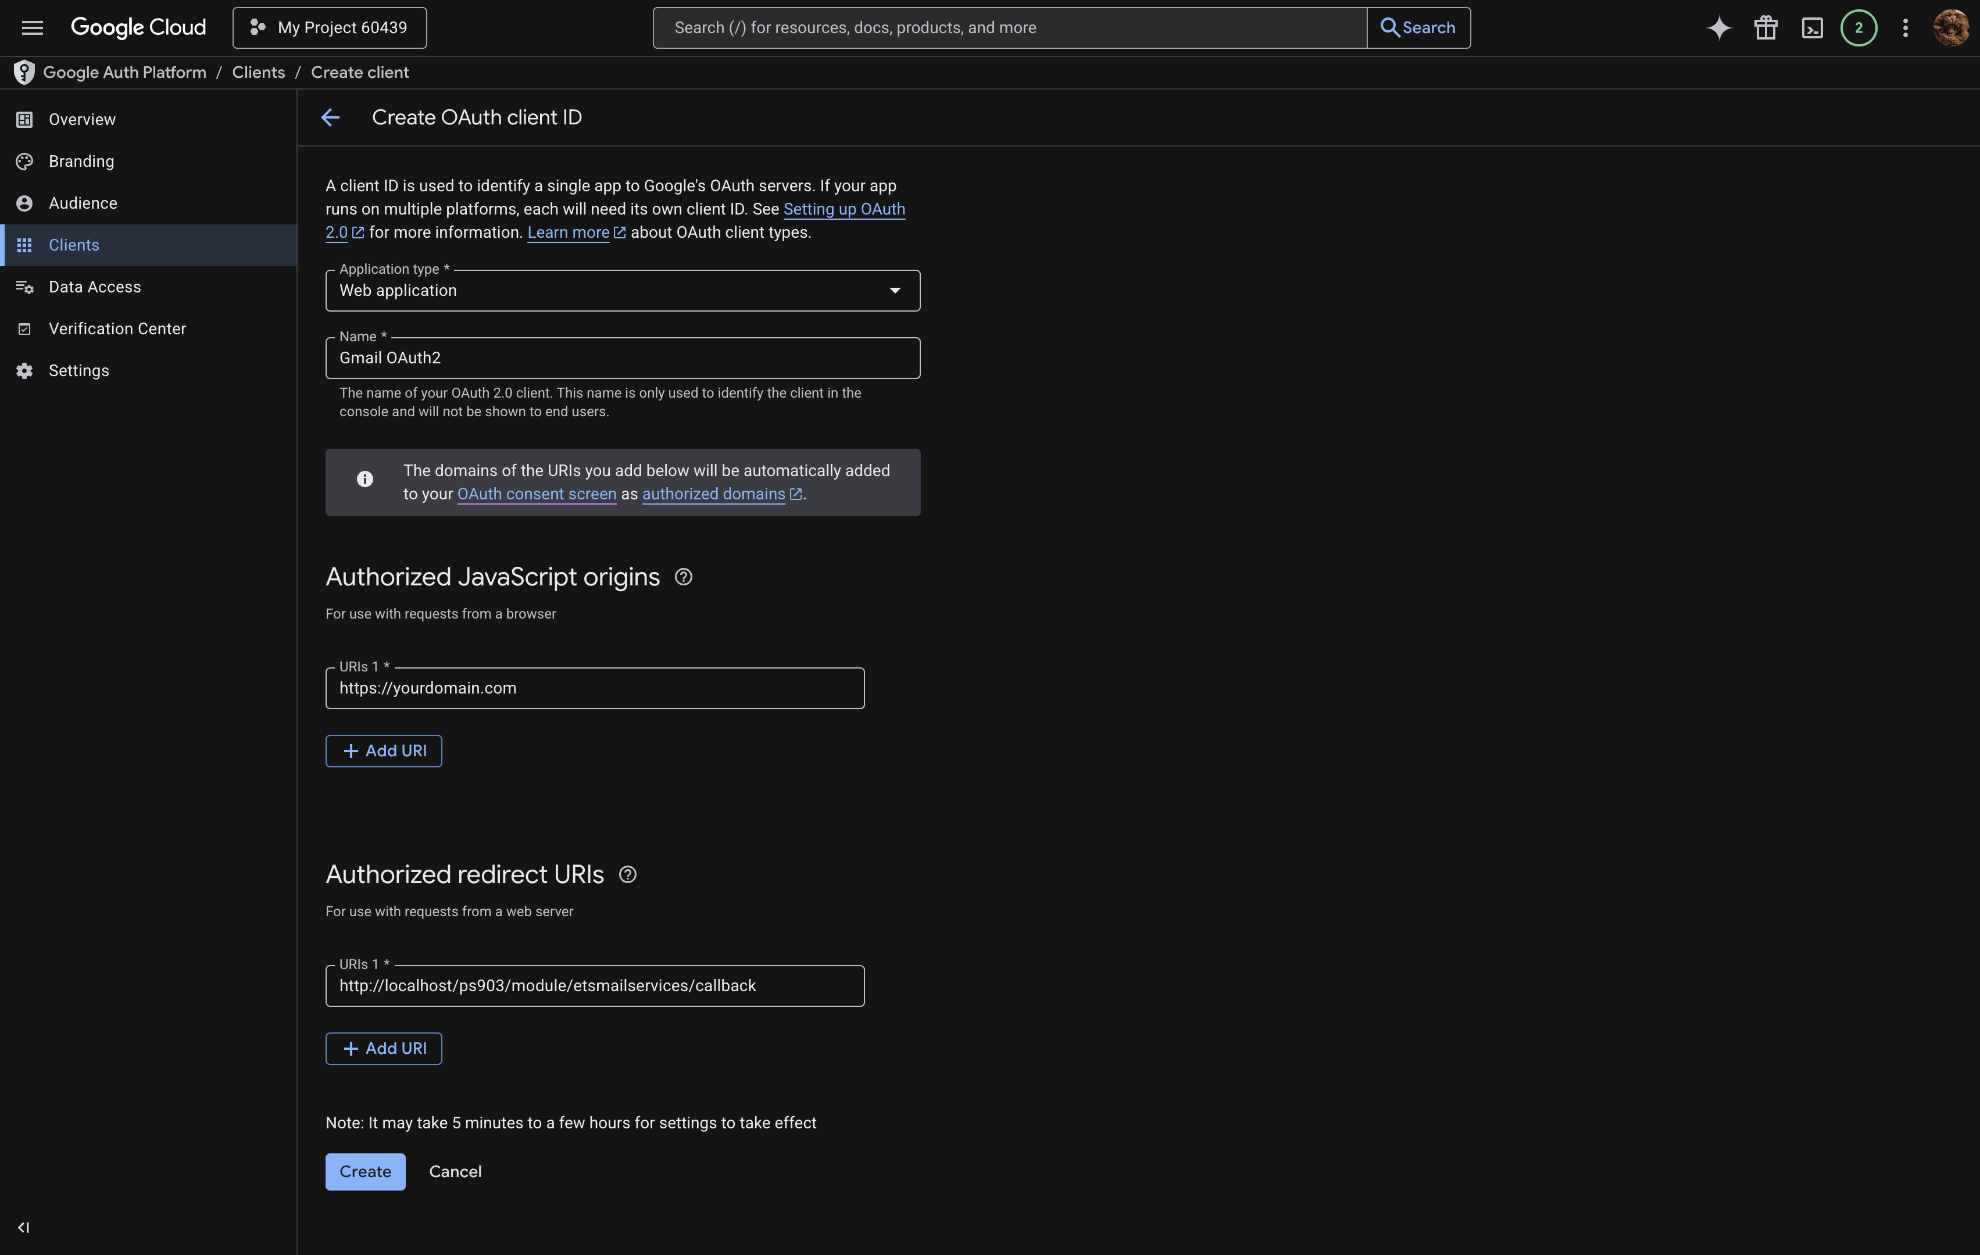
In the "Create OAuth client ID" screen, fill in the following details:
- Application type: Select Web application from the dropdown menu.
- Name: Enter a descriptive name for your internal reference (e.g., `PrestaShop Easy SMTP`). This name is only visible to you in the Google Cloud Console.
- Authorized JavaScript origins: Click + Add URI. Enter your store's base URL (e.g., `https://yourdomain.com`).
Note: Google requires the domain to be pre-registered in the "Authorized domains" section of your Branding tab.
- Authorized redirect URIs (The most critical step): This is the URL where Google sends the authorization code after you log in.
- Go to your Easy SMTP module configuration page in PrestaShop. Look for a field labeled "Redirect URI".
- Copy that URL and click + Add URI in Google Cloud Console to paste it. Example format: `https://yourdomain.com/module/etsmailservices/callback`
Warning: Even a missing `/` at the end or using `http` instead of `https` will cause a `redirect_uri_mismatch` error.
- Click the Create button at the bottom of the page.
An "OAuth client created" pop-up will appear. It will display two long strings of characters:
1. Your Client ID: The public identifier for your application.
2. Your Client Secret: The private password used to exchange codes for tokens. Keep this secret and do not share it.
Copy both values and paste them into the corresponding fields in your Easy SMTP module settings.
Finalizing Data Access
After creating the Client, you must define what that client is allowed to do:
Navigate to the Data Access tab.
Click Add or remove scopes.
In the filter box, type "Gmail API" and look for the scope: `.../auth/gmail.modify` (to only send emails) or `.../auth/mail.google.com` (full access).
For most SMTP modules, `https://mail.google.com/` is the standard required scope.
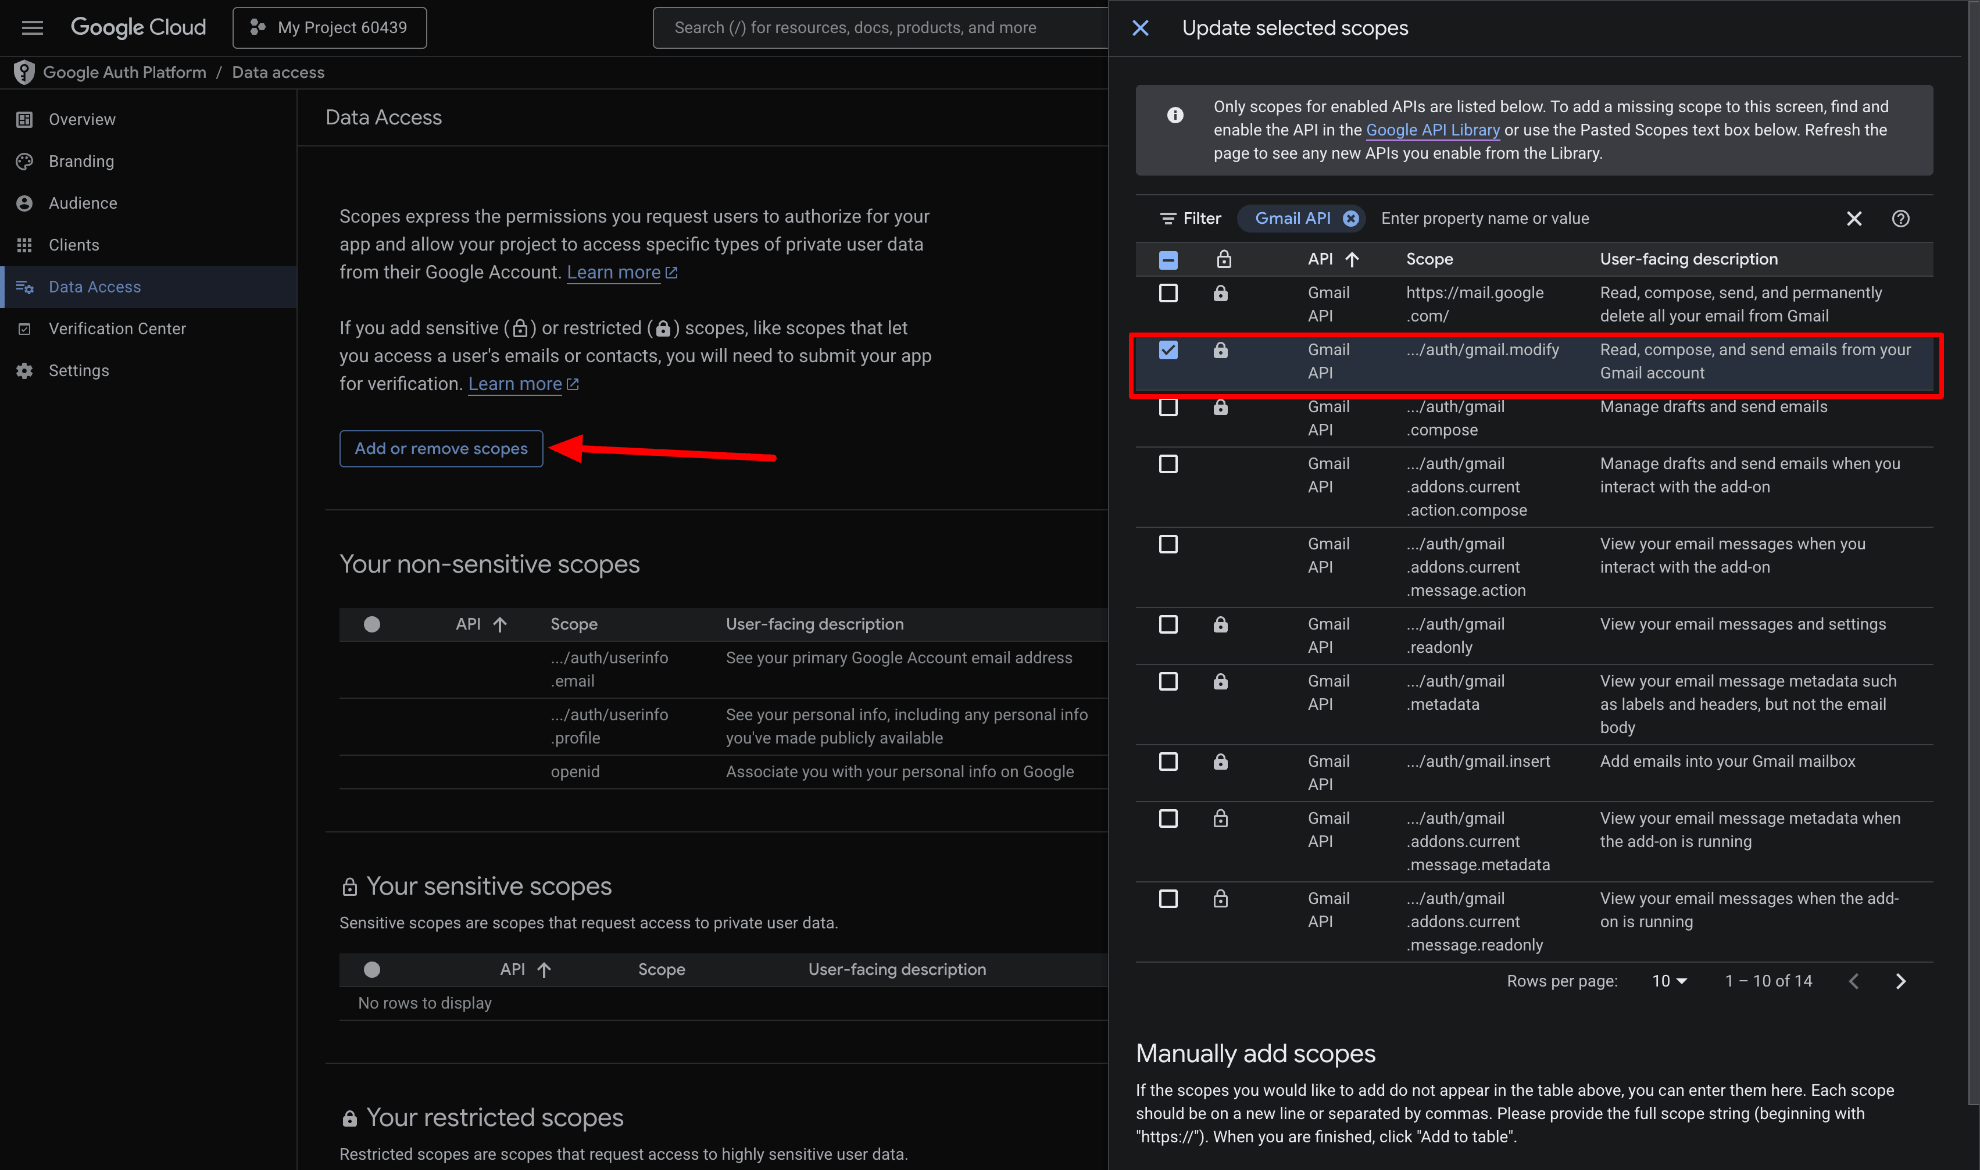
Select the checkbox for the scope, scroll to the bottom of the panel, and click Update.
Finally, click Save at the bottom of the Data Access page to apply the permissions.
Step 4: Final Configuration in the Easy SMTP Module
After generating your credentials on the Google Cloud Console, return to your PrestaShop admin panel to link the module with your Gmail account.
1. Select the Mailing Method
Select the mailing method: ensure you have selected the radio button for "Gmail with OAuth2".
2. Enter Google API Credentials
- Gmail OAuth2 Client ID: Paste the Client ID you copied from the Clients tab in Google Cloud Console.
- Gmail OAuth2 Client Secret: Paste the corresponding Client Secret.
- Redirect URI: This URI must exactly match the "Authorized redirect URI" you entered in Step 3 on Google Cloud Console. If they don't match, you will encounter a `redirect_uri_mismatch` error.
3. Authorize the Connection
- Click the Get Access token button. A new window or tab will open, redirecting you to Google’s login page.
- Log in using the Gmail account you want to use for sending emails.
- Click Allow to give the module permission to send emails on your behalf.
- Once successful, the window will close, and the module should confirm that the token has been received.
4. Configure Sender Identity
- Gmail OAuth2 email address: Enter the full Gmail address you just authorized (e.g., `[email protected]`).
- Sender name: Enter the name you want customers to see (e.g., `My Store Support`). Leave blank if you want to use the default Shop Name from your PrestaShop settings.
- Reply-to email: Enter the email address where you want to receive customer replies. Leave blank to use your default Shop Email.
- Reply-to name: Enter the name for the reply-to contact. Leave blank to use your default Shop Name.
5. Save and Test
- Click Save at the bottom of the module.
- Use the "Send a test email" feature to verify that the SMTP connection is working perfectly.