Communicating with Customers Through Support Tickets
Effective communication with customers is essential for providing excellent support. This guide will explain how to interact with customers through support tickets, detailing the ticket interfaces in both the back office and front office of PrestaShop.
How customers manage their support tickets
Customers can easily view and manage their support tickets from the front office of your website.
Step 1: Accessing ticket details
- Customers should log in to their account on your PrestaShop store.
- Go to "My account" > "Support tickets".
- From the list of support tickets, select the ticket you want to view and click "View".
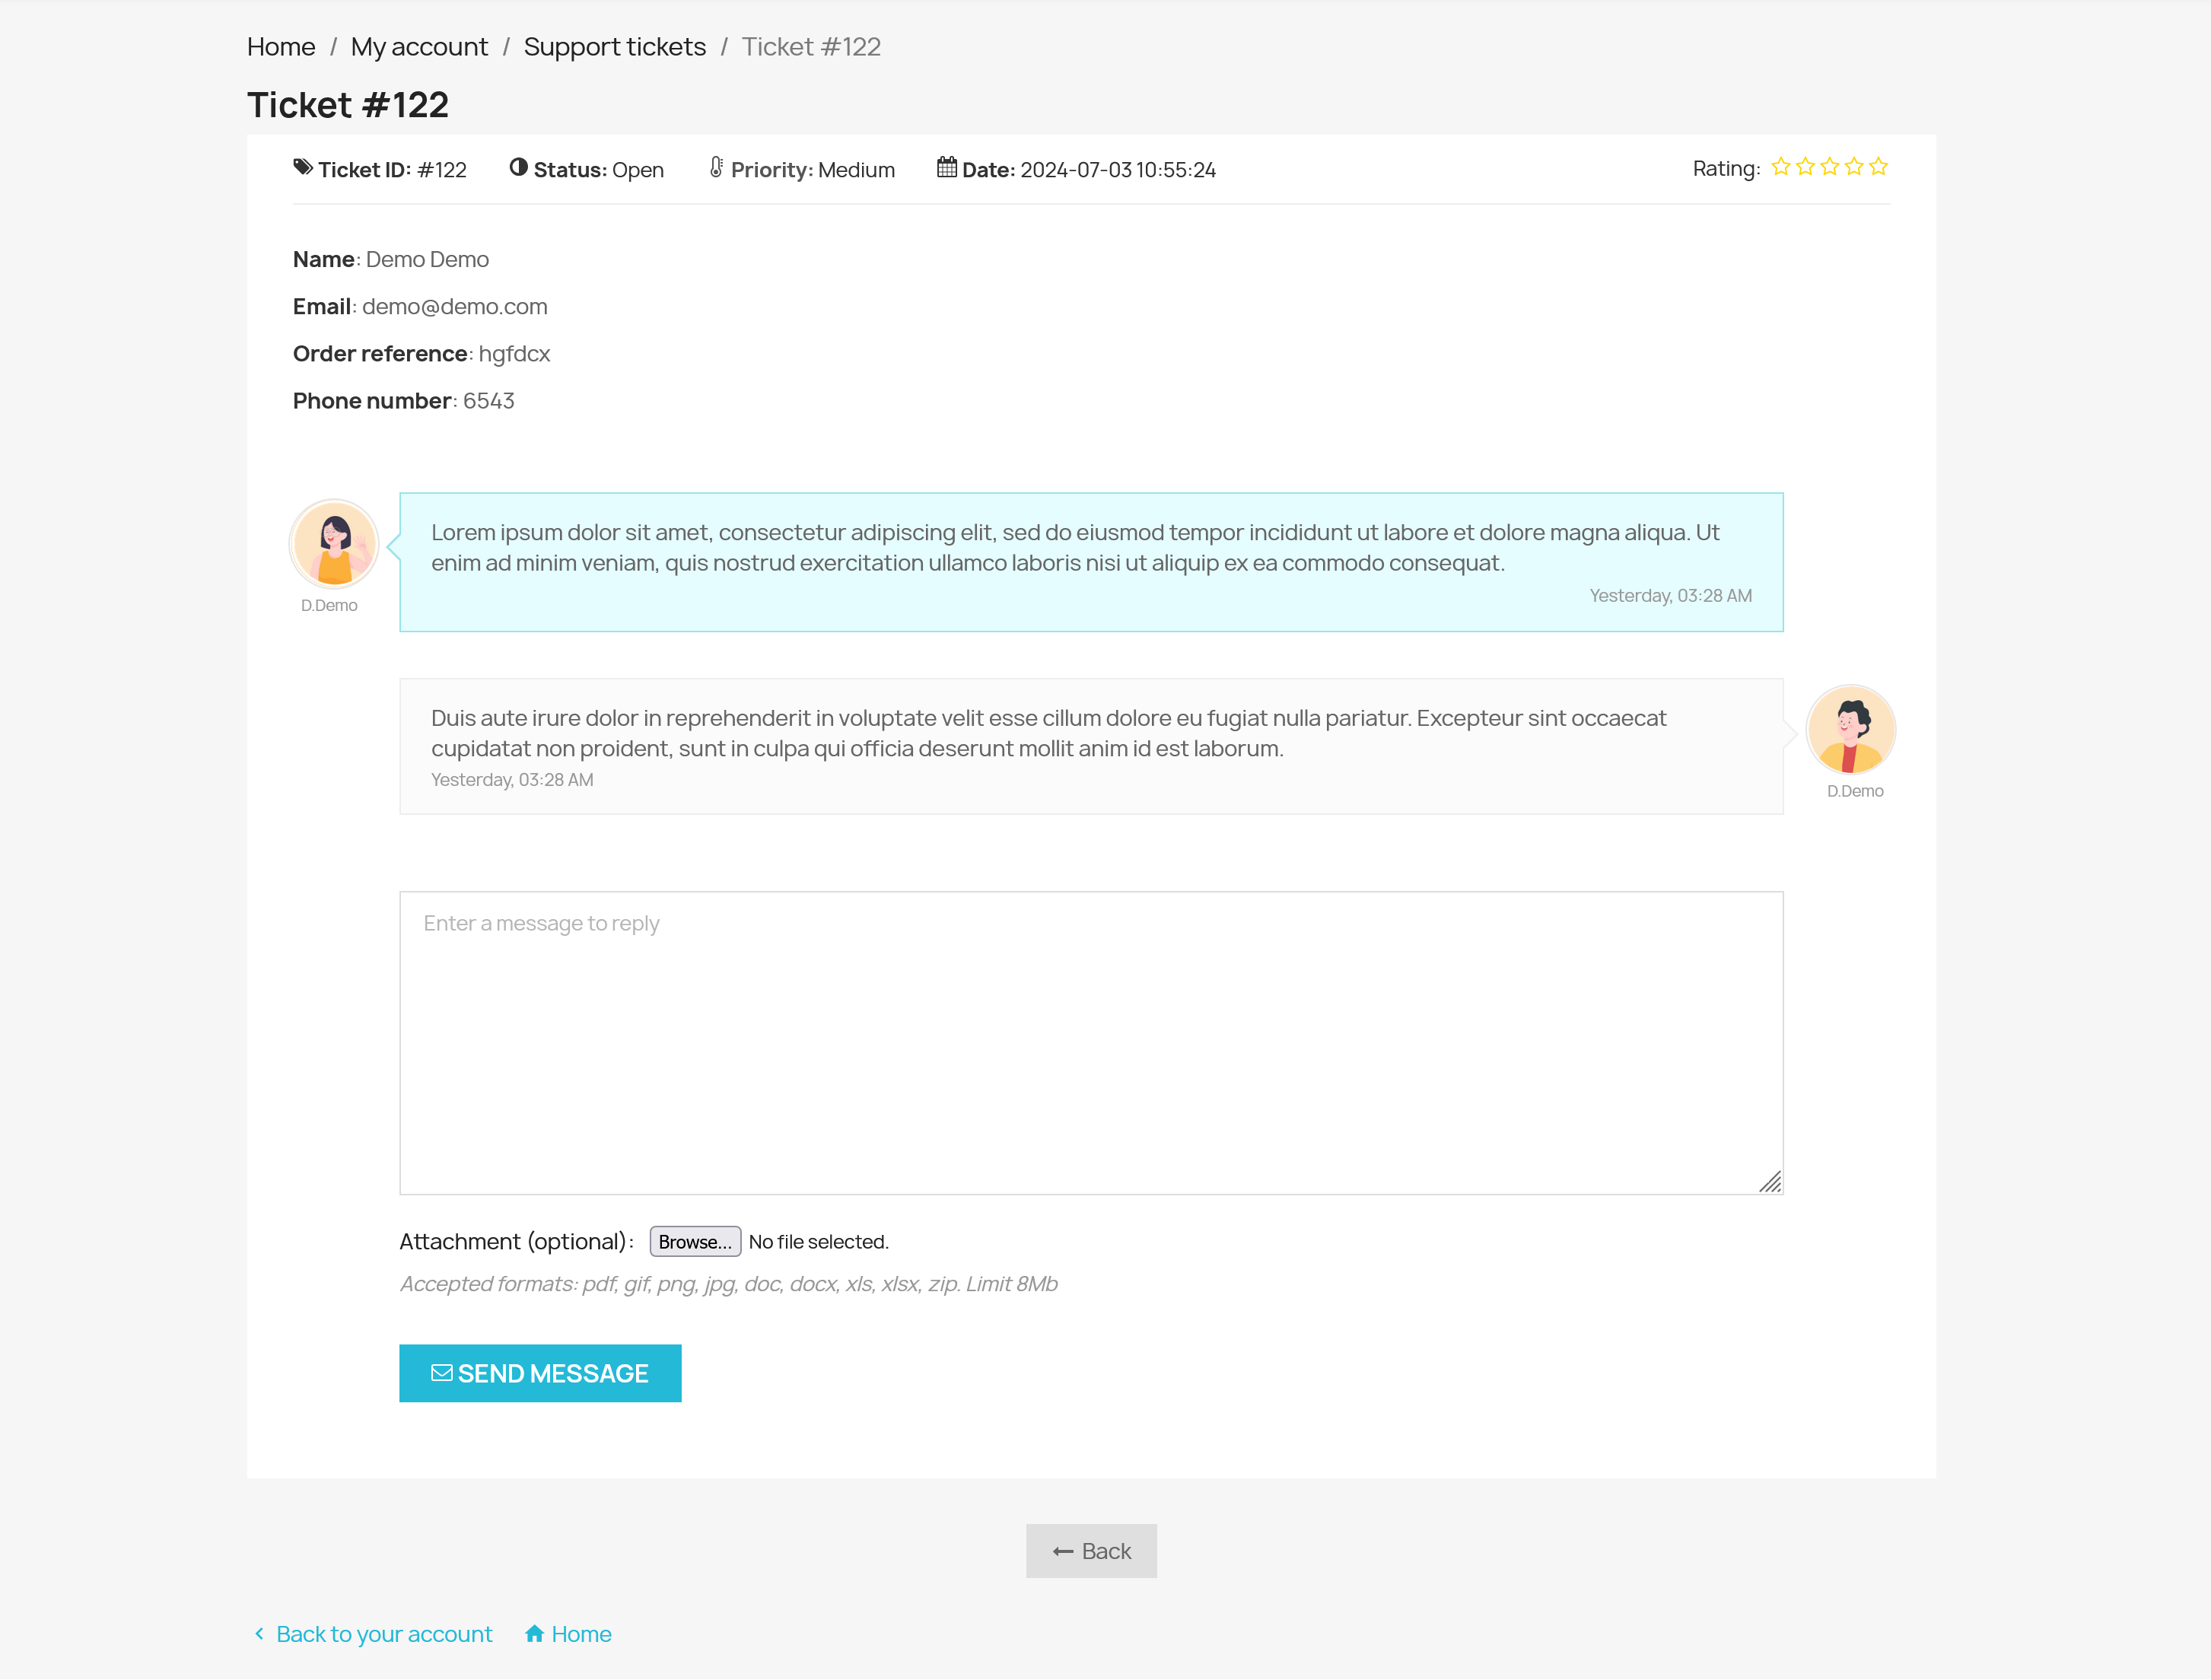
Step 2: Ticket details page
Ticket information:
- ID: Unique identifier for the ticket.
- Status: Current status (Open, Closed, Canceled).
- Priority: Urgency level of the ticket (Low, Medium, High, Urgent).
- Creation time: When the ticket was created.
Customer satisfaction rating: Customers can rate the support service from 1 to 5 stars.
Basic customer information:
- Name
- Related order ID (if any)
- Phone number
Messages: Conversation thread between the customer and the support staff. Customers can enter a message and attach a file to send to the support staff.
How admin/staff responds to support tickets
Admins and staff can manage and respond to support tickets from the back office:
Step 1: Accessing ticket details:
- Admin or staff login to the back office using their credentials.
- Go to the configuration page of the "Live Chat, Contact Form & Ticket System" module.
- Select the "Tickets" menu.
- From the list of support tickets, select the ticket you want to view and click "View".
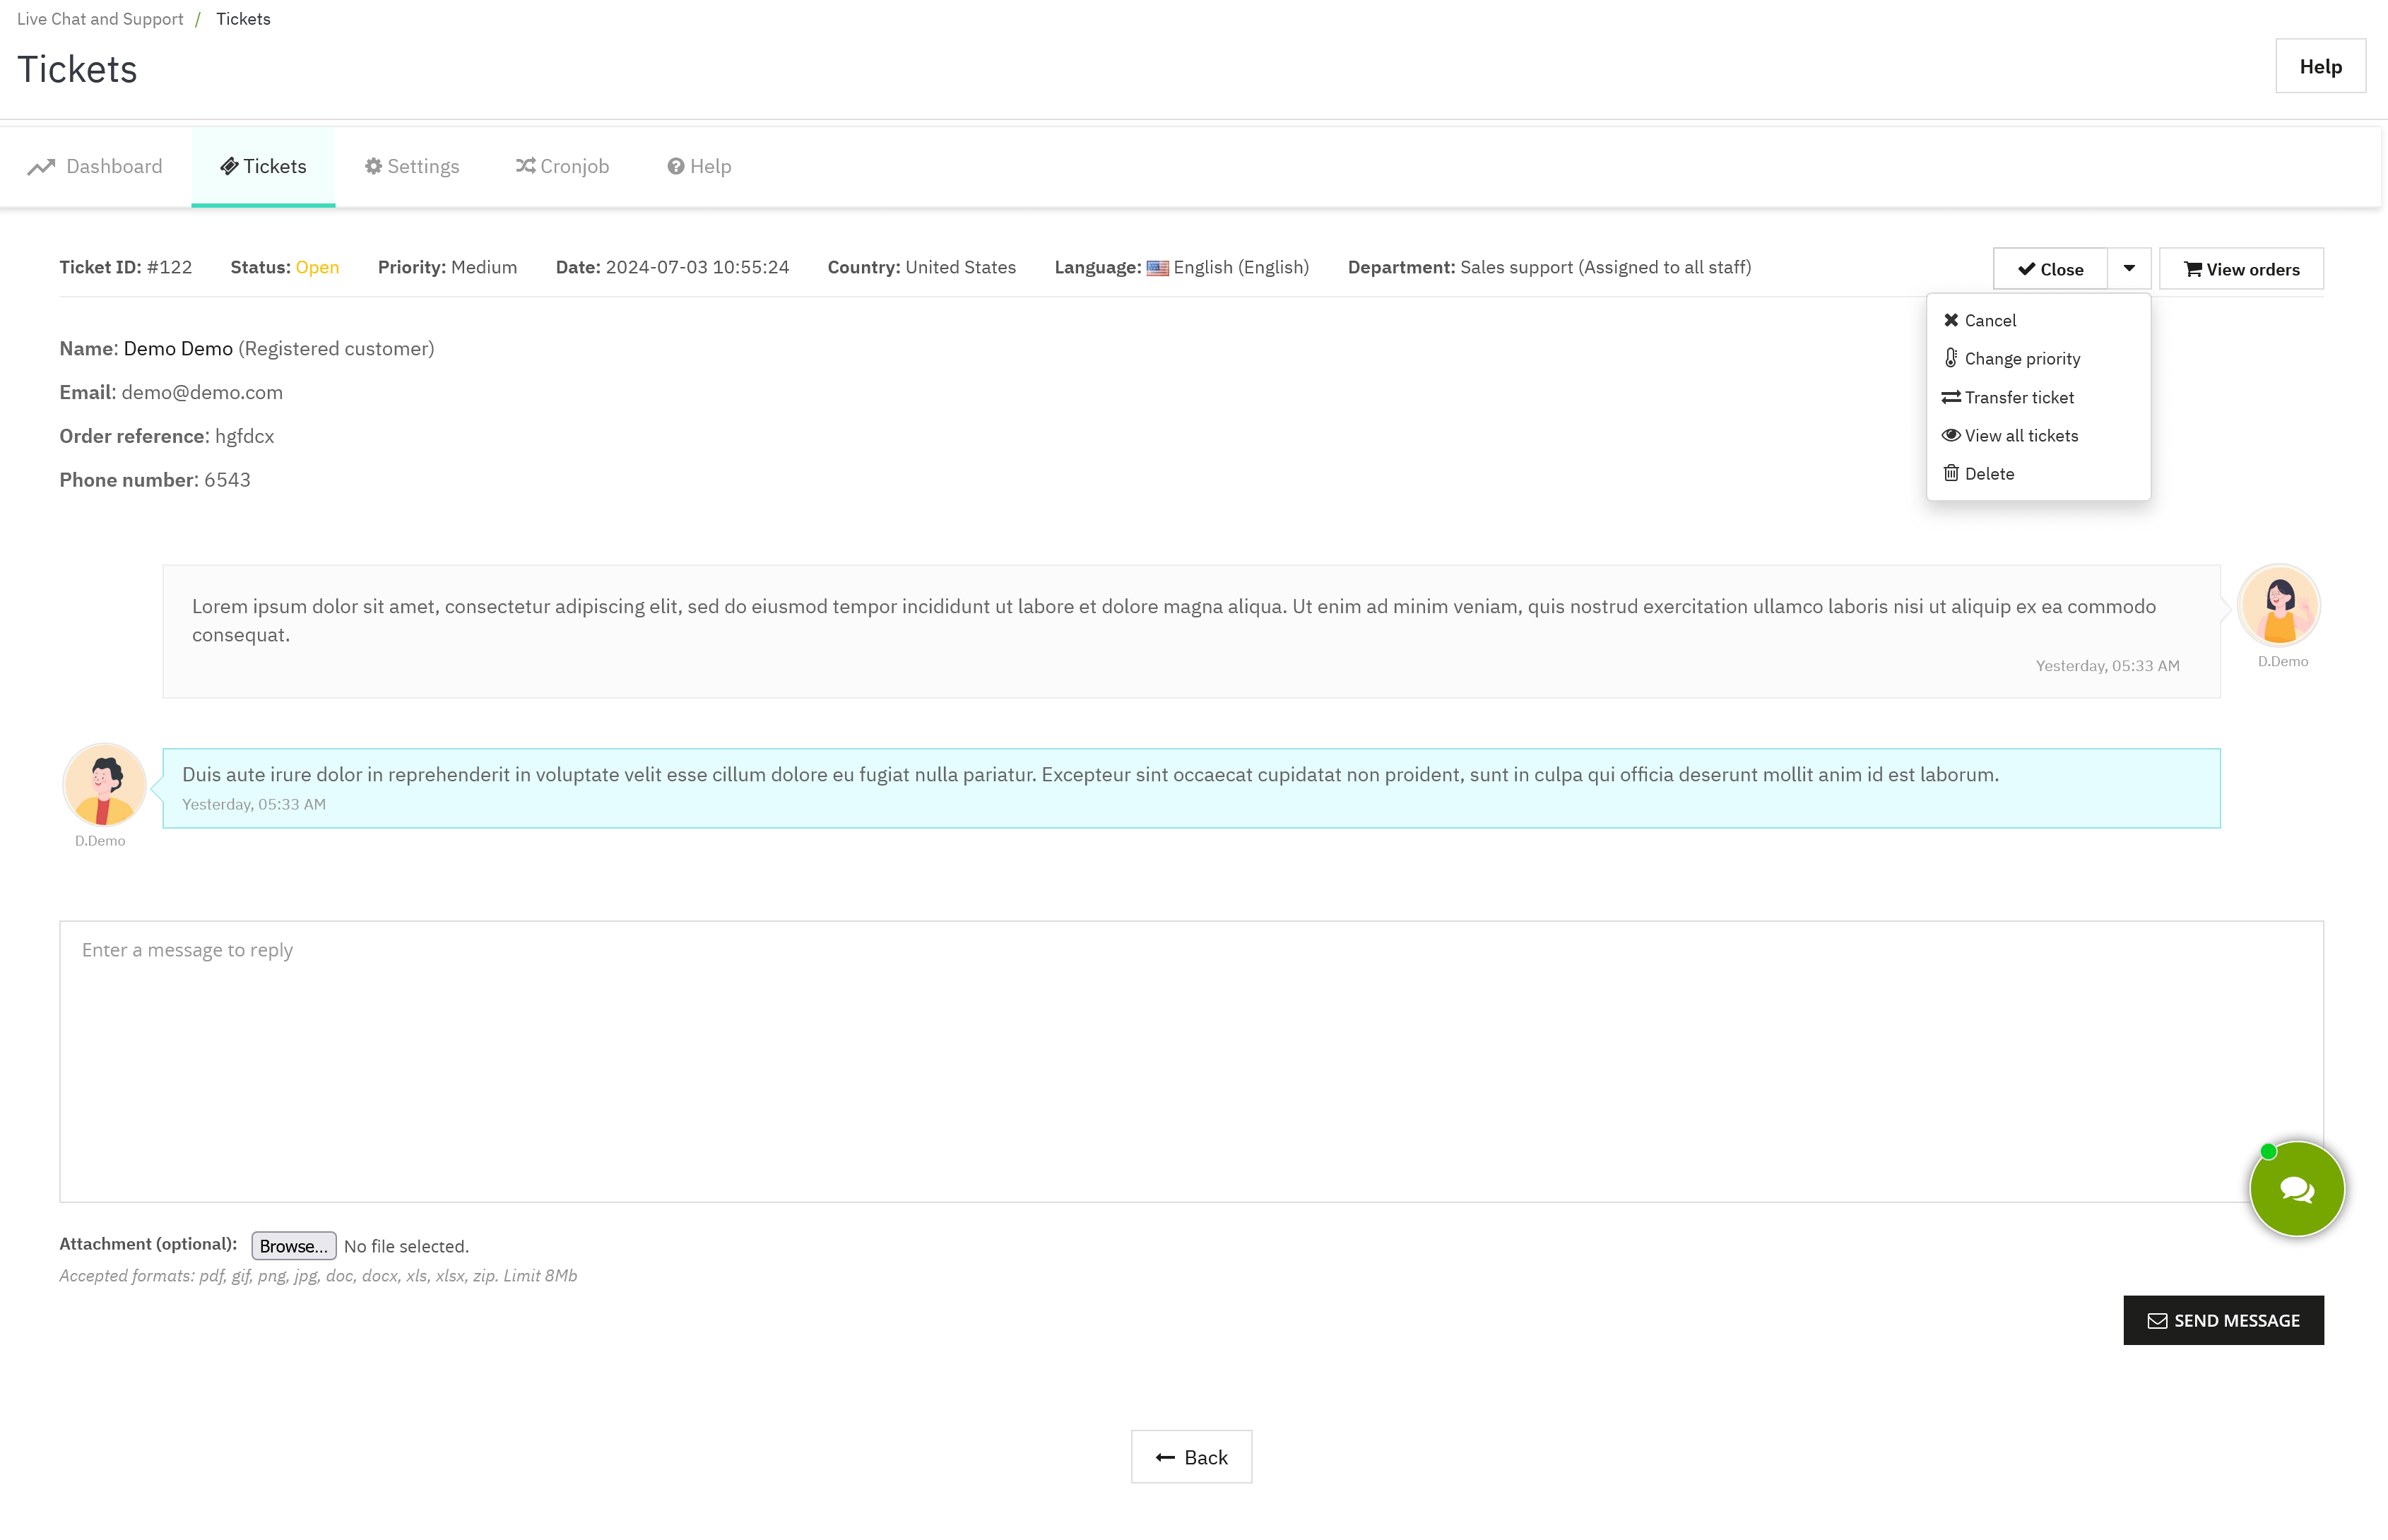
Step 2: Ticket details page:
Ticket information:
- ID: Unique identifier for the ticket.
- Status: Current status (Open, Closed, Canceled).
- Priority: Urgency level (Low, Medium, High, Urgent).
- Creation time: When the ticket was created.
- Customer’s country & language
- Department: The department responsible for handling the ticket.
Action menu: Dropdown options to change ticket status (Close/Cancel), priority, transfer the ticket to another department/staff, or delete the ticket.
Order information: Related order ID (if any) and a button to view order history.
Customer information:
- Name
- Phone number
- Order ID
Additional fields: Based on the support form configuration.
Messages: Conversation thread between the customer and the support staff. Staff can enter a message and attach a file to send to the customer.
Notifications for new messages
Whenever there is a new message in the ticket, both customers and admin/staff receive email notifications. This ensures timely communication and response to customer queries.
To change the email notification settings for a support ticket form, admin/staff need to navigate to the module configuration page > "Settings" menu > "Ticketing system" tab. Then, select the form and click "Edit" icon. Go to the "Email" tab to adjust the email notification settings.
Conclusion
Understanding how to navigate and utilize the detailed interfaces of support tickets in PrestaShop allows for efficient and effective communication with customers. By managing support tickets proficiently, businesses can ensure high customer satisfaction and prompt resolution of issues.